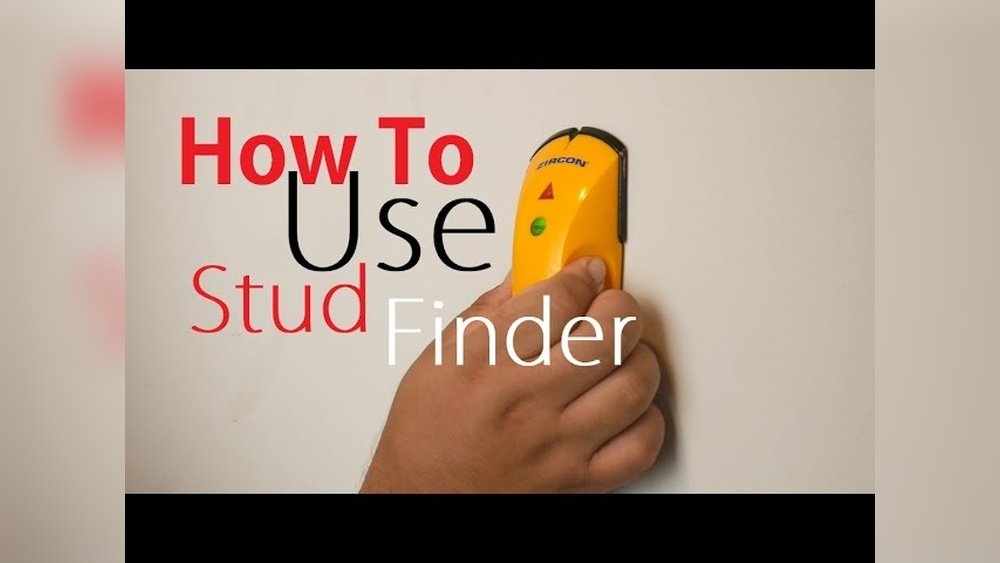
If you have ever tried to hang a shelf or mount a TV, you know the fear of hitting the wrong spot on the wall. I’ve been there. The first time I tried to hang a heavy mirror, I ended up with a few extra holes and a mirror that nearly fell off. That’s when I decided to learn how to use a stud finder. At first, it seemed complicated, but with a bit of practice, it became one of my favorite tools. Let me walk you through how to use a stud finder, what to watch out for, and share a few stories from my own experience. My goal is to make this as simple as possible, even if English isn’t your first language. Trust me, if I can do it, so can you.
Why You Need A Stud Finder
When you hang something heavy, like a cabinet or a TV, you want it to stay put. Walls look solid, but many are hollow with wooden beams called studs behind them. If you just put a screw into the drywall, it often won’t hold. You need to anchor it into a stud. That’s where a stud finder comes in handy—it tells you exactly where those hidden wooden beams are.
Before I started using a stud finder, I used the old “knock and guess” method. I would tap on the wall and listen for a change in sound. Sometimes it worked, but often it didn’t. I made a lot of unnecessary holes and wasted time.
Using a stud finder made everything easier and more accurate.
Different Types Of Stud Finders
Not all stud finders are the same. I’ve tried a few, and each has its own pros and cons. Here’s a quick look at the main types:
| Type | How It Works | Pros | Cons |
|---|---|---|---|
| Magnetic | Finds screws or nails in studs using a magnet | Cheap, no batteries needed | Can miss studs, only finds metal |
| Electronic | Senses changes in wall density to detect studs | More accurate, finds stud edges | Needs batteries, more expensive |
| Advanced (with sensors) | Uses multiple sensors for depth and wires | Can detect pipes, wires, and studs | High cost, needs charging or batteries |
Personally, I started with a basic magnetic stud finder. It was cheap, but I soon moved to an electronic one for better accuracy. If you hang a lot of things or do DIY often, electronic models are worth the extra money.
Getting Ready: What You Need
Before you start, gather your tools. Here’s what I usually have:
- Stud finder (charged or with fresh batteries)
- Pencil for marking
- Tape measure (optional, but helpful)
- Masking tape (if you don’t want to write on the wall)
- Step stool for high spots
I also make sure the wall is clear of pictures or furniture. This gives me space to move the stud finder smoothly.
Simple Steps: How I Use A Stud Finder
Using a stud finder is easy once you get the hang of it. Here’s my go-to method:
1. Power Up And Read Instructions
Always check the batteries first. I’ve had a stud finder die in the middle of a job, and it’s annoying. Also, each model is a bit different, so I glance at the manual. Even if you think you know how it works, a quick look saves time.
2. Prep The Wall
Wipe the wall with a dry cloth. Dust or grease can confuse the sensors. I learned this the hard way when my stud finder gave me false readings in the kitchen.
3. Calibrate The Device
Most electronic stud finders need calibration. Place it flat against the wall, press the button, and wait for the beep or light. Don’t move it yet. If you start moving too soon, it won’t calibrate right.
4. Slow And Steady Sweep
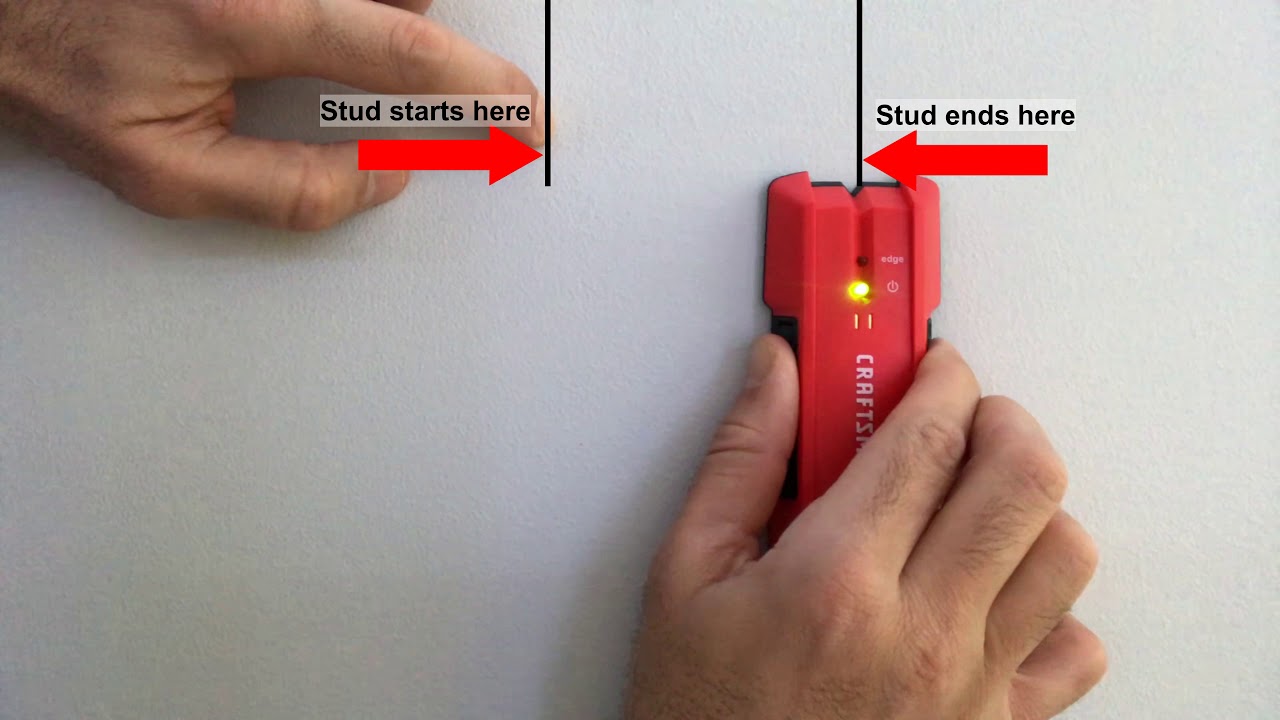
Move the stud finder slowly in a straight line. Go left to right, about a foot above the floor. If your model has a screen, watch for the bars or lights. When you hit a stud, it will beep or flash.
Here’s a tip: go past the stud, then come back from the other direction. Mark both edges you find with a pencil. The center is between those two marks. I used to just mark the first beep, but sometimes that’s not the middle.
5. Double-check
After marking the stud, I always check again, just to be sure. Sometimes walls have odd framing or extra wires. If the stud finder gives strange readings, I check nearby spots.
6. Mark Clearly
I use a light pencil mark or a bit of masking tape. That way, when I drill or hammer later, I know exactly where to go.

Common Mistakes I’ve Made (and How To Avoid Them)
When I first started, I made a lot of beginner mistakes. Here are some things to watch out for:
1. Moving Too Fast
If you move the stud finder quickly, it can miss the stud or beep in the wrong spot. Take your time.
2. Not Calibrating
Skipping calibration leads to bad results. I once drilled into what I thought was a stud and hit air.
3. Forgetting About Wires And Pipes
Some walls have wires or pipes near studs. Advanced stud finders can detect them, but basic models can’t. I always check for wall switches or outlets nearby—if they’re there, there’s probably a wire running vertically.
4. Rough Or Textured Walls
If your wall is bumpy or has thick paint, it can confuse some devices. I once tried on a popcorn ceiling—bad idea! For rough walls, press the finder firmly and move even slower.
5. Low Battery
A weak battery can make the device act up. If it starts to beep randomly, I change the batteries before trying again.
How To Confirm You’ve Really Found A Stud
Sometimes, even with a stud finder, you want to be extra sure. Here’s what I do:
- Look for electrical outlets: Outlets are often attached to studs. Measure 16 or 24 inches from the outlet—studs in US homes are usually spaced this way.
- Use a small nail or pin: After marking, I gently tap in a thin nail. If it goes in and hits solid wood, I know I’ve found the stud.
- Check for other clues: Sometimes, you can spot a tiny bump or seam in the wall that lines up with the stud.
My Experience With Different Stud Finders
I’ve tried several models over the years. Here’s how they compare in my hands:
| Model | Type | Best For | My Experience |
|---|---|---|---|
| CH Hanson 03040 | Magnetic | Quick jobs, small budgets | Simple, but sometimes misses studs |
| Zircon StudSensor e50 | Electronic | DIYers, home projects | Accurate, easy to use, needs calibration |
| Franklin Sensors ProSensor 710 | Advanced | Pro users, finding wires/pipes | Very reliable, shows full width of stud |
If you’re just starting out, try an electronic model. They’re a little more expensive than magnetic ones, but they save a lot of headache.
Real-life Example: Hanging A Tv
Let me tell you about the first time I used a stud finder for something big—a wall-mounted TV. I measured everything, found what I thought was a stud, and started drilling. The drill went in too easily. Turns out, I’d missed the stud by an inch.
After that, I used the stud finder, marked both edges, and double-checked with a nail. The second time, I hit solid wood. The TV has stayed up for years now.
From this, I learned to always:
- Mark both edges of the stud
- Double-check with a small nail
- Take my time, even if I’m excited to finish
Non-obvious Insights I’ve Learned
There are a few things I wish I knew when I started:
1. Not All Walls Are The Same
Older homes might have studs spaced unevenly or use metal studs. My uncle’s house had metal studs, and my basic finder didn’t work. If you’re in a really old or new building, check the wall type first.
2. Humidity Can Affect Results
After a humid day, my stud finder once gave false positives in the bathroom. Moisture in the wall can mess with sensors. I try to use the finder when the room is dry.
3. Studs Are Not Always Perfectly Vertical
Sometimes, especially above windows or doors, studs aren’t where you expect. If you get strange results, try a few inches higher or lower.
4. Multiple Studs For Heavy Items
If you’re hanging something heavy, like a big shelf, use two or more studs. I once hung a shelf on a single stud, and it started to sag. Distribute the weight if you can.
When A Stud Finder Might Not Work
There are times when even the best tool struggles. Here’s what I’ve found:
- Plaster walls: Older homes with plaster and lath can confuse stud finders, as the layers are uneven.
- Metal studs: Some modern buildings use metal. Magnetic models won’t work, and electronic ones might beep at anything.
- Very thick paint or wallpaper: Layers of paint or wallpaper can dull the sensor’s accuracy.
In these cases, I rely on other clues—like measuring from outlets, or using a very thin nail to probe gently.
Safety Tips From My Experience
Safety is important. Here are a few things I always remember:
- Turn off the power if you’re drilling near outlets or switches. You don’t want to hit a wire.
- Wear safety glasses when drilling.
- If your stud finder has a wire alert, pay attention to it.
I once ignored the wire warning and almost drilled into a live wire. Luckily, I stopped in time.
How To Maintain Your Stud Finder
Keep your stud finder working by:
- Wiping it clean after use
- Storing it in a dry place
- Changing batteries often
I keep mine in a toolbox, away from moisture and dust. A little care goes a long way.

Frequently Asked Questions
What If My Stud Finder Gives Different Readings In The Same Spot?
This can happen with low batteries or on textured walls. Try changing the batteries and wiping the wall. Move the stud finder slowly and repeat the process. If readings are still inconsistent, try a different part of the wall or a different tool.
Can I Use A Stud Finder On The Ceiling?
Yes, most stud finders work on ceilings. I’ve used mine to hang light fixtures. Just be careful—ceilings can have extra insulation or wires, so move slowly and double-check your marks.
Are There Any Walls Where A Stud Finder Won’t Work?
Yes, stud finders can struggle with old plaster walls or walls with metal mesh. In those cases, I use other methods, like measuring from outlets or using a small nail to probe for studs.
How Far Apart Are Studs Usually Spaced?
In most US homes, studs are 16 or 24 inches apart. You can measure from an outlet or corner to get an idea. But in older homes, spacing can be irregular, so always check with the stud finder.
Are Expensive Stud Finders Really Better?
In my experience, yes—advanced stud finders with sensors are more accurate, especially for finding wires or pipes. If you do a lot of home projects, they’re worth it. For simple jobs, a mid-range electronic model is usually enough.
If you want more technical info, check out this guide from Wikipedia.
Using a stud finder changed my DIY projects for the better. It took away the guesswork and made my walls look a lot neater. If you take your time, follow these tips, and double-check your work, you’ll avoid the mistakes I made in the beginning.
Happy building!
As an Amazon Associate, We earn from qualifying purchases