When I started working with pipes, I had no idea how important a good pipe cutter was. I thought any tool would do the job. But after a few failed attempts with saws and hacksaws, I realized I was making things harder for myself.
The cuts were never straight. The edges were rough. And sometimes the pipes didn’t even fit together. That’s when I picked up my first pipe cutter. It changed everything.
If you’re new to pipe work, or just want an easier way to cut pipes, let me walk you through what I’ve learned. I’ll explain how to use a pipe cutter, what mistakes to avoid, and how to get that clean, professional cut every time.
I’ll keep things simple and share tips that helped me. Let’s dive right in.
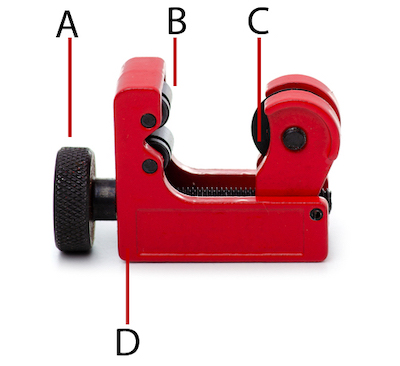
What Is A Pipe Cutter?
A pipe cutter is a tool made to slice pipes quickly and smoothly. Instead of using a saw, which can leave jagged edges, a pipe cutter rolls around the pipe and cuts with a sharp wheel. The result? A perfect, straight edge.
There are a few types. The most common are:
- Tube cutters for copper and plastic pipes
- Wheeled pipe cutters for steel or heavy metal pipes
- Mini pipe cutters for tight spaces
I’ve used all three, depending on the job. Each has its place, and knowing which to use can save you a lot of time and frustration.
Why Use A Pipe Cutter?
At first, I thought a pipe cutter was just another fancy tool. But after my first try, I saw the benefits:
- Cleaner cuts – No more sanding rough edges
- Faster work – One spin and you’re done
- Less mess – No sawdust, no metal shavings everywhere
- Safer – Less risk of slipping and cutting yourself
I used to struggle with leaks and poor connections. Most of those problems disappeared once I switched to a pipe cutter.
Types Of Pipe Cutters And When To Use Them
Choosing the right pipe cutter makes a huge difference. Here’s a quick guide from my own experience:
| Type | Best For | My Experience |
|---|---|---|
| Tube Cutter | Copper, PVC, thin metal | Easy, precise, great for home plumbing |
| Wheeled Pipe Cutter | Steel, iron, thick metal | Heavy-duty, needs more strength |
| Mini Pipe Cutter | Small spaces, tight spots | Handy under sinks or behind walls |
| Plastic Pipe Cutter (Scissor Type) | PEX, CPVC, soft plastics | Quick snip, no mess |
I usually grab my tube cutter for most home plumbing. But if I’m working on something tough, like a steel pipe outside, I pull out the wheeled cutter.
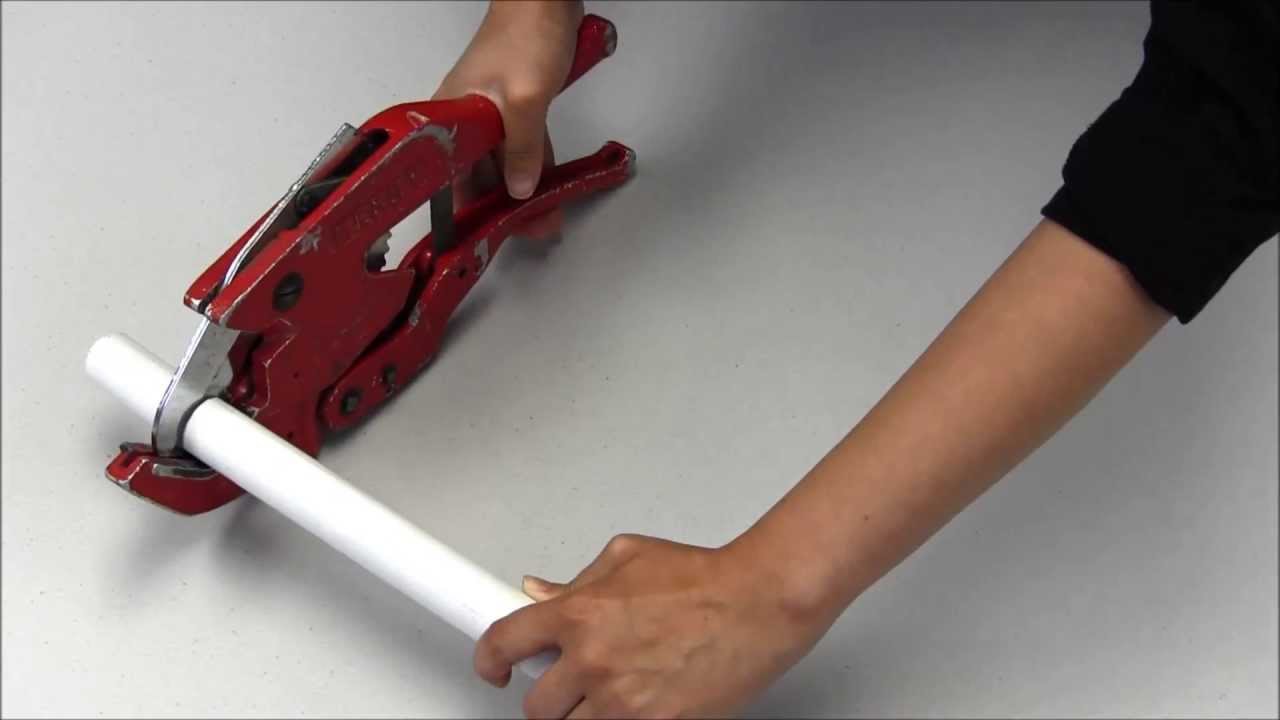
Step-by-step: How To Use A Pipe Cutter
Let me walk you through the basic process. I’ll use a tube cutter as an example since that’s what I use most.
1. Measure And Mark
Always start by measuring your pipe. Use a tape measure, then mark where you want to cut. I prefer a permanent marker because it doesn’t wipe off as easily. Take your time here—a wrong cut means wasted pipe.
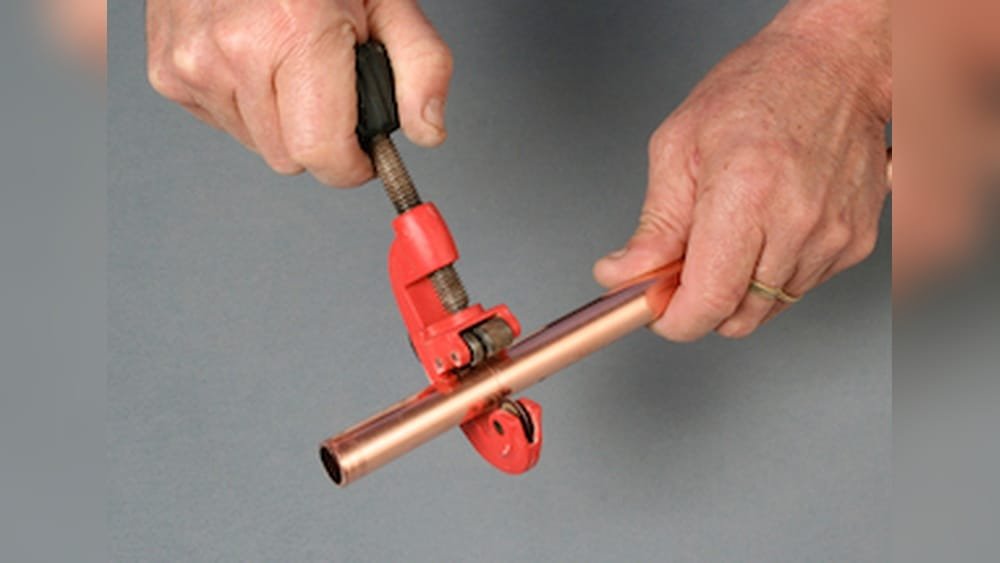
2. Position The Pipe Cutter
Open the cutter and place the pipe inside, right on your mark. Make sure the cutting wheel lines up with your mark. I learned the hard way that if you’re off, even by a little, your fitting might not line up later.
3. Tighten The Cutter
Turn the knob to tighten the cutter just enough to touch the pipe. Don’t over-tighten. Too much pressure can crush the pipe or make the cutter slip.
4. Rotate Around The Pipe
Now, rotate the cutter around the pipe. After each full turn, tighten the knob a little more. You’ll feel the wheel start to bite into the pipe.
Keep spinning and tightening until the pipe snaps cleanly. Usually, it takes about 5–10 turns for copper or PVC. For thicker pipes, it might take more.
5. Remove Burrs
After cutting, check the edge. Sometimes there’s a small lip, called a burr. Most cutters have a deburring tool built in. Use it to scrape the inside edge. This step is easy to skip, but it stops leaks and makes fittings go on smoother.
6. Clean Up
Wipe down your pipe. Make sure there are no metal bits inside. A clean pipe is a happy pipe—trust me, your future self will thank you.

Common Mistakes And How To Avoid Them
I’ve made plenty of mistakes with pipe cutters. Here are a few you should watch out for:
- Over-tightening the cutter – This can crush soft pipes. Tighten slowly.
- Forgetting to deburr – Skipping this step leads to poor connections and leaks.
- Cutting too close to the end – Leave enough pipe for fittings. I messed this up more than once!
- Using the wrong cutter – A plastic cutter won’t work on metal. Check your tool before you start.
- Not marking the pipe – Guessing leads to uneven cuts and wasted pipe.
If you keep these in mind, you’ll save yourself headaches (and money).
Comparing Pipe Cutter And Hacksaw
A lot of people ask me why not just use a hacksaw. I’ve tried both, so here’s a quick comparison:
| Feature | Pipe Cutter | Hacksaw |
|---|---|---|
| Cut Quality | Very clean | Rough, uneven |
| Speed | Fast | Slower, more effort |
| Edge Finish | Smooth | Needs more work |
| Noise & Mess | Quiet, tidy | Loud, messy shavings |
I only use a hacksaw if I have nothing else, or if the pipe is too big for my cutter. Otherwise, the pipe cutter wins every time.
Tips For A Perfect Cut Every Time
Here’s what helped me get better, and what most beginners miss:
- Check your blade – If the cutting wheel is dull, replace it. A sharp wheel makes all the difference.
- Support the pipe – Hold the pipe steady to avoid a crooked cut.
- Work slowly – Rushing can lead to mistakes. Take your time, especially as you get close to finishing the cut.
- Practice on scrap – Before your first real cut, try the tool on a leftover piece. You’ll get a feel for the pressure and turning.
- Keep the tool clean – I wipe mine down after every use. It lasts longer and works better.
Using Pipe Cutters On Different Materials
Not all pipes are the same. Here’s what I found with different materials:
Copper Pipes
These are soft and easy to cut. Tube cutters work perfectly. Just don’t over-tighten, or you’ll squish the pipe.
Pvc And Plastic Pipes
Use a plastic pipe cutter for these. The scissor-style is quick and leaves a smooth edge. If you use a tube cutter, go easy—plastic can crack if you rush.
Steel Or Iron Pipes
For heavy metal pipes, a wheeled pipe cutter is best. It takes more effort, and you need to tighten more often. Wear gloves. Sometimes, you’ll need to use a little oil to help the wheel cut through.
Pex Pipes
PEX is soft. A special PEX cutter works best—it’s like garden shears. One quick squeeze, and you’re done.
Safety Tips When Using A Pipe Cutter
I want to be honest—pipe cutters are much safer than saws, but you still need to be careful.
- Wear gloves to protect your hands from sharp edges.
- Keep fingers clear of the cutting wheel.
- Don’t force the tool—if it’s stuck, loosen and reposition.
- Cut in a well-lit area so you can see your mark.
- Dispose of scraps safely so nobody steps on them.
One more thing: after cutting metal, the edge can be sharp. I’ve nicked my fingers before. Always check and deburr.
How To Maintain Your Pipe Cutter
A well-kept tool lasts years. Here’s what I do:
- Clean after use – Wipe off any dust or metal bits.
- Oil the wheel – A drop of oil keeps it spinning smoothly.
- Check for rust – If you see any, clean it right away.
- Replace dull wheels – Most cutters let you swap out the blade.
- Store in a dry place – Moisture can ruin your tool.
I’ve had my main cutter for over five years. It still works like new, thanks to a little care.
When Not To Use A Pipe Cutter
Sometimes, a pipe cutter isn’t the right choice. Here’s when I reach for something else:
- Pipes larger than 2 inches – Most cutters don’t open that wide.
- Bent or dented pipes – The cutter might slip or make a bad cut.
- Very hard metals – Sometimes, only a power tool will do.
- Close to walls or corners – If you can’t spin the cutter, use a mini-cutter or a saw.
Knowing when not to use the tool is just as important as knowing how.
Real-world Example: Fixing A Leaky Sink
Let me share a quick story. My kitchen sink was leaking. The copper pipe underneath had a crack. I measured, marked, and used my tube cutter. The cut was so clean, the new fitting slipped on without trouble. The whole job took 10 minutes.
If I’d used a saw, I’d still be cleaning up.
That’s the power of a good pipe cutter.
Where To Learn More
If you want more in-depth info on pipe cutters and plumbing tools, I recommend checking out Wikipedia’s page on pipe cutters. It covers the different types and history if you’re curious.
Frequently Asked Questions
What Size Pipes Can A Pipe Cutter Handle?
Most standard pipe cutters handle pipes from 1/4 inch to 2 inches in diameter. Mini-cutters work for smaller, tight spaces. For larger pipes, you’ll need a special cutter or a saw.
Can I Use A Pipe Cutter On Plastic Pipes?
Yes, but use the right type. Plastic pipe cutters (scissor style) are best for PEX or PVC. Tube cutters can work, but go slow to avoid cracking the plastic.
How Do I Know If The Blade Needs Replacing?
If cutting gets harder or the cut isn’t smooth, your blade is probably dull. Most cutters let you replace the cutting wheel easily.
Is It Safe For Beginners To Use A Pipe Cutter?
Absolutely. Pipe cutters are much safer than saws. Just go slow, wear gloves, and follow the steps I shared above.
What Do I Do If My Pipe Cutter Gets Stuck?
Stop and loosen the tool. Check if the pipe is bent or if the wheel is worn out. Sometimes, cleaning the tool or adding a drop of oil helps.
—
Learning to use a pipe cutter made my DIY projects smoother and less stressful. I hope sharing my experience helps you avoid my early mistakes. With the right tool and a little practice, anyone can cut pipes cleanly—even if you’re just starting out.
Happy cutting!
As an Amazon Associate, We earn from qualifying purchases