Cutting copper pipes might sound a bit technical, but trust me, it’s much easier than most people think. The first time I tried to cut a copper pipe, I was nervous. I worried about making a crooked cut, damaging the pipe, or even hurting myself.
Prime Day Pick
Limited-time Prime Day price. Check current discount on Amazon.
But once I learned how to use a copper pipe cutter properly, things changed. Now, I find the process smooth, safe, and even a little satisfying. If you’re about to cut copper pipes for plumbing, a DIY project, or just out of curiosity, let me walk you through everything you need to know.
I’ll share all the tips, mistakes, and little tricks I’ve picked up along the way.
Prime Day Pick
Limited-time Prime Day price. Check current discount on Amazon.
What Is A Copper Pipe Cutter?
A copper pipe cutter is a simple tool designed to cut copper pipes cleanly and quickly. You might also hear it called a tubing cutter. It’s built to grip the pipe and uses a sharp cutting wheel to score and slice through the metal. There are a few types, but the basic idea is the same: get a clean, straight cut without squashing or bending the pipe.
Prime Day Pick
Limited-time Prime Day price. Check current discount on Amazon.
When I started, I thought a hacksaw could do the job. I was wrong. Hacksaws can leave rough edges, and it’s almost impossible to get a straight cut by hand. Using a copper pipe cutter made my work look professional, and the fittings went on so much easier.
Types Of Copper Pipe Cutters
You might not realize there’s more than one kind. Here’s what I’ve used:
| Type | Best For | Pros | Cons |
|---|---|---|---|
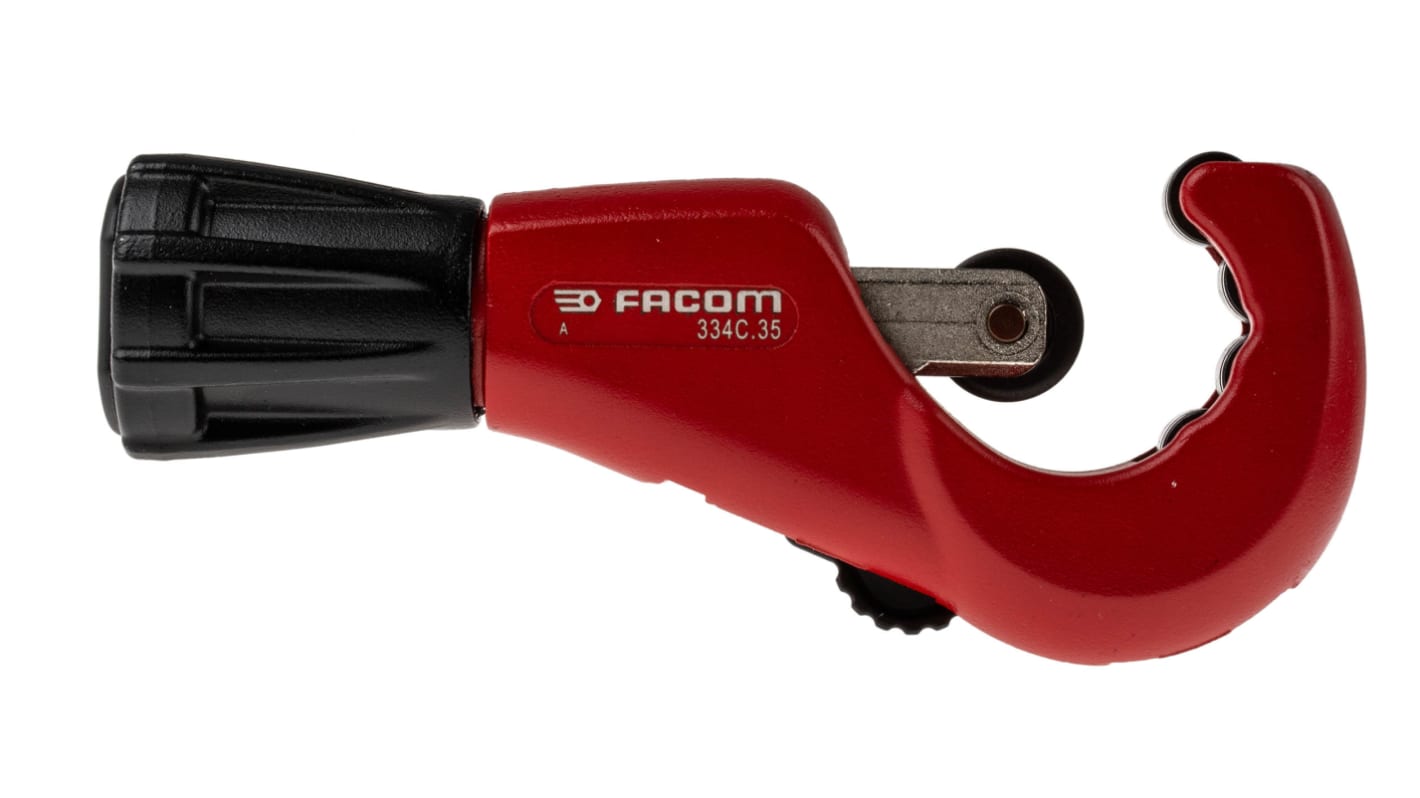
| Standard Tubing Cutter | Most household pipes (1/2″ to 1″) | Easy to use, clean cuts | Can’t reach tight spaces |
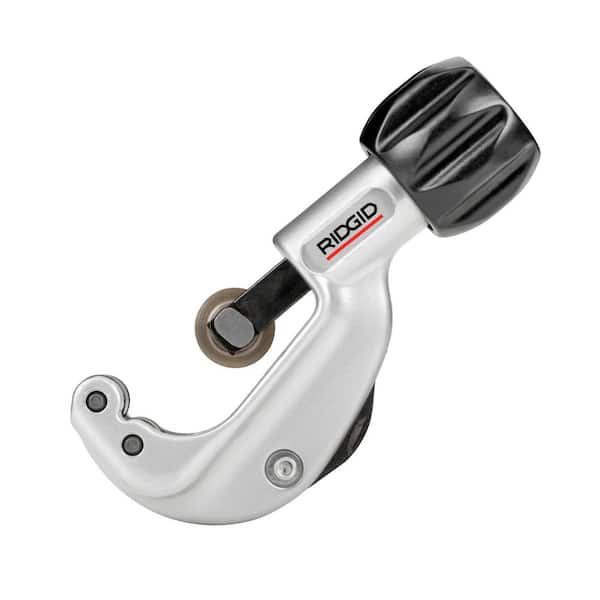
| Mini Tubing Cutter | Tight spaces, small pipes | Compact, good for repairs | Harder to grip, slower |
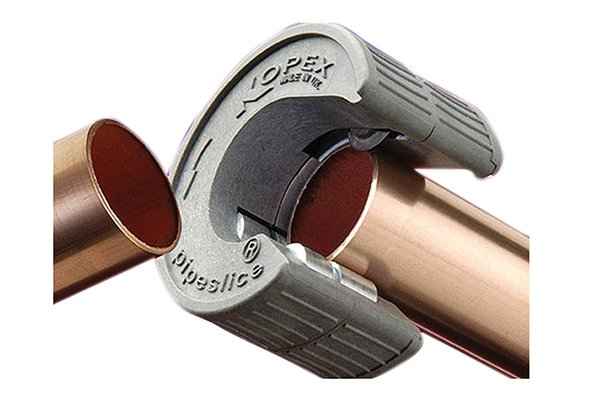
| Autocut/Quick-Release Cutter | Fast cuts, frequent jobs | No adjustments, super quick | Limited pipe sizes, more expensive |
For most jobs around my house, I use a standard tubing cutter. If I’m working under a sink or inside a wall, the mini cutter saves the day.
Why Use A Copper Pipe Cutter?
It’s tempting to grab whatever tool is handy, but here’s why you should use the right cutter:
- Clean cuts: No jagged edges, which means better pipe connections.
- No pipe crushing: Squeeze too hard with pliers or use a saw, and you might bend the pipe.
- Less mess: Cutting wheels don’t make metal shavings like saws.
- Speed: Once you know what you’re doing, it’s fast.
I once tried to save time with a saw. The fitting leaked, and I had to redo everything. Lesson learned.
Tools And Supplies You Need
Before you start, gather everything so you don’t have to run around mid-project. Here’s what I always keep close:
- Copper pipe cutter (choose the right type for your space)
- Measuring tape or ruler
- Marker or pencil for marking the pipe
- Pipe deburring tool (or a round file)
- Safety glasses
- Work gloves
- Old towel to catch water (if cutting existing plumbing)
- Bucket (optional, for draining water)
Don’t skip the safety glasses. Tiny metal bits can fly off, and it’s easy to forget you’re working with sharp tools.
Step-by-step: How To Use A Copper Pipe Cutter
Let me break down the process. I’ll share what’s worked for me and a couple of things to avoid.
1. Measure And Mark
First, figure out exactly where you need to cut. Use a tape measure for accuracy. I always mark the pipe with a permanent marker or a pencil. Make the mark all the way around the pipe if you can. This helps keep your cut straight.
2. Prepare The Area
Make sure the pipe is empty and dry. If you’re working on plumbing, turn off the water and drain the line. Place a towel or bucket under the pipe, just in case water drips out. I once forgot this step and ended up with a small flood under my sink.
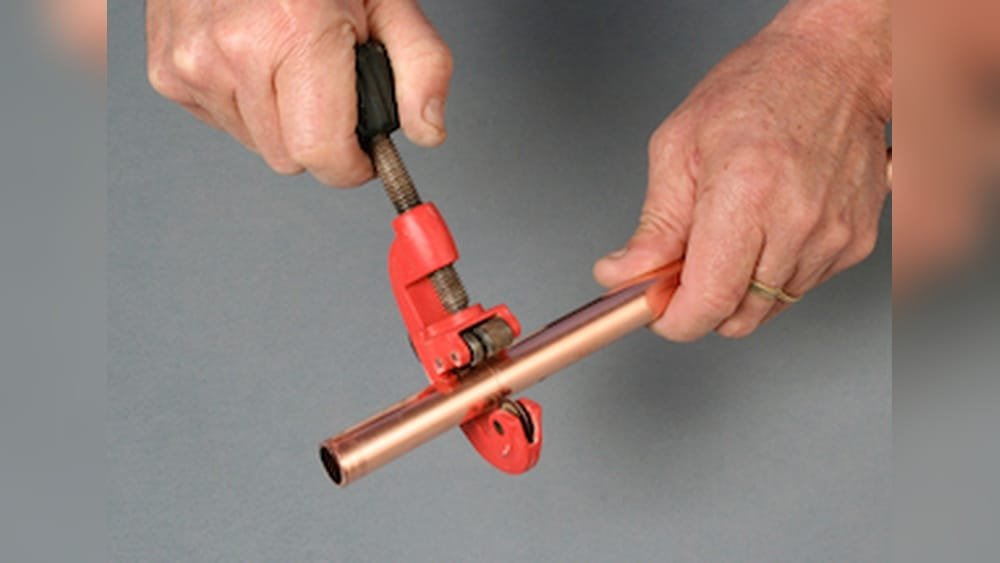
3. Position The Cutter
Open the cutter by twisting the knob. Place the pipe in the groove, lining up the cutting wheel exactly on your mark. Close the cutter gently so it grips the pipe, but don’t overtighten. Too much pressure can dent the pipe.
4. Rotate The Cutter
Hold the pipe steady, then turn the cutter around the pipe. With each full rotation, tighten the knob a little—just a quarter turn. Keep turning and tightening until you feel the cutter slice through.
Pro tip: Don’t rush. If you tighten the knob too much at once, the wheel can skip or make a spiral cut. I’ve done this, and it ruined the pipe.
5. Remove And Deburr
Once the pipe is cut, take off the cutter. You’ll notice a small ridge, or burr, inside the pipe. Use a deburring tool or file to smooth it out. This step is crucial. Burrs can block water flow or damage pipe fittings.
If you skip this, you’ll notice fittings don’t slide on well, and water might not flow smoothly.
6. Check Your Work
Run your finger around the cut. It should feel smooth and even. The edge should be flat, not pinched or sharp. If it’s not, file it a bit more.
7. Clean Up
Wipe the pipe with a cloth to remove any tiny metal particles. Clean up your workspace before moving on.
Common Mistakes And How To Avoid Them
I wish someone had warned me about these when I started:
- Overtightening the cutter: This can squash the pipe and create a leaky connection.
- Forgetting to deburr: Even a small ridge inside the pipe can cause big problems.
- Cutting a live pipe: Always shut off and drain the water first.
- Not marking the pipe fully: A partial mark can result in a slanted cut.
- Using the wrong cutter size: Mini cutters are great for small spaces, but they’re slow for big pipes.
Sometimes, the simplest mistakes can cost you hours of extra work. I’ve had to cut and recut pipes just because I rushed.
Copper Pipe Cutter Vs. Other Cutting Tools
Let’s look at how copper pipe cutters compare with other tools I’ve tried.
| Tool | Cut Quality | Speed | Best For |
|---|---|---|---|
| Copper Pipe Cutter | Clean, straight | Fast | Plumbing, DIY |
| Hacksaw | Rough, uneven | Slow | Thick pipes, emergency use |
| Reciprocating Saw | Messy, jagged | Very fast | Demolition, large jobs |
| Angle Grinder | Clean but hot | Fast | Heavy-duty, outdoor |
From my experience, nothing beats a copper pipe cutter for small and medium jobs. It’s designed for the task and leaves the best finish.
Safety Tips I Always Follow
I can’t stress enough how important safety is. A few simple habits make all the difference:
- Always wear safety glasses. Even a tiny copper shard can be dangerous.
- Use gloves to avoid cuts. The pipe edge can be sharp.
- Work slowly. Rushing leads to mistakes and injuries.
- Keep your workspace tidy to avoid slips.
One time, I forgot my glasses and a tiny bit of copper flicked into my eye. It was painful and could have been much worse. Don’t skip these steps.
When To Replace Your Copper Pipe Cutter
A good cutter can last for years, but it won’t last forever. Here’s how I know it’s time for a new one:
- The cutting wheel feels dull or has nicks.
- The tool is hard to tighten or the knob slips.
- Cuts start to look uneven or take longer.
You can buy new cutting wheels for most cutters. If you use your tool often, check the wheel every few months.
Advanced Tips For The Best Results
Once you’ve got the basics, these tips can make your work even better:
- Practice on scrap pipe. Before you make that important cut, try it on a leftover piece. I ruined a few scraps before I got it perfect.
- Oil the cutter wheel. A drop of oil keeps the wheel turning smoothly and helps it last longer.
- Double-check your measurements. It’s so easy to lose half an inch if you don’t account for the cutter’s width.
- Use two hands. One to steady the pipe, one to turn the cutter. This gives you more control.
And here’s a small thing most people miss: after you cut and deburr, wipe the inside of the pipe with a damp cloth. This removes any metal dust that might cause problems later.
Real-world Example: Fixing A Leaky Pipe
Last winter, I had a small leak under my kitchen sink. Instead of calling a plumber, I grabbed my copper pipe cutter. I measured, marked, and cut out the damaged section. I cleaned up the ends, added a new piece, and everything fit perfectly.
No leaks. I saved about $150 and felt pretty proud.
How To Choose The Best Copper Pipe Cutter
If you’re buying your first cutter, here’s what I’ve learned:
- Get the right size: Most home plumbing uses 1/2″ or 3/4″ pipe.
- Try it in your hand: Some cutters are heavy, some are light. Pick what feels right.
- Check the cutting wheel: Make sure it’s sharp, smooth, and easy to replace.
- Look for a mini cutter if you plan to work in tight spots.
- Read reviews online. I like to check forums or sites like Family Handyman for honest advice.
Don’t buy the cheapest tool. A good-quality cutter makes the job easier and lasts longer.
Troubleshooting: What If Something Goes Wrong?
Sometimes, things don’t go as planned. Here’s what I do:
- Cutter won’t tighten: Check for dirt or metal shavings in the threads.
- Cut is uneven: Make sure you’re tightening the knob slowly and evenly.
- Pipe is crushed: Use less force, and always support the pipe well.
- Deburring is tough: Try a different tool or a new file.
If you keep having issues, it might be time to replace the cutter.
Environmental Tip: Recycling Copper
Don’t throw away your old copper pipe. Copper is valuable and can be recycled. Local scrap yards or recycling centers often pay for clean copper. This is a nice way to help the environment and maybe earn a few dollars.
Frequently Asked Questions
How Do I Know If My Copper Pipe Cutter Is Dull?
If it takes longer to cut or leaves rough edges, the cutting wheel is probably dull. You can buy a replacement wheel for most cutters.
Can I Use A Copper Pipe Cutter On Other Materials?
Yes, but only on soft metals like aluminum or brass. Never use it on steel or plastic—use the right tool for each material.
Do I Need To Deburr Both Inside And Outside The Pipe?
You should always deburr the inside to prevent blockages and leaks. The outside only needs smoothing if it feels sharp or rough.
What Size Cutter Should I Buy For Home Plumbing?
Most home plumbing uses 1/2-inch or 3/4-inch copper pipe. A standard cutter that handles this range is perfect for most jobs.
Is A Mini Cutter As Good As A Full-size One?
Mini cutters work well in tight spaces but can be slower and harder to grip. For long, straight pipe, I prefer a full-size cutter.
Cutting copper pipes is simple once you have the right tool and know what to do. Take your time, follow these steps, and soon you’ll be making perfect cuts every time. If I can do it, so can you. Good luck with your project!
As an Amazon Associate, We earn from qualifying purchases