How To Test Spark Plug Cables: My Step-by-step Guide
For years, I didn’t think much about my car’s spark plug cables. I knew they existed, but I figured they just worked—until my old sedan started to misfire on the highway. The engine shook, my gas mileage dropped, and the check engine light flashed at me like an angry warning. That’s when I realized: spark plug wires matter. Testing them is not hard, but it’s easy to get wrong if you don’t know what you’re doing. So, let me walk you through how I learned to test spark plug cables the right way, and help you avoid the mistakes I made along the way.
What Are Spark Plug Cables And Why Test Them?
First, let’s clear up what spark plug cables actually do. They carry high-voltage electricity from the ignition coil to each spark plug in your engine. This is what creates the spark that makes your car run. If these cables go bad, you get rough idling, misfires, poor fuel economy, and sometimes, your car won’t start at all.
In my experience, many people ignore these cables until something goes wrong. But regular testing can save you from bigger problems, like a damaged catalytic converter or even being stranded.
Two things most beginners miss:
- Spark plug cables can look fine on the outside but be broken inside.
- Bad cables can cause damage to your ignition coil and spark plugs over time.
Signs Your Spark Plug Cables Need Testing
I learned the hard way that you can’t always spot a failing cable by looking at it. Here are the main signs I noticed:
- Engine misfires: The car shakes, especially at idle.
- Hard starts: It takes longer to start, or it doesn’t start at all.
- Rough idling: The engine feels like it’s skipping or struggling.
- Poor fuel economy: You fill up more often.
- Check engine light: Sometimes you’ll get a warning.
If you see these signs, don’t ignore them. Testing your spark plug cables only takes a few minutes and some basic tools.
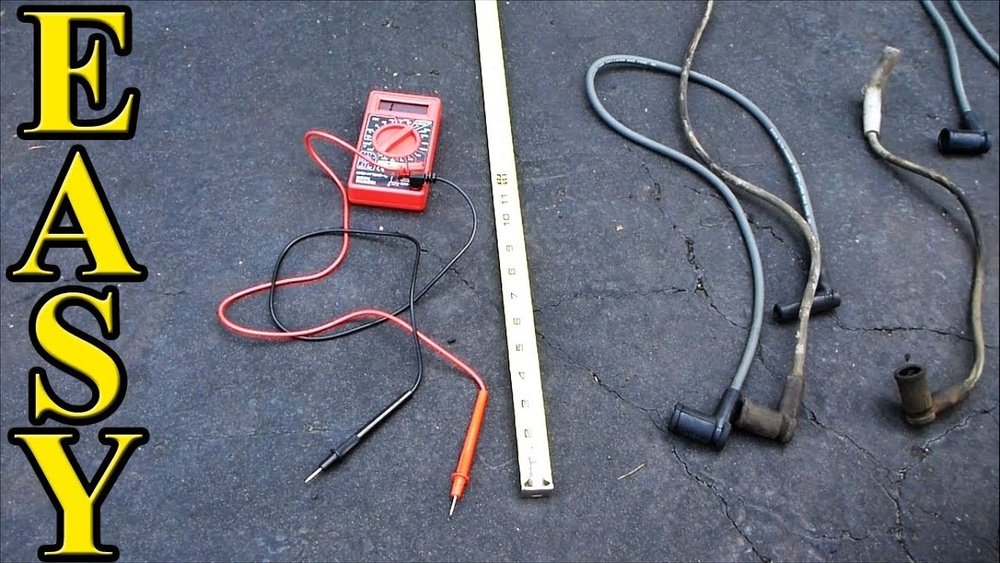
Tools You Need To Test Spark Plug Cables
You don’t need fancy garage equipment. I use these simple tools:
- Digital Multimeter: Checks resistance in the cable.
- Spray bottle with water: Helps spot insulation leaks.
- Insulated pliers: For safety, if you need to move a cable while the engine is running.
- Gloves: To protect your hands.
- Flashlight: To see in tight spaces.
A digital multimeter is the most important tool. If you don’t have one, you can borrow or buy one for less than $30.
Preparing To Test: Safety First
Before you start, make sure the engine is off and cool. I once burned my hand because I got impatient—don’t make my mistake. Always:
- Turn off the ignition.
- Let the engine cool for at least 30 minutes.
- Wear gloves.
If you need to test cables with the engine running, use insulated tools and keep your hands away from moving parts.
Step 1: Visual Inspection
I always start with a close look. Sometimes, damage is obvious:
- Cracks or splits in the rubber.
- Burn marks or melted spots.
- Oil or dirt on the cables.
If you find any of these, replace the cable. Dirt and oil can weaken the cable and cause it to fail.
But remember, some bad cables look perfect on the outside.
Step 2: The Dark Room Test
This tip came from an old mechanic friend. On a dark night, I popped the hood, started the engine, and sprayed a little water mist over the cables. If you see tiny blue sparks or a faint glowing line on the cable, you have a leak.
Why does this work? Water helps the electricity “jump” through weak spots in the cable insulation. If you see sparks, that cable is leaking voltage and needs to go.
Never touch the cables while the engine is running! Use a flashlight and keep your hands back.
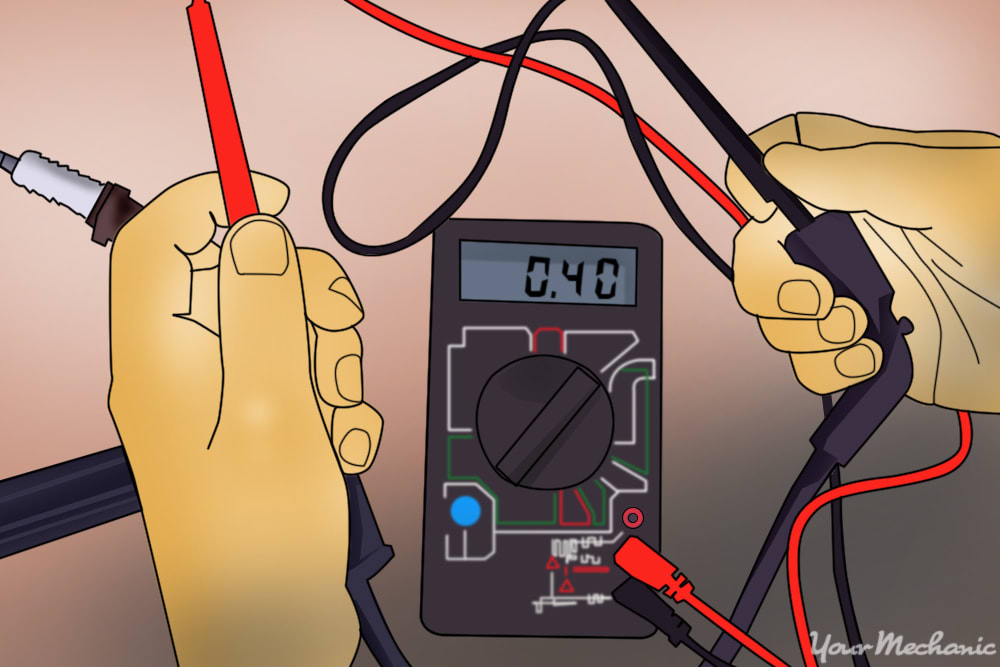
Step 3: Checking Cable Resistance With A Multimeter
This is the real test. Cables can look perfect but still fail inside.
How To Test Cable Resistance
- Set your multimeter to the “Ohms” (Ω) setting.
- Remove one spark plug wire at a time.
- Touch one multimeter probe to the metal end that connects to the spark plug, and the other to the distributor or ignition coil end.
- Read the resistance value.
Most spark plug cables should measure between 3,000 and 12,000 ohms per foot. Check your car’s manual for the exact range.
Example Table: Spark Plug Cable Resistance By Length
Here’s what I found when testing my own cables:
| Cable Length (inches) | Expected Resistance (ohms) | My Test Result (ohms) | Status |
|---|---|---|---|
| 10 | 3,000 – 10,000 | 5,500 | Pass |
| 15 | 4,500 – 15,000 | 16,000 | Fail |
| 20 | 6,000 – 20,000 | 7,200 | Pass |
If your result is higher than the range, the cable is failing. If it’s much lower, the cable might be shorted.
Pro Tip
Always test one cable at a time and label them if you’re removing more than one. Mixing up the order will cause new problems!
Step 4: Flex And Wiggle Test
Sometimes, a cable only fails when it’s bent. While the cable is off the car, gently bend and twist it while watching the multimeter reading. If the resistance jumps or drops, the cable is broken inside, even if it looks fine.
This step saved me once. My cable only failed when the engine moved, and that was hard to spot until I bent it during testing.

Step 5: Comparing All Cables
One thing I learned: compare all your cables. They should be close in resistance if they’re the same length. If one cable is much higher or lower, it’s a sign of a problem.
Quick Comparison Table
Here’s a simple comparison I made:
| Cable Number | Length (inches) | Resistance (ohms) |
|---|---|---|
| 1 | 12 | 7,200 |
| 2 | 12 | 7,000 |
| 3 | 12 | 8,100 |
| 4 | 12 | 15,000 |
Cable 4 stood out—it had double the resistance of the others, so I replaced it.
Step 6: Test For Continuity (optional)
Some people like to do a continuity test. Set your multimeter to beep mode. Touch both ends of the cable. If it beeps, electricity can pass through. But even if it beeps, you still need to check the resistance. High resistance can still cause problems.

Step 7: Replacing Bad Cables
If a cable fails any test, replace it. I learned not to mix old and new cables, because one bad wire can ruin the performance of the rest. Always get cables that match your car’s year and model.
When replacing, push the new cable firmly onto the spark plug and ignition coil. You should feel or hear a click.
Extra Tips And Common Mistakes
Over the years, I picked up a few things that most guides never mention:
- Never pull the cable by the wire. Always grip the boot. Pulling the wire can break the connection inside.
- Keep cables away from hot engine parts. Excess heat shortens their life.
- Replace all cables at once if they’re old. If one is bad, the others are probably close to failing.
- Use dielectric grease on the boots. This helps prevent moisture and makes them easier to remove next time.
Many beginners skip the flex test or forget to label cables. This can lead to hours of frustration. Also, don’t assume new cables are perfect—test them before installing.
How Often Should You Test Spark Plug Cables?
In my routine, I check the cables every 30,000 miles or every year, whichever comes first. If you drive in harsh conditions (lots of heat, humidity, or dust), check them more often.
Why Regular Testing Matters
I once ignored a small misfire for months. That $20 cable ended up costing me a $300 catalytic converter. The unburned fuel from the misfire ruined it. Since then, I never skip my cable checks. It’s a cheap way to keep your car running strong and efficient.
Spark Plug Cables Vs. Coil-on-plug Systems
Modern cars often use coil-on-plug systems, which don’t have traditional spark plug cables. If your car has this, you don’t need to test cables, but you should check the coils. Always check your owner’s manual to know what type you have.
Here’s a quick comparison to help you know the difference:
| System | Has Cables? | Common Problems |
|---|---|---|
| Spark Plug Cable System | Yes | Worn cables, high resistance, misfire |
| Coil-on-Plug | No | Coil failure, connection issues |
If you’re not sure, a quick search of your car’s make and model will tell you.
Where To Learn More
If you want detailed specs for your car, or help with using a multimeter, I found the Wikipedia Spark Plug page helpful. It has diagrams, history, and deeper info for those who want to go beyond the basics.
Frequently Asked Questions
What Happens If I Drive With Bad Spark Plug Cables?
Driving with bad cables can cause misfires, poor fuel economy, and engine damage. Over time, it can harm your catalytic converter, which is expensive to fix.
How Long Do Spark Plug Cables Last?
Most last 30,000 to 50,000 miles, but heat, oil leaks, and rough handling can shorten their life. If you see wear or your car misfires, check them sooner.
Can I Use Any Spark Plug Cable, Or Does It Need To Match My Car?
Always use cables made for your car’s year, make, and model. Wrong cables can cause poor performance or damage your engine.
Is It Safe To Test Cables With The Engine Running?
It’s safe if you use insulated tools and keep hands and clothes away from moving parts. Never touch the cables directly while the engine is on.
Should I Replace All Cables If Only One Is Bad?
It’s best to replace the whole set. If one cable failed, the others are likely close behind. New cables work better as a matched set.
If you take the time to test your spark plug cables right, you’ll save money, avoid headaches, and keep your car running smooth. Trust me, a few minutes of testing now beats a big repair bill later.
As an Amazon Associate, We earn from qualifying purchases