Testing fiber cables was something I learned the hard way. The first time I touched a fiber line, I was nervous. People told me it was easy, but I soon realized there are tricks and details that make all the difference.
Over the years, I’ve tested hundreds of fiber cables for internet, business, and even TV systems. I want to share what I’ve learned—step by step—so you can do it right, avoid mistakes, and feel confident.
Why Testing Fiber Cables Matters
If you’ve ever wondered why your internet is slow or your connection drops, the answer can be a bad fiber cable. These cables are the “roads” that carry light signals. If there’s a problem—dirt, bend, or crack—the signal gets weak or lost. I’ve seen big offices lose money because one fiber cable was dirty. So, testing isn’t just a technical thing. It means better speed, less downtime, and fewer headaches for everyone.
Tools You Need To Test Fiber Cables
When I started, I thought I could use any tool. That’s not true. Good tools make your work easier and results more accurate. Here’s what I always bring:
| Tool | Use |
|---|---|
| Visual Fault Locator (VFL) | Finds breaks or bends using red light |
| Optical Power Meter | Measures how much light passes through |
| Light Source | Sends light into the cable for testing |
| OTDR (Optical Time Domain Reflectometer) | Shows a map of the fiber, finds losses and events |
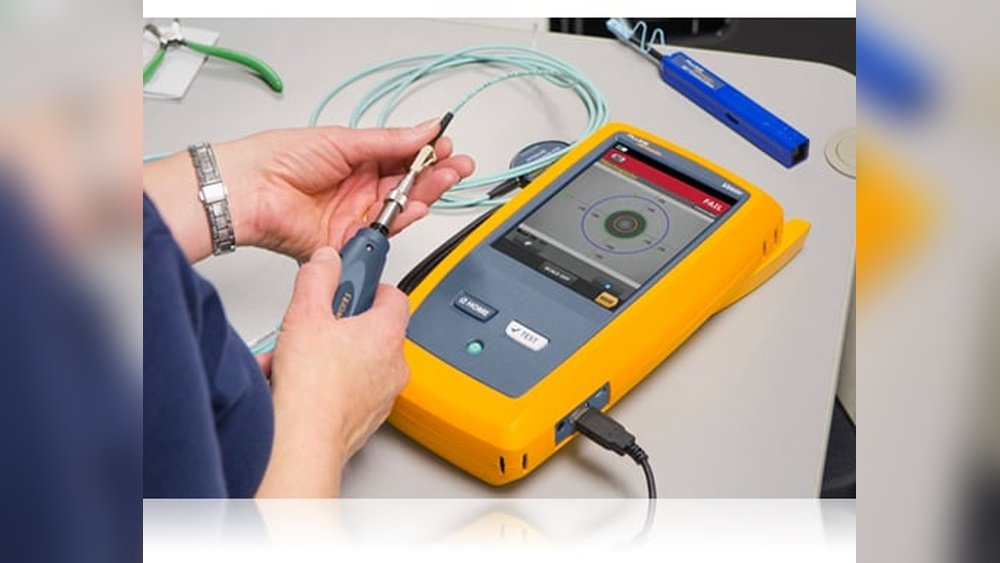
| Fiber Inspection Microscope | Checks for dirt on connectors |
| Cleaning Kit | Removes dust and oil from fiber ends |
I once tried to skip the cleaning kit, thinking a “quick wipe” would do. The result? Hours lost chasing a ghost problem that was just dust. So trust me, always clean before you test.
Safety First: Protect Yourself And The Cable
Safety sounds boring, but I learned from others’ mistakes. Fiber splinters are real, and they hurt. Never look into a fiber cable with your naked eye. The light is invisible but can damage your eyes. Always wear safety glasses, and use the microscope properly.
Keep your hands clean, and don’t touch the fiber ends.
If you break a fiber, don’t touch the glass. Use tape to pick up pieces and throw them away safely. It’s a small step, but it keeps you safe.
Step-by-step: How I Test Fiber Cables
Let’s get to the real part. These are the steps I follow every time.
1. Inspect And Clean The Connectors
First, I look at both ends of the cable. I use a fiber inspection microscope to check for dust or oil. Even a tiny fingerprint can cause big problems. I clean both ends with a cleaning kit. If you skip this, your tests will be wrong. I learned this after failing a test three times, only to find a smudge on the connector.
2. Use A Visual Fault Locator (vfl)
If the cable is short (less than 5 km), I connect a VFL. This tool sends a red laser through the fiber. If there’s a break, the light leaks out, and you can see where the problem is. I once found a bend hidden behind a desk just by following the red glow. It’s simple but powerful.
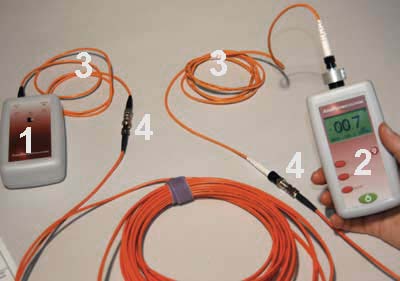
3. Measure With An Optical Power Meter
Next, I use an optical power meter and a light source. Here’s how:
- Connect the light source to one end.
- Connect the power meter to the other end.
- Check the reading.
If the power is too low, there’s a problem—maybe a dirty connector, bad splice, or break. Always check the expected power for your cable type. I once got confused by a low reading, only to find I used the wrong wavelength on the meter.
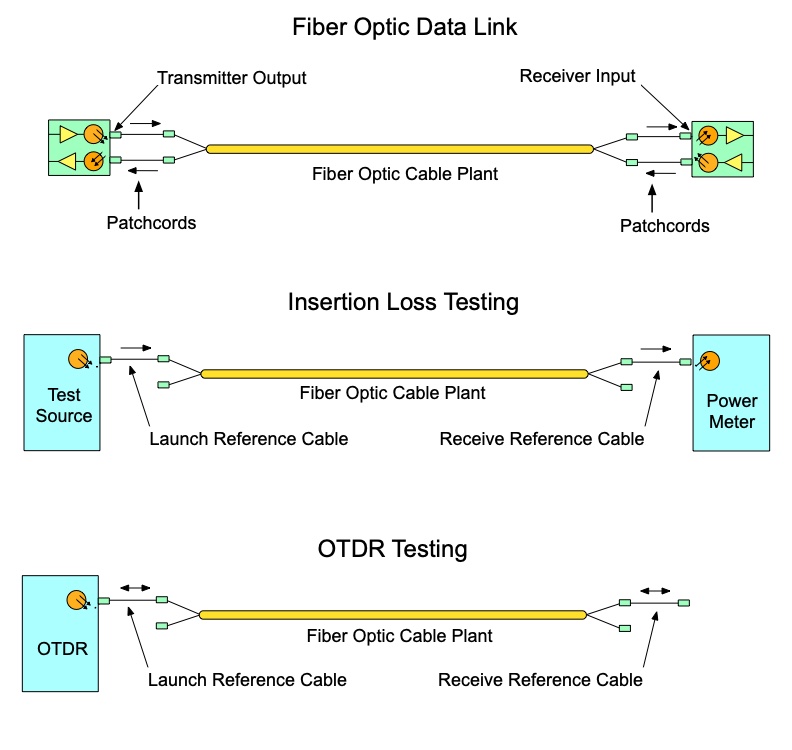
4. Test With An Otdr
For longer cables or when I want a full “map,” I use an OTDR. This tool sends a light pulse and “listens” for reflections. It draws a graph that shows where losses, bends, or breaks are. I remember using an OTDR to find a cable crushed under a heavy filing cabinet. The graph showed a big spike at 23 meters—the exact spot of the damage.
Here’s what I do:
- Set the right wavelength (usually 1310 or 1550 nm).
- Connect the OTDR to one end.
- Run the test.
- Read the graph for loss points (splices, connectors, breaks).
5. Document Results
This step is easy to skip, but it saves you later. I take photos of the OTDR screen and write down power readings. If someone calls me months later, I have proof the cable was fine when I left. Good records can save your reputation.
Interpreting Test Results: What To Look For
Numbers can be confusing. Here’s how I break it down:
- Loss: Measured in dB (decibels). Lower is better. Typical loss is 0.2–0.5 dB per kilometer for single-mode fiber.
- Reflection: High reflections mean dirty or damaged connectors.
- Breaks/Bends: OTDR shows these as sharp spikes.
If you see sudden loss or reflection, check that spot. Sometimes, the problem is just a connector that’s not pushed in all the way. I always double-check connections before assuming the cable is bad.
Common Problems And How I Fix Them
I’ve faced every problem you can imagine. Here are a few that come up often:
1. Dirty Connectors
Most issues are just dirt. Clean both ends, retest, and the problem often disappears.
2. Bent Fiber
Fiber doesn’t like tight bends. Always check behind racks or desks. If the bend is tight, straighten it out.
3. Bad Splice Or Connector
If you find a sudden loss, it could be a bad splice. Try cleaning or replacing the connector.
4. Broken Cable
Sometimes, the cable is just broken. Use the VFL or OTDR to find the spot. Replace the bad section.
5. Wrong Test Settings
I once spent an hour before realizing I set my OTDR to the wrong fiber type. Always double-check your test settings.

Single-mode Vs Multi-mode: Testing Differences
When I started, I didn’t know there were different fiber types. Single-mode and multi-mode need different tools and settings.
| Fiber Type | Core Size | Typical Use | Testing Wavelength |
|---|---|---|---|
| Single-mode | 8-10 microns | Long distance (WAN, Internet) | 1310/1550 nm |
| Multi-mode | 50/62.5 microns | Short distance (LAN, buildings) | 850/1300 nm |
Testing is similar, but always use the right settings. If you mix them up, the readings will not make sense.
Tips Only Experienced Testers Know
Here are two things I wish someone had told me early on:
- Test both directions: Sometimes, a cable looks good one way but bad the other. Test both ways to catch hidden problems.
- Record the environment: Heat and cold can change fiber readings. If you test in a hot room, results may be different later. I write down the room temperature with my test results.
One more: Don’t trust your memory. Always write down what you did and what you found.
My Checklist Before Leaving The Job
Before I pack up, I always:
- Clean and inspect all connectors again.
- Test one last time, both ways.
- Save or photograph test results.
- Label cables with date and results.
- Make sure everything is back where it was.
This routine has saved me more than once. If a problem shows up later, I know it wasn’t from my work.
When To Replace A Fiber Cable
Testing helps you find problems, but sometimes cables are just too old or damaged. Here’s how I decide:
- If loss is above 1 dB per kilometer, I consider replacing.
- If connectors are cracked or won’t clean, replace them.
- If the OTDR shows many sharp spikes, the cable is likely damaged in many places.
Replacing is sometimes faster and cheaper than endless repairs.
Fiber Cable Testing: Real-world Example
Let me share a quick story. I was once called to a hospital with slow internet. The staff blamed the provider. I tested the main fiber line with a power meter—power was low. The VFL showed a sharp bend in the ceiling, where a worker had hung a sign.
The OTDR confirmed the loss at that spot. We fixed the bend, cleaned the connectors, and the speed doubled. Testing saved everyone time and stress.
Comparing Testing Methods
There are different ways to test. Here’s how they compare based on my experience:
| Method | Speed | Accuracy | Best For |
|---|---|---|---|
| VFL | Fast | Low | Finding breaks |
| Power Meter | Medium | High | Checking loss |
| OTDR | Slow | Very High | Full cable map |
I pick the tool based on the problem. No need to use an OTDR for a short patch cable. But for a long run, it’s worth the time.
Learning More
If you want to dive deeper, check out the resources from Wikipedia. Their guides helped me understand the science behind the tests.
Testing fiber cable isn’t just about tools—it’s about habits, details, and care. Every job is a little different, but these steps work everywhere. You’ll get faster and more confident each time. And nothing beats the feeling of solving a tough problem and seeing the network run at full speed.
Frequently Asked Questions
How Often Should I Test Fiber Cables?
I test cables every time I install, move, or suspect a problem. For big networks, I suggest testing at least once a year.
Can I Test Fiber Cables Without Expensive Tools?
You can do basic checks with a VFL and cleaning kit. But for full tests, a power meter and OTDR are worth the investment.
What’s The Most Common Problem With Fiber Cables?
In my experience, dirty connectors cause most problems. Cleaning before testing can fix many issues.
Is It Safe To Touch Or Look Into A Fiber Cable?
Never look into a fiber cable with your eye, even if it looks off. The light can hurt your eye, even if you can’t see it.
What Should I Do If My Fiber Test Results Are Bad?
First, clean both connectors and check again. If the result is still bad, use a VFL or OTDR to find the problem spot. Replace or repair as needed.
Testing fiber cables gets easier with practice. Stay patient, pay attention to the small things, and you’ll get great results every time.
As an Amazon Associate, We earn from qualifying purchases