If you own a Stihl trimmer, you know it’s a real workhorse for keeping your yard neat. I remember the first time I tried to string mine—I thought it would be simple. Well, I ended up with tangled line, sore fingers, and a trimmer that just wouldn’t cut. It took trial, error, and some advice from a neighbor before I finally got it right. If you want to skip the frustration and do it right the first time, you’re in the right place. I’ll walk you through every step, share what I learned, and point out the little details that make a big difference.
Why Proper Stringing Matters
Stringing your trimmer correctly isn’t just a small thing. I’ve learned that a poorly strung trimmer will jam, break the line, and even damage the head. I once rushed and wound the line too tight. It snapped every few minutes.
When you get it right, though, the trimmer feels smooth, and you finish the job faster. Plus, you’ll save money on replacement line.
Know Your Stihl Trimmer Model
Before you start, check the model of your Stihl trimmer. Most home users have models like the FS 38, FS 56, or FS 70. The way you open the head and feed the line can be a bit different for each. I keep my manual nearby just in case. If you don’t have the manual, you can look up your model on the official Stihl website.
If you’re not sure, check the sticker on the shaft of your trimmer. It will say something like “FS 56 RC-E. ” That’s all you need.
Tools And Supplies You’ll Need
You don’t need a lot for this job, but it helps to have everything ready. Here’s what I grab:
- Replacement trimmer line (check your manual for the right diameter; usually 2.0 mm or 0.080” for home models)
- Work gloves (trust me, the line can cut your skin)
- Clean rag (for wiping dirt off the spool)
- Scissors or a sharp knife
A little tip: I always buy a good-quality line. Cheap line breaks faster and can make your trimmer vibrate more.
Safety First
Don’t skip this. I once forgot to unplug the spark plug wire, and the trimmer almost started with my hand near the head. Always:
- Turn off the trimmer.
- Disconnect the spark plug wire.
- Wait for the engine to cool.
- Wear gloves.
These steps only take a minute and can prevent a bad accident.
Removing The Trimmer Head
This step used to scare me. But it’s actually easy. Most Stihl heads twist off by hand, but some need you to press tabs or use a screwdriver. Here’s what works for me:
- Lay the trimmer on a flat surface.
- Hold the head firmly.
- Turn the spool cover counterclockwise (to the left).
- If there are tabs, press them gently and lift the cover.
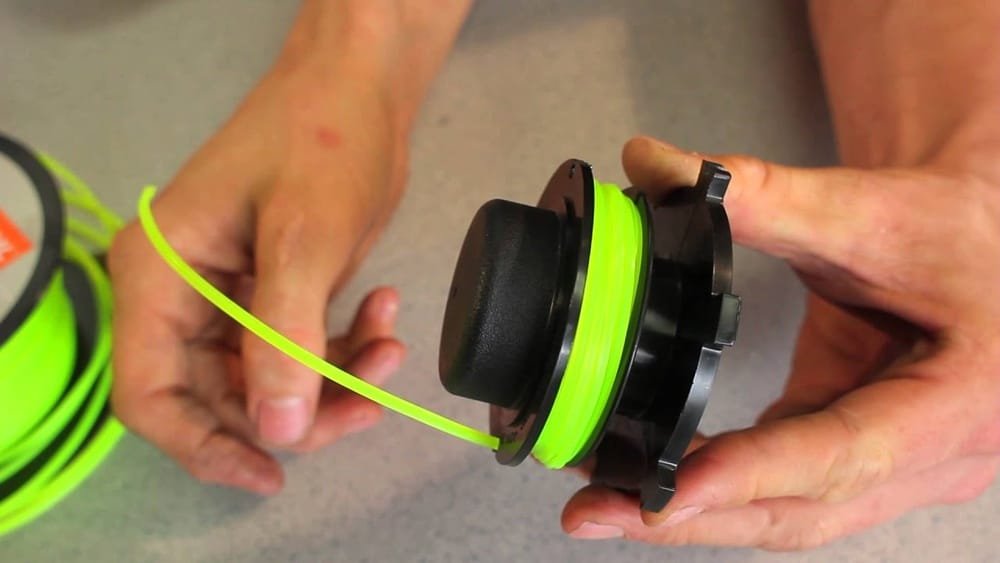
Inside, you’ll see the spool (where the line wraps). Wipe away any dirt. Sometimes grass builds up inside, which can make the line jam later.
Choosing And Measuring The Trimmer Line
Here’s where I made my first mistake. I used line that was too thick. It wouldn’t feed through the holes. Always check your model’s requirements. For my FS 56, I use 2. 0 mm (0. 080”) round line.
How much line do you need? Most Stihl spools hold about 10 to 15 feet per side. If you use too much, the spool won’t fit back together. Too little, and you’ll run out quickly.
I usually cut two lengths of line, each about 12 feet long. It’s better to have a little extra and trim it later.
Winding The Line: Step-by-step
This is where things get tricky. I used to wind the line too loosely, which caused it to tangle. Here’s what works for me every time:
- Find the starter holes on the spool (usually marked with an arrow or a hole).
- Insert one end of the line into the hole.
- Wind the line in the direction of the arrow on the spool. Most Stihl spools wind clockwise.
- Keep the line tight and even. Avoid crossing lines over each other.
- Stop when you have about 6 inches of line left.
- Clip the end of the line into the notch on the edge of the spool. This keeps it from unwinding.
Repeat with the second piece of line on the other side of the spool if your trimmer is a dual-line model. If it’s a single-line model, you only need one piece.
Quick Comparison: Single-line Vs. Dual-line
When I bought my first trimmer, I didn’t know the difference. Here’s a quick look at how they compare.
| Feature | Single-Line | Dual-Line |
|---|---|---|
| Cutting Power | Lower | Higher |
| Stringing Difficulty | Easy | Medium |
| Best For | Small Lawns | Thick Weeds |
Dual-line heads cut faster but need more care when winding. If you have thick grass or weeds, dual-line is the way to go.
Threading The Line Through The Eyelets
This is a step where I used to get stuck. If you don’t feed the line through the eyelets (the small holes on the head) before closing the spool, it will jam.
- Hold the spool close to the trimmer head.
- Take the end of each line and thread it through the eyelet on each side.
- Pull the lines gently so they are even.
It helps to keep the lines tight as you do this. Loose lines will tangle when you start the trimmer.
Reassembling The Trimmer Head
Now, you’re almost done. Place the spool back into the head. Make sure the lines don’t slip out of the notches. Align the spool, and press it down gently.
Put the cover back on, and twist it clockwise (to the right) until it clicks. Give the lines a gentle tug to make sure they move freely.
I always spin the head by hand before reconnecting the spark plug. If it feels stuck or rough, open it up and check for crossed lines.
Testing Your Work
Reconnect the spark plug wire. Start the trimmer and bump the head on the ground. This should feed out a bit more line. If nothing happens, you may have wound the line too tight or missed the notches.
I like to test on a small patch of grass before starting a big job. If the line feeds out and cuts clean, you did it right.

Common Mistakes And How To Avoid Them
I’ve made almost every mistake you can think of. Here are the big ones, and how to dodge them:
- Using the wrong line size: It won’t fit, or it will break. Always check your manual.
- Overfilling the spool: If you use too much line, the head jams. Stick to the recommended length.
- Winding the line too loose: Loose line will tangle and jam. Keep it snug.
- Crossing the lines: Crossed lines cause uneven feeding. Take your time and keep them side by side.
- Forgetting to disconnect the spark plug: This is a safety risk. Always disconnect before you start.
How Often Should You Restring?
I used to wait until the line broke before restringing. But I learned it’s best to check the line every few uses. If you notice the line getting short, brittle, or uneven, it’s time to replace it.
Here’s a rough guide from my experience:
| Yard Size | Restring Frequency |
|---|---|
| Small (under 1/4 acre) | Every 4-5 uses |
| Medium (1/4 to 1/2 acre) | Every 2-3 uses |
| Large (over 1/2 acre) | Every use |
If you trim a lot of fences or sidewalks, you may need to restring more often.

Different Types Of Trimmer Line
You might be surprised at how many types of line there are. I tried a few before I found what works best for me.
| Type | Best For | Durability |
|---|---|---|
| Round | Grass, light weeds | Medium |
| Twisted | Thicker weeds | High |
| Serrated | Heavy brush | Very High |
Round line is the easiest to install and works for most yards. If you have tough weeds, try twisted or serrated line.
Pro Tips For Trouble-free Stringing
Here are a few things I wish I’d known earlier:
- Cut the line with sharp scissors. Jagged ends make threading harder.
- If the line keeps breaking, try soaking it in water for an hour before use. This keeps it flexible.
- Mark the end of the line with a marker before winding. If you lose track, it’s easy to find where you started.
- Clean the head every time you restring. Dirt and grass can clog the spool.
These small habits save time and hassle.
When To Replace The Trimmer Head
Even a good trimmer head wears out. If you notice the head cracking, the bump feed not working, or the line jamming often, it might be time for a new head. I replaced mine after three years of heavy use.
It made a world of difference.
Frequently Asked Questions
How Do I Know What Size Trimmer Line I Need?
Check the sticker on your trimmer or your manual. Most Stihl home models use 2.0 mm (0.080″) line. Using the wrong size can cause jams or breakage.
What If My Trimmer Has A Bump Feed Head?
Bump feed heads are the most common. You load the line, close the head, and tap the head on the ground to feed more line. Make sure the line is wound tight and even for best results.
Can I Use Any Brand Of Trimmer Line?
You can, but I’ve found that Stihl branded line lasts longer and feeds better. Some off-brand lines break or jam more often.
Why Does My Line Keep Breaking?
The line may be too old, too thin, or you’re hitting hard surfaces like rocks or fences. Try a thicker or better-quality line if you have tough conditions.
Is It Okay To Wind More Line Than The Manual Says?
No. Overfilling causes jams and can damage the head. Stick to the length in your manual—usually 10 to 15 feet per side.
If you follow these steps and tips, you’ll find stringing your Stihl trimmer gets easier every time. You’ll save time, money, and a lot of frustration. I know I did. Happy trimming!
As an Amazon Associate, We earn from qualifying purchases