I still remember the first time I had to reload my Ego String Trimmer. The sun was out, the grass was high, and I was excited to make my yard look sharp. But then, my trimmer ran out of string. If you’ve ever stood there, scratching your head with a tangled mess in your hands, you’re not alone. I’ve been there too. Over the years, I’ve learned a few tricks to make this process simple and stress-free. I’m here to walk you through each step, share what worked for me, and help you avoid the mistakes I made when I was new to this.
Why The Ego String Trimmer Stands Out
Before we jump into the details, I want to share why I chose the Ego String Trimmer in the first place. I’ve tried several trimmers, but the Ego model is different. It’s battery-powered, which means no messy fuel mixing or harsh fumes. The power is impressive—it cuts through thick weeds without slowing down. Plus, it’s lighter than many gas models I’ve used. This makes a big difference if you have a big yard like mine.
One thing I love most is the Powerload feature (if your model has it). It’s a game-changer for loading string. Even if your trimmer doesn’t have Powerload, Ego still makes string changes easier than most brands I’ve tried.
Getting To Know Your Ego String Trimmer
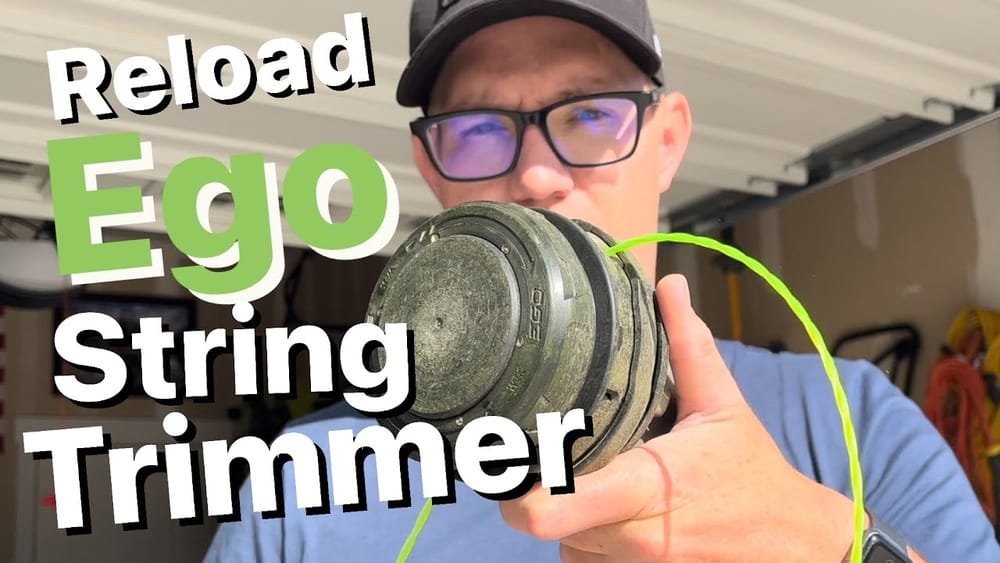
When I first got my trimmer, I took a few minutes to look at all the parts. Here’s what you’ll see on most Ego models:
- Trimmer head: This is where the string comes out.
- Battery slot: Where you insert the battery.
- Trigger: Controls the spinning.
- Line guide: Helps feed the string straight.
It’s important to know these parts because you’ll be working with the trimmer head when loading new string.
Let’s compare the Ego Power+ trimmer with a basic gas trimmer so you know what’s different:
| Feature | Ego Power+ String Trimmer | Basic Gas Trimmer |
|---|---|---|
| Power Source | Battery | Gasoline |
| String Loading | Powerload or Manual | Manual |
| Weight | Light to Medium | Medium to Heavy |
| Noise Level | Low | High |
| Maintenance | Low | High |

What You’ll Need Before Loading
Before you start, you’ll want to have a few things ready:
- Replacement string: Ego recommends 0.095-inch diameter line for most models. I’ve also tried 0.080-inch, but 0.095 lasts longer.
- Scissors or a cutter: To cut the string.
- Gloves (optional): I use them to avoid blisters, especially if the old string is dirty.
- Clean workspace: A flat area helps keep the string from tangling.
I’ve found that using the right string really matters. Cheap or thin line breaks faster, so I always use Ego’s own string or a trusted brand.
Step-by-step: How To Load Ego String Trimmer
Let me walk you through the process, just like I would for a friend. I’ll explain both the manual way and the Powerload way, since Ego offers both.
Manual Loading (most Common)
1. Remove The Battery
Safety first! I always take out the battery before touching the string head. This stops any chance of the trimmer starting by accident.
2. Cut The Right Length Of String
For my 15-inch model, Ego says to use about 16 feet of string. It’s better to measure it out—too much string can jam the head.
3. Open The Trimmer Head
Push in the tabs on both sides and pull off the cap. Sometimes it’s tight, so I use my thumbs to press firmly. Inside, you’ll see a spool.
4. Wind The String
Find the arrow on the spool. This shows you which way to wind. If you go the wrong way, the string won’t feed out. I made this mistake my first time and had to start over.
- Place the string in the anchor hole on the spool.
- Wind the string evenly, following the arrows.
- Don’t overlap too much—this helps avoid tangles.
- Feed the ends through the eyelets
Each side of the head has a small hole. Feed a few inches of string through each one.
6. Snap The Spool And Cap Back On
Make sure the string stays in the grooves. Press the head together until it clicks.
7. Pull The String To Check Tension
I give each end a gentle tug. If the string slides out easily, you’ve loaded it right.
8. Reinstall The Battery
Now, you’re ready to get back to work.
A Quick Tip I Learned:
If the string keeps breaking or jamming, check for old pieces stuck inside the head. Clean them out before loading new line.
Using The Powerload Feature (if You Have It)
When Ego released Powerload, it made my life so much easier. Here’s how it works:
1. Remove The Battery
Again, always start safe.
2. Cut The Right Length Of String
About 16 feet is good for most models.
3. Feed The String Through The Head
Find the holes on both sides of the trimmer head. Push the string straight through until you see an equal amount sticking out each side.
4. Press The Powerload Button
Hold the button down. The trimmer winds the string by itself. It’s almost fun to watch! Stop when about 6 inches of string is left on each side.
5. Check The Tension
Pull gently to make sure the string is secure.
6. Reinstall The Battery
You’re Done—no Winding By Hand!
I often show this trick to friends. They’re amazed how fast it is compared to older models.
Here’s a table comparing manual and Powerload methods:
| Step | Manual Loading | Powerload Feature |
|---|---|---|
| String Preparation | Cut and measure | Cut and measure |
| Installation | Open, wind, close | Feed, press button |
| Time Needed | 5-10 minutes | 1-2 minutes |
| Ease | Requires some skill | Beginner-friendly |
Common Mistakes And How To Avoid Them
I’ve made a few mistakes over the years. Here are some things to watch for:
1. Wrong String Size
Using string that’s too thick can jam the spool. Too thin, and it breaks quickly. Stick to 0. 095-inch if you can.
2. Overfilling The Spool
More isn’t always better. If you use too much string, it won’t feed or could cause the line to tangle.
3. Winding In The Wrong Direction
Always follow the arrow on the spool. If the line comes out too quickly or not at all, check your winding direction.
4. Not Cleaning The Head
Bits of old line or grass can make the new string jam. I always give the head a quick clean before reloading.
5. Forgetting To Check Tension
I learned that if the string isn’t tight, it can slip inside and not cut well. A quick tug after loading saves a lot of trouble.
6. Not Wearing Gloves
Sometimes, the string can be rough. A pair of gloves makes the job more comfortable, especially if you’re doing a lot of yard work.
Tips For Smoother String Loading
- Lay the string flat before winding. This prevents it from twisting and tangling.
- Cut extra line if you’re not sure of the length. It’s easier to trim it after loading than to come up short.
- Practice makes perfect. My first few tries took longer, but now I can reload in under two minutes.
- Keep extra string handy. I keep a roll in my shed so I’m never caught off guard.
- Use good lighting. It’s easier to see what you’re doing, especially if the head is dark or has small parts.

How Often Should You Reload?
How often you need to reload depends on your yard size and the type of grass you’re trimming. For my medium yard, I reload about every two weeks in the growing season. If you hit rocks or fences, the string wears out faster.
If you notice the trimmer not cutting well, or if the string seems short, it’s time to reload.
When To Replace The Trimmer Head
Sometimes, the problem isn’t the string—it’s the head itself. If you notice cracks, broken springs, or the head doesn’t snap together, it might be time for a new one. I had to replace mine after about two years of heavy use.
Ego sells replacement heads, and swapping one is almost as easy as loading the string. Always check the manual for your model.
Storing Your Ego String Trimmer
After reloading, I like to store my trimmer in a dry place. Moisture can make the string brittle and hard to use. I remove the battery after each use and hang the trimmer on a wall hook. This keeps it off the floor and out of the way.
Real-world Example: My First Time Loading
I’ll never forget my first try. I rushed, didn’t read the manual, and wound the string the wrong way. It jammed, and I had to take it apart again. Now, I always double-check the arrows and take my time. After a few tries, it feels natural.
And honestly, it’s satisfying to hear that clean “click” when the head snaps together.
Why String Quality Matters
I once used a cheap off-brand string because it was on sale. It broke every five minutes, and I spent more time fixing than trimming. Since then, I stick with Ego’s own string or a good commercial line. It costs a little more, but it saves time and frustration.
Here’s a quick look at different line types:
| Type | Durability | Cut Quality | Noise |
|---|---|---|---|
| Round | Good | Medium | Low |
| Twisted | Very Good | High | Very Low |
| Multi-sided | High | Very High | Medium |
Final Thoughts
Reloading your Ego String Trimmer doesn’t have to be a headache. With a little practice, it’s a quick, simple process. The right string, proper loading, and regular care make all the difference. Don’t let a tangled mess slow you down. If I can do it, anyone can. Take your time, follow the steps, and soon you’ll be trimming like a pro.
If you want more details or need to check your model, the official Ego site has great guides: Ego Power+.

Frequently Asked Questions
How Much String Should I Use For My Ego Trimmer?
Most Ego string trimmers use about 16 feet of 0.095-inch string. Check your manual for the exact number, as some models may differ.
What If The String Keeps Breaking?
If your string breaks often, it could be old, the wrong size, or hitting hard objects like rocks. I recommend using Ego’s own line for the best results.
Can I Use Other Brands Of String?
Yes, but make sure it’s the right diameter (usually 0.095-inch). Off-brand string may break faster or jam the trimmer.
Why Does My Trimmer Head Jam After Reloading?
Common causes are overfilling, winding the string the wrong way, or old line stuck inside. Make sure the head is clean and follow the arrows for winding.
Is The Powerload Feature Worth It?
In my experience, the Powerload feature is a big time saver. If you reload often or struggle with manual winding, it’s definitely worth it.
I hope this guide makes your next string reload smoother and less stressful. Happy trimming!
As an Amazon Associate, We earn from qualifying purchases