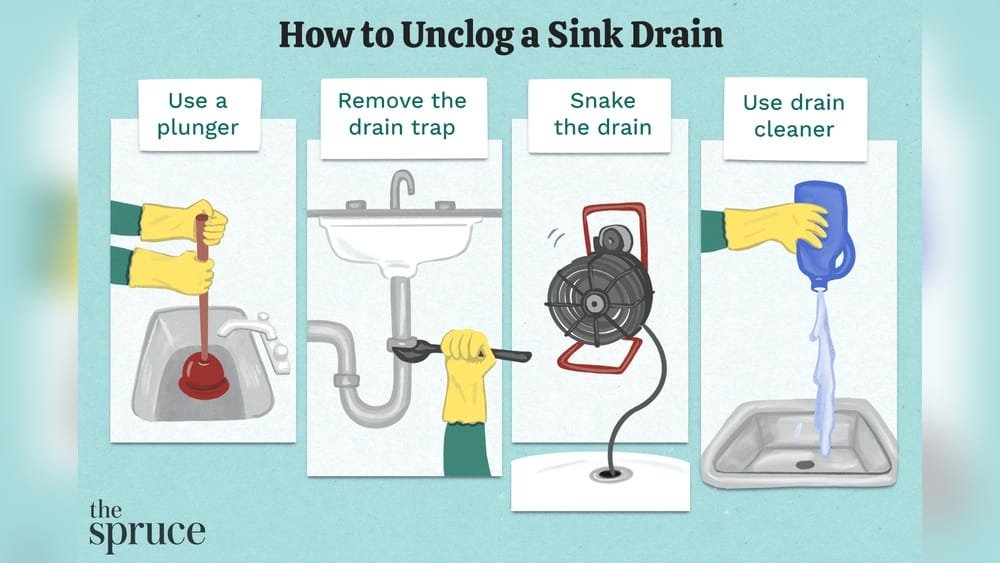
If you’ve ever had water sitting in your sink, refusing to drain, you know how annoying it is. I’ve been there too—standing over a slow-draining sink, wondering if I should call a plumber or try fixing it myself. After a few frustrating experiences, I finally learned how to snake a sink drain on my own.
Prime Day Pick
Limited-time Prime Day price. Check current discount on Amazon.
It’s simpler than I thought, and I wish someone had told me sooner. Let me walk you through everything I’ve learned, step by step, so you can fix your clogged sink without stress.
Why Learn To Snake A Sink Drain?
When my bathroom sink first clogged, I tried pouring hot water and baking soda down the drain. It helped a little, but not much. I soon realized that snaking is one of the most reliable ways to clear tough clogs. Plumbers are expensive, and waiting days for an appointment is even worse. Snaking lets you take control of the problem right away. Plus, it’s satisfying to see water flow freely after you fix it yourself.
Prime Day Pick
Limited-time Prime Day price. Check current discount on Amazon.
What Causes Sink Drains To Clog?
Over the years, I’ve noticed a few things that almost always lead to clogs:
Prime Day Pick
Limited-time Prime Day price. Check current discount on Amazon.
- Hair: Especially in bathroom sinks, hair tangles with soap and forms a blockage.
- Grease and Food: Kitchen sinks often get clogged by grease, coffee grounds, and food scraps.
- Soap Scum: This builds up slowly and narrows the pipe.
- Small Objects: Sometimes rings, toothpaste caps, or even kids’ toys fall in.
Knowing what caused your clog helps you avoid it in the future. For example, I put a mesh screen over my drain after finding a chunk of potato peel was the culprit once.
Tools You Need To Snake A Sink Drain
When I first tried unclogging a drain, I used a bent wire hanger. It sometimes worked for shallow clogs, but a real drain snake (also called a plumber’s auger) is much better. Here’s what I now keep handy:
- Drain snake/auger: I use a 15-25 foot manual snake for sinks.
- Bucket: For catching dirty water or debris.
- Rubber gloves: Things can get messy.
- Old towels or rags: To protect the area under the sink.
- Adjustable wrench or pliers: Helpful if you need to remove the P-trap.
- Flashlight: To see under the sink.
- Safety goggles: Not essential, but I learned the hard way that splashes happen.
If you don’t already have a snake, they’re not expensive. Most hardware stores sell them for $10-$30.
Safety First: What To Know Before You Start
I always think about safety before starting any repair. Here are some key things I do:
- Turn off the water to the sink, just in case.
- Clear the cabinet under the sink so you have room to work.
- Wear gloves because drains can be pretty gross.
- Keep a towel handy to wipe up drips or splashes.
And if you’ve used any chemical drain cleaners, be extra careful. They can burn your skin. I avoid them whenever I can.
Step-by-step: How I Snake A Sink Drain
After a few attempts, I’ve settled on a process that works almost every time. Here’s how I do it:
1. Remove Standing Water
If the sink is full, I bail out as much water as I can with a cup. Otherwise, things get very messy fast.
2. Take Out The Drain Stopper
Most bathroom sinks have a pop-up stopper. I twist and pull it out. Sometimes, you need to unscrew a nut under the sink first. Kitchen sinks usually don’t have this, but if they do, it’s easy to remove.
3. Try Clearing Blockage By Hand
I peek down the drain with a flashlight. If I see hair or debris near the top, I grab it with my fingers or some tweezers. This simple step can fix many shallow clogs.
4. Remove The P-trap (if Needed)
The P-trap is the curved pipe under the sink. Sometimes the clog is here, not deeper. I put a bucket underneath, then use pliers to loosen the slip nuts on both ends. The P-trap slides off, and I check it for gunk. Cleaning it out is often all you need.
Here’s a quick comparison I made after unclogging my own kitchen and bathroom sinks:
| Sink Type | Most Common Clog Spot | Ease of P-Trap Removal |
|---|---|---|
| Bathroom | Just under the drain/stopper | Easy |
| Kitchen | P-Trap and deeper | Can be tight, but doable |
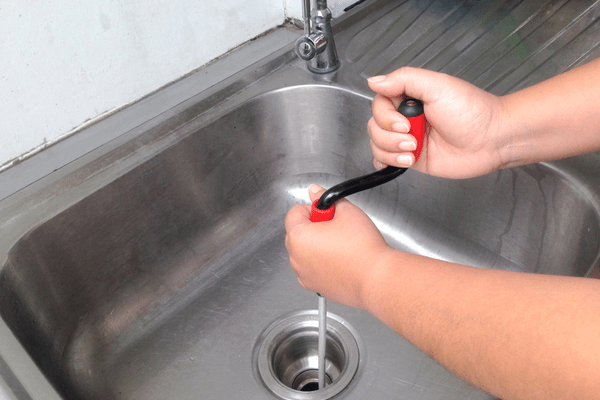
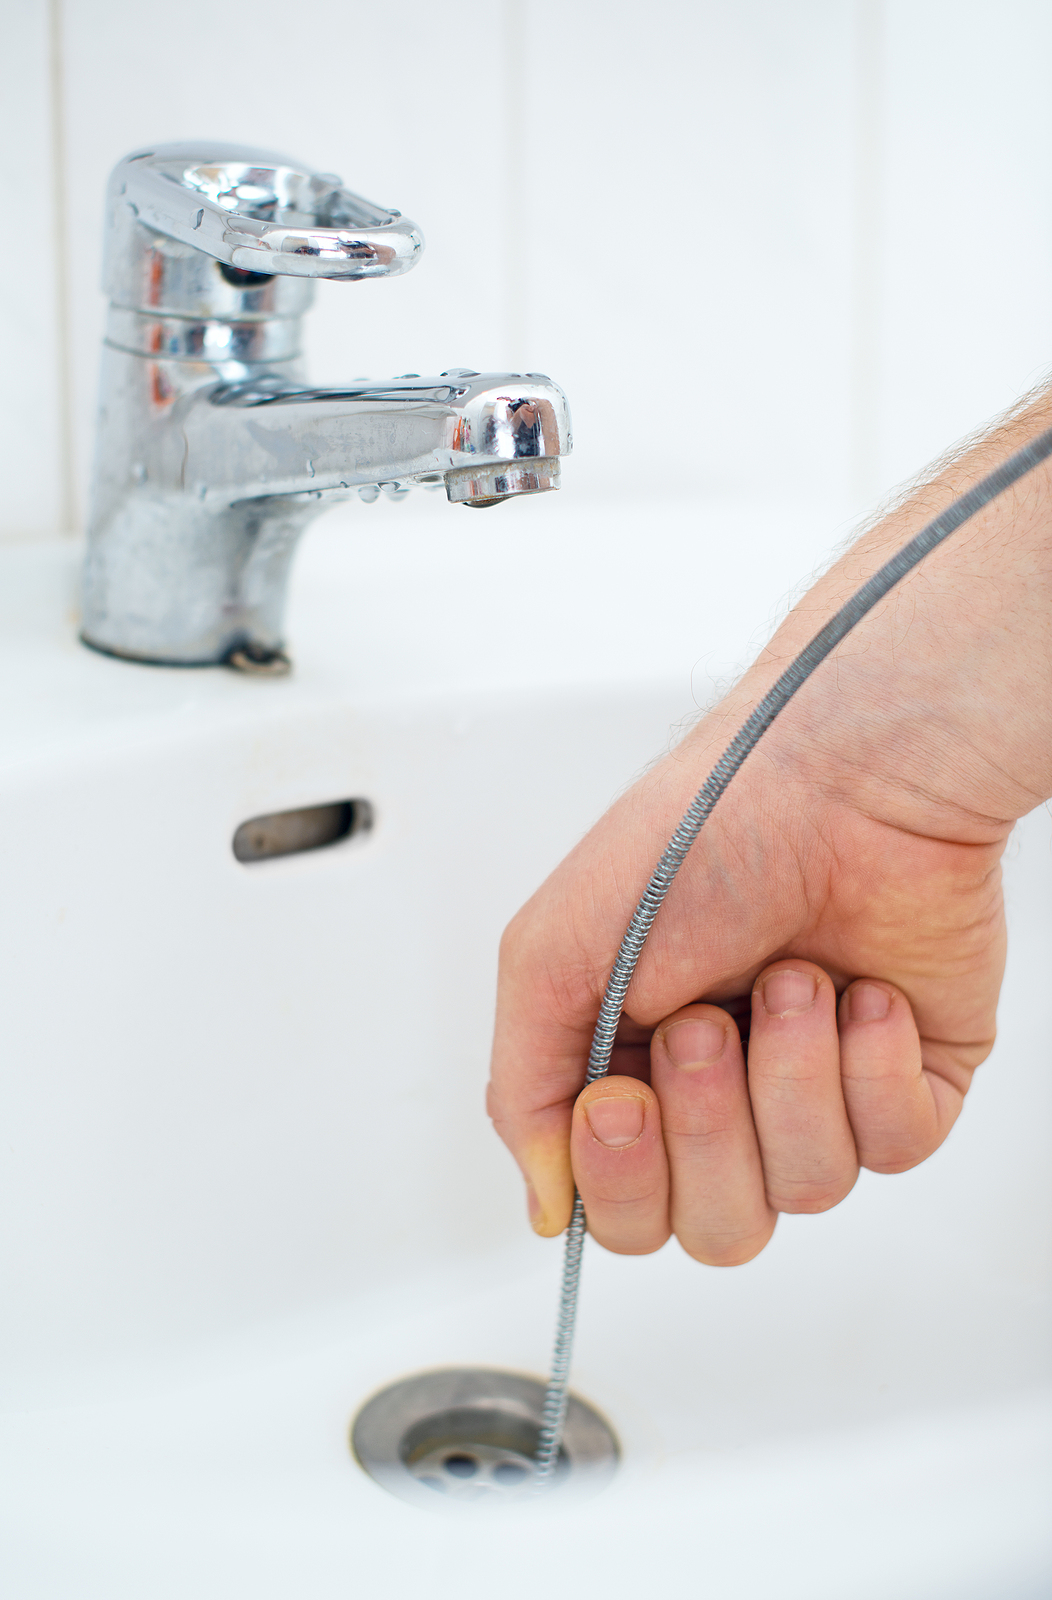
5. Insert The Drain Snake
Here’s where the magic happens. I feed the tip of the snake into the drain or the open pipe (if I removed the P-trap). I gently push and turn the handle at the same time. If I feel resistance, I rotate the snake.
That usually helps it grab the clog.
I try not to force it. If the snake won’t go further, I pull it back a bit and try again. Sometimes the clog is stubborn, but patience pays off.
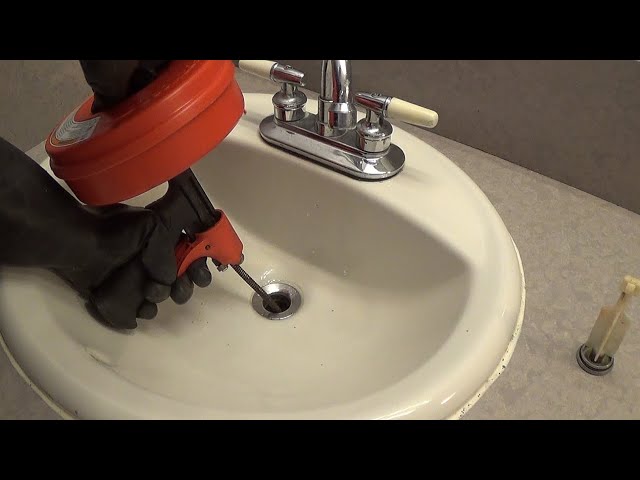
6. Break Up And Pull Out The Clog
Once the snake grabs something, I twist and pull it out slowly. Sometimes it comes out with the snake, sometimes it breaks up and washes away. Either way, I run some hot water to test the flow. If it’s still slow, I repeat the process.
Here’s a quick table comparing two main types of drain snakes I’ve used:
| Snake Type | Best For | Pros | Cons |
|---|---|---|---|
| Manual Hand Snake | Most home sinks | Cheap, easy to control | Requires more effort |
| Power Drill Snake | Stubborn, deep clogs | Very effective, fast | More expensive, needs a drill |
7. Reassemble Everything
When the clog is gone, I put the P-trap back in place and tighten the nuts. I make sure everything is snug but not overly tight (I cracked a plastic nut once by turning too hard).
8. Test The Drain
I turn on the water and let it run for a minute. If it drains quickly, I know I did the job right. I always check under the sink to make sure there are no leaks.
Tips And Tricks I’ve Learned
Some things only come from experience. Here are a few lessons I picked up:
- Go slow with the snake. If you push too hard, you might kink it or damage the pipe.
- Clean up afterwards. Drains are full of bacteria. I sanitize the area and wash my hands well.
- Don’t forget the O-rings. If your P-trap has rubber seals, make sure they’re lined up before tightening.
- Keep a towel under the P-trap. Even if you think there’s no water, there’s always a little left inside.
One thing beginners miss: sometimes the clog is farther down the line, beyond reach of a short snake. If you try all this and it still doesn’t work, it might be time to call a plumber.
How Often Should You Snake Your Sink?
I used to wait until the sink was completely blocked. That was a mistake. Now, I snake my bathroom sinks every 6-12 months as a preventative step. It only takes 15-20 minutes, and I avoid big problems later. Kitchen sinks need it less often if you’re careful about what goes down the drain.
Common Mistakes To Avoid
I’ve made almost every mistake in the book. Here are some to watch out for:
- Using too much force: This can break pipes, especially old ones.
- Skipping the P-trap: Many clogs are right there, not deep in the wall.
- Not testing for leaks: Always run water and check for drips.
- Forgetting to protect the area: I’ve splashed dirty water all over the cabinet before.
- Not wearing gloves: Trust me, you don’t want to touch what comes out of a drain.
When To Call A Professional
Sometimes, you just can’t fix it yourself. If you notice any of these, I recommend calling in a pro:
- Water backs up in multiple drains at once
- Bad smells linger even after snaking
- The snake gets stuck and won’t come out
- Pipes are old or corroded and may break
A good plumber has specialized tools and experience for these tough cases.
Preventing Future Clogs
After my first big clog, I changed some habits:
- Use drain screens to catch hair and food.
- Don’t pour grease down the kitchen sink. Wipe pans first.
- Run hot water after using the sink, especially in the kitchen.
- Clean stoppers and strainers every few weeks.
These simple steps keep my drains flowing and save me a lot of hassle.
The Benefits Of Doing It Yourself
Learning to snake a sink drain has saved me hundreds of dollars in plumber fees. More than that, it’s made me feel confident about home repairs. The satisfaction when the water drains away smoothly is hard to beat. Plus, I know my home’s plumbing a lot better now.
If you’re new to this, don’t worry. Everyone starts somewhere. The first time might feel tricky, but you’ll get faster and more skilled with each attempt. And if you ever get stuck, there are great resources online, like the guides at Family Handyman, that helped me when I needed extra tips.
Frequently Asked Questions
How Long Does It Take To Snake A Sink Drain?
For me, it usually takes about 20-30 minutes from start to finish. If the clog is deep or the P-trap is tricky to remove, it might take longer. Most basic clogs are quick once you know what to do.
Do I Need Any Experience To Use A Drain Snake?
No, you don’t need plumbing experience. The first time I tried, I just followed simple instructions and took my time. As long as you’re careful and patient, anyone can do it.
Can I Use A Drain Snake On Any Sink?
Yes, you can use a manual snake on most bathroom and kitchen sinks. Some very old or unusual sinks may have tricky pipes, but I haven’t run into any I couldn’t handle yet.
Will Snaking Damage My Pipes?
If you use the right size snake and don’t force it, your pipes should be fine. I always go slow and never jam the snake in. If you have old or fragile pipes, be extra gentle.
What If Snaking Doesn’t Fix My Clog?
Sometimes, the clog is farther down or caused by a bigger issue. If snaking doesn’t help after a few tries, or if you notice water backing up in other places, it’s best to call a professional plumber.
Snaking a sink drain might seem intimidating at first, but with a little patience and the right tools, it’s totally doable. I’m glad I learned how, and I hope my experience helps you tackle your own clogged sink with confidence.
Don’t be afraid to give it a try—you might just surprise yourself!
As an Amazon Associate, We earn from qualifying purchases