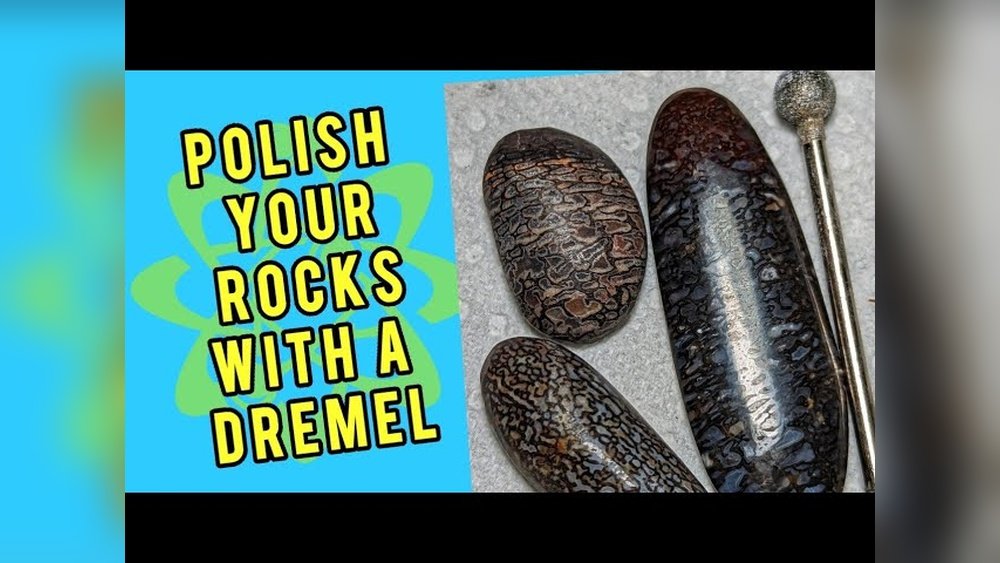
Polishing Stones With A Dremel: My Simple, Step-by-step Guide
Ever picked up a rough stone and wondered if you could make it shine? That’s how I felt the first time I tried polishing stones with a Dremel. I didn’t have fancy tools or a big budget. I just had a small rotary tool, some simple supplies, and a lot of curiosity.
Over time, I learned how to turn dull, rough rocks into shiny gems—right at home.
If you’re curious about how to polish stones with a Dremel, I’ll share everything I’ve learned. This guide is for beginners and anyone who wants to try something new without complicated steps. I’ll walk you through each stage, from picking the right stones to the final polish.
I’ll also share the little tricks I wish I knew when I started.
Why Use A Dremel For Polishing Stones?
I chose a Dremel tool because it’s small, affordable, and easy to control. I didn’t want a big rock tumbler or expensive equipment. A Dremel lets you polish one stone at a time, so you can see results fast. It’s also great if you have limited space. I found it perfect for small stones, crystals, or even jewelry pieces.
Another thing I noticed: polishing with a Dremel is hands-on. You see every change as you work. It’s a bit like drawing, but with rocks. This makes it fun and personal. Plus, you can stop anytime and pick up where you left off.
What You Need To Get Started
You don’t need a lot to begin. Here’s what I use every time I polish stones with my Dremel:
- Dremel rotary tool (any basic model will do)
- Variable speed settings (important for control)
- Diamond bits or carbide grinding bits
- Sanding drums and discs (various grits: 60, 120, 400, 600, 1200)
- Polishing wheels (felt or cloth)
- Polishing compound (cerium oxide or aluminum oxide)
- Protective eyewear and mask
- Small bowl of water (for cooling the stone)
- Soft cloths (for wiping and finishing)
- Your stones (river rocks, quartz, agates, jasper, etc.)
I remember starting with just a few bits and learning as I went. Don’t worry if you can’t get everything on day one. You can always add to your kit later.
Picking The Right Stones
Not every rock is good for polishing. I learned this the hard way! Some stones just crumble, and others never get shiny. Here’s what I look for now:
- Hardness: Stones between 5 and 7 on the Mohs scale work best.
- Texture: Smooth stones are easier. Avoid ones with deep cracks.
- Size: Stones that fit in your hand are easier to control.
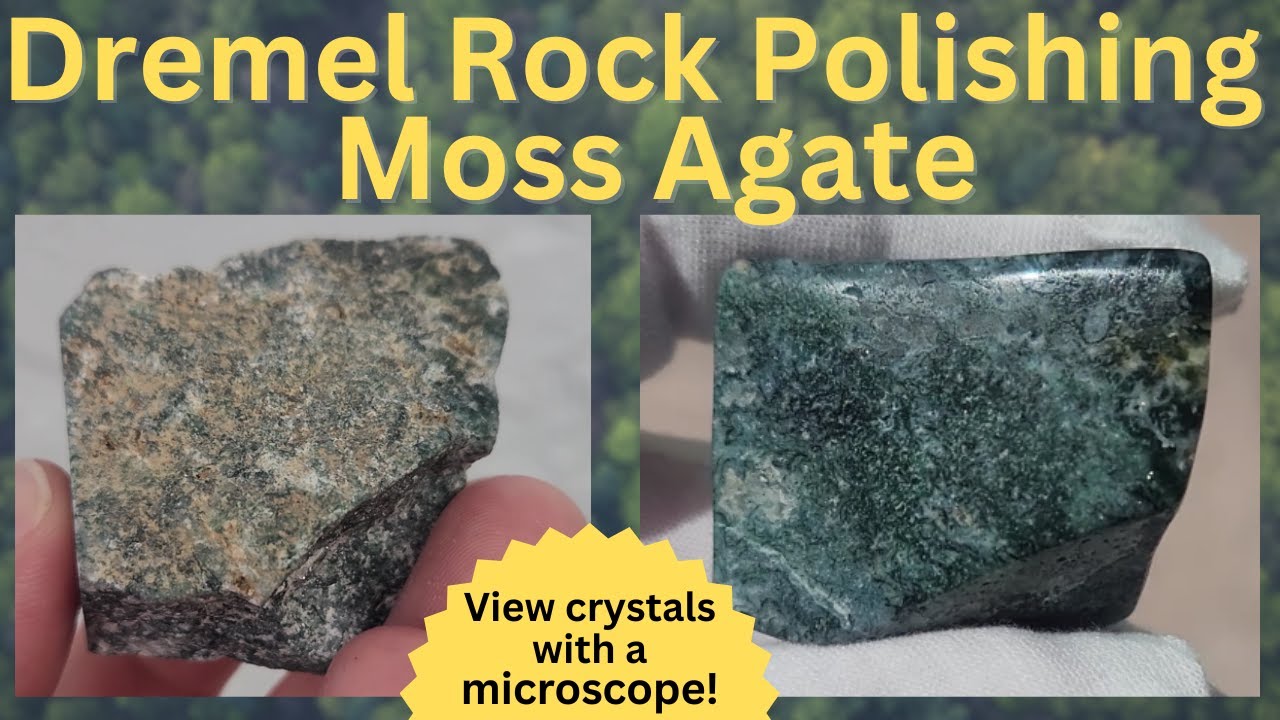
- Type: I’ve had good results with quartz, agate, jasper, and obsidian.
If you’re not sure what kind of stone you have, try a small area first. I once tried to polish a chalky rock, and it just turned to dust!
Comparing Popular Stones For Polishing
Here’s a quick comparison based on my experience:
| Stone Type | Hardness (Mohs) | Polish Quality | Beginner-Friendly |
|---|---|---|---|
| Quartz | 7 | High | Yes |
| Agate | 6.5-7 | Very High | Yes |
| Jasper | 6.5-7 | High | Yes |
| Obsidian | 5-6 | Medium | Yes (but can chip) |
| Calcite | 3 | Low | No |
Quartz and agate are my favorites for beginners. They don’t break easily, and the shine is worth the effort.
Getting Ready: Safety And Setup
Before you start, safety comes first. I learned early on that dust from rocks can be harmful. Always wear protective eyewear and a mask. I do all my polishing outside or near an open window to avoid breathing in dust.
Set up your work area with good light. Keep your tools and stones within easy reach. I put a towel under my workspace to catch any bits that fall. Having a bowl of water nearby helps cool the stone and reduces dust.
If your Dremel has a variable speed setting, start on the lowest speed. High speeds can make stones heat up quickly and even crack.
Step-by-step: How I Polish Stones With A Dremel
I’ll break down my process so you can follow along. It’s not hard, but patience is key. Each step matters for a perfect shine.
1. Shape The Stone
I begin with the roughest bit, usually a diamond grinding bit. This lets me shape the stone and remove any sharp edges or uneven spots.
- Hold the stone firmly, but not too tight.
- Turn on the Dremel at a low speed.
- Gently run the bit over the surface, moving in small circles.
- Dip the stone in water every minute to keep it cool.
Don’t rush this step. If you grind too fast, the stone can chip or crack. I learned to take my time and check the shape often.
2. Sand The Surface
After shaping, I switch to a coarse sanding drum (about 60 or 120 grit). This smooths out any scratches from the grinding bit.
- Work over the entire surface, keeping pressure light.
- Use water often to avoid overheating.
- Change to finer grits as you go (400, 600, 1200).
Each grit removes the scratches from the last one. I spend extra time at this stage because it makes polishing much easier later.
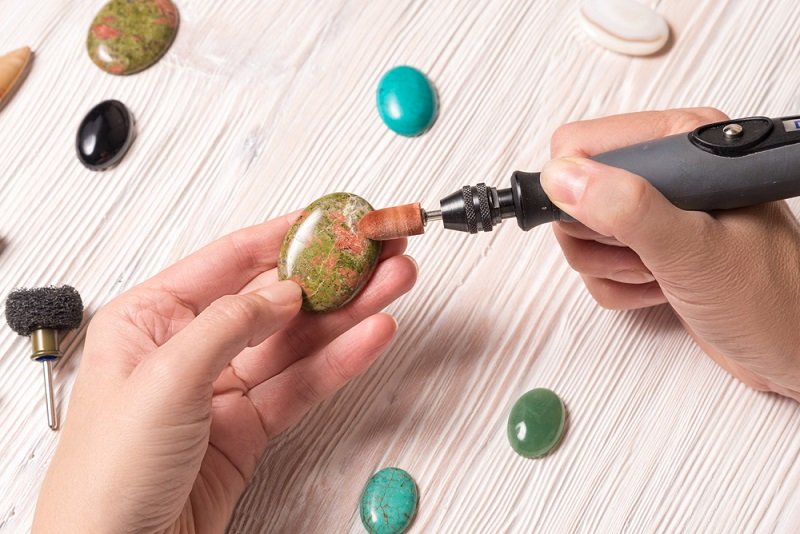
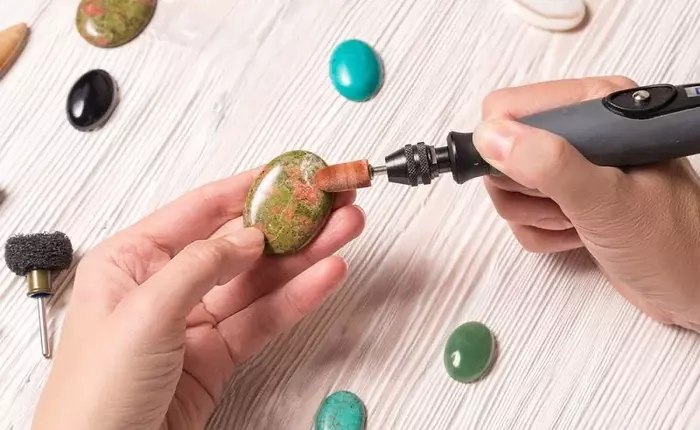
3. Polish The Stone
This is my favorite part! I use a felt wheel or cloth polishing bit with a small amount of polishing compound.
- Apply a bit of compound to the wheel.
- Run the Dremel at a low to medium speed.
- Gently press the wheel against the stone, moving in circles.
- Wipe off excess compound with a soft cloth.
The shine starts to appear after a few passes. Sometimes I repeat this step for a deeper gloss.
4. Clean And Finish
Once I’m happy with the shine, I rinse the stone in clean water and dry it with a soft cloth. I like to give it a final buff by hand.
If the stone still looks dull in spots, I go back to a finer sanding grit and repeat the process. The key is not to skip steps.
Polishing Tips I Wish I Knew Sooner
Some things are not obvious when you start. Here are two insights that helped me:
- Water is your best friend: Keeping the stone wet reduces dust, keeps it cool, and helps you see the real color as you work.
- Patience pays off: The final shine depends on how well you sand. If you rush, you’ll see scratches no matter how much you polish.
Also, don’t be afraid to experiment. I once tried a mix of different grits and found a combination that worked best for my local river rocks.
Common Mistakes And How To Avoid Them
Everyone makes mistakes. I’ve made plenty! Here are a few common ones and how to avoid them:
- Using too much pressure: Let the tool do the work. Pushing hard can crack the stone or wear out your bits.
- Skipping grits: Moving from coarse straight to fine leaves scratches. Always use each grit in order.
- Not cooling the stone: Stones heat up fast. I keep dipping them in water to avoid cracks.
- Polishing soft stones: Stones like calcite or sandstone won’t shine. Stick to harder stones.
- Ignoring safety gear: Dust is real. Always wear a mask and glasses.
Time And Cost: What To Expect
Polishing one stone takes me about 30 to 60 minutes, depending on its size and hardness. The cost for supplies is low if you already have a Dremel. Most bits and wheels are reusable.
Here’s a rough breakdown of the time and money I spend:
| Step | Time (per stone) | Supplies Needed | Cost Estimate |
|---|---|---|---|
| Shaping | 10-15 min | Diamond bit | $5-10 |
| Sanding | 10-20 min | Sanding drums (various grits) | $10-15 (lasts for many stones) |
| Polishing | 10-20 min | Felt wheel, compound | $5-10 |
| Finishing | 5 min | Cloth, water | Negligible |
Overall, once you have the tool, you can polish dozens of stones for just a few dollars in consumables.
Dremel Vs. Rock Tumbler: Which Is Better?
I get asked if a Dremel is better than a rock tumbler. Here’s what I’ve found from personal experience:
| Feature | Dremel | Rock Tumbler |
|---|---|---|
| Speed | Fast (30-60 min/stone) | Slow (days to weeks) |
| Control | High (work on details) | Low (batch process) |
| Space Needed | Small | Medium to large |
| Cost | Low (if you own a Dremel) | Higher (buying tumbler + grit) |
| Best For | Small projects, details | Large batches |
If you want to polish many stones at once, a tumbler is easier. But if you enjoy hands-on work and want to see quick results, the Dremel is hard to beat.
Creative Uses For Polished Stones
Once I started polishing stones, I found so many ways to use them:
- Jewelry: Make pendants, rings, or earrings.
- Home decor: Display in bowls or vases.
- Gifts: Give to friends or family.
- Craft projects: Add to mosaics or art.
A polished stone can be more than just a pretty rock. I’ve even used them as worry stones or pocket charms.
Polishing Stones With Kids: What I Learned
I’ve tried this with my niece and nephew. If you want to involve kids, here are some tips:
- Pick bigger stones that are easy to hold.
- Let them help with sanding by hand (not with the tool).
- Always supervise when the Dremel is running.
- Teach them about safety and rock types.
Kids love seeing a dull rock turn shiny. It’s a great way to spend time together and learn about nature.
Where To Learn More
I’ve picked up many tips from rockhounding groups and online forums. If you want to dive deeper, check out the Lapidary Wikipedia page for background on stone polishing.
Frequently Asked Questions
What Stones Are Best For Polishing With A Dremel?
Hard stones like quartz, agate, and jasper work best. They don’t break easily and can get a nice shine. Softer stones usually crumble or stay dull.
Can I Polish Beach Stones Or River Rocks?
Yes! Many river and beach stones are perfect for polishing. Just make sure they’re not too soft. Test a small spot before you start.
How Do I Know When My Stone Is Ready For Polishing?
After sanding, your stone should feel smooth with no rough spots. If you see scratches, go back to a finer grit. The better the sanding, the shinier the final result.
Is It Safe To Use A Dremel For Stone Polishing?
It’s safe if you use eye protection and a mask. Always work in a well-ventilated area. Keep fingers away from spinning bits and never force the tool.
Can I Use Toothpaste Or Baking Soda As A Polishing Compound?
Toothpaste or baking soda can work in a pinch, but they’re not as effective as real polishing compounds like cerium oxide. For the best shine, use the right product.
Polishing stones with a Dremel has become one of my favorite hobbies. It’s creative, relaxing, and always a bit magical when the shine appears. If you give it a try, remember to be patient, stay safe, and enjoy the process.
With a little practice, you’ll turn ordinary rocks into treasures you’ll be proud to show off.
As an Amazon Associate, We earn from qualifying purchases