Cutting plexiglass with a Dremel can seem tricky at first. I remember the first time I tried it—I was nervous about cracking the sheet or making a rough edge. But after a few projects and some trial and error, I learned a lot about how to do it safely and smoothly.
If you’re new to this, I’ll walk you through the whole process, step by step, just like I’d explain it to a good friend. My goal is to help you avoid the mistakes I made and get clean, professional results every time.
Why I Use A Dremel To Cut Plexiglass
When I started working with plexiglass, I tried using hand saws and box cutters. They worked, but not well. The edges often chipped or cracked. Once I switched to a Dremel rotary tool, I saw a big improvement. The Dremel is lightweight, easy to handle, and cuts curves and shapes that other tools can’t. For me, it’s the best tool for both straight and curved cuts on thin to medium plexiglass sheets.
What You Need Before You Start
Before you even plug in your Dremel, make sure you have everything you need. Here’s my go-to list:
- Dremel rotary tool (I use the 4000 model)
- Cutting wheel attachment (the fiberglass reinforced type works best)
- Plexiglass sheet (I usually work with 1/8 inch thick)
- Clamps to hold the plexiglass steady
- Workbench or sturdy table
- Masking tape
- Measuring tape and marker
- Safety goggles and gloves
- Dust mask (plexiglass dust can irritate your lungs)
- Sanding block or fine sandpaper (for finishing edges)
Don’t skip on safety gear. Plexiglass splinters and dust can be nasty.
Choosing The Right Dremel Bit
The right bit makes a huge difference. Early on, I tried a standard metal cutting wheel, but it melted the plastic. Later, I learned that fiberglass reinforced cutting wheels are best. They cut quickly without heating up as much. There are also specialty plastic cutting bits, but I’ve found the reinforced wheels give me the cleanest edge.
Here’s a quick comparison of common Dremel attachments I’ve used:
| Attachment | Best For | Edge Quality |
|---|---|---|
| Fiberglass Reinforced Cutting Wheel | Straight & Curved Cuts | Smooth |
| Plastic Cutting Bit | Detailed Shapes | Good |
| Standard Metal Wheel | Thin Sheets Only | Rough/Melted |
How To Prepare Plexiglass For Cutting
Preparation is key. Here’s how I get my plexiglass ready:
- Mark Your Cut Line: I use a permanent marker and a ruler for straight lines, or a flexible curve for shapes. Make the line bold enough to see.
- Mask the Line: I stick masking tape along both sides of the line. This helps prevent chips and cracks while cutting.
- Secure the Sheet: Plexiglass moves easily. I clamp it to my workbench, leaving the cutting area free.
- Wear Safety Gear: Always put on goggles, gloves, and a dust mask before you start.
One thing I learned the hard way: don’t skip the masking tape. Without it, the plastic chips much more easily.
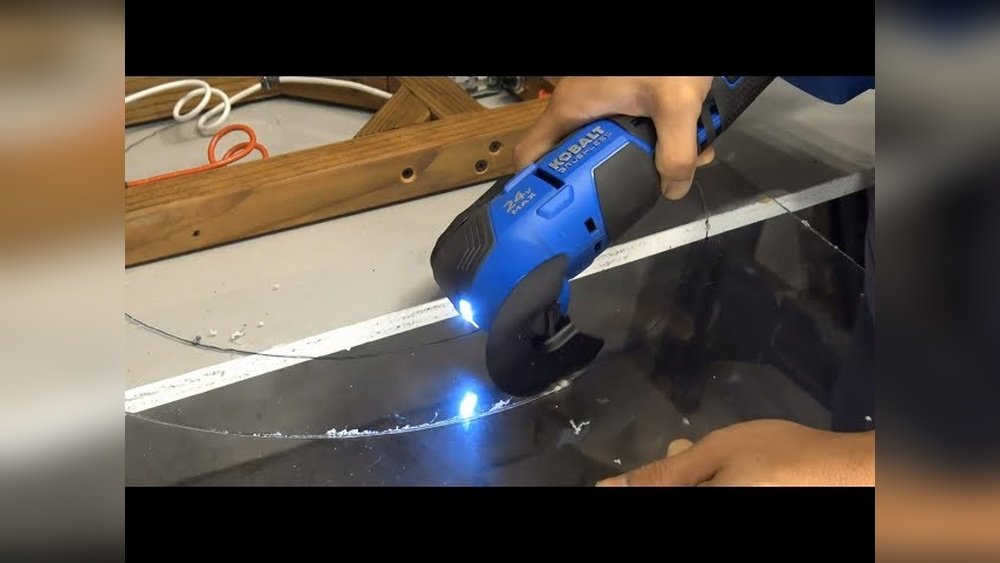
Step-by-step: Cutting Plexiglass With A Dremel
Let’s get to the main part. Here’s the exact process I follow every time:
1. Set Up Your Dremel
Attach your cutting wheel. Tighten it well. Set the speed to medium or high (about 25,000–30,000 RPM). Too slow, and the tool will melt the plexiglass instead of cutting.
2. Start The Cut
Turn on the Dremel before touching the plexiglass. Bring the spinning wheel gently to the edge of your marked line. Let the tool do the work—don’t force it.
3. Guide The Tool Slowly
Move the Dremel along your line at a steady pace. Don’t rush. If you go too fast, the sheet may crack or the edge will be jagged. If you go too slow, the plastic may melt and gum up the wheel.
4. Pause To Cool Down
If you’re making a long cut, pause every 20–30 seconds. Plexiglass heats up fast and can warp. I often blow on the cut or let it cool for a minute.
5. Finish The Cut
Once you reach the end, gently lift the tool away. Turn off the Dremel and let the wheel stop spinning before setting it down.
6. Clean Up The Edge
Remove the masking tape. The edge will probably feel a little rough. I use a fine sanding block or 400-grit sandpaper to smooth it out. Just a few light passes make a big difference.
Here’s a table to help you pick the right Dremel speed for different plexiglass thicknesses:
| Plexiglass Thickness | Dremel Speed (RPM) | Cutting Difficulty |
|---|---|---|
| 1/16 inch | 20,000–25,000 | Easy |
| 1/8 inch | 25,000–30,000 | Moderate |
| 1/4 inch | 28,000–32,000 | Challenging |
Tips For A Cleaner Cut
I’ve picked up a few tricks that really help:
- Keep the tool moving: Stopping in one spot melts the plexiglass.
- Use two hands: One to guide the Dremel, one to steady your arm.
- Practice on scrap pieces: I always test on a leftover bit before cutting my actual project.
- Cut in a well-ventilated area: The smell from melted plastic can be strong.
One thing beginners often miss: Don’t push too hard. The Dremel should glide through the plexiglass with light pressure. Forcing it just leads to mistakes.
Common Mistakes To Avoid
I made my share of errors when I started. Here are the top ones and how to avoid them:
- Going too fast: This causes cracks and uneven edges.
- Using the wrong bit: Always choose a reinforced cutting wheel.
- Not clamping the sheet: Plexiglass moves easily, and one slip ruins the cut.
- Skipping safety gear: Plexiglass dust is sharp. Goggles and a mask are a must.
- Not cooling between cuts: Overheated plexiglass warps and melts.
If you avoid these, your cuts will be much better.
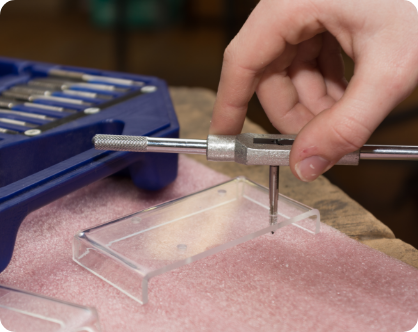
Finishing And Polishing The Edges
After cutting, the edges need a little love to look their best. I use a sanding block with fine sandpaper (400–600 grit). Move in one direction along the edge, not back and forth. For a glossy finish, I sometimes use a plastic polish and a soft cloth.
This step makes a big difference, especially if the plexiglass will be visible.
For deeper scratches, I’ve used a flame from a small torch to polish the edge. But this takes practice and can burn the plastic if you’re not careful. For most home projects, hand sanding and polish are enough.

When Not To Use A Dremel
While the Dremel is my favorite for most cuts, there are times when I use other tools. For thick plexiglass (over 1/4 inch), a jigsaw or table saw works better. The Dremel can struggle and may even break the bit. For tiny, delicate cuts, a scoring knife sometimes gives a cleaner result. Always match your tool to your project.
Here’s a quick comparison:
| Tool | Best For | Drawbacks |
|---|---|---|
| Dremel Rotary Tool | Curves, thin sheets | Not for very thick pieces |
| Jigsaw | Thick sheets, long straight lines | Harder to control on small pieces |
| Scoring Knife | Very thin sheets, straight lines | Doesn’t cut curves |
Safety Is Always First
I can’t stress this enough. Plexiglass may look harmless, but it can splinter and send bits flying. Always wear safety goggles and a dust mask. Work in a place with good airflow. And keep your hands clear of the spinning wheel. I once had a small shard fly up and hit my cheek—thankfully, I had my mask and glasses on.
Real-world Project Examples
Let me share two quick examples from my own experience:
- Picture Frame Cover: I cut a custom plexiglass front for an old frame. The Dremel let me make a rounded corner that matched the wood frame perfectly.
- Aquarium Lid: I needed a slot for wires. The Dremel made a neat, curved notch—something a saw couldn’t do.
In both cases, practice cuts on scrap helped a lot. The final results looked store-bought.
How Long Does It Take?
For a simple straight cut in a 1/8 inch sheet, I usually spend about 10 minutes, including setup. Curved cuts or thick sheets can take longer. Add extra time for sanding and polishing. Don’t rush—going slow gives you the best finish.

Where To Get More Tips
There are lots of good guides and videos online. For deep dives into plexiglass and its uses, I recommend the official Wikipedia page on acrylic glass. It covers the science, safety, and more.
Frequently Asked Questions
How Thick Of Plexiglass Can A Dremel Cut?
From my experience, a Dremel handles sheets up to 1/4 inch thick. For anything thicker, the tool may bog down or overheat. For thick pieces, I use a jigsaw.
What Dremel Speed Works Best For Cutting Plexiglass?
I get the cleanest cuts at 25,000–30,000 RPM. Too slow, and the blade melts the plastic. Too fast, and it may splinter. Always test on scrap first.
Can I Cut Curves In Plexiglass With A Dremel?
Yes, and that’s where the Dremel shines. Move slowly and let the tool do the work. For tight curves, use a smaller cutting wheel for more control.
How Do I Stop Plexiglass From Cracking?
The best ways are to mask the cut line, clamp the sheet, and cut slowly. Never force the Dremel or rush. Keeping the tool moving and pausing to cool helps too.
Do I Need To Polish The Edges After Cutting?
For most projects, yes. Sanding and polishing give a safe, smooth finish. It also makes your project look more professional and prevents sharp edges.
Cutting plexiglass with a Dremel is something you can master with a little practice. Take your time, use the right gear, and soon you’ll be making clean, smooth cuts for all kinds of creative projects. If I can do it, you can too!
As an Amazon Associate, We earn from qualifying purchases