Ever since I was a kid, I’ve loved collecting rocks. I used to stuff my pockets with them after every hike or trip to the beach. But for a long time, those stones just sat in jars, looking dull and rough.
That changed when I discovered how easy it is to polish rocks with a Dremel. If you’ve ever held a shiny, smooth stone in your hand and wondered how people make them, you’re in the right place. I’ve polished dozens of rocks at home, and I want to share everything I’ve learned—mistakes, surprises, and tips you won’t find in most guides.
Why Use A Dremel For Polishing Rocks?
At first, I thought only big machines could polish rocks. But a Dremel rotary tool is much smaller, cheaper, and perfect for beginners or hobbyists like me. With the right attachments, it can turn a rough pebble into a gemstone lookalike. Plus, it’s fun, fast, and you don’t need a lot of space. I was surprised how much control I had with it, especially on small stones.
What You Need To Start Polishing Rocks
Let’s talk about the tools and materials. Here’s what I use every time:
- Dremel rotary tool (corded or cordless)
- Different grit sanding drums (coarse, medium, fine)
- Polishing wheels or felt tips
- Polishing compound (cerium oxide or aluminum oxide)
- Safety glasses and dust mask
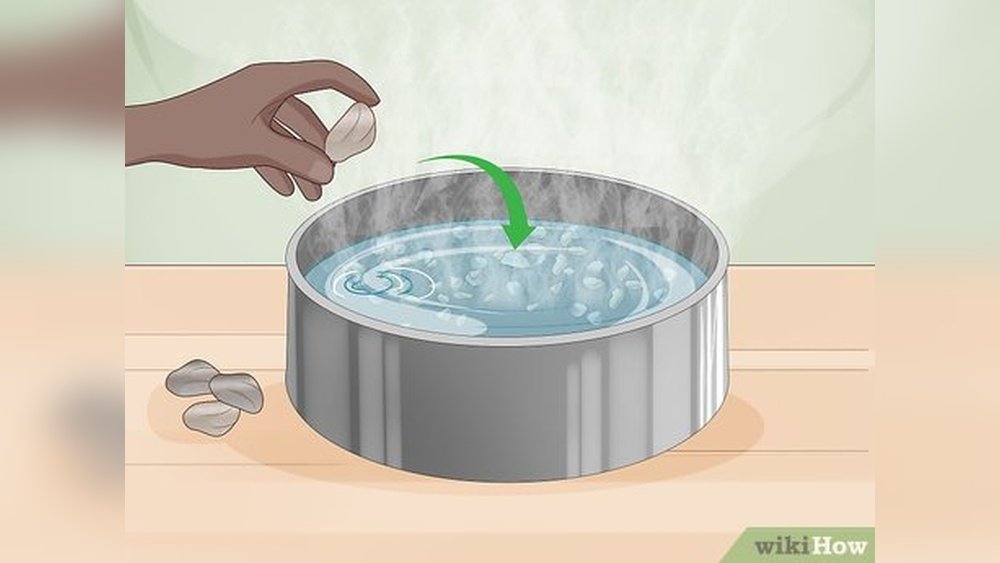
- Bowl of water
- Clean, soft cloth
- Rocks (best: Agate, jasper, quartz, petrified wood)
Most of these are easy to find at hardware stores. When I first started, I bought a basic Dremel kit online. It had everything I needed except the rocks.
Choosing The Right Rocks
Not all stones are good for polishing. I learned this the hard way after a few of my first rocks broke or didn’t shine up at all. Here’s what works best:
- Hard stones: Agate, jasper, quartz, petrified wood, and chalcedony are ideal. They are hard enough to take a polish.
- Avoid soft rocks: Stones like sandstone, limestone, and chalk will crumble or scratch.
- Flat or rounded shapes: Odd shapes can be tricky, but not impossible. Flatter rocks are easier for beginners.
If you’re not sure what kind of rock you have, try scratching it with a steel nail. If it scratches easily, it’s probably too soft.
Step-by-step: How I Polish Rocks With A Dremel
Let me walk you through my process, step by step. I’ll share what works and what mistakes to avoid.
1. Clean The Rocks
First, I rinse my rocks under running water and scrub them with an old toothbrush. Dirt and grit will ruin the polishing tips and leave scratches. Don’t skip this step. Sometimes I soak stubbornly dirty rocks overnight.
2. Prepare Your Workspace
Polishing rocks can get messy. I always work outside or in a well-ventilated area. I set down an old towel to catch dust and keep a bowl of water nearby. Safety glasses and a dust mask are a must—the dust is not safe to breathe.
3. Coarse Sanding
This is where the magic starts. I attach a coarse sanding drum (60-80 grit) to my Dremel and set it to a medium speed. Holding the rock in one hand and the tool in the other, I gently sand away the rough outer layer. I dip the rock in water every minute to keep it cool and control dust.
Tip: Don’t press too hard. Let the Dremel do the work. If you push, you’ll get uneven surfaces or even break the rock.
4. Medium And Fine Sanding
After the rock feels smooth, I switch to a medium grit drum (120-220 grit). I go over the entire surface again, removing scratches from the coarse sanding. Finally, I use a fine grit drum (400 grit or higher) to make the rock feel silky.
At this stage, the rock should look matte but smooth, with no visible scratches. If you see deep lines, go back to the previous grit.
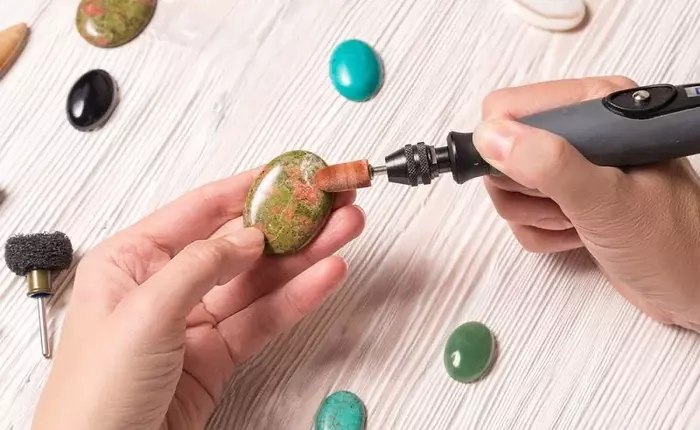
5. Polishing
Now comes the fun part: making the rock shine. I attach a felt polishing wheel and dab a bit of polishing compound onto it. Cerium oxide works great for most rocks. I set the Dremel to a low or medium speed and polish the stone, moving in small circles.
Pro insight: If you use too much polishing compound, the wheel will clog and leave streaks. A little goes a long way.
6. Cleaning And Finishing
After polishing, I rinse the rock again in clean water and wipe it with a soft cloth. Sometimes, I repeat the polishing step for an extra shine. If you want, you can add a tiny drop of mineral oil to bring out the colors.
Comparing Dremel Rock Polishing Vs. Rock Tumbler
When I first started, I was torn between buying a Dremel or a rock tumbler. Here’s what I found after trying both:
| Feature | Dremel Polishing | Rock Tumbler |
|---|---|---|
| Speed | 1-2 hours per rock | Days to weeks |
| Control | High (shape each rock) | Low (all rocks together) |
| Best For | Single rocks, small batches | Bulk polishing |
| Learning Curve | Easy to moderate | Beginner friendly |
For me, the Dremel was perfect because I liked working on one special rock at a time. Tumblers are better if you want to polish a lot of rocks with less effort.
Common Mistakes And How To Avoid Them
I made plenty of mistakes when I started. Here are a few—and how you can avoid them:
- Overheating the rock: Pressing too hard or sanding too long in one spot can make the stone hot. Dip it in water often.
- Skipping grits: If you jump from coarse to fine, you’ll keep scratches forever. Always use each grit.
- Using the wrong rocks: Soft stones will crumble. Test them first.
- Too much polishing compound: Less is more. Use a small dab.
- Not wearing safety gear: The dust is dangerous. Always wear glasses and a mask.
One thing I learned: patience pays off. If you rush, you’ll end up with a lumpy, scratched rock.

Real Results: Before And After
I still have some of my early attempts, and the difference is clear. A rough, dull rock becomes glassy and colorful after sanding and polishing. Here’s how my favorite agate turned out:
| Stage | Appearance |
|---|---|
| Before | Dull, rough, brownish, no shine |
| After Coarse Sanding | Smoother, starting to show color |
| After Fine Sanding | Silky surface, colors more visible |
| After Polishing | Shiny, bright, deep colors, almost glassy |
Holding a finished stone up to the light, I could see patterns and colors I never noticed before. It’s almost like finding a treasure inside something ordinary.
Two Surprising Lessons I Learned
Most guides don’t tell you these things:
- Different rocks need different speeds. Softer rocks burn or break at high speed. I ruined a few before learning to use a lower setting for delicate stones.
- Some rocks hide cracks inside. I once spent an hour on a pretty piece of jasper, only to have it snap in two at the last step. Now, I check for cracks under a bright light before I start.
If you want your stones to last, always inspect them before you begin.
Safety Tips That Matter
It’s easy to forget safety when you’re excited. Here’s what I always do:
- Wear safety glasses to protect your eyes from dust and chips.
- Use a dust mask. Rock dust is fine and can hurt your lungs.
- Keep a bowl of water nearby to cool the rock and reduce dust.
- Work in a well-ventilated space or outside.
- Don’t rush. Take breaks if your hands get tired.
Polishing rocks is safe if you respect the tools and the dust.
How To Choose The Best Polishing Compound
I tried a few different compounds before finding what works best. For most rocks, cerium oxide gives a brilliant shine. Aluminum oxide is good for harder stones. Both are easy to find online or at hobby stores.
If you’re curious about the science behind polishing compounds, I found this resource helpful: Wikipedia: Polishing.

Pro Tips For A Perfect Polish
Here’s what really made a difference for me:
- Keep the rock moving. If you hold the Dremel in one spot, you’ll get flat spots or grooves.
- Change sanding drums often. A worn-out drum won’t smooth the rock well and can leave marks.
- Clean the rock between grits. If you leave grit from the last stage, it will scratch the stone in the next stage.
- Test on a junk rock first. Practice makes perfect, and mistakes hurt less on a rock you don’t care about.
Which Dremel Attachments Work Best?
There are many Dremel bits, but you only need a few for rock polishing. Here’s what I use most:
| Attachment | Purpose |
|---|---|
| Coarse Sanding Drum (60-80 grit) | Shape and smooth rough surfaces |
| Medium Sanding Drum (120-220 grit) | Remove scratches from coarse sanding |
| Fine Sanding Drum (400+ grit) | Make the rock feel silky |
| Felt Polishing Wheel | Buff to a shine with polishing compound |
Don’t be afraid to experiment with different tips. Some shapes work better for corners, others for flat sides.
Frequently Asked Questions
How Long Does It Take To Polish A Rock With A Dremel?
It usually takes about 1-2 hours per rock, depending on size and hardness. Some harder stones may take longer, especially if you want a mirror finish.
What Is The Best Dremel Model For Rock Polishing?
Most Dremel rotary tools work well. I use a Dremel 3000 because it’s affordable and powerful. Cordless models are lighter, but battery life can be short for long sessions.
Can I Polish Any Rock With A Dremel?
No, only hard stones like agate, jasper, and quartz polish well. Soft stones tend to crumble or scratch. Always test a small area first.
Is Water Necessary During Sanding And Polishing?
Yes! Water keeps the rock cool, reduces dust, and helps prevent cracks. I dip the rock often, especially during coarse sanding.
How Do I Know When To Switch To The Next Grit?
When all scratches from the previous grit are gone, it’s time to move up. If you still see deep lines or rough spots, keep sanding a bit longer.
Polishing rocks with a Dremel is one of my favorite hobbies now. The feeling of turning a plain stone into something beautiful is hard to beat. Plus, each rock is unique—a little piece of nature’s art you made even better.
If you’re just starting out, be patient, stay safe, and enjoy the process. Every rock has a hidden shine, and with a little practice, you’ll bring it out too.
As an Amazon Associate, We earn from qualifying purchases