Keeping your hedge trimmer blades clean may not sound exciting, but trust me, it makes all the difference. I learned this the hard way when my favorite trimmer started snagging and chewing up branches. The cuts became rough, and the motor even sounded tired.
At first, I thought it was broken. But the real problem? The blades were sticky, covered in plant sap, and even had a bit of rust. After a good cleaning, my hedge trimmer worked like new again. If you’ve ever struggled with dull, dirty trimmer blades, I’m here to walk you through how to clean them—quickly and safely.
Let’s save you time, protect your plants, and maybe even avoid buying a new trimmer.
Why Clean Hedge Trimmer Blades?
When I first started, I thought a dirty blade was just “normal. ” But I learned that dirty blades cut slower, make rougher cuts, and can even damage your bushes. Clean blades glide right through branches. They also put less strain on the trimmer’s motor, which means your tool lasts longer.
Besides that, sap and plant debris can spread plant diseases. If you trim a sick bush and don’t clean your blades, you might spread that disease to healthy plants. After seeing some of my best shrubs turn brown, I started paying attention to blade hygiene.
What You’ll Need Before You Start
Over time, I’ve found that having the right tools makes the job easier and safer. Here’s what I always gather before cleaning my hedge trimmer:
- Work gloves (thick ones to protect your hands)
- Safety goggles
- A stiff brush (like an old toothbrush)
- Rags or paper towels
- Bucket of warm, soapy water
- Scraper or plastic putty knife (for stubborn sap)
- WD-40, light machine oil, or blade cleaner
- Household disinfectant (like rubbing alcohol or diluted bleach)
- Screwdriver (if you need to remove the blades)
- Sharpening stone or file (optional, for extra maintenance)
I keep all these in a small box. That way, I don’t have to search every time.
Step-by-step: How I Clean My Hedge Trimmer Blades
Let me break down the exact steps I follow. I do this about once a month during heavy use, or whenever my trimmer starts to “feel” different.
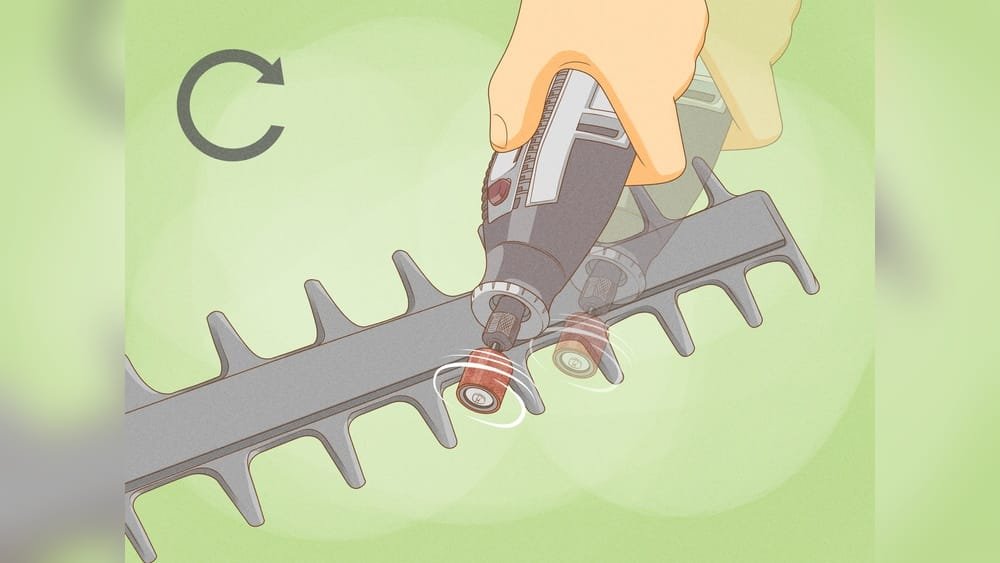
1. Unplug And Secure The Trimmer
First, always unplug electric trimmers or remove the battery. For gas models, disconnect the spark plug. I once skipped this and almost had a nasty accident. You don’t want the blades moving while you clean.
2. Wear Gloves And Eye Protection
Even dull blades are sharp enough to cut skin. I learned this after a small slip, so now I never skip the gloves. Goggles help if you’re scrubbing off dried sap that might fly up.
3. Remove Loose Dirt And Leaves
I start by brushing off all the loose stuff—twigs, leaves, and dirt. A stiff brush or even an old toothbrush does the trick. This clears the way for a deeper clean.
4. Scrub With Soapy Water
Next, I dip a rag or sponge in warm, soapy water and wipe the blades. For stuck-on sap, I use a plastic scraper. This takes some patience, but don’t use a metal scraper (it can scratch the blades). If the sap is extra stubborn, soaking a rag in hot soapy water and letting it sit on the blade for a few minutes really helps.
5. Remove Rust And Stubborn Sap
If you see any rust, a bit of WD-40 or penetrating oil can help. I spray it on, wait a few minutes, and then scrub with a brush. For really tough rust, I use a fine sanding pad, but gently, so I don’t scratch the steel.
6. Disinfect The Blades
This step is easy to skip but very important. Wiping the blades with rubbing alcohol or a bleach solution (one part bleach to nine parts water) keeps plant diseases from spreading. I always let the solution sit for a minute, then wipe off with a clean rag.
7. Dry The Blades
Water left on the blades can cause rust, so I always dry them right away with a towel. Sometimes I even leave the trimmer out in the sun for a few minutes.
8. Lubricate The Blades
A thin layer of machine oil or WD-40 keeps the blades moving smoothly and protects against rust. I spray or drip a little oil on, then move the blades back and forth by hand (if safe) to spread the oil.
Wipe off any excess.
9. Inspect And Reassemble
If you removed the blades, make sure everything is tight and in place. I always double-check that the screws are snug and that the blades move freely.
10. Sharpen (optional)
Sometimes, after a deep clean, I notice the blades feel dull. If so, I use a sharpening stone or file. A few gentle strokes along the edge is usually enough. Don’t overdo it—you want to keep the factory angle.
How Often Should You Clean Hedge Trimmer Blades?
When I first got my trimmer, I only cleaned it once a year. Big mistake! Sticky sap and dirt can build up fast, especially if you’re cutting resinous plants like pine or cedar. Now, I do a quick wipe-down after every use and a deeper clean every 3–5 uses.
If you hit a patch of diseased plants, always clean and disinfect right after.
Here’s a quick comparison of cleaning frequency and results:
| Cleaning Frequency | Blade Performance | Risk of Disease Spread | Tool Lifespan |
|---|---|---|---|
| After every use | Excellent | Very low | Longer |
| Once a month | Good | Medium | Average |
| Once a year | Poor | High | Shorter |

Which Cleaning Products Actually Work Best?
Over the years, I’ve tried everything from fancy blade cleaners to simple soap and water. Here’s what I found works best:
| Product | Effectiveness on Sap | Rust Removal | Ease of Use | Availability |
|---|---|---|---|---|
| Warm soapy water | Good | Poor | Easy | Everywhere |
| WD-40 | Excellent | Good | Easy | Hardware stores |
| Dedicated blade cleaner | Excellent | Excellent | Medium | Garden centers |
| Rubbing alcohol | Fair | Poor | Easy | Pharmacies |
If you only want to buy one thing, WD-40 works well for both sap and rust. For disinfecting, stick with alcohol or bleach.
Common Mistakes I’ve Made (so You Don’t Have To)
When I first started, I made a few mistakes that ended up costing me time and money. Here’s what I wish I’d known:
- Skipping blade cleaning after cutting sticky or sappy plants. This made the next job much harder.
- Using metal scrapers or steel wool, which scratched the blades and made them rust faster.
- Not drying blades completely. Even a little moisture can cause rust spots.
- Over-oiling the blades. Too much oil attracts dirt and clogs up the mechanism.
- Forgetting to disinfect after trimming diseased plants. This spread problems to healthy bushes in my yard.
The biggest lesson? A few minutes of care after each use saves hours of frustration later.
Why Blade Cleaning Matters For Plant Health
I didn’t realize at first how much blade hygiene affects the health of your plants. When blades are dirty, they make ragged cuts. These are harder for plants to heal, which means more chance for pests and diseases. Clean blades cut cleanly, helping your hedges stay strong and healthy.
There’s also the risk of spreading bacteria or fungus. According to the Plant Pathology page on Wikipedia, contaminated tools are a top cause of plant disease spread. Even if your trimmer looks clean, a quick disinfecting wipe can protect your garden.
How To Store Hedge Trimmer Blades After Cleaning
After cleaning and oiling, storage matters too. I’ve made the mistake of tossing my trimmer in a damp shed, only to find the blades rusty a week later. Now, I always store my trimmer:
- In a dry place, away from moisture
- With a blade cover or sheath, if possible
- Laying flat, not hanging by the blade
- Away from fertilizer or chemicals that cause rust
This simple habit keeps my trimmer ready to go, every time.

Signs Your Hedge Trimmer Blades Need Cleaning
If you’re wondering when it’s time to clean, here’s what I watch for:
- Blades feel sticky or look dull
- The trimmer pulls or tears branches instead of cutting
- You hear the motor working harder than usual
- There’s visible rust or sap buildup
- Trimmer leaves ragged edges on your hedges
When I notice any of these, I know it’s time for a good cleaning.
Quick Tips For Faster, Safer Cleaning
After years of trial and error, here are some quick tips that make cleaning easier:
- Clean right after use, before sap hardens
- Use a drop cloth to catch mess and make cleanup easy
- Always double-check that power is off
- Keep your cleaning kit ready in one box
- Oil the blades, but just a thin layer

Frequently Asked Questions
How Often Should I Clean Hedge Trimmer Blades?
I recommend a quick wipe-down after every use, especially if you’ve been cutting sticky or diseased plants. A full cleaning is good every 3–5 uses, or at least once a month during busy trimming seasons.
Can I Use Vinegar To Clean My Trimmer Blades?
Yes, vinegar can help remove light rust and sap. Soak a rag in vinegar and wrap it around the blade for 10–15 minutes. Then scrub gently. Just remember to rinse and dry well, as vinegar can cause metal to corrode if left on.
Do I Need To Take The Blades Apart To Clean Them?
Not always. Most of the time, you can clean blades while they’re still on the trimmer. If there’s a lot of buildup or you need to sharpen, removing the blades gives better access. Always follow your trimmer’s manual for safe removal.
What Should I Do If My Blades Are Very Rusty?
If you see heavy rust, spray with WD-40 or use a rust remover. Let it sit, then scrub with a stiff brush or fine sanding pad. For deep rust, you may need to sharpen or even replace the blade.
Is There A Way To Prevent Sap From Sticking To The Blades?
After cleaning, a light coat of oil or silicone spray helps sap slide off during use. Some people even rub the blade with a candle or bar of soap as a barrier. I’ve found this really does make cleaning easier next time.
Cleaning hedge trimmer blades may seem like a small chore, but it makes a big difference. I’ve seen my trimmer last longer, cut better, and keep my plants healthier just by sticking to these simple steps. If you make blade cleaning a habit, you’ll spend less time fighting with your tools and more time enjoying a tidy, healthy garden.
Happy trimming!
As an Amazon Associate, We earn from qualifying purchases