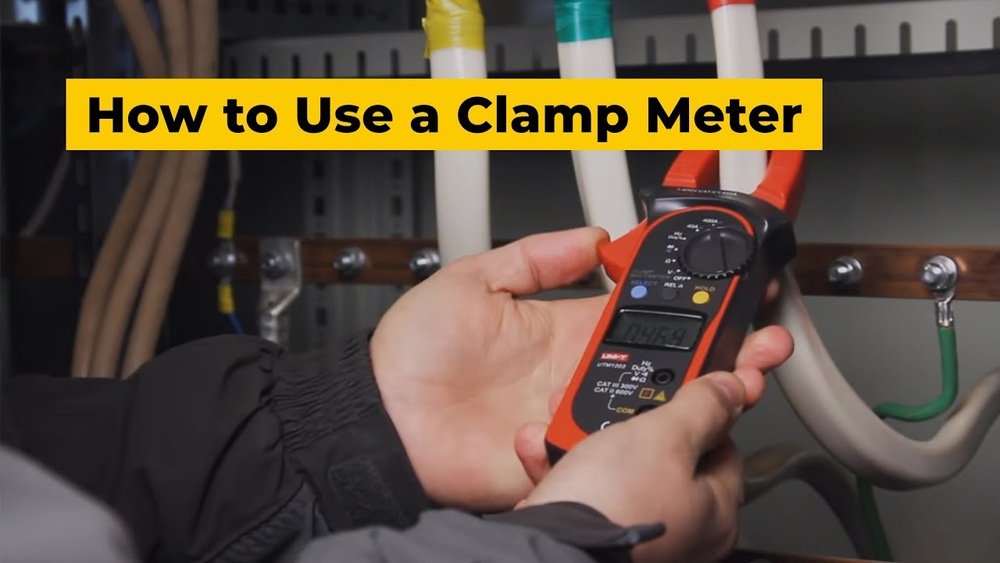
How To Use A Clamp Meter: My Hands-on Experience
Have you ever looked at a bunch of wires and wondered how to check if electricity is flowing safely? I have. The first time I held a clamp meter in my hand, I felt a bit nervous. It looked like a tool for experts. But after a while, I realized it’s not as hard as it seems. Today, I’ll walk you through how I use a clamp meter, sharing real tips from my experience. Whether you want to check current at home, fix a machine, or just learn something new, you’ll find this guide friendly, easy, and full of practical advice.
What Is A Clamp Meter? My First Impressions
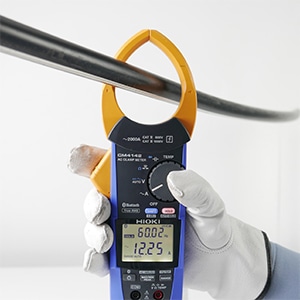
When I first saw a clamp meter, I thought it was just another multimeter. But it’s different. A clamp meter can measure electric current without touching bare wires. You just “clamp” it around a wire and get a reading. No need to cut anything or turn off the power. This is super helpful when you want to stay safe.
The clamp part opens and closes like a big jaw. Inside, there’s a sensor that detects how much current is flowing. Some clamp meters also check voltage, resistance, and even temperature. It’s a handy tool for anyone who deals with electricity—even beginners like I once was.
Why Use A Clamp Meter? Real-world Reasons
Let me tell you why I reach for my clamp meter so often:
- Safety: I can check live wires without touching metal parts.
- Speed: I save time since I don’t need to disconnect wires.
- Versatility: One tool can measure current, voltage, and more.
- Troubleshooting: I quickly find which wire or machine is causing problems.
For example, my kitchen lights kept flickering. With my clamp meter, I found a wire drawing too much current. Fixing that solved the problem, and I avoided a possible fire hazard.
Types Of Clamp Meters: What I’ve Used
There are many clamp meters out there. I’ve used a few, so here’s what I learned:
| Type | Main Use | Pros | Cons |
|---|---|---|---|
| Current Clamp Meter | Measuring AC current | Simple, accurate for most jobs | Usually only AC, not DC |
| Digital Clamp Meter | Multi-purpose: current, voltage, resistance | Easy to read, more features | Needs batteries |
| Flexible Clamp Meter | Measuring big or hard-to-reach wires | Can wrap around thick cables | Less accurate with small wires |
The digital ones are my favorite. They show numbers on a screen, which makes it much easier for me to read the values.
Parts Of A Clamp Meter: Getting Familiar
Before using any tool, I like to know its parts. Here’s what I look for:
- Clamp Jaw: The big jaw that opens and closes to go around a wire.
- Display Screen: Shows the measurement.
- Selection Dial: Lets me choose what I want to measure—current, voltage, etc.
- Trigger: Opens the clamp.
- Test Leads: Wires for checking voltage or resistance (not always needed for current).
- Hold Button: Freezes the reading on the screen. Very handy if the numbers jump around.
At first, all these buttons felt confusing. But after a few tries, it made sense.
How A Clamp Meter Works: Simple Explanation
I once worried about how the clamp could “see” the electricity. Here’s what I learned: When current flows through a wire, it creates a small magnetic field. The clamp jaw senses this field. The meter then tells you how much current is flowing. No need to cut or strip wires—just clamp and read.
Some models also measure DC current using a special sensor called a Hall effect sensor. If you want to check batteries or solar panels, look for a meter with this feature.
Getting Ready: Safety Steps I Never Skip
Before I use my clamp meter, I always follow these steps:
- Check the Meter: Make sure it’s not damaged. No cracked case or loose wires.
- Read the Manual: Each meter is a bit different. I always check the instructions, even if I’m in a hurry.
- Wear Safety Gear: I use insulated gloves and, sometimes, safety glasses.
- Set the Meter Right: I double-check the dial is on the correct setting—current, voltage, or resistance.
- Stay Dry: Never use the meter with wet hands or in a damp place.
These habits keep me safe. I’ve heard stories of people skipping these steps and getting hurt. It’s not worth the risk.
Step-by-step: How I Use A Clamp Meter
The first time I used a clamp meter, I followed these steps. Now, it’s second nature.
1. Power On And Select Mode
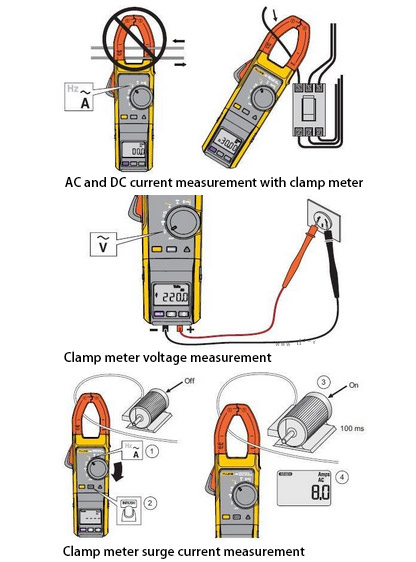
I press the power button. Then I turn the dial to the setting I want—usually AC current.
2. Open The Clamp
I squeeze the trigger to open the jaw. It feels like opening a big clothespin.
3. Place Around A Single Wire
This is important: The clamp only measures current in one wire at a time. If I clamp around a whole cable (with both live and neutral wires), the reading will be zero. So, I make sure to clamp around just the live (hot) wire.
4. Read The Value
The screen shows the current flowing through the wire. For example, my water heater wire showed 12.4 amps. If the number is much higher than normal, something may be wrong.
5. Remove The Clamp
I gently open the jaw and remove the meter. I always turn off the meter when I’m done, to save the battery.
6. Using Test Leads (optional)
If I want to measure voltage or resistance, I use the test leads. I connect them to the right ports on the meter and touch them to the circuit. For current, though, the clamp is all I need.
Common Mistakes I Made—and How You Can Avoid Them
I made a few mistakes when I started. Here’s what I learned the hard way:
- Clamping Around Multiple Wires: This gives a wrong reading, often zero. Always clamp around one wire.
- Wrong Setting: Once, I set the meter to DC instead of AC. The screen showed nothing. Double-check the dial.
- Loose Connections: If the clamp isn’t fully closed, you’ll get a bad reading.
- Measuring Too High Current: Every meter has a limit. If you try to measure more than it can handle, you could break it or get hurt. Check the rating first.
One thing many beginners miss: If the wire is hard to reach, don’t force it. Use a flexible clamp meter or get help. Safety comes first.
Real-life Uses: Where I Use My Clamp Meter Most
Here are some places where my clamp meter has saved the day:
- Home Electrical Panels: I check if any circuit is overloaded.
- Air Conditioners: I measure how much current the motor draws.
- Kitchen Appliances: I found my old microwave was drawing too much power.
- Car Batteries: With a DC-capable clamp meter, I checked my car’s starting current.
- Solar Panels: I measured how much current my panels were sending to the inverter.
Sometimes, I help friends with their homes. I bring my clamp meter, and we check the wiring together. It’s a great way to learn and stay safe.
Features I Look For When Buying A Clamp Meter
If you’re thinking of getting a clamp meter, here’s what matters most based on my experience:
| Feature | Why It Matters | My Experience |
|---|---|---|
| Current Range | Measures small and large currents | I need at least 400A for home use |
| AC/DC Capability | For both household and car circuits | My DC clamp meter saved my car battery once |
| Display Size | Easy to read numbers | Larger screens are less tiring |
| Backlight | Use in dim places | Very helpful in dark fuse boxes |
| Data Hold | Freeze the number | Stops the value from changing while I move the meter |
| Safety Ratings | Protection from shocks | Look for CAT III or IV for best safety |
Some brands are more reliable. I always check reviews and ask friends before buying.

Practical Tips I Wish I Knew Earlier
Let me share two tips that made a big difference for me:
- Label Your Wires: If you often check the same panel, label each wire. It’s easy to forget which one you checked last.
- Keep Spare Batteries: Nothing is worse than a dead meter when you really need it.
Also, don’t be afraid to practice on unused wires first. That helped build my confidence.
Clamp Meter Vs. Multimeter: What’s The Difference?
Many people ask me if a clamp meter is better than a multimeter. Here’s what I found:
- Clamp meters are best for measuring current, especially in live wires.
- Multimeters are better for voltage, resistance, and small electronic work.
If you work around high-power circuits, a clamp meter is safer. For small electronics, I still use my multimeter.
When Not To Use A Clamp Meter
There are times when a clamp meter isn’t the right tool. For example, if you need to check the current in a tiny circuit board, the wires are too small for the clamp. Also, clamp meters can’t measure current in a DC circuit unless they have a Hall sensor. Always check your meter’s specs.
Learning More: Reliable Sources
If you want to dive deeper, I recommend the Wikipedia Clamp Meter page. It has a lot of useful info and some history, too.
Frequently Asked Questions
How Accurate Is A Clamp Meter?
Most clamp meters are accurate enough for home and field work. The error is usually within 2%. For very precise jobs, use a high-end meter or a calibrated reference.
Can I Use A Clamp Meter For Dc Current?
Yes, but only if your clamp meter has a Hall effect sensor. Regular clamp meters only measure AC. Always check the manual before testing DC.
Is It Safe To Use A Clamp Meter On Live Wires?
Yes, if you follow safety steps and use the meter as directed. Never touch bare wires, and always clamp around one wire at a time.
What Does “true Rms” Mean?
True RMS means the meter can measure both regular and irregular (non-sinusoidal) current accurately. This matters if you work with devices like dimmers or inverters.
How Do I Know If My Clamp Meter Is Working Correctly?
Test it on a known circuit, like a lamp or appliance with a known current draw. If the reading matches the label or your expectation, your meter is likely working fine.
Using a clamp meter changed how I handle electrical work. It made my projects safer and faster. Don’t be afraid to try it. Start small, follow the steps, and you’ll soon feel like a pro. If you have more questions or want to share your own stories, I’d love to hear them.
Stay safe, and happy measuring!
As an Amazon Associate, We earn from qualifying purchases