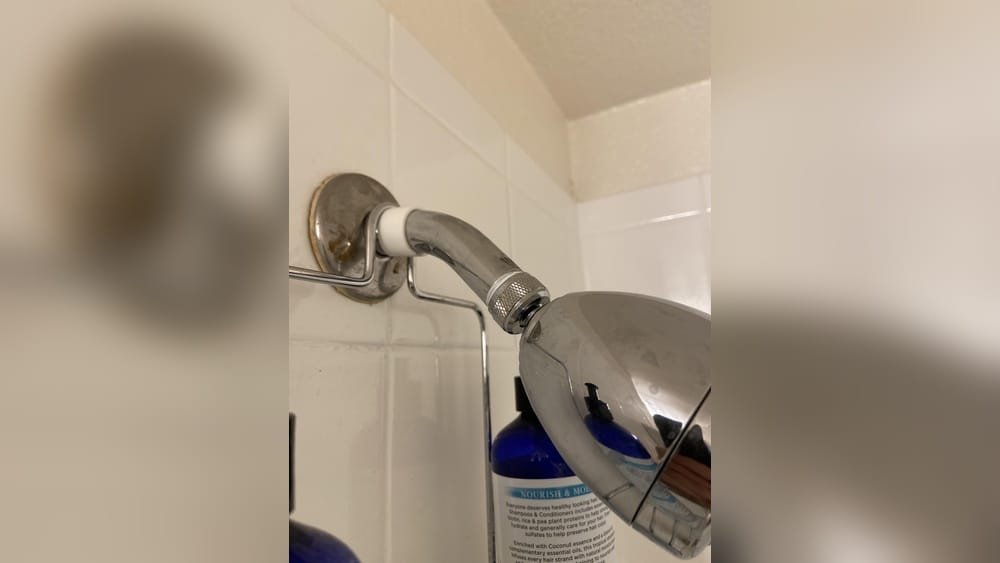
Sometimes, you need to unscrew a pipe and realize you don’t have a wrench. This happened to me in my old apartment. The bathroom sink pipe was leaking, and I had to fix it fast. No wrench in sight. At first, I panicked. But then I remembered a few tricks I learned from my dad and some old YouTube videos. In this article, I’ll share all the ways I managed to unscrew pipes without a wrench, plus some clever ideas I’ve picked up since then.
Prime Day Pick
Limited-time Prime Day price. Check current discount on Amazon.
I know the feeling—standing in front of a stubborn pipe, hands slipping, tools missing. But trust me, you can solve this problem with some creativity and patience. Whether you’re a beginner or have some DIY experience, these tips can save the day.
I’ll break everything down so it’s easy to follow, even if English isn’t your first language. And I’ll explain every step, using stories from my own journey.
Prime Day Pick
Limited-time Prime Day price. Check current discount on Amazon.
Why You Might Need To Unscrew A Pipe Without A Wrench
Let me start with a simple question: why would anyone try to unscrew a pipe without a wrench? It’s not just about forgetting your tools. Sometimes, the wrench doesn’t fit. Maybe the pipe is hidden behind a wall, or the size is odd. Other times, your wrench is broken or lost.
Prime Day Pick
Limited-time Prime Day price. Check current discount on Amazon.
This happened to me when I moved into a new place. The kitchen sink pipe was clogged, and I needed to remove it. My wrench was packed in another box, miles away. I had to improvise, using whatever I could find around the house.
Not having the right tool isn’t the end of the world. If you know some tricks, you can handle most pipes without a wrench. And, honestly, it feels good when you solve a problem with your own hands.
Understanding Pipe Types And Joints
Before you try to unscrew a pipe, it’s important to know what kind of pipe you’re dealing with. Pipes come in different materials—metal, PVC, copper. Each one reacts differently.
For example, metal pipes are strong but can rust. PVC pipes are light and easy to break. Copper pipes are soft and can bend if you use too much force.
Most pipes connect with threaded joints (like screws), compression fittings (tightened rings), or push-fit connectors (just pushed together). If you know the type, you can pick the best method.
Here’s a quick comparison:
| Pipe Material | Common Joint Type | Difficulty Level |
|---|---|---|
| Metal | Threaded | Hard |
| PVC | Compression | Medium |
| Copper | Soldered/Compression | Medium-Hard |
Once you know what you’re dealing with, you can plan your attack.
Safety First: Protect Yourself And Your Pipes
I learned early that safety matters. Pipes can be sharp, dirty, and sometimes hot. Always wear gloves. I use thick garden gloves to protect my hands.
Check if the pipe has water pressure. Turn off the main valve if you’re unsure. Put a bucket under the pipe in case water spills. If it’s a gas pipe, stop and call a professional. Never risk your health.
It’s tempting to yank the pipe, but too much force can break it. Be gentle, especially with old or plastic pipes. I once cracked a PVC pipe because I was too rough. That turned a small problem into a big mess.
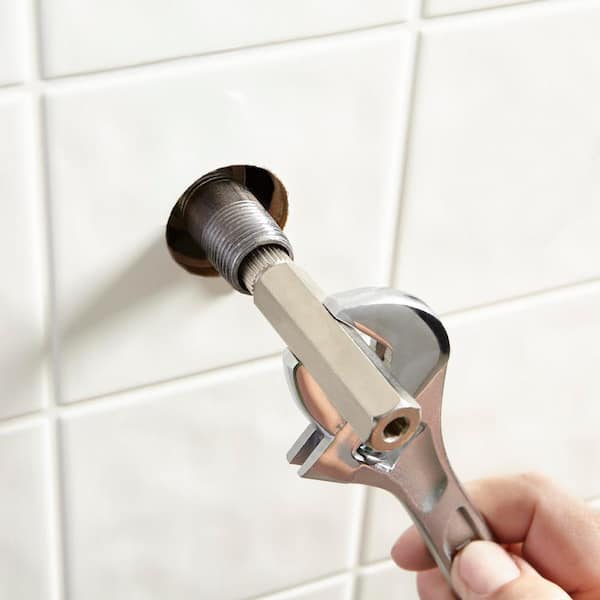
Household Items You Can Use Instead Of A Wrench
So, what can you use if you don’t have a wrench? I’ve tried many things over the years. Here are some tools and items that really work:
1. Slip-joint Pliers
These are like a small wrench. They grip tight and work for most pipes. If you have pliers, use them first.
2. Channel Lock Pliers
Even better than slip-joint. They open wide, so you can grip big pipes. I borrowed these from a neighbor once. They saved me.
3. Adjustable Spanner
Not a wrench, but close. It fits different sizes. If you have one, use it.
4. Vice Grips
These lock in place. Great for tight pipes. I used vice grips to unscrew a rusty shower pipe.
5. Rubber Strap Wrench
It’s a strap that wraps around the pipe. You pull, and it turns the pipe. I used a belt once, which worked like a homemade strap wrench.
6. Duct Tape And A Stick
Wrap duct tape around the pipe, attach a stick, and twist. It gives you more grip.
7. Cloth And Pliers
Wrap a thick cloth around the pipe to protect it, then use pliers for extra grip.
8. Leatherman Tool
A multi-tool with pliers can help in emergencies.
9. Belt Or Rope
Loop a belt or rope around the pipe. Pull one end to twist. This works best for smooth pipes.
10. Bare Hands And Rubber Gloves
Sometimes, all you need is a good grip. Wear rubber gloves for friction. I unscrewed a drain pipe this way.
Here’s a quick side-by-side comparison:
| Alternative | Best For | Risk Level |
|---|---|---|
| Slip-Joint Pliers | Small pipes | Low |
| Channel Lock Pliers | Large pipes | Medium |
| Rubber Strap Wrench | PVC, fragile pipes | Low |
| Vice Grips | Rusty pipes | Medium |
| Belt/Rope | Smooth pipes | Low |
| Bare Hands | Loose joints | Low |
Step-by-step: How I Unscrew A Pipe Without A Wrench
Let’s walk through the process together. I’ll explain each step, just like I did in my apartment.
Step 1: Check For Water Or Gas
Always start by checking if the pipe carries water or gas. Turn off the supply. I learned this the hard way—water everywhere!
Step 2: Clean The Pipe
Wipe off any dirt or grease. Pipes get slippery, making it harder to grip. I use a rag and sometimes a bit of dish soap to remove grime.
Step 3: Protect The Pipe
If you’re using pliers, wrap a cloth or duct tape around the pipe. This stops scratches and gives you extra grip.
Step 4: Choose Your Tool
Look for anything that can grip—pliers, belt, rope, even your hands. If the pipe is big, try channel lock pliers. For small pipes, slip-joint pliers work well.
Step 5: Grip And Turn
Hold the pipe firmly. Turn it counterclockwise (lefty-loosey). If it’s stuck, tap it gently with a stick to loosen it. Never hit too hard.
Step 6: Use A Belt Or Rope
If you don’t have pliers, wrap a belt or strong rope around the pipe. Hold one end, pull tight, and twist. This gives extra force.
Step 7: Try Rubber Gloves
Rubber gloves increase friction. Grip the pipe and turn. Sometimes, this works when nothing else does.
Step 8: Apply Heat (if Safe)
For metal pipes, heat can loosen stuck joints. I use a hair dryer or hot water. Never use an open flame. Heat expands the metal, making it easier to unscrew.
Step 9: Tap The Joint
Light taps can break rust or buildup. I use a wooden stick or the handle of a screwdriver.
Step 10: Use Wd-40 Or Oil
If the pipe is rusty, spray WD-40 or cooking oil. Wait a few minutes, then try again. This trick saved me many times.
Step 11: Check For Hidden Screws
Some pipes have small screws holding them. Look closely, especially on older pipes.
Step 12: Work Slowly
Patience is key. If the pipe won’t move, try a different angle. Don’t force it.
Step 13: Ask For Help
If all else fails, ask a neighbor or friend. Two hands are better than one.
Step 14: Know When To Stop
If the pipe won’t budge or you hear cracking, stop. You might damage the pipe or the joint. I once broke a pipe by being stubborn. It cost me more in repairs.
Common Mistakes And How To Avoid Them
I’ve made plenty of mistakes. Here are a few, so you don’t repeat them:
- Using too much force: Pipes break easily, especially PVC.
- Skipping safety steps: Water or gas leaks are dangerous.
- Ignoring hidden screws: Always check for extra fasteners.
- Not protecting the pipe: Scratches lead to leaks later.
- Forgetting patience: Slow, steady pressure works better than quick pulls.
One time, I twisted a pipe too fast and it snapped. That meant calling a plumber and paying $120 for a five-minute fix. Learn from my mistakes!

When To Call A Professional
Sometimes, you can’t do it alone. If the pipe is connected to gas, or if it’s very old and fragile, call a plumber. It’s safer and can save money in the long run.
If you smell gas, stop right away. Never try to fix a gas pipe yourself.
Extra Tips For Beginners
Here are some things I wish I knew when I started:
- Keep the area dry: Wet floors make accidents more likely.
- Have a flashlight: Pipes under sinks can be hard to see.
- Take photos: Before you start, snap a picture. Helps you remember how it looked.
- Use both hands: Sometimes you need to balance the pipe and tool.
- Store all removed parts: Put screws and washers in a cup. Losing them is easy.
And here’s a tip most beginners miss: sometimes, pipes unscrew in the opposite direction. Especially in old houses. If lefty-loosey doesn’t work, try righty.
Real-life Examples And Anecdotes
Once, my neighbor’s pipe was so stuck, we had to use a belt and two pairs of gloves. After 30 minutes, it finally moved. Another time, I fixed a drain pipe with just rubber gloves and patience.
It feels great to solve these problems yourself. You learn, save money, and get more confident.
Comparing Wrench Alternatives: Grip And Damage
Let’s look at how different alternatives compare for grip and risk of damage:
| Tool/Method | Grip Strength | Pipe Damage Risk |
|---|---|---|
| Channel Lock Pliers | High | Medium |
| Rubber Gloves | Medium | Low |
| Belt/Rope | Medium | Low |
| Vice Grips | High | High |
| Cloth + Pliers | Medium | Low |
Choosing the right alternative can save you from damaging the pipe and make the job easier.

Frequently Asked Questions
What Can I Use If I Don’t Have Any Tools At All?
If you have no tools, try rubber gloves for extra grip. Use a belt or rope to wrap around the pipe. Pull and twist. Sometimes, bare hands are enough if the joint is loose.
Is It Safe To Use Heat To Loosen Pipes?
Yes, but only with metal pipes. Use a hair dryer or hot water. Never use fire. For plastic pipes, avoid heat—it can melt them.
Can I Unscrew Pipes With Wd-40 Or Oil?
Absolutely. Spray WD-40 or cooking oil around the joint. Wait a few minutes. This loosens rust and makes unscrewing easier. For more info, check Wikipedia’s WD-40 page.
How Do I Know If I Should Call A Plumber?
Call a plumber if the pipe is connected to gas, if you hear cracking, or if you smell anything strange. Also, if you try several methods and nothing works, it’s safer to get help.
Will These Methods Work For All Pipes?
Most methods work for threaded and compression pipes. If the pipe is soldered or glued, you can’t unscrew it. Check what type of joint you have before you start.
Trying to unscrew a pipe without a wrench can feel stressful, but with these tricks, you’ll be ready next time. I’ve learned that improvising tools and using patience is often more important than having expensive equipment. Remember, safety comes first.
And if you ever feel stuck, don’t be afraid to ask for help or call in a pro. Good luck—your next DIY fix is waiting!
As an Amazon Associate, We earn from qualifying purchases