Sanding a concrete floor can sound scary if you haven’t tried it before. I remember the first time I walked into my old garage, looked at that rough, stained concrete, and thought, “How hard can it be?” The answer: Harder than I thought—but not impossible! It just takes the right steps, a little patience, and some tips that nobody told me until I made a few mistakes. If you want a smooth, beautiful concrete floor, let me walk you through the process based on what I learned.
Why Would You Sand A Concrete Floor?
Before I started, I wondered if sanding was even needed. But after years of oil stains, rough patches, and ugly paint spots, I realized sanding is the best way to refresh a concrete floor. Some people sand to prepare for painting or sealing.
Others want to remove high spots or fix cracks. In my case, I wanted a surface that was safe, easy to clean, and nice to look at.
What You’ll Need To Sand Concrete
Let’s get into the gear. I made the mistake of trying to sand a big floor with just a hand sander. It took forever! Here’s what actually works:
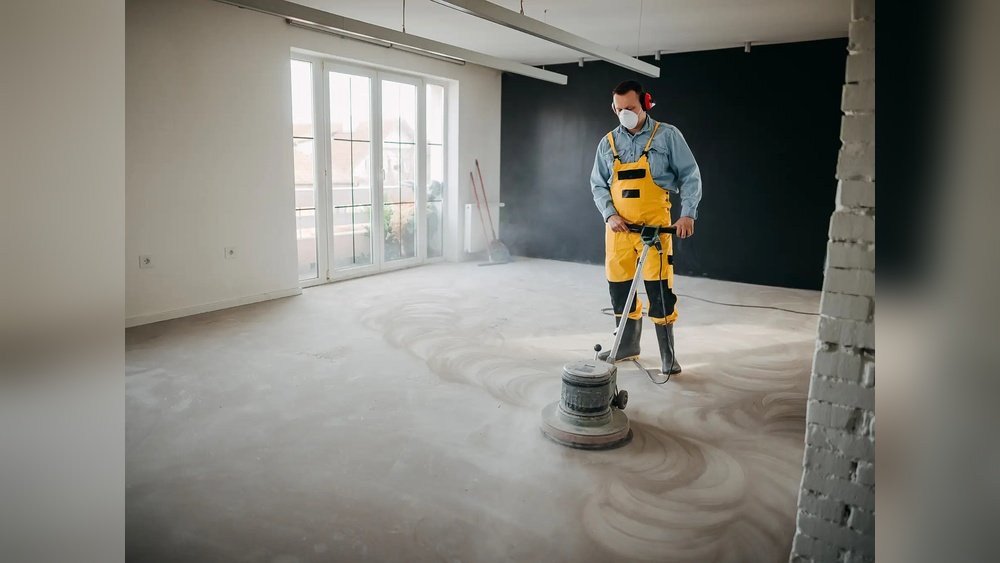
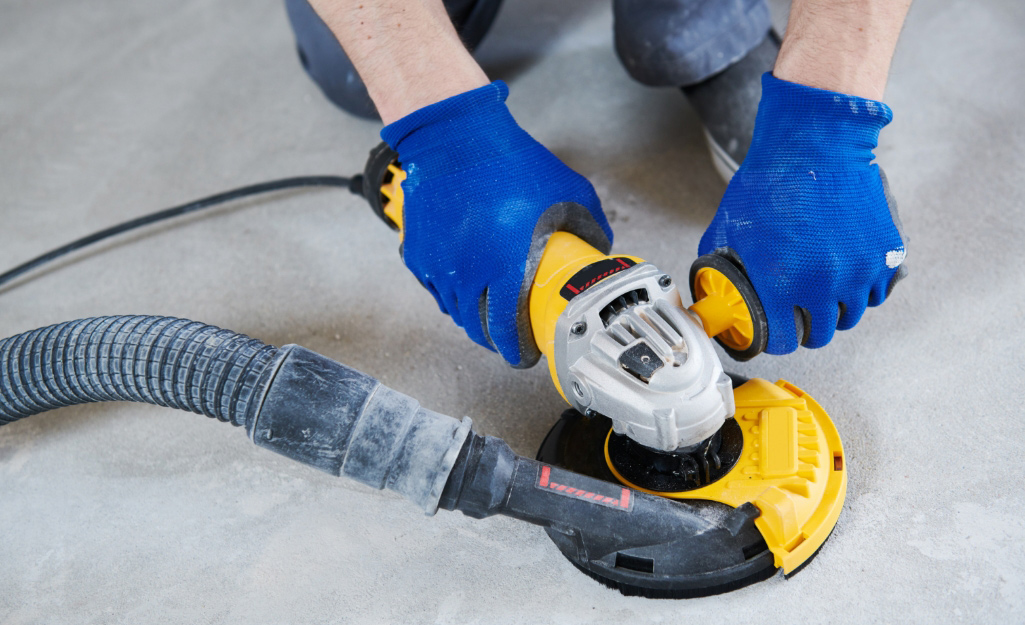
- Concrete grinder: This is the main tool. For large spaces, rent a walk-behind floor grinder. For small spots, a handheld grinder works.
- Diamond sanding pads: These are special pads made for concrete. You’ll need a few grits, from coarse to fine.
- Shop vacuum: Concrete dust gets everywhere! A good vacuum keeps the air clean.
- Protective gear: Wear a dust mask (or respirator), safety glasses, and ear protection.
- Broom and mop: For cleanup before and after.
- Plastic sheeting and tape: If you don’t want dust in the rest of your house.
- Knee pads: Trust me, your knees will thank you.
For small projects, you might use a palm sander with heavy-grit sandpaper, but it’s slow. For a garage, basement, or patio, go with a grinder.
Step-by-step: How I Sanded My Concrete Floor
1. Clear And Clean The Area
First, I moved everything out. Even small things like screws can get caught under the grinder and scratch the floor. After sweeping, I used a mop to get rid of dust and dirt. This helps the grinder work better and keeps the air cleaner.
2. Check For Cracks And Holes
I got down on my knees and looked for cracks and holes. If you skip this, the grinder might make them worse. I filled small cracks with a concrete patch and let it dry overnight. For bigger holes, I followed the directions on the patch product.
Some need a few hours to set; others take longer.
3. Set Up Safety
Concrete dust is no joke. The first time, I didn’t use a mask. My throat hurt for days! Now, I always put on a dust mask, glasses, and ear plugs. I taped plastic sheets over doors to keep dust out of other rooms.
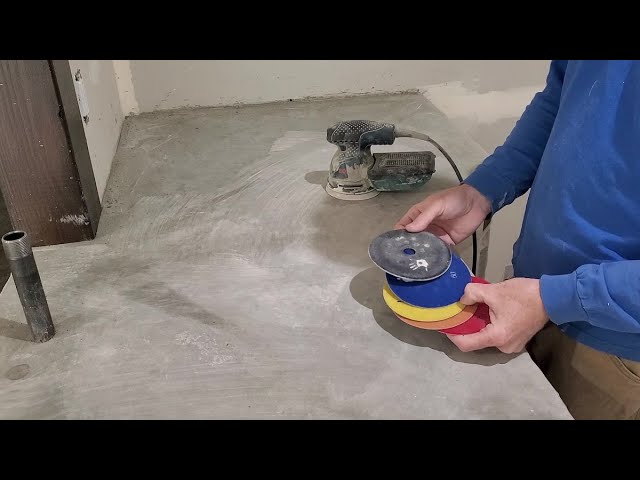
4. Choose The Right Grit
Concrete sanding pads come in different grits. Lower numbers (like 30 or 50) are coarse. Higher numbers (like 200 or 400) are fine. I started with 30-grit to remove rough spots and stains. If your floor is smoother, you can start with 60-grit.
Here’s a quick look at common pad grits and uses:
| Grit | Use |
|---|---|
| 30-50 | Heavy grinding, removing paint or glue |
| 60-80 | Smoothing, removing minor marks |
| 100-150 | Final smoothing, prepping for sealers |
| 200+ | Polishing for a shiny finish |
5. Start Grinding
When I fired up the floor grinder, I was surprised by how heavy it felt. Let the tool do the work—don’t press down hard. I made slow passes, overlapping each row, like mowing a lawn. After covering the whole floor, I vacuumed up the dust to see how it looked.
If you see low spots or rough patches, go over them again.
A good tip: If you run the grinder too fast, it might leave swirl marks. Go slow and steady.
6. Switch To Finer Grits
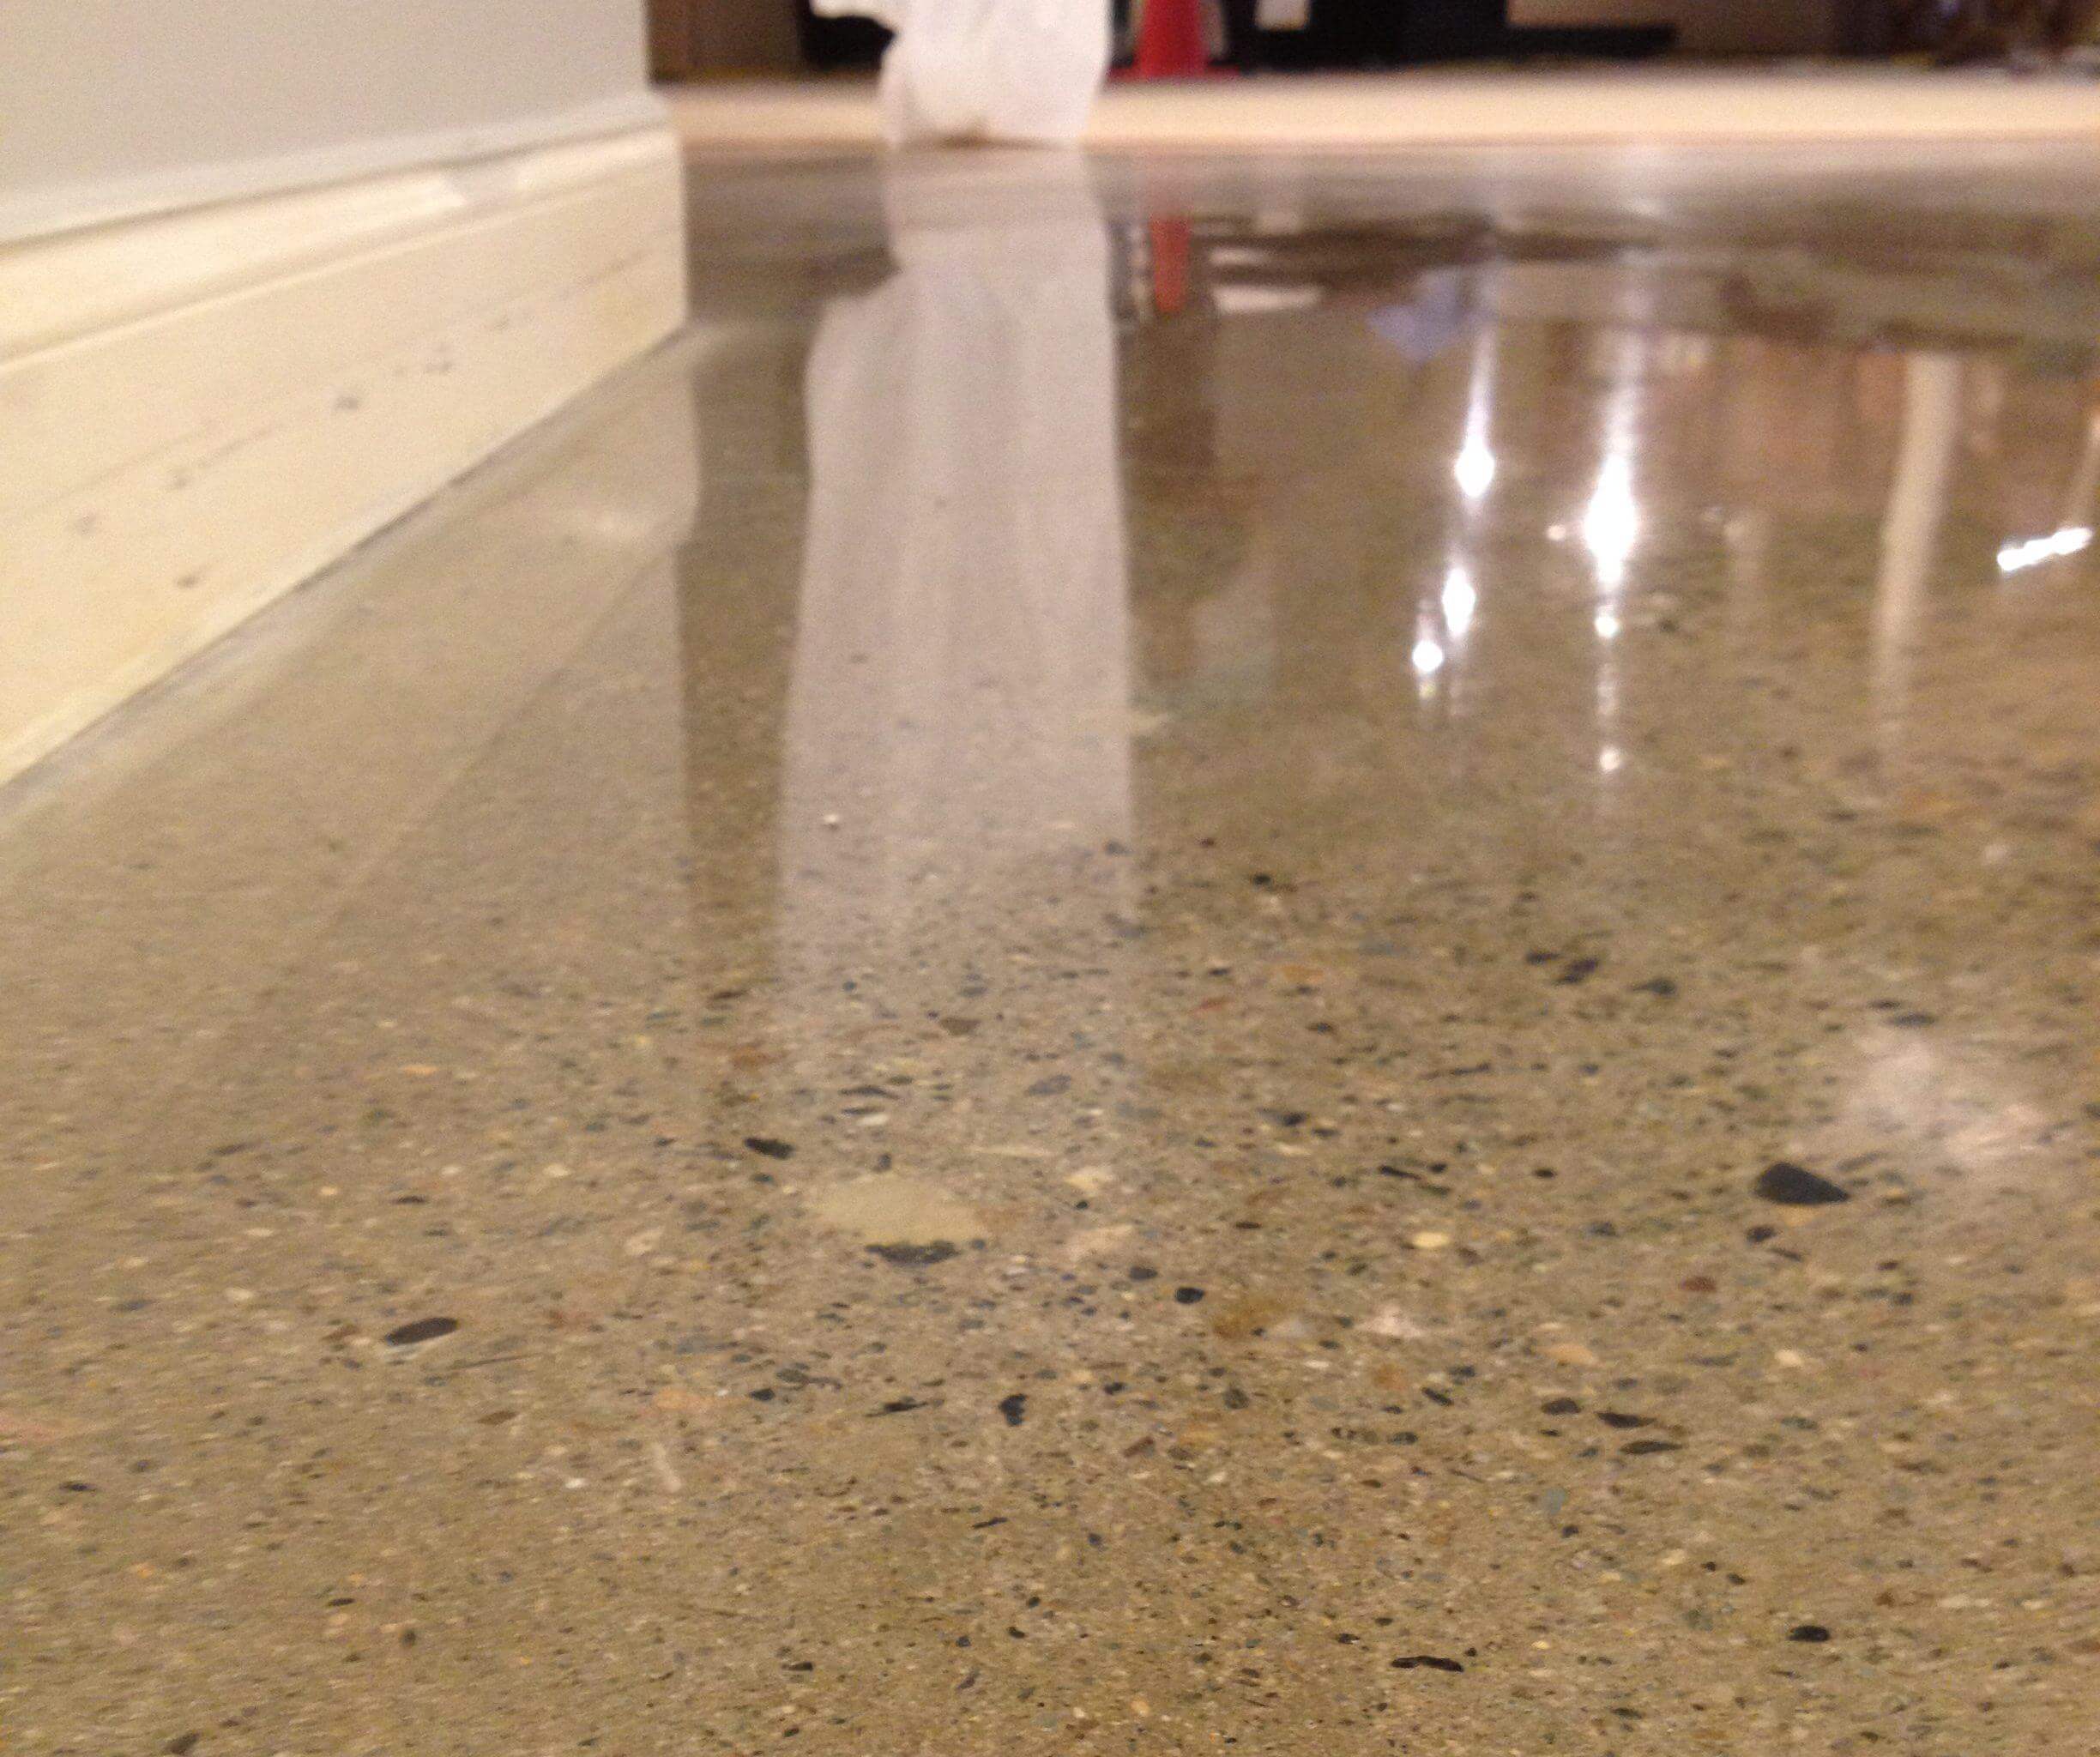
Once the floor looked even, I changed to a finer pad. I repeated the process, vacuuming between each pass. With each finer grit, the floor got smoother. For my garage, I stopped at 150-grit, but if you want a polished, shiny look, keep going up to 400 or higher.
7. Clean Up Thoroughly
After sanding, there was concrete dust everywhere. I vacuumed, then mopped with water. This step is important if you plan to paint or seal the floor. Any leftover dust can ruin the finish.
Wet Vs Dry Sanding: What’s Better?
I tried both wet and dry sanding. Wet sanding keeps dust down, but it gets messy. The water mixes with concrete dust and forms a gray sludge. Cleaning it up takes time. Dry sanding is faster and easier, but you need a good vacuum and mask.
Here’s a quick side-by-side:
| Wet Sanding | Dry Sanding |
|---|---|
| Less dust in the air | Faster and less messy |
| Sludge cleanup needed | More airborne dust |
| Better for indoor spaces | Needs good vacuum system |
If you have allergies or are working indoors, wet sanding might be better. For garages or patios, I prefer dry sanding with a good vacuum.
How Long Does It Take To Sand A Concrete Floor?
It depends on the size of your floor, its condition, and your tools. My two-car garage (about 400 square feet) took me most of a Saturday. I spent:
- 1 hour moving things and cleaning
- 2-3 hours grinding with coarse pads
- 2 hours with finer pads
- 1 hour on cleanup
If your floor is in bad shape, expect it to take longer. Small rooms can be done in a few hours. Big commercial spaces might take days.
Common Mistakes (and How I Learned To Avoid Them)
Let me save you some pain. Here are things I wish someone had told me:
- Skipping cracks and holes: I ignored a few small cracks. They turned into bigger problems after sanding. Always patch first!
- Not changing pads often enough: Old pads get clogged. Change them when they stop cutting well.
- Forgetting protective gear: Concrete dust is harmful. Always wear a mask and glasses.
- Rushing the process: The first time, I tried to finish in one pass. The result was uneven. Go slow, and check your progress often.
- Not vacuuming between grits: Dust from coarse sanding can scratch the floor when using a fine pad.
When To Call A Professional
Honestly, I’m a DIY fan, but some jobs are too big. If your floor is huge, very uneven, or has deep cracks, a pro might be faster and safer. Also, if you want a mirror-like polish, the right machines and skills make a difference.
For most home garages and basements, though, you can do it yourself.
How To Choose The Right Grinder And Pads
Renting a grinder can feel overwhelming. My advice: talk to the rental place about your floor size and what you want to achieve. For small spaces, a handheld grinder is enough. For large areas, get a walk-behind machine.
Pad choice matters a lot. Here’s a quick comparison of pad types:
| Pad Type | Best For | Cost |
|---|---|---|
| Diamond Pads | Concrete, stone | High |
| Silicon Carbide | Light sanding, edges | Medium |
| Resin Pads | Polishing after grinding | High |
Diamond pads cost more, but they last longer and work better for tough jobs. Silicon carbide is okay for touch-ups or very small jobs.
What To Do After Sanding
Once your floor is smooth, you have choices. You can:
- Seal the floor to keep out stains and water
- Paint it for color and protection
- Polish it for a shiny, reflective finish
I sealed my garage floor with a water-based sealer. It made cleaning up oil and dirt much easier. If you want to paint, make sure the floor is completely dry after cleaning.
Hidden Tips Most Beginners Miss
Let me share a couple of things I learned the hard way:
- Edge work takes longer: The big grinder can’t reach the walls. I used a hand grinder for the edges, which doubled the time.
- Temperature matters: Concrete dust sticks to damp floors. Make sure the floor is dry before you start.
- Lighting helps: I missed low spots until I shined a flashlight across the floor at a low angle. Good lighting shows where you need to sand more.
These small things can save you hours and help you get a better finish.
Is Sanding Concrete Floor Worth It?
If you want a safer, nicer, and easier-to-clean surface, yes. It takes effort, but the results are worth it. My garage went from stained and ugly to smooth and bright. It also made it easier to find small dropped things, like screws and nails, because the floor was even and clean.
If you want to learn even more about concrete flooring, you can check out this Family Handyman guide for extra tips.
Frequently Asked Questions
How Much Does It Cost To Sand A Concrete Floor?
Costs depend on floor size and tools. Renting a grinder for a day can be $50–$100. Pads cost about $30–$50 each. Add a few dollars for safety gear and cleaning supplies. A small garage might cost $100–$200 total. Hiring a pro is more—often $3–$8 per square foot.
Can I Sand A Painted Concrete Floor?
Yes, but it takes more time. Use coarse grit pads (30–50) to remove paint. Be ready for lots of dust and some elbow grease. You may need extra pads, as paint clogs them quickly.
Is Sanding Concrete Dangerous?
It can be. Concrete dust is harmful to your lungs. Always wear a dust mask or respirator and eye protection. Use a vacuum to collect dust. Wet sanding reduces dust but makes cleanup messier.
How Do I Know When I’m Done Sanding?
Run your hand over the floor. It should feel smooth, not rough or gritty. Shine a light at a low angle to check for high or low spots. If you’re painting or sealing, do a water drop test—if water soaks in evenly, you’re ready.
What’s The Difference Between Sanding And Polishing Concrete?
Sanding removes surface roughness and stains. Polishing uses finer pads (up to 3000 grit) to make the floor shiny and reflective. Sanding is for leveling and prep; polishing is for looks.
Sanding a concrete floor is hard work, but it’s something you can do with the right advice. I hope my experience helps you get a floor you’ll be proud of.
As an Amazon Associate, We earn from qualifying purchases