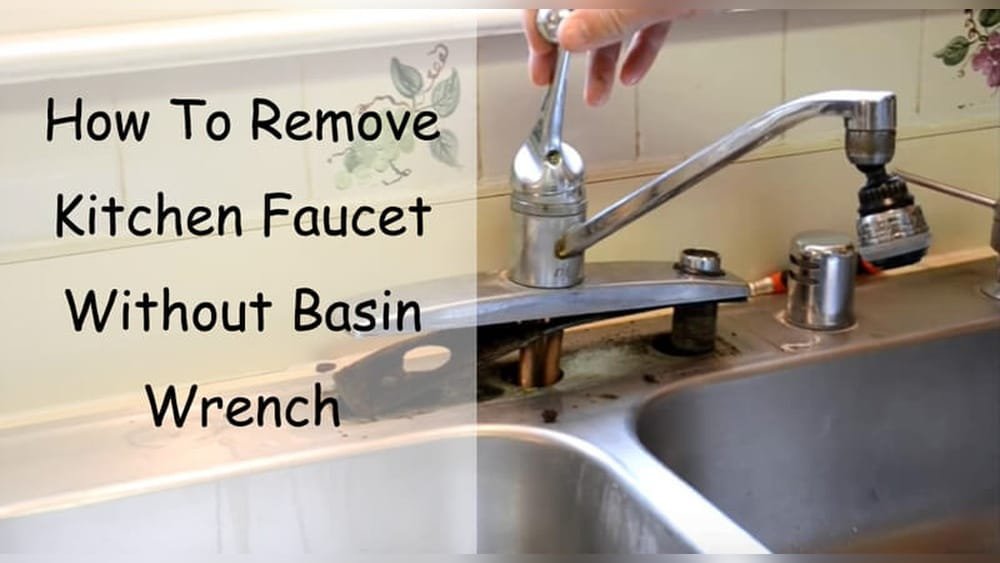
Removing a sink faucet without a basin wrench can feel tricky. I know because I’ve done it myself. When my old kitchen faucet started leaking, I wanted to fix it. But I didn’t have a basin wrench, and I didn’t want to buy one just for this job.
Prime Day Pick
Limited-time Prime Day price. Check current discount on Amazon.
So, I decided to use what I had and figure out a solution. If you’re in the same spot, let me walk you through what worked for me. I’ll share clear steps, some useful tricks, and mistakes to avoid. By the end, you’ll feel confident tackling this task—even if you don’t own special plumbing tools.
Why Remove A Faucet Without A Basin Wrench?
Not everyone keeps a basin wrench in their toolbox. They’re handy, but they’re not cheap, and you might only use them once. When I started, I had regular tools: pliers, adjustable wrenches, and a few screwdrivers. I wanted to see if they could do the job.
Prime Day Pick
Limited-time Prime Day price. Check current discount on Amazon.
Sometimes, the space under the sink is tight. Basin wrenches fit well in narrow spaces, but so can other tools if you use them creatively. Plus, learning to work with basic tools gave me more confidence in handling other home repairs.
Prime Day Pick
Limited-time Prime Day price. Check current discount on Amazon.
Tools You’ll Need
Here’s what I used instead of a basin wrench:
- Adjustable wrench – for nuts and bolts
- Channel lock pliers – for gripping and turning
- Socket wrench (if you have one) – for tricky nuts
- Screwdriver – usually Phillips or flathead
- Penetrating oil – helps loosen stuck nuts
- Flashlight – to see under the sink
- Bucket – to catch water
- Towel or rag – for spills
- Gloves – protect your hands
You don’t need all of these, but having them nearby helps. Sometimes, I had to switch tools when one didn’t fit.

Preparing Your Workspace
Before you start, make sure your sink area is ready. Here’s what I did:
- Clear out the cabinet under the sink. Remove cleaning products and anything in the way.
- Turn off the water supply. Find the shut-off valves under the sink and twist them clockwise. If you can’t find them, turn off your home’s main water supply.
- Open the faucet to drain leftover water.
- Place a bucket and towel under the pipes. This catches leaks and keeps things dry.
It sounds simple, but skipping these steps can lead to a mess. I once forgot to clear the cabinet, and water spilled everywhere. Don’t make my mistake!
Step-by-step: Removing The Faucet Without A Basin Wrench
Here’s how I did it, step by step.
1. Disconnect Water Supply Lines
The supply lines are flexible tubes that connect your faucet to the shut-off valves. Use an adjustable wrench to loosen the nuts holding these lines. If they’re stuck, spray a bit of penetrating oil and wait a few minutes.
- Hold the valve steady with one hand.
- Turn the nut counterclockwise with the wrench.
- Repeat for both hot and cold lines.
Once they’re loose, pull the lines away. Some water may drip out, so keep your bucket ready.
2. Remove Mounting Nuts Under The Sink
This step is usually the hardest. The faucet is held in place by mounting nuts under the sink. Normally, you’d use a basin wrench here. Instead, I used channel lock pliers and a socket wrench.
- Crawl under the sink and shine your flashlight on the nuts.
- If there’s enough room, use channel lock pliers to grip the nut and turn it.
- For tight spaces, try a socket wrench with an extension.
- If the nut won’t budge, spray more penetrating oil and wait.
I found that channel lock pliers gave me a good grip, even in awkward positions. Sometimes, I had to use both hands to steady the pliers and keep them from slipping.
3. Loosen And Remove The Faucet
Once the nuts are off, the faucet should lift out easily. If it’s stuck due to old caulk or mineral buildup:
- Run a utility knife around the base to cut through any sealant.
- Wiggle the faucet gently until it comes loose.
Be careful not to scratch the sink. I used a rag to protect the surface while prying up the faucet.
4. Clean Up And Check For Damage
After removing the faucet, check the sink for leftover caulk, grime, or rust. I used a sponge and some vinegar to clean the area. Look for cracks or chips—sometimes, removing an old faucet can reveal hidden damage.
If you’re installing a new faucet, it’s best to start with a clean surface.
Useful Tricks And Tips
Over the years, I’ve learned a few extra tricks that make this job easier:
- Use a mirror: Sometimes, you can’t see under the sink well. A small mirror helps you see nuts and bolts in tight corners.
- Wrap the nut with a rag: If your pliers slip, wrap the nut with a rag for better grip.
- Heat stuck nuts: If a nut is rusted, use a hairdryer to warm it. This can loosen the metal.
- Don’t force it: If the nut won’t move, stop and use more oil. Forcing it can break the pipe.
- Have patience: Sometimes, it takes a few tries. I’ve spent over an hour loosening one stubborn nut.
These tips saved me from frustration and extra repairs.
Common Mistakes To Avoid
When I first tried removing a faucet, I made some mistakes. Here’s what to watch out for:
- Forgetting to turn off water: Water leaks can damage your cabinet and floor.
- Using the wrong tool: Some wrenches can damage nuts. Use adjustable tools and go slow.
- Ignoring leaks: If water drips, fix it before installing a new faucet.
- Not cleaning the area: Old caulk and rust can make installing the new faucet harder.
- Rushing the job: Take your time, especially with old plumbing.
Learning from mistakes is part of home repair. If you mess up, it’s okay—just clean up and try again.
Comparing Tools For Faucet Removal
Here’s a quick comparison of tools I used, and how they performed against a basin wrench.
| Tool | Ease of Use | Best For | Cost |
|---|---|---|---|
| Channel lock pliers | Moderate | Loosening nuts | $15-$25 |
| Adjustable wrench | Easy | Supply lines | $10-$20 |
| Socket wrench | Hard (tight spaces) | Deep nuts | $20-$40 |
| Basin wrench | Easy | Hard-to-reach nuts | $25-$35 |
I found that channel lock pliers worked best for most nuts. Adjustable wrenches were perfect for supply lines. The socket wrench helped when the nut was deep and the space was limited.
Time And Difficulty Estimates
You might wonder how long this will take. In my experience, removing a faucet without a basin wrench usually takes longer than with one. Here’s a quick breakdown:
| Step | Estimated Time | Difficulty |
|---|---|---|
| Disconnecting supply lines | 10 minutes | Easy |
| Removing mounting nuts | 30-45 minutes | Medium |
| Removing faucet | 10-15 minutes | Easy |
| Cleaning up | 5-10 minutes | Easy |
The hardest part is the nuts under the sink. Sometimes, you’ll spend most of your time there.
When To Use A Basin Wrench Instead
While you can remove a faucet without a basin wrench, there are times when buying one makes sense:
- Extremely tight space: If you can’t fit pliers or wrenches, a basin wrench is needed.
- Multiple faucets: If you plan to do more plumbing in the future, invest in the right tool.
- Corroded nuts: Sometimes, only a basin wrench can grip old, rusty nuts.
In my case, I managed with basic tools. But if you’re struggling, a basin wrench can save time and effort.
How To Prevent Future Problems
After replacing my faucet, I learned how to keep things easy next time:
- Hand-tighten nuts when possible. You don’t need super tight connections.
- Use plumber’s grease on threads to prevent rust.
- Check for leaks after installation. Catch problems early.
- Clean under the sink once a year to spot issues before they grow.
These simple habits keep your plumbing in good shape and make future repairs easier.

Real-world Example
Let me share a quick story. When I helped my friend remove his bathroom faucet, we didn’t have a basin wrench. The space was so tight, we couldn’t even fit our hands. We used a mirror to see the nuts, and a socket wrench with a long extension. It took almost two hours, but we finally got the faucet out. What helped most was patience—and not giving up when things got tough.
That experience taught me that you don’t always need fancy tools. Sometimes, creative problem-solving is just as important.
Safety Tips
Plumbing can be safe if you follow a few simple rules:
- Wear gloves to avoid cuts and scrapes.
- Keep tools organized so you don’t lose them under the sink.
- Work with a partner if possible. Someone can hand you tools or help steady things.
- Use good lighting. A flashlight or headlamp makes a big difference.
I’ve hurt my hands before by rushing. Take your time, and always protect yourself.

Frequently Asked Questions
What If The Nuts Won’t Move At All?
Try penetrating oil and let it sit for at least 15 minutes. If that doesn’t work, gently heat the nut with a hairdryer. This can help break the rust. Never force the nut, as it may damage the pipe.
Can I Use Regular Pliers Instead Of Channel Lock Pliers?
Yes, but channel lock pliers have a wider jaw and better grip. Regular pliers may slip, especially if the nut is large or tight. If you only have regular pliers, wrap the nut with a rag for extra grip.
Is It Safe To Work Under The Sink Without A Basin Wrench?
Yes, as long as you use the right tools and take your time. Always turn off the water supply and wear gloves. Keep your workspace dry to avoid slips.
Do I Need To Replace The Supply Lines When Installing A New Faucet?
It depends. If the supply lines are old, cracked, or leaking, it’s best to replace them. New lines are cheap and easy to install. If they’re in good shape, you can reuse them.
Where Can I Find More Information About Plumbing Tools?
You can read more about plumbing tools and techniques at Wikipedia. It has detailed descriptions and pictures that help you understand what tools to use.
Removing a faucet without a basin wrench is totally doable. It takes a little patience, some basic tools, and a willingness to try new things. I’ve done it myself, and I know you can too. If you ever feel stuck, remember that creative thinking often solves the toughest problems.
And next time you face a plumbing job, you’ll know exactly how to tackle it—even without the fancy tools.
As an Amazon Associate, We earn from qualifying purchases