Making a wooden bowl on a lathe was one of the most satisfying things I have ever done in my workshop. I’m excited to share my journey with you, hoping you’ll feel confident enough to try it yourself. I started with little knowledge, but with each bowl, my skills grew.
Here’s what I learned, step by step—mistakes, surprises, and all. If you’re thinking of making your first wooden bowl, or just want to improve, I hope my story helps you avoid common pitfalls and brings you closer to that sweet, smooth finish.
Choosing The Right Wood
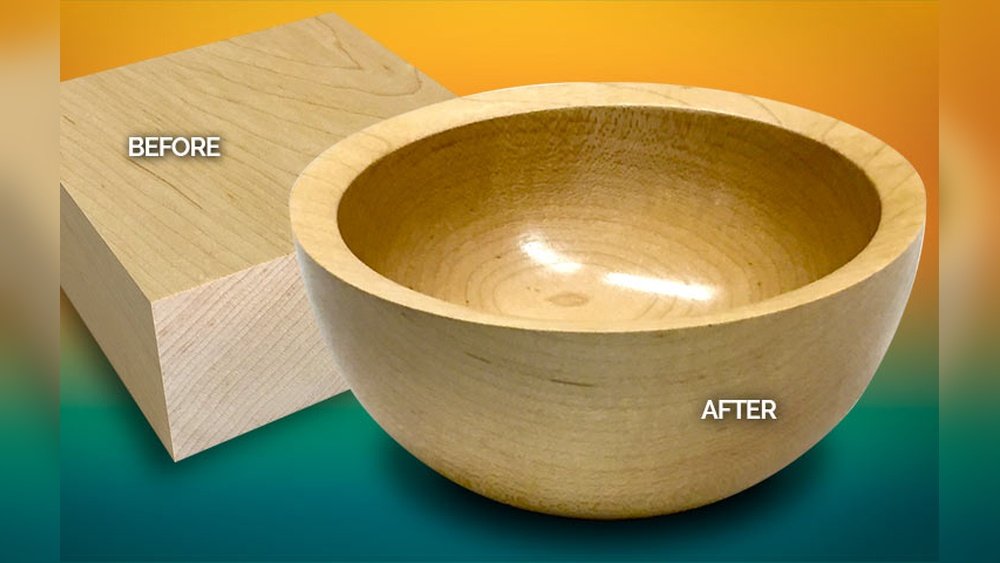
Before I even touched my lathe, I had to pick the right piece of wood. The wood you choose makes a huge difference in how easy the project feels and how the bowl looks at the end.
Hardwoods like maple, walnut, and cherry are great for bowls. They’re strong, but not too hard to shape. Softwoods, like pine, are easier to turn but can tear out or dent. For my first bowl, I chose a dry maple blank. It was about 8 inches in diameter and 3 inches thick.
Here’s a quick comparison of popular woods for bowls:
| Wood Type | Grain Tightness | Durability | Workability |
|---|---|---|---|
| Maple | Fine | High | Medium |
| Walnut | Medium | High | Medium |
| Cherry | Fine | Medium | Easy |
| Pine | Coarse | Low | Easy |
A tip I learned: avoid wood with visible cracks or knots, especially when starting out. They can catch your tool or even fly off the lathe, which is scary and dangerous. Always check for moisture content too. Wet wood can warp after you finish, so I stick with kiln-dried blanks.
Getting The Tools Ready
The right tools make everything smoother and safer. I learned quickly that using sharp tools is not just nice—it’s essential.
Here’s what I keep on hand for bowl turning:
- Lathe (with speed control)
- Faceplate or chuck
- Bowl gouge (my favorite tool for shaping)
- Parting tool
- Scraper
- Calipers (to check wall thickness)
- Sandpaper (various grits, from 80 to 400)
- Finishing oil or wax
- Safety gear (face shield, dust mask, ear protection)
One thing I didn’t expect: a dull gouge can catch and ruin the wood, or even jerk the tool from your hands. I learned to sharpen my tools before every session. It only takes a few minutes and saves a lot of frustration.

Setting Up The Lathe
I remember how nervous I was the first time I mounted a blank on my lathe. It looked simple in videos, but I realized alignment is key. If your blank isn’t balanced, it will wobble, and you’ll struggle.
How I set up:
- I marked the center of the blank with a pencil.
- I screwed the faceplate securely to the blank.
- I attached the faceplate to the lathe spindle.
- I spun the lathe by hand first to make sure nothing hit.
- I set the speed low (about 500 RPM to start).
If you skip the spin-by-hand test, you risk a nasty surprise. One time, I forgot this and a tool rest was too close. The blank hit it hard—luckily, I wasn’t hurt, but it scared me.
Shaping The Outside Of The Bowl
Turning on the lathe for the first time felt like a big moment. The wood spun, and I got ready with my bowl gouge. I used a gentle grip, letting the tool do the work.
Here’s my process:
- I started shaping the outside, making smooth passes from the base toward the rim.
- I kept the tool rest close (about 1/8 inch away) and adjusted it as the shape changed.
- I made the base slightly thick so I could hold it later.
- I used calipers to check for even thickness as I worked.
I noticed beginners often press too hard or move the gouge too fast. When I tried to rush, I got nasty “catch”—the tool jammed and left a gouge in the wood. Slow, light cuts work best.
After shaping, I sanded the outside with the lathe spinning slowly. I started with 80 grit, then worked up to 400. Sanding at slow speed keeps the wood cool and prevents burns.
Creating The Tenon
Every bowl needs a way to be held on the lathe while you hollow the inside. I learned to create a tenon (a small lip at the bottom) with a parting tool.
Steps I followed:
- I measured the chuck jaws so the tenon would fit snugly.
- I used the parting tool to cut a lip at the base, about 1/4 inch deep.
- I checked the tenon size with calipers.
A mistake I made early on was making the tenon too small or too shallow. The bowl spun off once, which was both dangerous and frustrating. Now, I always double-check the tenon before moving on.
Reversing The Bowl And Hollowing
With the tenon ready, I removed the bowl, flipped it around, and gripped the tenon in the chuck. This step always made me a little nervous at first, but after a few tries, it became routine.
How I hollowed the inside:
- I used the bowl gouge, starting at the center and moving out.
- I took light cuts, checking the wall thickness with calipers.
- I left about 3/8 inch wall thickness for strength.
- I worked slowly near the rim to avoid chipping.
One thing that surprised me: wood can vibrate or “chatter” if you press too hard or the tool rest is too far away. When that happened, I adjusted the rest and slowed down. Patience paid off, and the inside became smooth.

Sanding And Finishing
Sanding is where the bowl starts to feel real in your hands. I learned not to rush, even though I wanted to see the finished product.
My sanding routine:
- Started with 80 grit to remove tool marks
- Moved to 120, then 220, 320, and finally 400 grit
- Wiped the bowl with a damp cloth between grits to raise the grain
Burns can happen if you hold sandpaper in one spot too long. I move the sandpaper gently and keep the lathe at a slow speed. For the final finish, I tried different oils and waxes. My favorite is food-safe mineral oil, which brings out the grain without leaving a sticky surface.
Here’s a quick look at common finishes and their qualities:
| Finish Type | Food-Safe | Gloss Level | Dry Time |
|---|---|---|---|
| Mineral Oil | Yes | Low | 1-2 hours |
| Walnut Oil | Yes | Medium | 8-24 hours |
| Shellac | Yes | High | 30 min |
| Polyurethane | No | High | 8 hours |
Removing The Tenon And Final Touches
The last step is removing the tenon and finishing the bottom. I used to struggle with this part, but I found a few tricks.
If your lathe has a jam chuck or you can use a soft pad, you can reverse the bowl and gently finish the base. I used a scrap piece of wood and a towel to protect the rim, then removed the tenon with a small gouge and sanded the base smooth.
The first time, I rushed and cracked the bowl. Now, I take my time and use very gentle cuts. I also sign my name and the date on the bottom with a wood-burning pen—a little touch that makes each bowl special.
Safety Tips I Learned The Hard Way
Safety isn’t optional when working with a lathe. I had a few close calls that taught me to never skip these steps:
- Always wear a face shield—wood can shatter and fly at high speed.
- Check for cracks before mounting the blank.
- Keep your workspace clean—wood chips pile up fast.
- Don’t wear loose clothing or jewelry.
- Stand to the side when starting the lathe, just in case something comes loose.
One thing beginners often miss: turn off the lathe before adjusting the tool rest. I slipped once and almost hit my hand.
Common Mistakes And How I Fixed Them
I made plenty of mistakes, but each one taught me something important.
Tool Catches
When the tool “catches,” it means it grabbed too much wood at once. It can ruin your bowl or even hurt you.
What helped me:
- Keeping the tool sharp
- Light, controlled cuts
- Watching my angle—don’t dig the edge in
Uneven Walls
Thick and thin spots feel strange and can make the bowl weak.
How I improved:
- Used calipers often
- Worked slowly, especially near the rim
Tear-out
Some woods tear instead of cutting cleanly, especially with dull tools.
My solution:
- Used a sharp scraper for the last pass
- Sanded with the grain if needed
Here’s a comparison of mistakes and quick fixes:
| Mistake | What Causes It | How I Fixed It |
|---|---|---|
| Tool catch | Dull tool, wrong angle | Sharpen tool, adjust angle |
| Uneven wall | Rushing, not checking | Use calipers, slow down |
| Tear-out | Soft grain, dull tool | Sharp scraper, sand with grain |
Advanced Tips I Wish I Knew Sooner
After a few bowls, I picked up some tricks that made everything easier:
- Use a light behind the bowl to check wall thickness—shadows show thin spots.
- Wet the wood after sanding to raise the grain, then sand again for a silky finish.
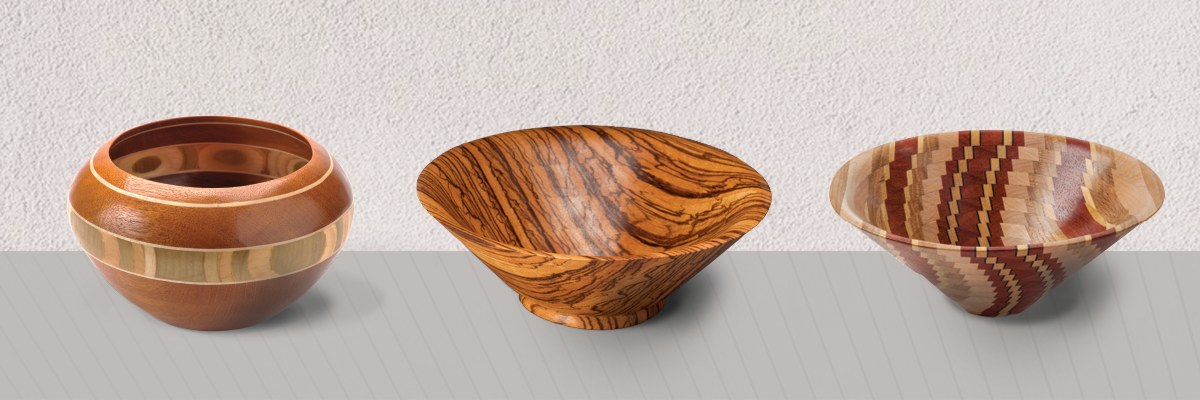
- Try different shapes and rim styles, not just round. A small bead or foot makes the bowl stand out.
One thing I didn’t expect: even small changes in shape can change how the bowl feels in your hand. I experiment with curves and profiles now, and each bowl has its own “personality.”
Where To Learn More
There’s always more to discover in woodturning. I found inspiration and help from other turners online. If you want to dive deeper into bowl turning, check out the Wikipedia page on woodturning for more history and advanced techniques.
Frequently Asked Questions
How Long Does It Take To Make A Wooden Bowl?
For my first bowl, it took about 3 to 4 hours. Now, with practice, I can finish one in about 2 hours, including sanding and finishing. Larger or harder woods can take longer.
What Is The Best Wood For Beginners?
I recommend maple or cherry. They’re forgiving and turn well. Avoid very hard woods or anything with lots of knots until you’re comfortable.
How Do I Avoid Tool Catches?
Keep your tools sharp, use light cuts, and always check your tool angle. If you feel nervous, slow down and practice on scrap wood first.
Is A Face Shield Really Necessary?
Yes—absolutely. Even small pieces of wood can fly off at high speed. I learned this the hard way and now never skip wearing one.
Can I Use Green (wet) Wood?
You can, but green wood will shrink and may crack as it dries. For your first few bowls, I suggest using kiln-dried wood. If you do try green wood, let it dry slowly to reduce warping.
Making a wooden bowl on a lathe turned out to be one of the most rewarding hobbies I’ve found. Each bowl feels unique, and I learn something new every time. If you’re on the fence, I hope my experience gives you the push to try.
You’ll be proud when you hold your own finished bowl—just like I was.
As an Amazon Associate, We earn from qualifying purchases