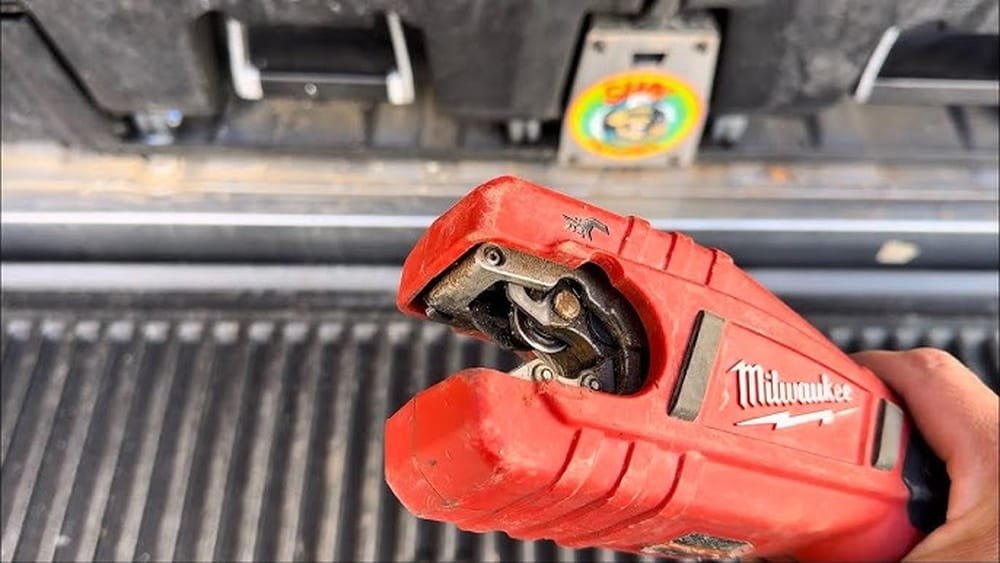
Changing the blade on a Milwaukee pipe cutter might sound simple, but my first time was a bit of a learning curve. I made a few mistakes, scratched my knuckles, and even wasted a blade once. But after doing it many times, I’ve figured out what works best, what to avoid, and how to make the process smooth. If you’ve never changed a blade before or you want to avoid some rookie mistakes, I’m here to walk you through everything. I’ll share what I wish someone had told me from the start, using plain English and real talk.
Prime Day Pick
Limited-time Prime Day price. Check current discount on Amazon.
Why Blade Changes Matter
I learned pretty quickly that a dull or damaged blade can ruin your work. Not only does it make cutting harder, but it can also leave rough edges on pipes. That means more time spent filing or starting over. Once, I tried to push through with a dull blade, and my cut was so bad that the pipe wouldn’t fit right.
Since then, I’ve made it a rule to check my blade before every job. If it’s dull, I change it. Trust me, using a sharp blade saves time and headaches.
Prime Day Pick
Limited-time Prime Day price. Check current discount on Amazon.
Tools And Parts You’ll Need
Before you start, gather your tools. I’ve found that having everything ready makes the process faster and less stressful. Here’s what you need:
Prime Day Pick
Limited-time Prime Day price. Check current discount on Amazon.
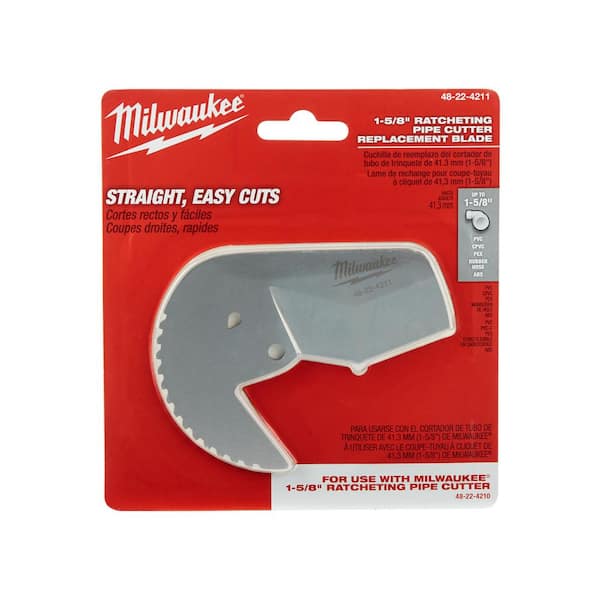
- Replacement blade – Make sure it’s the right size for your Milwaukee pipe cutter. Check your model number.
- Screwdriver – Most models use a Phillips or flathead.
- Small wrench or pliers – For some models, you might need this to loosen the blade bolt.
- Clean rag – To wipe away grease or metal shavings.
- Protective gloves – Optional, but I recommend them. Blades can be sharp.
Don’t skip the gloves. The first time I changed a blade bare-handed, I cut my finger. It wasn’t deep, but it reminded me that safety always comes first.

Knowing When To Change The Blade
I used to wait until the blade stopped cutting completely. That was a mistake. Now, I look for these signs:
- The pipe cutter feels harder to turn.
- Cuts take longer or require more pressure.
- The cut edges look rough or uneven.
- I see chips or nicks on the blade.
If you notice any of these, it’s time for a new blade. Don’t wait until the blade breaks or gets stuck in a pipe.
Step-by-step: How I Change The Blade
Let me break down the exact steps I follow. This works for most Milwaukee pipe cutter models, but check your manual if you’re unsure. I’ll share a few personal tips along the way.
1. Prepare Your Workspace
I like to work on a stable bench with good lighting. Lay out all your tools and the new blade. Wipe down your pipe cutter with a rag to remove dirt or grease. This prevents slipping.
2. Remove The Old Blade
Most Milwaukee pipe cutters have a screw or bolt holding the blade in place. Here’s what I do:
- Turn the tool upside down so the blade faces up.
- Use the screwdriver (or wrench) to loosen the screw. Hold the blade steady—it might drop out quickly.
- Set the screw or bolt aside in a small dish so you don’t lose it.
A tip from my own mistake: Watch out for small washers. Once, I lost one and had to search my garage floor for twenty minutes.
3. Take Out The Blade
Lift the blade out gently. If it’s stuck, wiggle it side to side, but don’t force it. Sometimes, old blades get wedged in with debris. If so, use the rag to clean the area.
4. Clean The Blade Housing
This is a step I used to skip. Now I always clean out the blade housing before putting in a new blade. Metal shavings or old grease can cause problems. Just wipe it down with the rag.
5. Insert The New Blade
Take your new blade and check the orientation. There’s usually a “this side up” marking. Line it up with the slot in your cutter. Carefully lower it in.
Be gentle here—a bent blade won’t cut straight. I learned this after rushing once and having to buy another blade.
6. Secure The Blade
Put the screw or bolt back in. Tighten it firmly, but don’t overdo it. If you strip the screw, you’ll have trouble next time. I always check that the blade spins freely but doesn’t wobble.
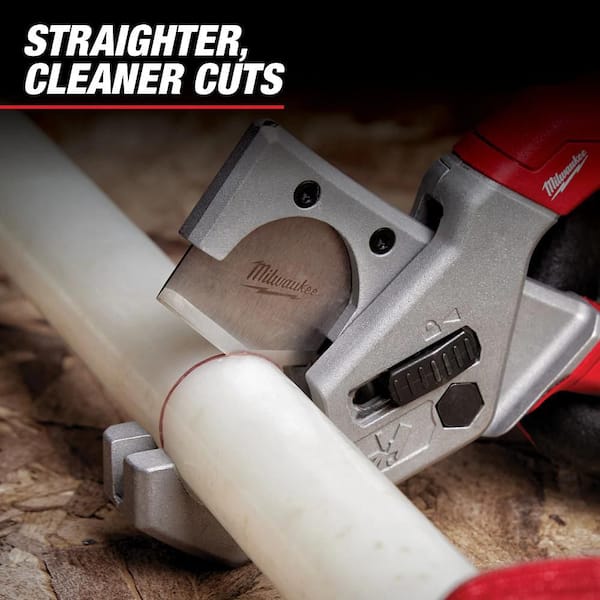
7. Test The Cutter
Before using it on a real pipe, I do a quick test on a scrap piece. If the cut is smooth and easy, I know everything’s set.
A Closer Look: Blade Types And Compatibility
Not all blades fit every Milwaukee pipe cutter. I learned this the hard way when I bought the wrong blade online. Here’s how you can avoid that mistake.
| Milwaukee Model | Blade Size | Best Use |
|---|---|---|
| 2471-20 | 1/2″ – 1″ | PVC, PEX, CPVC |
| 48-22-4200 | 1/2″ – 2″ | PEX, Rubber Hose |
| 48-22-4202 | 1/2″ – 1-1/4″ | PEX, Poly Pipe |
Always double-check the model number and blade size before buying. If you’re not sure, Milwaukee’s official website has clear guides.
Mistakes I Made (so You Don’t Have To)
Changing a blade isn’t rocket science, but small mistakes can lead to big problems. Here are a few things I learned the hard way:
- Forgetting to disconnect battery (for powered models): I once left the battery in and almost turned the tool on while changing the blade. Always remove the battery or unplug the tool.
- Using the wrong blade: A blade that’s too big or too small won’t cut right and can damage your tool.
- Over-tightening the screw: This stripped the threads for me once. Tight is good, but don’t force it.
- Not cleaning the housing: Debris can make the blade slip or jam.
- Losing small parts: Work over a tray or towel so dropped screws don’t disappear.
How Often Should You Change The Blade?
This depends on how much you use your pipe cutter and what materials you cut. For me, cutting plastic pipes daily, I swap blades about once a month. If you mostly cut soft materials, blades last longer. For metal pipes, blades wear out faster.
Here’s a rough guide based on my experience:
| Material Cut | Average Blade Life | Warning Signs |
|---|---|---|
| PVC/PEX | 200-300 cuts | Rough edges, extra force needed |
| CPVC | 100-200 cuts | Blade chipping, uneven cuts |
| Thin Metal | 50-100 cuts | Blade dulls quickly, sparks |
If you notice cuts getting harder, don’t wait. Change the blade before it ruins your tool or your project.
Tips For Better Blade Performance
Over the years, I’ve picked up some habits that keep my pipe cutter working longer:
- Lubricate the blade: A drop of light oil every few jobs prevents rust and makes cutting smoother.
- Store in a dry place: Moisture can rust the blade and the tool.
- Use the right blade for the job: Don’t use a plastic-only blade on metal pipes.
- Replace damaged blades immediately: Even a small chip can cause the pipe to crack or shatter.
One thing beginners often miss: *Don’t try to “stretch” the life of a blade.* It’s not worth it. A new blade costs a few bucks, but fixing a bad cut or buying a new tool costs much more.
Comparing Milwaukee Pipe Cutters: Manual Vs. Powered
Not all Milwaukee pipe cutters are the same. Some are manual, others are battery powered. I’ve used both. Here’s a quick comparison to help you understand the differences, especially for blade changes.
| Type | Blade Change Difficulty | Maintenance | Speed |
|---|---|---|---|
| Manual | Easy | Low | Slower |
| Powered | Moderate | Medium | Faster |
Manual cutters are simple—just a screw and the blade. Powered models may have extra guards or parts, but the steps are similar.
Real-world Example: My Fastest Blade Change
One day, I was on a job and my blade snapped mid-cut. I had a client waiting and no time to waste. Because I had a spare blade, screwdriver, and rag in my tool bag, I changed the blade in under five minutes.
That little bit of preparation made me look like a pro and saved me from embarrassment. Since then, I always carry a spare blade and the right tool. Preparation pays off.
Common Questions And Troubleshooting
Sometimes, things don’t go as planned. Here are a few problems I’ve run into and how I fixed them:
- Blade won’t fit: Check you have the right blade for your model. If it still won’t fit, look for debris in the housing.
- Blade keeps coming loose: The screw might be stripped. Replace it with a new one from Milwaukee.
- Pipe cutter squeaks or jams: Clean and lubricate the blade and moving parts.
If you’re still stuck, Milwaukee’s support site has videos and manuals that help a lot. I used their guides when I first started. Here’s a reliable source for more tips: Milwaukee Tool Manuals.
Frequently Asked Questions
How Do I Know If My Milwaukee Pipe Cutter Needs A New Blade?
If you feel more resistance, see rough edges, or the blade looks chipped or dull, it’s time to change it. Don’t wait until it stops cutting.
What Tools Do I Need To Change The Blade?
Usually, a screwdriver and sometimes a small wrench or pliers. Always check your model. Gloves and a clean rag also help.
Can I Use Any Blade On My Milwaukee Pipe Cutter?
No. Only use blades made for your model and pipe type. Using the wrong blade can damage your tool and give poor results.
How Long Does It Take To Change A Blade?
With practice, under five minutes. The first time might take longer, but the steps are simple once you know them.
Is It Safe To Change The Blade Myself?
Yes, as long as you disconnect any power source and wear gloves. Take your time and don’t rush. If you’re unsure, check the manual.
Changing the blade on a Milwaukee pipe cutter is easy once you know how. The first time might feel tricky, but with the right tools and a little patience, you’ll get it done in minutes. Always use the right blade, keep your tool clean, and don’t ignore the warning signs of a dull blade.
With these tips, your cuts will be smoother, your work faster, and your hands a lot safer. If you have any doubts, check your manual or visit the official Milwaukee support page for extra help. Happy cutting!
As an Amazon Associate, We earn from qualifying purchases