
Sanding acrylic edges is something I learned the hard way. I love working with acrylic sheets for different projects—picture frames, signs, even making shelves. But I used to get frustrated with those sharp, cloudy, or rough edges after cutting. If you’ve ever wondered, “Can you sand acrylic edges?
“—I’ve been in your shoes. Yes, you can. And not only is it possible, but you can get beautiful, glass-like edges if you do it right. Let me walk you through everything I’ve learned about sanding acrylic edges, step by step, with tips and real-life examples from my workbench.
Why Sand Acrylic Edges?
When I first started using acrylic sheets, I noticed the cut edges were far from smooth. They looked white, rough, and sometimes had chips. These edges not only looked bad but could scratch or cut your skin. Sanding made a huge difference for me. It helped in:
- Making edges safe to touch
- Improving the look—much clearer and shinier
- Helping pieces fit better in DIY projects
It’s not just about looks. Sometimes, a smooth edge means your acrylic piece fits perfectly or doesn’t break easily. If you want a professional result, sanding is a must.
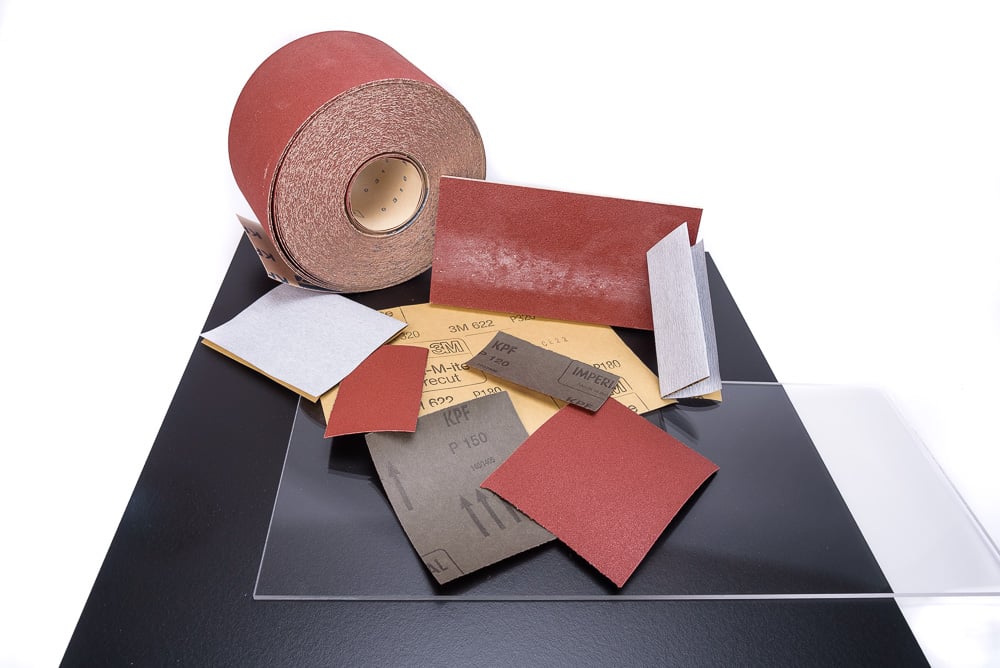
Tools You Need For Sanding Acrylic
At first, I thought I needed fancy tools. But I realized you can start simple and upgrade as you go. Here’s what I use:
- Sandpaper – Different grits (from coarse to fine)
- Sanding block or a small wood block
- Water spray bottle (for wet sanding)
- Masking tape (to protect the acrylic surface)
- Polishing compound (optional, for a glossy finish)
- Soft cloth or microfiber towel
- Electric sander or rotary tool (for big projects)
You don’t need everything at once. For most small jobs, sandpaper and water are enough.
Understanding Sandpaper Grits
Let’s talk grit numbers. Grit refers to how rough or smooth the sandpaper is. Lower numbers are rougher. Higher numbers are smoother.
Here’s a comparison of common grits I use:
| Grit Number | Texture | Use |
|---|---|---|
| 120 | Coarse | Removing big scratches or chips |
| 220 | Medium | Smoothing rough edges |
| 400 | Fine | Blending and refining |
| 800-1000 | Extra Fine | Making edges clear and shiny |
If you start with a rough grit, always finish with finer grits. That’s the secret to smooth, clear edges.
My Step-by-step Guide To Sanding Acrylic Edges
Let me share the method I use. I made some mistakes at first, but these steps gave me the best results.
1. Prepare Your Workspace
I always clear my table and lay down a soft cloth. Acrylic scratches easily. Even a little dust can make marks. I learned to keep everything clean and organized.
2. Protect The Surface
I use masking tape along the edge, about 2-3 mm from the cut. This keeps the flat sides from getting scratched while sanding.
3. Start With Coarse Sandpaper
If the edge is very rough or has saw marks, I begin with 120 grit. I wrap the sandpaper around a sanding block so I get even pressure. Sand in one direction—never in circles. I made that mistake once, and it took much longer to get a clear edge.
4. Move To Finer Grits
After the edge feels smoother, I switch to 220 grit. Then, I use 400 grit for even more smoothness. Sometimes, I keep going up to 800 or 1000 grit if I want a really shiny edge.
5. Try Wet Sanding
Wet sanding was a game-changer for me. I spray a little water on the edge and the sandpaper. This keeps dust down and helps the sandpaper last longer. It also prevents the acrylic from getting too hot and melting.
6. Finish With A Polish
If I want a super clear, glass-like edge, I use a plastic polishing compound on a soft cloth. I rub it along the edge, and in a few minutes, it looks amazing. Sometimes, I use a rotary tool with a soft buffing pad for larger pieces.
Common Mistakes And How To Avoid Them
I wish someone had warned me about these when I started:
- Using only one grit: Don’t skip grits. If you jump from coarse to very fine, you’ll see scratches.
- Pressing too hard: Acrylic can melt or chip. Gentle pressure works better.
- Sanding the flat surface: Always use masking tape. It’s easy to scratch the face of the acrylic by accident.
- Skipping water: Dry sanding creates heat. Wet sanding is cooler and safer.
- Not cleaning as you go: Dust or grit can make new scratches. I wipe the edge after each grit.
When Should You Sand Acrylic Edges?
I sand almost every time I cut acrylic. But here are some times when it’s especially important:
- After using a saw (circular saw, jigsaw, table saw)
- When edges are cloudy or chipped
- Before gluing acrylic pieces together (a smooth edge helps glue bond)
- If the piece will be handled or seen
If you’re just cutting a piece for a hidden spot, you might not need perfect edges. But for anything visible or touched, sanding is worth the effort.

Manual Sanding Vs. Power Tools
I’ve tried both by hand and with machines. Each has its place.
| Method | Pros | Cons | Best For |
|---|---|---|---|
| Manual Sanding | More control, less chance of melting | Slower, more effort | Small pieces, delicate work |
| Electric Sander | Fast, good for big projects | Easy to overheat, can melt edges | Large pieces, lots of sanding |
| Rotary Tool (Dremel) | Great for curves, edges, polishing | Takes practice, can gouge acrylic | Curved shapes, finishing work |
If you’re new, start by hand. Once you’re comfortable, try an electric sander or rotary tool for speed.
How To Get A Polished, Clear Edge
I remember the first time I got a crystal-clear edge on acrylic. It looked just like glass, and I felt proud. Here’s how I do it now:
- Sand with 120, 220, 400, 800, and 1000 grit sandpaper (each step removes scratches from the last).
- Clean the edge with a damp cloth.
- Put a little plastic polish on a soft towel, and buff the edge.
- For a mirror finish, use a rotary tool with a soft buffing wheel and a little more polish.
If you want to see a pro method, check out this guide on Wikipedia about acrylic materials.

Extra Tips From My Experience
Let me share a few things I learned that most beginners miss:
- Acrylic dust is sticky. It clings to everything. I vacuum often and wear a mask for big jobs.
- Edges can crack if you rush. If you see white lines or chips, slow down and use finer sandpaper.
- Don’t use metal files. They’re too rough and can gouge the acrylic.
- Check your work in bright light. Scratches are easier to see and fix before you polish.
How Sanded Acrylic Edges Compare To Other Materials
You might be curious how acrylic compares to glass or polycarbonate. Here’s what I’ve noticed:
| Material | Edge After Cutting | Ease of Sanding | Final Look |
|---|---|---|---|
| Acrylic | Rough, cloudy, sometimes chipped | Easy (with proper sandpaper) | Can look like glass with polish |
| Glass | Sharp, can cut skin | Harder, needs diamond tools | Always clear but risky to sand |
| Polycarbonate | Less chipping, still rough | Easy, but scratches more easily | Not as clear as acrylic |
Acrylic is the best choice if you want clear, safe, polished edges without special equipment.
Safety Tips When Sanding Acrylic
Safety is key. Acrylic dust can be a problem, and tools can be dangerous. Here’s what I do:
- Wear a dust mask for large jobs
- Use eye protection
- Keep your workspace clean and uncluttered
- Go slow with power tools
- Wash your hands after sanding
I once got a tiny acrylic splinter in my finger. It was almost invisible but hurt for days. Now I always pay attention.
What I Wish I Knew Sooner
Looking back, I wish someone had told me:
- Take your time. Rushing always led to mistakes or ruined pieces.
- Wet sanding is magic. It saves time and gives a better finish.
- Finer grit = better shine. Don’t be afraid to go up to 1000 or even 2000 grit.
- Polishing is worth it. Even if you’re tired after sanding, polish that edge. You’ll love the result.
Frequently Asked Questions
Can You Use A Nail File Or Emery Board On Acrylic Edges?
Yes, you can use a nail file or emery board for very small jobs or touch-ups. But they’re slow for bigger pieces. For best results, use proper sandpaper with different grits.
Is Sanding Acrylic Edges Safe For Kids To Do?
Sanding acrylic is safe with adult supervision. Use fine sandpaper, a sanding block, and avoid power tools for children. Always wear a dust mask and eye protection.
How Do You Avoid Scratches On The Flat Surface While Sanding?
I use masking tape close to the edge. This protects the face of the acrylic from accidental scratches. Sand gently and check often.
Do You Need To Sand Before Gluing Acrylic?
Yes, sanding helps glue stick better. A smooth, flat edge makes the bond stronger and neater. I always sand before gluing.
What Is The Fastest Way To Polish Acrylic Edges After Sanding?
The quickest way is to use a rotary tool with a soft buffing wheel and a plastic polish. For small pieces, a soft cloth and some elbow grease work well, too.
Working with acrylic has become one of my favorite hobbies. Sanding edges is a small step that brings a huge upgrade to your projects. If you haven’t tried it yet, grab some sandpaper and give it a go. You’ll be surprised how easy it is to turn a rough edge into something that looks and feels professional.
As an Amazon Associate, We earn from qualifying purchases