
Sanding a cement floor may sound like a tough job, but I promise, you can handle it if you know what to expect. When I first tried it, I had no idea what I was getting into. My hands were shaking a bit, and I worried I’d mess up the floor forever.
But after working through the steps and learning from my mistakes, I ended up with a smooth, clean surface that made the whole room look better. If you’re thinking of sanding a cement floor, let me walk you through the process—sharing what worked, what didn’t, and a few things I wish I’d known before I started.
Why Sand A Cement Floor?
There are many reasons to sand a cement floor. For me, it started with wanting a cleaner look in my garage. The surface was rough and hard to clean. Over time, dust and oil stains built up, making it feel dirty no matter how much I swept.
Some people sand their floors before painting or sealing. Others want to remove old glue or level an uneven spot. No matter your reason, sanding helps:
- Smooth rough patches
- Remove stains or old coatings
- Prepare for paint or sealers
- Even out uneven spots
When I finished my floor, it felt new. The room even looked brighter. It’s amazing how much difference a smooth floor makes.
Tools And Materials You’ll Need
The right tools can make sanding easier and safer. I learned this the hard way after trying to use the wrong sander at first! Here’s what you should have before you start.
Main Tools
- Concrete floor sander (also called a floor grinder): You can rent this from most hardware stores.
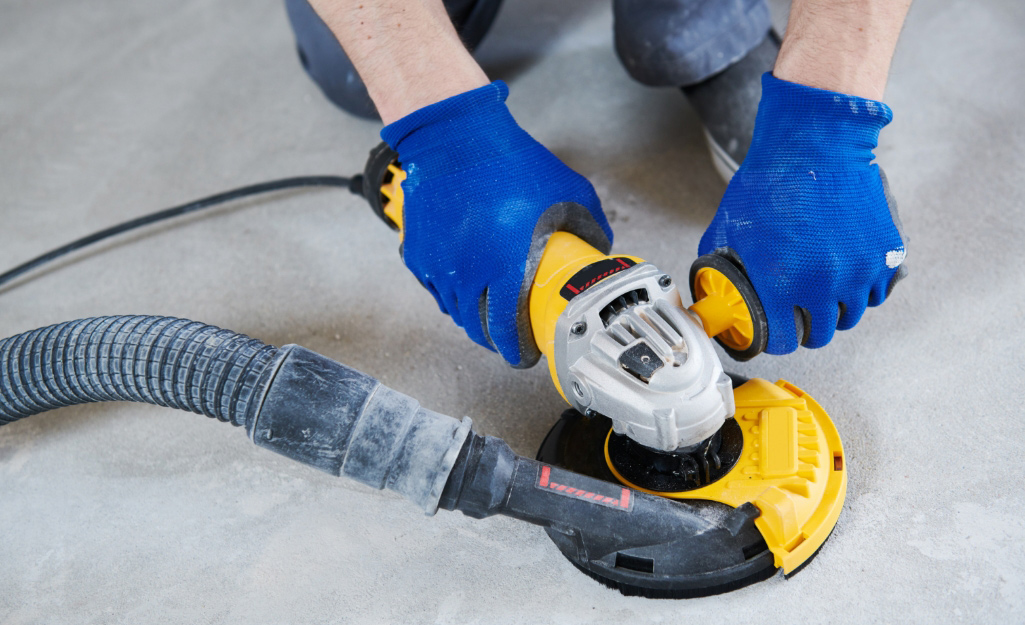
- Handheld angle grinder: Good for corners and edges.
- Shop vacuum: Keeps dust under control.
- Extension cords: Most sanders need a lot of power.
- Buckets and mops: For cleaning before and after.
Safety Gear
Don’t skip this part. Concrete dust is not safe to breathe.
- Dust mask or respirator
- Safety goggles
- Hearing protection
- Thick gloves
- Knee pads (if you’re doing edges by hand)
Other Supplies
- Diamond sanding pads (different grits, usually 30, 60, and 120)
- Plastic sheeting: Protects walls and furniture from dust.
- Duct tape: For sealing doors or covering vents.
When I started, I thought a simple mask was enough. I was wrong—the dust got everywhere. Covering vents and wearing a good mask made a big difference.
Choosing The Right Sander And Pads
Not all sanders are the same. I tried a small orbital sander at first, and it did almost nothing. Floor grinders are heavy, but they do the job right.
| Type of Sander | Best For | Pros | Cons |
|---|---|---|---|
| Walk-behind Floor Grinder | Large, open areas | Covers ground fast, even finish | Heavy, needs rental, loud |
| Handheld Angle Grinder | Edges, corners, small spaces | Easy to control, affordable | Slow for big jobs, can gouge floor |
| Orbital Sander | Light smoothing | Easy to use | Not strong enough for rough concrete |
For most floors, you’ll want a floor grinder with diamond pads. The grit size matters too. Lower numbers (like 30) are rough and remove more material. Higher numbers (like 120) are smoother for finishing.
How To Prepare The Floor
Preparation is key. I rushed this step the first time and regretted it. Here’s what to do before you even plug in the sander:
1. Empty The Room
Move everything out. Cement dust gets everywhere. I even covered the door with plastic to keep dust out of other rooms.
2. Clean The Floor
Sweep and mop. Pick up dirt, grease, and anything sticky. Grit and debris can scratch the floor or clog your sander.
3. Check For Nails Or Screws
Remove any metal. Even a tiny nail can ruin a sanding pad or send sparks flying. I missed a screw once—scary sparks!
4. Seal Doors And Vents
Use plastic and duct tape. This step keeps dust from spreading through your house.
5. Mark Problem Areas
Walk around and look for cracks, high spots, or sticky patches. I used chalk to circle the worst areas so I wouldn’t miss them.
A clean, empty room makes sanding much easier. It also helps you see your progress.
Step-by-step Sanding Process
Here’s how I tackled my floor, step by step. Each stage matters if you want a great result.
Step 1: Start With A Coarse Pad
Attach a coarse diamond pad (like 30 grit) to the floor grinder. This pad will remove the roughest spots and level the floor.
- Move the sander in slow, overlapping passes.
- Don’t push too hard. Let the machine do the work.
- Start in one corner and work across the room.
The first pass is noisy and dusty. I was surprised how quickly the floor started to look better.
Step 2: Vacuum Between Passes
After each grit, vacuum the floor. Concrete dust hides uneven spots. Use a shop vac with a HEPA filter if possible.
This step seems small, but it helped me see which areas still needed work. Skipping the vacuum means you might miss rough patches.
Step 3: Repeat With Medium And Fine Pads
Switch to a medium grit pad (like 60), and repeat the same process. This step smooths out scratches from the first pad.
Then, move to a fine grit pad (like 120). This pad gives the floor a nice, even look. After this, the surface should feel smooth to the touch.
| Grit Level | Main Purpose | Surface Feel |
|---|---|---|
| 30 | Heavy removal, leveling | Rough, gritty |
| 60 | Smoothing, blending | Less rough |
| 120 | Finishing | Smooth |
Step 4: Sand Edges And Corners
The big sander can’t reach every spot. I used a handheld angle grinder for corners and edges. Go slow here—if you press too hard, you can gouge the floor.
I found kneeling pads really helped. Working on the edges takes time but is worth it for a neat look.
Step 5: Final Cleaning
When you’re done sanding, vacuum again. Mop the floor to pick up fine dust. I changed the water a few times—concrete dust is stubborn!
If you plan to paint or seal the floor, let it dry completely. Even a little moisture can cause problems with paint.
Common Problems And How To Avoid Them
I made a few mistakes the first time. Here’s what I learned, so you don’t have to repeat my errors.
The Floor Isn’t Level
If your floor has high spots that won’t go away, check if your sander is level. Sometimes, uneven pad wear makes the machine tilt. Changing pads or adjusting the handle can help.
Dust Everywhere
I thought taping the doors was enough, but dust still got out. Running a shop vacuum while sanding reduced the dust a lot. Some machines even have a vacuum hookup.
Swirl Marks
Pressing too hard or moving too fast can cause swirl marks. It’s better to make two light passes than one heavy one. I learned to slow down and let the sander glide.
Pad Wears Out Fast
Concrete is tough. Cheap pads don’t last. Renting or buying good diamond pads made a big difference for me.
Edges Look Different
Using a different tool on the edges can sometimes make them look smoother or rougher than the main floor. I tried to match the grit size with the main sander for a consistent look.

What To Do After Sanding
Once your floor is smooth, what’s next? I had a few choices, and you will too.
1. Paint Or Seal
A sealer protects against stains and makes cleaning easier. I used a water-based sealer for a natural look. If you want color, there are special concrete paints.
2. Leave Bare
If you like the plain concrete look, just keep it clean. A smooth floor is less dusty and easier to sweep.
3. Install Flooring
Sanding makes a great base for tile, carpet, or laminate. I put rubber mats in part of my garage for a softer feel.
Always wait until the floor is 100% dry before applying paint or sealer. Even small damp spots can cause peeling or bubbles.
Tips I Wish I Knew Before I Started
Here are a few things I learned the hard way. I hope they save you time and headaches.
- Rent a good vacuum. Concrete dust is finer than regular dirt.
- Use more pads than you think. It’s better to have extras than to run out halfway.
- Ear protection is a must. These machines are loud.
- Work in small sections. It’s easier to check your progress and fix mistakes.
- Don’t rush the prep. Time spent cleaning and sealing makes sanding much easier.

How Long Does It Take?
My first 400 square feet took about six hours, including cleaning and breaks. The actual sanding took about four hours, but prep and cleanup added time. Bigger floors or deep stains might take longer.
Here’s a rough guide:
| Floor Size | Estimated Time | Difficulty |
|---|---|---|
| 100 sq ft (small room) | 2-3 hours | Easy |
| 400 sq ft (garage) | 5-6 hours | Moderate |
| 800 sq ft (basement) | 8-10 hours | Hard |
The work is noisy and dusty, but seeing the floor transform is worth it.
Safety And Environmental Tips
Cement dust is not just messy—it can be harmful. After my first time, I coughed for days. Now I always:
- Use a good dust mask or respirator
- Open windows when possible
- Wear long sleeves and gloves
- Keep pets and kids away
Dispose of the dust in a sealed bag. Don’t wash it down the drain, since it can clog pipes.
When To Call A Pro
Most small to medium floors are a DIY job. But, if your floor is cracked, badly stained, or larger than 1,000 square feet, you might want help. Professional sanding is fast and leaves a perfect finish, but it costs more.
I did my own garage, but I’d hire help for a whole basement.
For more on professional floor sanding, check out this Wikipedia article.
Frequently Asked Questions
How Much Does It Cost To Sand A Cement Floor?
If you do it yourself, expect to spend $150-$400 for rental tools, pads, and safety gear. A pro might charge $2-$5 per square foot, depending on the job size and your location.
Can I Sand A Painted Cement Floor?
Yes, but it takes longer. Old paint can clog pads, so start with a coarse grit and vacuum often. Some paints may need a chemical stripper before sanding.
What Grit Should I Use First?
Start with 30 grit for rough floors or heavy stains. If your floor is in good shape, you can try 60 grit. Always finish with a 120 grit pad for a smooth surface.
Do I Need To Seal The Floor After Sanding?
Sealing isn’t required, but I recommend it. Sealer keeps dust down and makes cleaning easier. It also protects against stains and moisture.
Can I Use A Regular Wood Sander On Cement?
No. Wood sanders don’t have the power or the right pads for cement. They can break or wear out fast. Always use a concrete floor grinder or angle grinder with diamond pads.
Sanding a cement floor takes effort, but the results are worth it. With the right tools, a bit of planning, and a few lessons from my own mistakes, you’ll get a smoother, cleaner floor—and maybe even enjoy the process.
As an Amazon Associate, We earn from qualifying purchases