Can You Sand Plexiglass Edges? My Honest, Hands-on Experience
If you’ve ever worked with plexiglass (also called acrylic), you know how sharp and rough the edges can get after cutting. I learned this the hard way the first time I cut a piece for a DIY window. I still remember running my finger along the edge and getting a tiny cut. That’s when I realized—those edges need smoothing, not just for looks, but for safety too.
I often get asked, “Can you sand plexiglass edges? ” The short answer is yes, you can. But there’s a right way and a wrong way. Over the years, I’ve tried different methods, made a bunch of mistakes, and finally figured out what works best.
In this article, I’ll walk you through everything I’ve learned—step by step—so you don’t have to repeat my mistakes.
Why Sand Plexiglass Edges?
When you cut plexiglass, whether with a saw, knife, or laser, the edges usually turn out rough, sharp, or cloudy. Not only do they look bad, but they can also be dangerous to touch. Sanding the edges makes them:
- Safer to handle (no more cuts!)
- Smoother to the touch
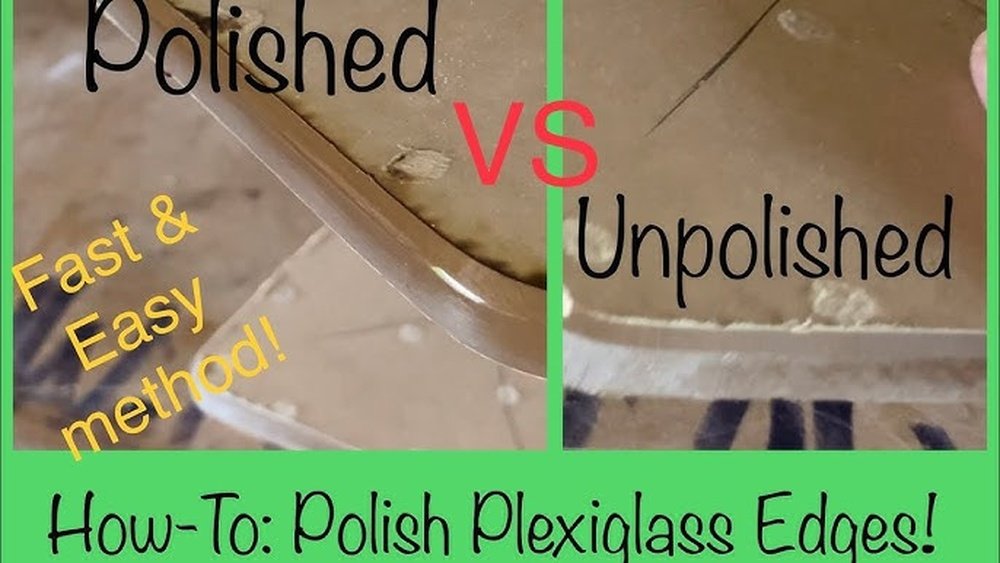
- Better looking—sometimes almost as clear as glass
I once tried skipping the sanding step, thinking it wasn’t important. But when I installed the panel, the jagged edge caught on my sleeve and left a scratch on my skin. That’s when I realized, even if you’re in a hurry, don’t skip this part.
What You Need Before Sanding Plexiglass
Let’s talk about the tools and supplies. I’ve tried everything from sandpaper to power tools. Here’s what I recommend:
- Sandpaper: Start with 180-grit, then 320-grit, and finish with 600-grit or higher for a super smooth edge.
- Sanding block: This helps keep the sandpaper flat and the edge even.
- Water: Wet sanding reduces scratches and keeps dust down.
- Masking tape: Protects the surface from accidental scratches.
- Safety gear: Wear glasses and a mask if you’re using power tools.
- Polishing compound (optional): For a glass-like shine.
Don’t worry if you don’t have fancy gear. For most small projects, regular sandpaper and a bit of patience work just fine.
How To Sand Plexiglass Edges: Step-by-step
Here’s the process I follow every time. It works for both small and large pieces.
1. Prepare The Surface
First, I always cover the flat surfaces near the edge with masking tape. This stops the sandpaper from scratching the good side. Trust me, I’ve learned the hard way—one slip and you’ll have a big scratch that’s impossible to hide.
2. Start With Coarse Sandpaper
Wrap 180-grit sandpaper around a sanding block. Hold the plexiglass steady (I like to use clamps, but your hand works for small pieces). Sand the edge with even strokes. Go slow. Don’t press too hard or you’ll melt the acrylic.
After a few passes, stop and check your progress. The edge should start to look less jagged. If you see deep cuts or chips, keep sanding until they’re gone.
3. Move To Finer Grits
Once the edge feels smoother, switch to 320-grit. Repeat the process with light, even strokes. For a super smooth finish, wet the sandpaper with water. This is called “wet sanding. ” It makes a big difference—less dust and fewer scratches.
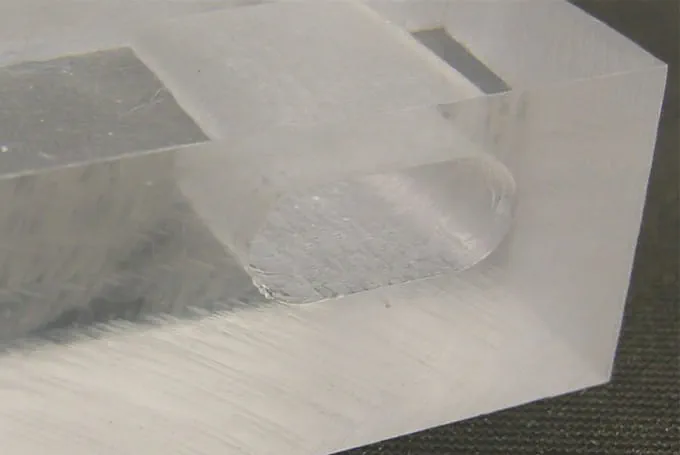
Finish with 600-grit (or even 1000-grit if you want a polished look). By now, the edge should feel silky smooth. If you run your finger along it, you shouldn’t feel any rough spots.
4. Optional: Polish For A Glass-like Edge
If you want the edge to look like real glass—clear and shiny—use a plastic polish. Put a dab on a soft cloth and rub the edge in small circles. There are special compounds made for plexiglass, but even regular car polish can work in a pinch.
One time, I used toothpaste as a polish because I ran out of the real stuff. It worked surprisingly well for a small project!
Dry Sanding Vs. Wet Sanding
Over time, I’ve learned that wet sanding gives the best results. Here’s why:
| Method | Pros | Cons |
|---|---|---|
| Dry Sanding | Quick and easy No mess | More scratches Dust everywhere |
| Wet Sanding | Smoother finish Fewer scratches Less dust | A bit messy Needs extra cleanup |
Whenever I want a perfect edge, I always finish with wet sanding. It’s worth the extra cleanup.
Hand Sanding Vs. Power Tools
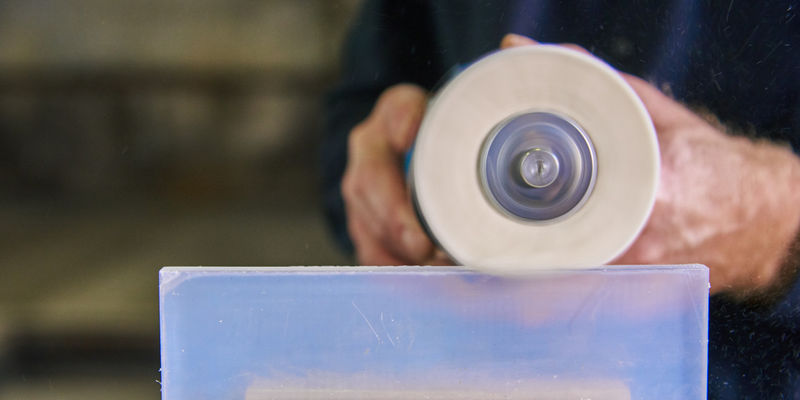
You can sand plexiglass by hand or use tools like a rotary tool (Dremel) or a sander. Here’s what I’ve learned from both:
| Method | Best For | What to Watch Out For |
|---|---|---|
| Hand Sanding | Small pieces Detailed control | Slower Tiring for big jobs |
| Power Tools | Large pieces Fast removal | Easy to melt plastic Can gouge edge |
I usually stick with hand sanding for anything smaller than a window. For big projects, I’ll use a sander, but I keep the speed low and take breaks so I don’t melt the edge.
Common Mistakes I’ve Made (so You Don’t Have To)
I wish someone had told me these tips when I started:
- Sanding too fast: Plexiglass melts easily if you press too hard or use high-speed tools. Always go slow and use light pressure.
- Skipping grits: Jumping from rough to super fine sandpaper leaves scratches. Move up one grit at a time.
- Forgetting masking tape: One slip and your beautiful surface gets scratched.
- Using dirty sandpaper: Old sandpaper can grind dirt into the plastic and make deep marks.
- Not cleaning between grits: Always wipe the edge before moving to a finer grit.
- Not testing on scrap: If you’re unsure, practice on a leftover piece first.
One time, I got impatient and used my power sander at full speed. The edge melted, curled, and turned white. I had to start over with a new piece. Lesson learned!
How Sanded Plexiglass Compares To Other Materials
You might wonder—how does sanding plexiglass compare to glass or polycarbonate? Here’s a quick comparison from my experience:
| Material | Ease of Sanding | Edge Finish | Special Tips |
|---|---|---|---|
| Plexiglass | Easy | Smooth, can polish clear | Use low speed, light pressure |
| Glass | Hard (needs diamond tools) | Very smooth, stays frosted | Wear gloves, edges remain sharp |
| Polycarbonate | Moderate | Smooth, hard to polish clear | Scratches easily, don’t overheat |
I find plexiglass the most forgiving. You can fix most mistakes, as long as you don’t melt the edge.
Real-world Examples: When I Sanded Plexiglass
Let me share a couple of quick stories.
Last year, I made a custom shelf for my bathroom window. After cutting the plexiglass, the edges were so rough, I almost gave up. But after 15 minutes of sanding with 180, 320, then 600 grit, and a bit of polish, the edge looked amazing—almost like store-bought glass.
Another time, I helped a friend build a display case. We skipped the masking tape to save time. Big mistake! The sandpaper scratched the surface, and we had to cut a new panel. Now, I never skip that step.

Non-obvious Tips For Perfect Edges
Through trial and error, I’ve found a few tricks that most people miss:
- Sand in one direction (not back and forth) for the final pass. This avoids swirl marks.
- Keep a spray bottle handy for wet sanding. It’s easier than dunking your sandpaper in water all the time.
- Let the sandpaper do the work. If you feel heat, you’re pressing too hard.
- Use a new piece of sandpaper for the final polish. Old grit can scratch.
- Buff with a microfiber cloth after polishing. It brings out a clear shine.
When Not To Sand Plexiglass
Sometimes, sanding isn’t the best option. If the plexiglass is super thin, sanding can crack or chip it. Also, if you need a perfectly clear edge (like in art frames), you might want to use a flame polishing technique instead. But that’s a bit advanced and needs practice and care—since it uses a small torch.
If in doubt, test on a scrap piece first. I once ruined a 1/16-inch sheet by sanding too hard—it snapped in two.
Is Sanding Safe?
Sanding plexiglass is pretty safe if you take a few simple steps:
- Wear safety glasses. Tiny bits can fly up.
- Use a mask if you’re creating dust.
- Sand in a well-ventilated area.
- Keep your hands away from power tools.
I’ve never had a serious injury, but I’ve had a few close calls with splinters and dust in my eyes. Safety is always worth the extra second.
When To Replace Sanded Plexiglass
If your plexiglass has deep cracks, cloudy spots that won’t polish out, or is brittle from age, sanding won’t fix it. Sometimes, it’s better to buy a new piece. I learned this the hard way after spending hours sanding an old, yellowed panel—it never looked right.
Final Thoughts: Is It Worth The Effort?
From my own experience, sanding plexiglass edges is absolutely worth it. A bit of time with sandpaper makes your project safer, smoother, and more professional-looking. Sure, it takes patience, but the results speak for themselves. Next time you cut plexiglass, don’t skip the sanding.
You’ll thank yourself every time you run your hand along that smooth edge.
If you want more info about working with plastics, there’s a good guide at Wikipedia.
Frequently Asked Questions
How Long Does It Take To Sand Plexiglass Edges?
For a small piece, it usually takes me 10 to 20 minutes from start to finish. If you want a polished edge, add another 5–10 minutes for polishing.
Can I Use A Regular Sander Or Dremel Tool?
Yes, but be careful. Use the lowest speed and don’t press hard. High speed can melt or gouge the edge. For detailed work, I prefer sanding by hand.
What Is The Best Grit Sandpaper For Plexiglass?
Start with 180-grit to remove rough spots. Move to 320-grit for smoothing, then finish with 600-grit or higher for a clear edge. Don’t skip grits for best results.
Can I Sand Colored Or Tinted Plexiglass?
Yes, but go slow. Colored plexiglass can show scratches more easily. Always test on a scrap piece first to see how it reacts.
Is Sanding Plexiglass Edges Better Than Flame Polishing?
For most home projects, sanding is easier and safer. Flame polishing gives a glass-clear edge but takes practice and can crack the plastic if done wrong. I only use it for special projects.
If you have more questions, feel free to ask. I’m always happy to share what I’ve learned!
As an Amazon Associate, We earn from qualifying purchases