Can You Sand Porcelain Tile Edges? My Hands-On Experience & What I Learned
I remember the first time I stared at the sharp edges of porcelain tiles in my bathroom. I wanted a smooth finish, just like you see in those home design magazines. But I had so many questions. Can you sand porcelain tile edges? Will I ruin the tile? What tools do I need? I dove in, made a few mistakes, and learned a lot along the way. In this article, I’ll share everything I wish I knew before I started. If you’re planning to sand porcelain tile edges, let’s walk through the process together.
Understanding Porcelain Tile Edges
Porcelain tiles are known for being tough. They’re fired at high temperatures, which makes them dense and hard. This means their edges can be very sharp after cutting. If you want a professional look, or if you’re worried about safety, you’ll want those edges smoother.
At first, I thought it would be like sanding wood. Just grab some sandpaper, right? But porcelain is much harder than wood, and even harder than most ceramics. Regular sandpaper won’t do the job. You need special tools and techniques.
Why Sand Porcelain Tile Edges?
There are a few good reasons to sand or smooth tile edges:
- Safety: Freshly cut tile edges can be razor-sharp. I actually cut my finger once, and I don’t want anyone else to have the same experience.
- Appearance: Smoothed edges look more finished, especially on visible borders or around sinks and tubs.
- Better Fit: Sometimes, tiles need small adjustments to fit snugly.
I learned that sometimes you don’t need to sand every tile—just the ones that will be exposed or touched.
Is It Possible To Sand Porcelain Tile Edges?
Yes, you can sand porcelain tile edges, but it’s not as simple as sanding wood or drywall. Porcelain is very hard—so hard that only certain abrasives will work. You’ll need the right tools, patience, and a gentle touch.
I’ll walk you through the main options, what worked for me, and what didn’t.
Tools And Materials For Sanding Porcelain Tile Edges
After some trial and error, here are the tools I found most useful:
| Tool | Best For | My Experience |
|---|---|---|
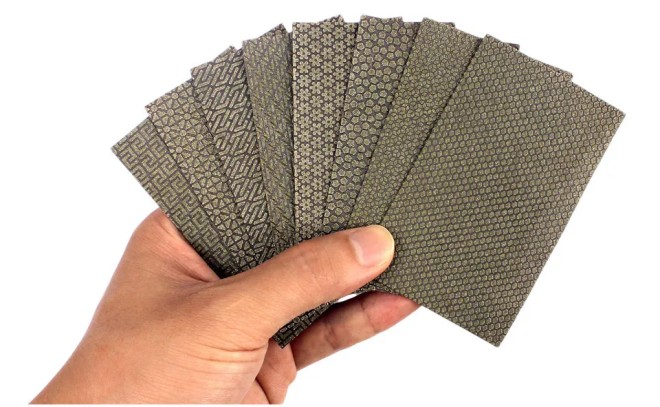
| Diamond Hand Pad | Small adjustments, smoothing chips | Easy to control, good for corners |
| Diamond File | Detailed shaping | Great for tight spots |
| Diamond Polishing Pad (on grinder) | Large edges, fast work | Powerful, but easy to overdo |
| Sanding Stone/Rubbing Brick | Basic smoothing | Slower, but safe for beginners |
| Silicon Carbide Sandpaper (very coarse) | Finishing touches | Good for light smoothing |
What Not To Use
- Regular sandpaper: It wears out almost instantly.
- Metal files: They scratch but don’t really smooth porcelain.
- Cheap pads: They break down fast.
If you’re going to invest in one tool, I recommend a diamond hand pad. It’s easy to use and lasts a long time.
Step-by-step: How I Sanded Porcelain Tile Edges
Here’s the process I followed. It took me some time to get good results, but you can learn from my mistakes.
1. Safety First
Wear safety goggles and a dust mask. Porcelain dust is sharp and not good to breathe. If you’re using a power tool, ear protection helps too.
2. Secure The Tile
I always placed my tile on a sturdy, flat surface. A rubber mat kept it from sliding. If you’re sanding a tile that’s already installed, tape off nearby surfaces to protect them.
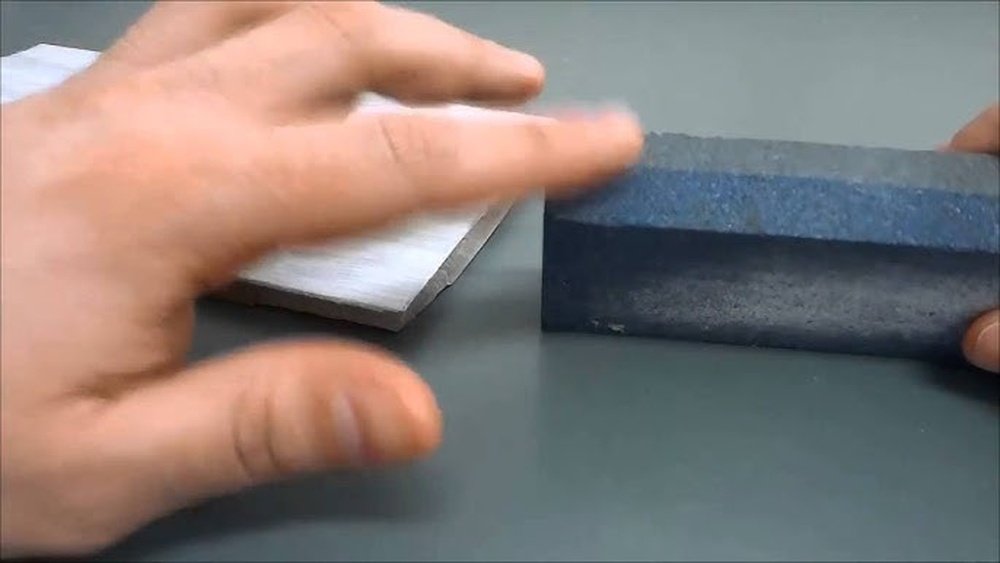
3. Start With A Diamond Hand Pad
I used a medium-grit diamond hand pad (about 200-400 grit). Hold it at a slight angle to the edge. Use gentle, even strokes. Don’t press too hard. Porcelain may look smooth, but it can chip if you push too much.
4. Check Progress Often
After every few strokes, I checked the edge. Porcelain doesn’t show changes right away, so patience is key. I found that sanding in one direction (not back and forth) gave a cleaner finish.
5. Move To Finer Grits
Once the edge was less sharp, I switched to a finer grit (800-1200). This polished the edge and made it feel silky smooth. If I skipped this step, the edge stayed dull and rough.
6. Wipe And Inspect
Dust can hide rough spots. I always wiped the edge with a damp cloth and ran my finger along it. If I felt any sharp spots, I repeated with the finer pad.
7. Polish (optional)
For a truly glossy edge, I used a fine diamond polishing pad. This step isn’t necessary for most projects, but it makes a big difference if the edge will be visible.
Mistakes I Made (and How You Can Avoid Them)
I wish someone had told me these things before I started:
- Rushing: The harder I pressed, the more likely the tile chipped. Go slow.
- Wrong Tools: I wasted money on regular sandpaper and metal files.
- Skipping Grits: Jumping from coarse to fine left scratches.
- Not Wearing Protection: Porcelain dust gets everywhere. Wear a mask.
- Over-polishing: On some tiles, polishing makes the edge shinier than the glazed surface. Test on a scrap piece first.

Comparing Methods: Hand Sanding Vs. Power Tools
I tried both hand and power methods. Here’s what I found:
| Method | Speed | Control | Risk of Damage |
|---|---|---|---|
| Hand Sanding | Slow | Very high | Low |
| Power Tools (Angle Grinder) | Fast | Medium | High |
| Rubbing Brick | Medium | High | Very low |
For beginners, I strongly recommend starting by hand. Power tools remove material quickly, but it’s easy to slip and chip the tile. If you do use an angle grinder, always use a diamond polishing pad, not a cutting wheel.
Wet Vs. Dry Sanding
I learned that wet sanding is much less dusty. Wet the pad and the tile edge with water as you sand. This keeps dust down and helps the pad last longer. Dry sanding works, but cleanup is a pain and the dust can be bad for your lungs.
One thing to note: If your tile is already installed, protect floors and walls from water.
Can You Round Or Bevel Porcelain Tile Edges?
Sometimes, you want more than just a smooth edge. You might want a beveled or rounded edge, especially on countertop tiles or steps. It’s possible, but it takes more time and patience.
- Use a coarse diamond pad or a diamond file to shape the edge.
- Move slowly, shaping the edge a little at a time.
- Finish with finer grits for a polished look.
I once tried to do a big bevel in one pass. Bad idea—the tile chipped. Small, gentle strokes work best.
How Long Does It Take?
The first tile edge I sanded took about 10 minutes by hand. Once I got the hang of it, I could do each edge in about 3-5 minutes. Power tools are faster but risky. For a whole room, I recommend doing a few tiles at a time to avoid getting tired or making mistakes.
When Should You Call A Pro?
If you need a lot of fancy edges or want a perfect factory finish, consider hiring a tile pro. They have special machines (like wet saws with tilting tables) and lots of experience. But for most home jobs—backsplashes, bathroom edges, small touch-ups—you can get great results yourself with patience.
Common Questions And Answers
After talking with friends and other DIYers, I realized a few questions come up again and again. Here are the answers I’ve learned from experience.
How Do I Know If My Tiles Are Porcelain?
Porcelain is usually heavier and denser than ceramic. The back of the tile is often the same color as the surface. If you’re still not sure, you can find simple tests and guides on Wikipedia.
Can I Use A Regular Tile Cutter To Smooth Edges?
No. Tile cutters are made for straight cuts, not for smoothing. They leave sharp edges. You’ll still need to sand or polish after cutting.
Will Sanding Damage The Tile’s Glaze?
If you only sand the edge, you’re safe. Stay away from the surface. If you slip and scratch the glazed face, it’s very hard to repair. I learned to tape the glazed side for extra protection.
What Grit Should I Start With?
Start with a medium grit (200-400) diamond pad for rough edges. Move to fine grit (800-1200) for polishing. Skipping grits leaves scratches.
Is It Safe For Wet Areas Like Showers?
Yes, as long as you seal the grout and keep the edge smooth, sanded porcelain holds up well in wet spots. I’ve had sanded edges in my shower for years with no problem.

Real-world Tips That Made My Life Easier
- Mark the edge with a pencil before sanding. It helps you stay on track.
- Practice on a scrap tile before doing the real thing.
- Use water to keep the dust down and the pad cool.
- Don’t try to do every edge. Only sand what will be seen or touched.
- Take breaks. It’s not a race.
The Bottom Line
Sanding porcelain tile edges isn’t as easy as sanding wood, but it’s totally possible with the right tools and a little patience. I’ve done it by hand, with power tools, and even made a few mistakes along the way. The feeling of running your fingers over a perfectly smooth edge is worth the effort.
If you’re planning a tile project, don’t be afraid to try. Just remember to go slow, use the right gear, and protect yourself from dust. You’ll get better with every tile.
Frequently Asked Questions
How Can I Tell If My Sanded Edge Is Smooth Enough?
Run your finger gently along the edge. If you feel any sharp spots, sand a little more. The edge should feel like polished stone, not rough or jagged.
What’s The Best Way To Sand Curved Edges Or Corners?
For curves, a diamond file works best. Move slowly and use short strokes. For inside corners, a small diamond hand pad can reach where larger tools can’t.
Can I Use Water When Sanding Installed Tiles?
Yes, but use a damp sponge or spray bottle. Don’t flood the area, especially near walls or electrical outlets.
How Do I Avoid Chipping The Tile?
Always use gentle pressure and a medium to fine grit. Never force the tool. If you see a chip forming, stop and switch to a finer pad.
Are There Special Pads For Different Tile Colors?
No, the color doesn’t matter. What matters is the hardness of the tile. Always use diamond abrasives for porcelain, no matter the color.
I hope my experience helps you get the smooth, safe tile edges you want! If you have other questions, feel free to ask—I’ve made all the mistakes so you don’t have to.
As an Amazon Associate, We earn from qualifying purchases