Attaching a Dremel cutting wheel seems simple, but I remember the first time I tried it. I felt nervous, not wanting to break the wheel or hurt myself. If you’re like me, you want clear steps, not confusing instructions. So, let me walk you through how to attach a Dremel cutting wheel, just like I do in my own shop.
I’ll share the little things I wish someone had told me, and by the end, you’ll feel ready and confident.
Understanding Dremel Cutting Wheels
Before we start, it helps to know what a Dremel cutting wheel is. The cutting wheel is a small, flat disc made for slicing metal, plastic, or wood. Dremel makes different types: some are thin and for metal, others are thicker for wood or plastic. Most wheels are made from hard materials like fiberglass or resin. Some are even coated with diamond dust for tougher jobs.
When I first bought my Dremel, I didn’t realize how many wheel types there were. I grabbed the wrong one and wondered why it wore out so fast. If you’re not sure, always check the label on the wheel. It tells you what it’s for—metal, wood, or plastic.
Tools And Materials You Need
To attach a Dremel cutting wheel, you need just a few things:
- Dremel rotary tool – Any model works. I use the Dremel 3000.
- Cutting wheel – Choose the right type for your project.
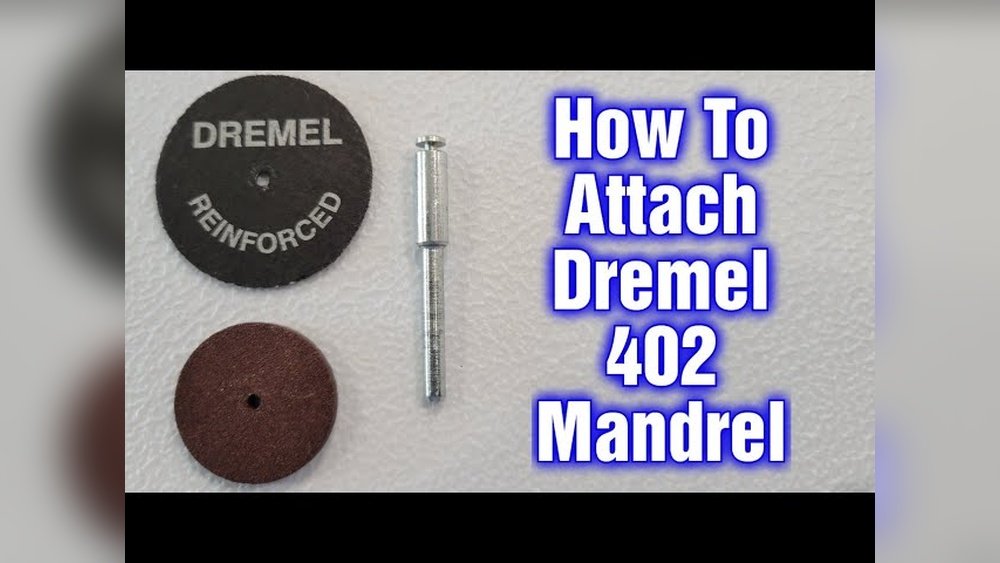
- Mandrel – This is the small metal rod that holds the wheel. Most kits include a mandrel.
- Small screwdriver – Usually a flathead. Some Dremel kits give you one.
- Safety glasses – Tiny pieces can fly off. Don’t skip these.
- Work gloves – Optional, but I like to protect my hands.
Having these ready saves time. I once started without safety glasses. A piece snapped, and I learned my lesson fast.
Types Of Dremel Mandrels
Dremel cutting wheels attach with a mandrel. There are two main types I use:
| Mandrel Type | Attachment Method | Common Wheel Type |
|---|---|---|
| Standard Screw Mandrel (402) | Flathead screw on top | Fiberglass, basic cut-off wheels |
| EZ Lock Mandrel (EZ402) | Pull-and-twist cap | EZ Lock wheels |
The standard screw mandrel is what I started with. It’s simple, but you need a screwdriver. The EZ Lock mandrel is faster and tool-free. If you plan to change wheels often, the EZ Lock is worth it.
Step-by-step: Attaching A Dremel Cutting Wheel
Let me break down the steps I follow. I’ll include tips that have saved me time (and frustration).
1. Unplug Or Turn Off The Dremel
This sounds obvious, but I sometimes forget. Always make sure your Dremel is unplugged or the battery is removed. Safety comes first.
2. Gather Your Parts
Lay out the mandrel, cutting wheel, and screwdriver. I like to do this on a towel so nothing rolls away.
3. Insert The Mandrel
Find the small hole in the end of the Dremel. Insert the mandrel shaft into the tool’s collet (the little metal sleeve that holds bits). Hold down the spindle lock button on the Dremel and twist the mandrel in by hand.
Then, use the wrench that came with your Dremel to tighten the collet nut. Make sure it’s snug—not too tight.
4. Attach The Cutting Wheel
Here’s where it depends on your mandrel type:
Standard Screw Mandrel
- Use the screwdriver to unscrew the tiny screw at the top of the mandrel.
- Take off the small metal washer.
- Slide the cutting wheel onto the mandrel shaft.
- Put the washer back on, then screw in the top.
- Hold the mandrel still with one hand and tighten the screw with the other.
Don’t overtighten, or the wheel can crack. The first time I did this, I broke a wheel—so be gentle.
Ez Lock Mandrel
- Pull the spring-loaded cap up.
- Insert the EZ Lock cutting wheel.
- Twist the cap to lock it in place.
It clicks when secure. I love this style because it’s fast and you don’t need tools.
5. Double-check Everything
Spin the wheel gently with your fingers. It should not wobble. If it does, loosen and retighten. A wobbly wheel can break when you start the Dremel.
6. Put On Safety Gear
Glasses are a must. Gloves are good, too. I learned the hard way that tiny pieces can hurt.
7. Test The Setup
Plug the Dremel back in, or insert the battery. Hold the tool away from your face and turn it on at a low speed. Let the wheel spin for a few seconds. Listen for odd sounds and watch for wobbling.
If Everything Looks Good, You’re Ready To Start Cutting!

Common Problems And How To Fix Them
I’ve made a lot of mistakes. Here are a few you might run into:
The Wheel Won’t Fit
Sometimes the hole in the wheel looks too small. Check if you’re using the right mandrel for the wheel. Most Dremel wheels fit the standard 402 mandrel, but EZ Lock wheels need the EZ402 mandrel.
The Wheel Wobbles
If the wheel doesn’t sit flat, take it off and put it back. Make sure the washer is there. Sometimes, dust or tiny pieces keep it from sitting right.
The Screw Won’t Tighten
If the screw at the top just spins, the threads might be stripped. I once overtightened and ruined a mandrel. Always tighten gently.
The Wheel Breaks Fast
Are you pressing too hard when cutting? Dremel wheels do best with light pressure. Let the tool do the work. I used to lean in, and the wheels snapped. Now, I go slow and steady.
Tips For A Safe And Easy Attachment
Over the years, I’ve picked up a few tricks:
- Lay out all parts before you start. Searching for screws slows you down.
- Check the wheel direction. Some wheels have a label or arrows. Face them the right way.
- Don’t skip the washer. It keeps the wheel from slipping.
- Clean your mandrel after each use. Dust can build up and cause problems.
- Replace worn mandrels. A bent or old mandrel can break wheels.
Small things make a big difference. Once, I forgot the washer and the wheel spun off during use. Scary, but I learned fast.
Choosing The Right Cutting Wheel
Not all cutting wheels are the same. Here’s a quick comparison of the main types I use:
| Wheel Type | Best For | Durability | Notes |
|---|---|---|---|
| Fiberglass Reinforced | Metal, bolts, screws | High | Doesn’t break easily |
| Basic Cut-Off Wheel | Plastic, thin wood | Low | Cheap but brittle |
| Diamond Wheel | Tile, stone, glass | Very High | Expensive but lasts long |
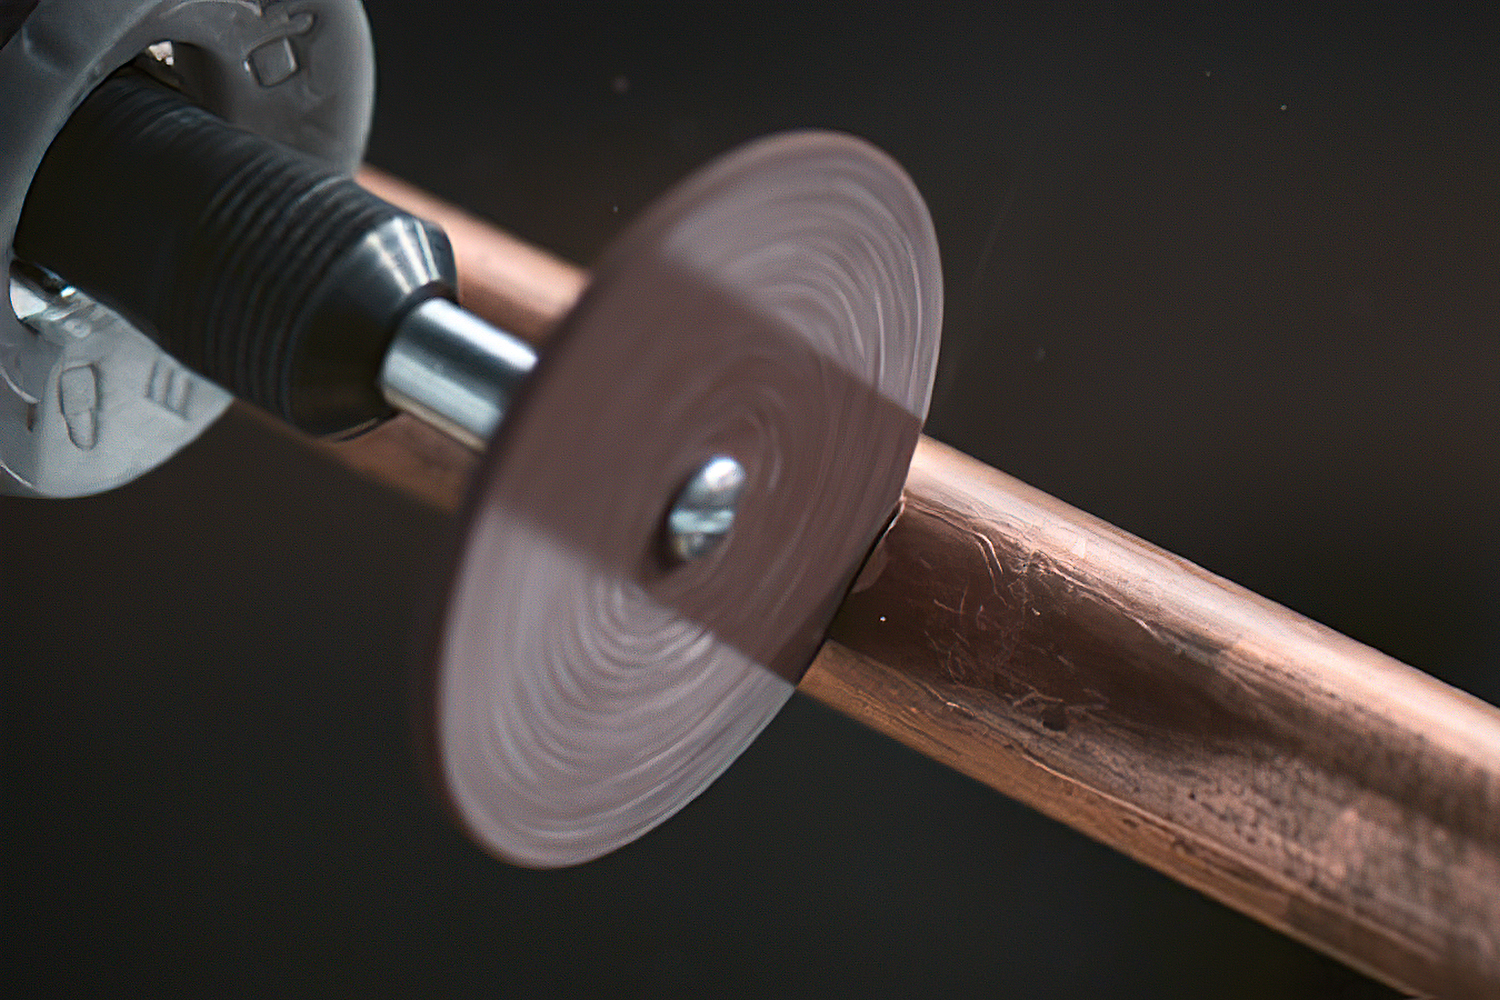
When I cut metal pipes, I use a fiberglass reinforced wheel. For plastic, I use the basic wheel to save money. For tile, I always use the diamond wheel. It costs more but doesn’t shatter.
Safety Checks Before You Start Cutting
Attaching the wheel is only half the story. A few safety checks help you avoid injury:
- Check the wheel for cracks. Even a small crack means you should toss it.
- Make sure the mandrel is tight. Loose parts can fly off.
- Hold the tool with two hands. This gives you more control.
- Never cut toward your body. Always angle the Dremel away.
- Wear hearing protection. Dremels can be loud, especially on metal.
One time, I ignored a small crack. The wheel exploded. Now, I check every time.
Real-life Example: My First Metal Cutting Project
My first real test was cutting off a rusted bolt from my old lawnmower. I attached the wheel, put on my glasses, and started. At first, I pressed too hard and broke the wheel. The next time, I let the tool do the work.
The bolt came off clean, and I felt proud.
What I learned: If it feels wrong, stop and check your setup. Most mistakes come from rushing.
Cleaning Up And Storing Wheels
After I finish, I always:
- Unplug the Dremel
- Remove the cutting wheel and mandrel
- Wipe off dust with a cloth
- Store wheels in a small box
This keeps everything ready for next time. Wheels can rust or crack if left out.
When To Replace Cutting Wheels
A wheel that’s too small, cracked, or worn is unsafe. If you notice:
- The wheel is less than half its original size
- Cracks or chips on the edge
- It wobbles when spinning
Replace it. Don’t try to use worn wheels. I once tried to save money and ended up wasting time and risking injury.
How Dremel Wheels Compare To Other Tools
You might wonder if a Dremel is the best tool for your job. Here’s a quick comparison I made when deciding between my Dremel and a full-size angle grinder:
| Tool | Best For | Precision | Safety |
|---|---|---|---|
| Dremel Rotary Tool | Small, precise cuts | High | Safer for beginners |
| Angle Grinder | Thick metal, big jobs | Low | Needs more experience |
For small projects, the Dremel is perfect. It’s less scary and easier to control. For big steel pipes, I use the angle grinder.
Non-obvious Insights I’ve Learned
- Mandrel maintenance matters. A dirty or bent mandrel causes more trouble than you’d think. I clean mine after every project.
- Wheel orientation affects performance. Some wheels have a label side—face it out for better balance.
Most guides skip these, but they’ve saved me a lot of time and hassle.
Where To Learn More
If you want more details, Dremel’s official site has great tutorials. I’ve learned a lot from their guides and videos. Here’s a link: Dremel Official Site.
Frequently Asked Questions
How Do I Know Which Mandrel To Use With My Cutting Wheel?
Most Dremel cutting wheels use the 402 standard screw mandrel. If your wheel says “EZ Lock,” you’ll need the EZ402 mandrel. Check your Dremel kit or the wheel’s packaging for the right match.
Can I Use Any Dremel Cutting Wheel On Wood?
Some Dremel wheels are made for wood, but most are for metal or plastic. Read the wheel’s label. Using a metal wheel on wood can burn the wood and ruin the wheel.
Why Does My Cutting Wheel Keep Breaking?
Most wheels break from overtightening the screw or pressing too hard while cutting. Make sure you’re using gentle pressure and the right wheel for your material.
How Tight Should I Screw On The Mandrel?
Tighten the mandrel snugly but not hard. Over-tightening can break the wheel or strip the mandrel. I use just enough force so the wheel doesn’t move when I spin it by hand.
Is It Safe To Use A Damaged Or Worn Cutting Wheel?
No, never use a cracked or damaged wheel. It can break at high speed and cause injury. Always check your wheel before every use.
Attaching a Dremel cutting wheel is easy once you know the steps. I hope my experience helps you avoid common mistakes and feel confident. Remember, take your time, use the right parts, and always put safety first. Happy cutting!
As an Amazon Associate, We earn from qualifying purchases