Taking care of my yard has always given me a strange joy—until the day my string trimmer stopped cutting. Instead of crisp edges, I got sad, whispy grass and weeds. I realized my trimmer line was worn out. The first time I replaced it, I felt nervous. I didn’t want to break anything or spend hours searching for answers. But after a few tries and some mistakes, I figured out a process that made it simple. Today, I’ll walk you through how to replace a string trimmer line, share tips I wish I knew earlier, and help you avoid the frustration I faced.
Prime Day Pick
Limited-time Prime Day price. Check current discount on Amazon.
Why Replacing Trimmer Line Matters
A healthy yard needs tools in good shape. The string trimmer line is what actually cuts the grass and weeds. When it’s old or too short, you get uneven edges and extra work. I once tried to finish my whole front yard with a worn-out line—big mistake! I had to redo the job after replacing it. Keeping your line fresh saves time, energy, and even money since you won’t overwork your trimmer.
Types Of String Trimmer Line
Before you start, it’s key to know what type of line your trimmer takes. My first trip to the hardware store left me confused—so many options! Here’s what I learned:
Prime Day Pick
Limited-time Prime Day price. Check current discount on Amazon.
| Line Shape | Best For | Notes |
|---|---|---|
| Round | Light grass, regular yards | Most common, easy to install |
| Twisted | Thicker weeds, tough grass | Less noise, more durable |
| Square/Star | Heavy weeds, large yards | Sharper edges, quick cut |
The diameter also matters. Most home trimmers use 0.065” to 0.080”. Heavy-duty ones use 0.095” or more. Always check your trimmer’s manual or the label near the spool.
Prime Day Pick
Limited-time Prime Day price. Check current discount on Amazon.

Gathering What You Need
One thing I learned: have all your tools ready before you start. Here’s what I grab every time:
- Replacement trimmer line (check the size!)
- Scissors or wire cutters
- Gloves (the line can be sharp)
- A clean rag (wiping dirt helps)
- Flat surface to work on
If you have a bump-feed or automatic feed trimmer, you may also need a screwdriver.
Understanding Your Trimmer Head
Not all trimmers are the same. I’ve used three types over the years:
- Single-line heads: Only one piece of line. Easiest to reload.
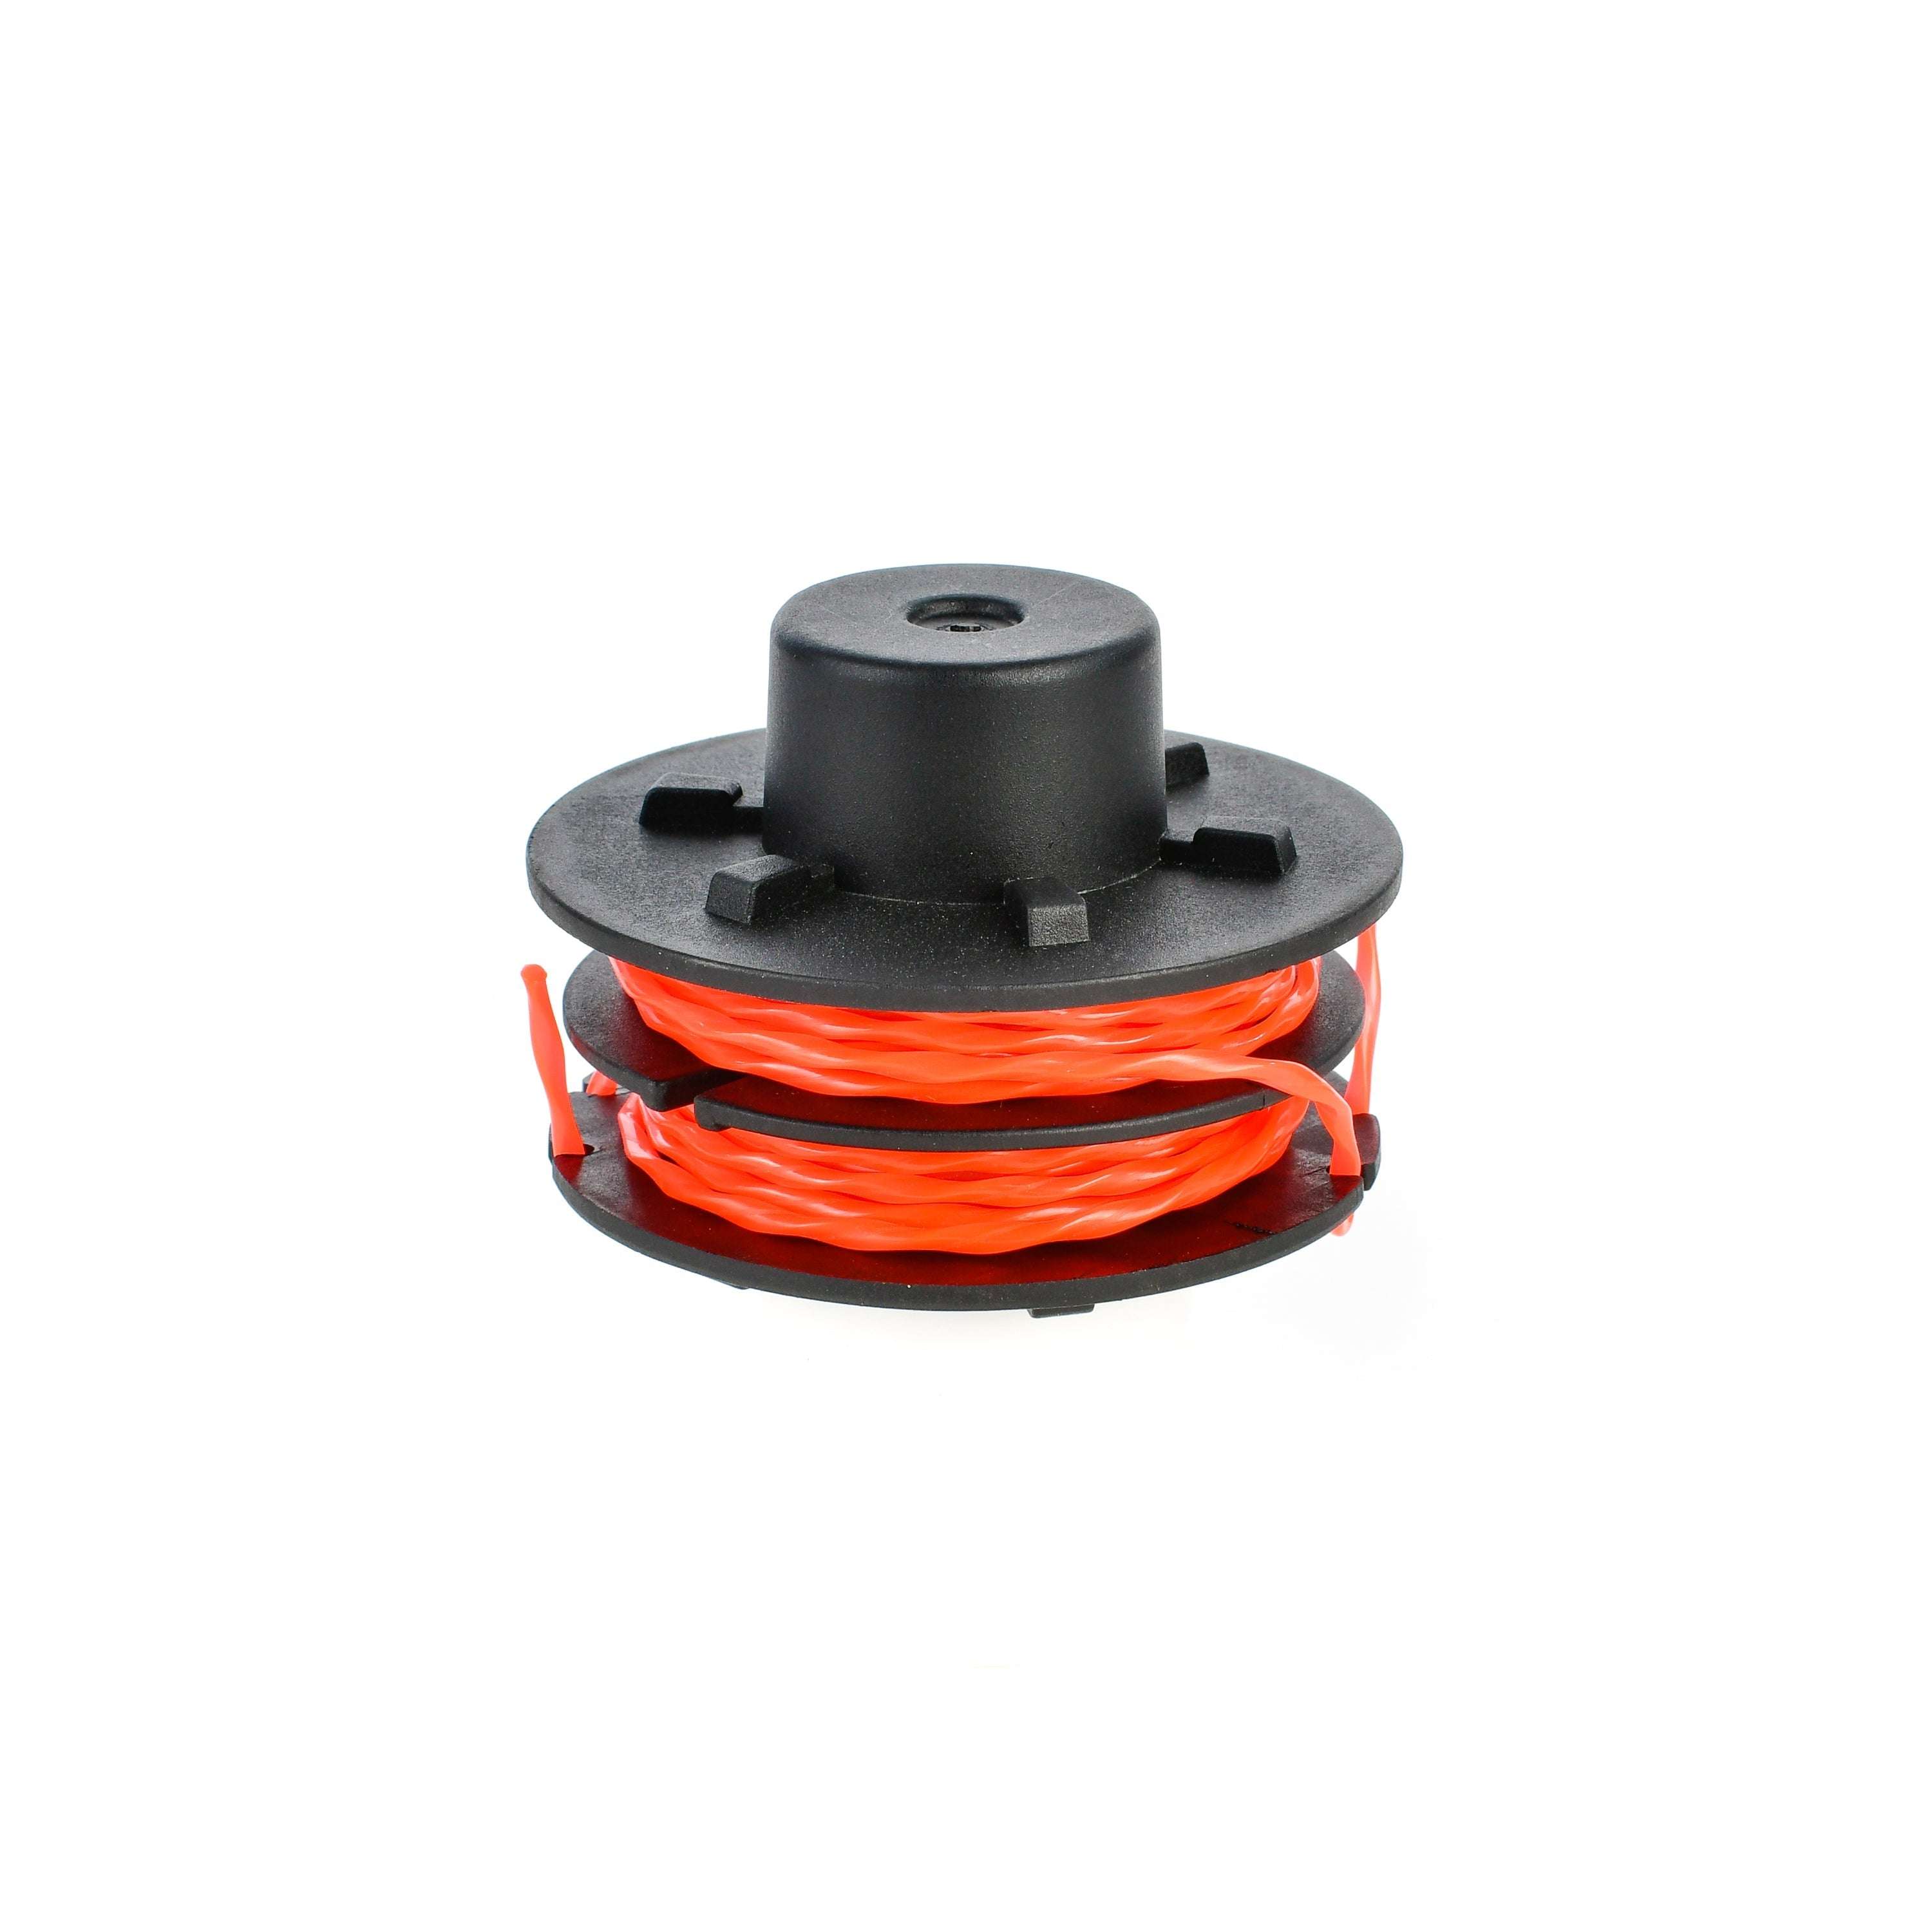
- Dual-line heads: Two lines. Cuts faster, but takes practice to reload.
- Pre-wound cartridges: Just pop in a new spool. Fastest, but more expensive.
I’ve found that dual-line heads are most common in mid-range trimmers. If you’re unsure, flip your trimmer over and look at the head. You’ll see either one or two holes where the line comes out.
Step-by-step: Replacing The Trimmer Line
Let’s get to the main event. I’ll share the steps I use, with notes for single and dual-line heads.
1. Safety First
Always unplug electric trimmers or remove the battery. For gas models, make sure the engine is off and cool. I once forgot this and almost lost a finger—never again!
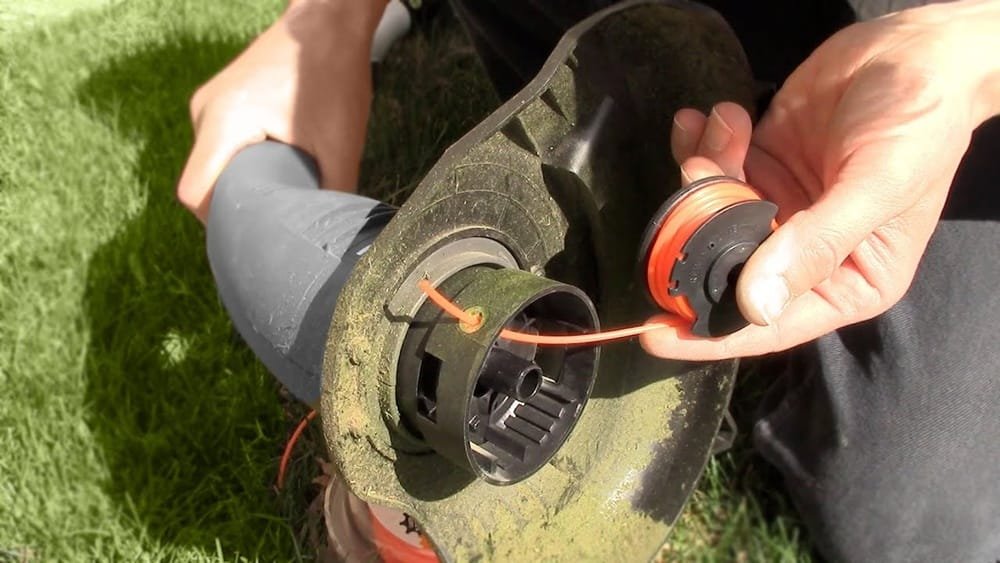
2. Remove The Spool Cap
Press the tabs or unscrew the cap on the trimmer head. I keep a rag handy since dirt always finds a way in. Set the cap aside somewhere you won’t lose it.
3. Take Out The Spool
Gently lift the spool out of the head. Some spools have a little spring—don’t let it fly away! Wipe off grass or dirt so everything stays smooth.
4. Cut The New Line
Check your manual for the right length. Most take 10 to 25 feet per side. I usually measure by stretching the line from my hand to my shoulder—about three feet per pull—then repeat until I have enough.
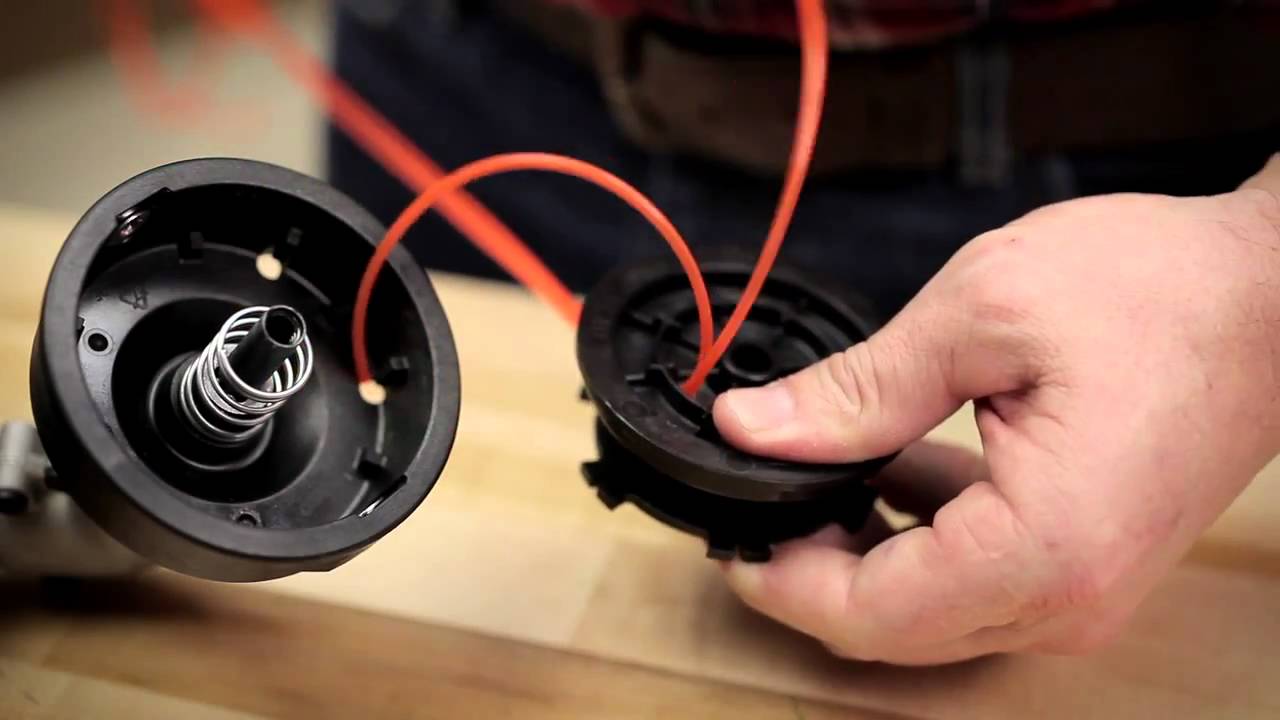
5. Insert The Line
For single-line heads:
- Find the anchor hole in the spool.
- Push one end of the line into the hole and pull it through about half an inch.
- Wind the line in the direction of the arrow on the spool. Keep it tight and even.
For dual-line heads:
- Cut two equal lengths of line.
- Insert each end into its own anchor hole.
- Wind both lines at the same time, in opposite directions if the spool has two chambers.
- Leave about 6 inches free at the end of each line.
If you don’t follow the winding direction, the line may jam or feed out wrong. I did this once, and my trimmer wouldn’t work until I rewound it correctly.
6. Secure And Replace The Spool
Slide the ends of the line through the eyelets on the trimmer head. Hold them tight, then place the spool back in. Snap or screw the cap back on. Tug gently to make sure the line feeds.
7. Power Up And Test
Plug in, insert the battery, or start the engine. Hold the trimmer away from your body, then squeeze the trigger. The line should spin freely and extend as you tap the head (bump-feed) or with the automatic system.
Common Mistakes And How To Avoid Them
The first few times I changed my trimmer line, I made some classic errors. Here’s what to watch for:
- Winding too loosely: This causes the line to jam or not feed at all.
- Using the wrong diameter: Too thick, and it won’t fit; too thin, and it breaks fast.
- Not checking the direction: Each spool has an arrow—follow it.
- Forgetting to unplug: Safety first, always.
- Leaving too much line out: Excess line whips your legs or breaks off.
A surprising tip: wipe the spool with a dry rag. Old grass clippings or dust can make the line stick or clog the feed.
When To Replace The Whole Spool
Sometimes, the spool itself is cracked, warped, or the spring is missing. If you see this, buy a new spool or a pre-wound cartridge. I resisted this for a long time, but a new spool made my trimmer work like new.
How Long Does Trimmer Line Last?
For a small yard, one spool or refill can last an entire season. If you have thick weeds or lots of edging, you’ll go through line faster. On average, I replace my line every 4-6 weeks during peak growing season.
If you notice the trimmer not cutting as well, or the line is short and ragged, it’s time for a change.
Tips For Making Line Last Longer
After years of trial and error, I found a few tricks:
- Soak the line in water overnight before installing. This makes it less brittle and helps it last longer, especially in dry climates.
- Trim before the grass gets too tall. Tough, thick weeds eat up line.
- Avoid hitting rocks, fences, or concrete. The line wears down fast on hard surfaces.
- Use the right speed. Full throttle isn’t always better—slower speeds save line on light jobs.
Comparing Trimmer Line Options
Buying the right line makes a big difference. Here’s how the main types compare based on my use:
| Type | Durability | Noise | Best Use |
|---|---|---|---|
| Round | Medium | Average | Regular grass |
| Twisted | High | Low | Thick weeds |
| Square/Star | Very High | Loud | Heavy brush |
From my experience, twisted line is a good balance for most yards. It’s quieter and lasts longer. Square line is best if you have lots of thick weeds or overgrown spots.
Pre-wound Spools Vs. Manual Winding
Some trimmers let you buy pre-wound spools. I tried these when I was busy, and they save time. But they cost more. If you have the patience, winding your own is cheaper and you can use stronger line.
Here’s a quick comparison:
| Option | Cost | Convenience | Custom Line Choice |
|---|---|---|---|
| Pre-wound | High | Very Easy | No |
| Manual winding | Low | More Steps | Yes |
If you want the fastest solution, pre-wound is great. If you want to save money and pick your line, manual winding is the way to go.
Extra Insights Most People Miss
Two things I wish someone told me earlier:
- Line material matters. Cheap lines break more often. I switched to a high-quality brand, and the difference was clear—less breakage, fewer replacements.
- Store extra line in a sealed bag with a wet paper towel. This keeps it flexible and stops it from drying out or cracking, especially if you buy in bulk.
Final Thoughts
Replacing a string trimmer line is easier than it looks. Like most things, the hardest part is getting started. With the right line, a little patience, and these steps, your trimmer will cut as good as new. Don’t be afraid to make mistakes—I did, and now I enjoy a neat yard without the stress.
If you keep your tools in shape, lawn work gets simpler and even a bit more fun.
If you want more details about different trimmer types and line options, the Wikipedia article on string trimmers is a great resource.
Frequently Asked Questions
How Do I Know What Size Trimmer Line To Buy?
Check your trimmer’s manual or look at the label near the head. Most home trimmers use 0.065” to 0.080” line. Using the wrong size can cause jams or poor cutting.
Why Does My Trimmer Line Keep Breaking?
Hitting rocks, fences, or trimming thick weeds can snap the line. Old or dry line also breaks more. Try soaking your line in water overnight to keep it flexible.
Can I Use Any Brand Of Trimmer Line?
Most brands work as long as the diameter and shape match your trimmer’s needs. I’ve mixed brands many times with no problems, but always check your manual for recommendations.
How Often Should I Replace My Trimmer Line?
It depends on yard size and how much you trim. For a small yard, once a season is often enough. For heavy use, you might replace it every few weeks.
Are Pre-wound Spools Worth It?
Pre-wound spools are fast and clean but cost more. They’re great if you want to save time. Winding your own line costs less and lets you pick stronger line, but takes a bit more effort.
If you have more questions, don’t hesitate to ask—I’ve probably faced the same problem and found a simple fix!
As an Amazon Associate, We earn from qualifying purchases