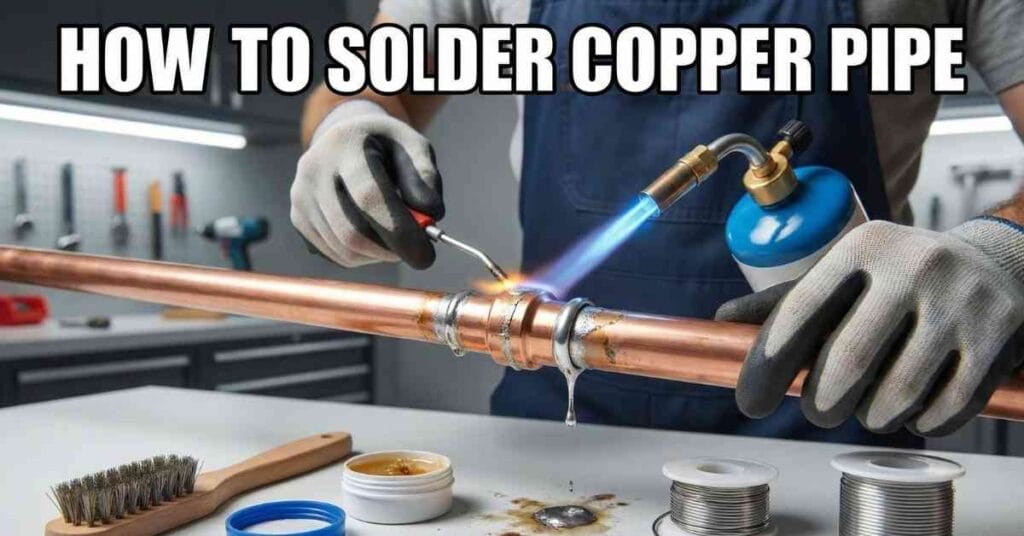
It usually starts in a basement, garage, or crawl space. You hear a small drip, or maybe you see a puddle. A relaxing weekend plan suddenly gets very real.
This guide focuses on what actually makes copper pipe soldering work in U.S. homes. I’ve been there, staring at a pipe, hoping I don’t flood the house. Let’s get it fixed.

Table of Contents
Tools and Materials I Actually Reach For
Most leaks come from rushing this part or grabbing whatever is closest in the toolbox. I used to think any tool would work, but plumbing is unforgiving.
Core tools for soldering copper pipe
Propane vs MAP gas torch and when each makes sense For most 1/2-inch or 3/4-inch pipes in a standard American home, a simple propane torch (the blue tank) is fine. It burns cooler, which actually helps you control the heat if you are new to this.
I only grab the yellow MAP gas tanks when I need speed or I’m working on larger pipes. MAP gas gets hot fast, which can overheat the flux if you aren’t paying attention. Stick to propane to start.
Tubing cutter vs hacksaw and why square cuts matter Put the hacksaw away. You need a tubing cutter. It spins around the pipe and makes a perfect, square cut.
A hacksaw leaves jagged edges and burrs. Those burrs create turbulence in the water line later, leading to pinhole leaks. I keep a small “thumb” cutter for tight spaces between joists.
Fitting brush, emery cloth, and why fingers don’t count You need a wire fitting brush to clean the inside of the fitting and emery cloth (sandpaper tape) for the outside of the pipe.
Don’t use your fingers to wipe the pipe after cleaning. The oils from your skin can actually ruin the bond. Keep it sterile.
Consumables that affect results more than skill
Lead-free plumbing solder (ANSI/NSF approved) In the US, you must use lead-free solder for drinking water lines. Look for the “NSF-61” or “Lead-Free” label on the roll.
Do not use electrical solder. It contains rosin and sometimes lead, which is dangerous for water pipes. Plumbing solder is silver-bearing and stronger for these joints.
Flux types and why paste is more forgiving Flux is the acid paste that cleans the copper when it gets hot. I prefer water-soluble paste flux.
It’s easier to wipe off later. Liquid flux can run down the pipe and make a mess. A good paste stays where you put it.
Heat shields, spray bottle, and clean cotton rags I never solder without a flame protector cloth or “heat shield.” It protects the wood framing behind the pipe.
I also keep a spray bottle of water nearby. If a stud starts smoking, you can douse it instantly. It’s cheap insurance.
Brand context: Milwaukee, DeWalt, Craftsman You don’t need top-tier pro tools for this. A basic Bernzomatic torch kit from Home Depot works great.
However, for tubing cutters, I find Milwaukee or Rigid cutters hold their edge longer. Dull cutters crunch the pipe into an oval shape, which is a nightmare to fit.
Standards: ANSI, NSF, OSHA safety basics Stick to materials marked ANSI/NSF. This ensures your water stays safe to drink.
For safety, wear safety glasses. Solder can spit. And keep a fire extinguisher close—basic OSHA logic applies even in your basement.
Prep Work That Decides Whether the Joint Leaks
This part feels boring. I know you just want to light the torch. But this is where success or failure gets locked in.
Cutting and dry-fitting the copper pipe
Measuring twice in tight spaces When measuring, account for the “socket depth”—how far the pipe goes into the fitting. It’s usually about a half-inch.
If you cut the pipe too short, it won’t seat all the way. This creates a weak joint that might hold today but burst next winter.
Dry-fitting to check alignment before heat Assemble the whole section dry (no flux, no solder) first. Make sure it fits without forcing it.
If the pipe is under tension or bending to fit, the solder joint will fail. The heat relaxes the metal, and it might pop out of alignment.
Marking insertion depth to avoid joint creep I take a marker and draw a line on the pipe right at the edge of the fitting.
This tells me if the pipe slips out while I’m moving things around. If that line moves, I know I need to push it back in before soldering.
Cleaning copper until it actually works
Oxidation and invisible residue Copper oxidizes simply by sitting in the air. That dull, brown look is oxidation. Solder refuses to stick to it.
Even if the pipe looks new, clean it. There is often an invisible factory coating on it that repels solder.
Inside vs outside cleaning mistakes Most people sand the outside of the pipe beautifully but forget the inside of the fitting.
Use the wire fitting brush for the inside. Twist it until the bristles crunch. Both surfaces must be raw, bright metal.
What properly cleaned copper looks and feels like The copper should shine like a brand-new penny. It should be bright pink-gold.
If you see any dark spots, sand again. Solder flows where the copper is clean. It stops where it’s dirty.
Applying Flux the Right Way
Too much flux causes almost as many problems as none at all. It bubbles up and pushes the solder out.
Where flux should go and where it shouldn’t Brush a light coat on the outside of the pipe and the inside of the fitting.
Do not scoop it on. You just need a glossy film. Wipe away any excess that globs on the pipe end.
Thin, even coats vs messy applications If you use too much flux, it ends up inside the pipe. This can corrode the copper from the inside out over time.
I aim for a translucent layer. You should still be able to see the copper color through the paste.
Signs flux is burned before soldering starts If you apply heat and the flux turns black and crusty immediately, you overheated it.
Burnt flux blocks the solder. If this happens, you have to stop, let it cool, and clean it all off again.
Heating the Joint Without Ruining It
This is where most DIY confidence disappears fast. The torch roars, and it feels intense. Relax.
Where to aim the flame
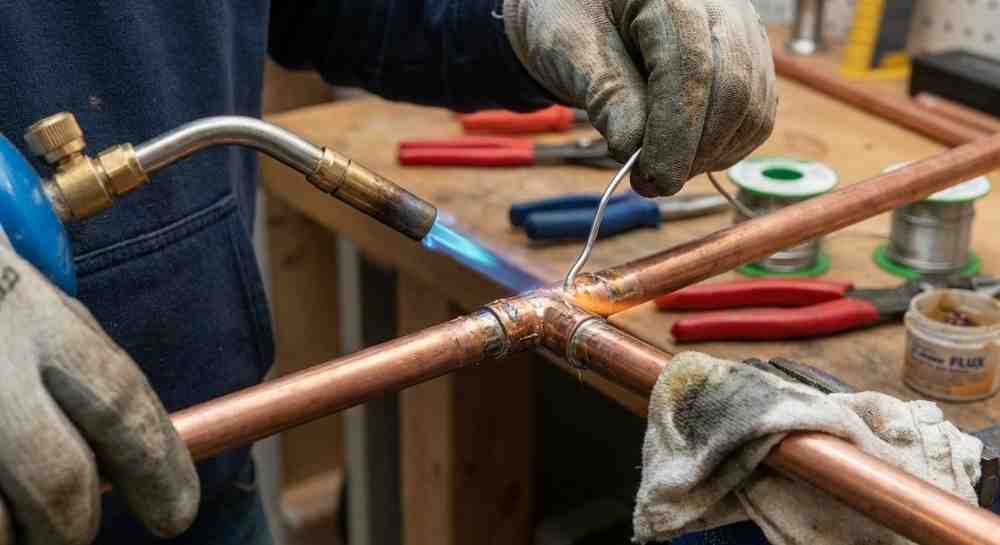
Heating the fitting, not the solder This is the golden rule: Do not melt the solder with the torch. Heat the copper fitting (the hub).
The hot copper will melt the solder. If you melt the solder with the flame, it just drips on the floor.
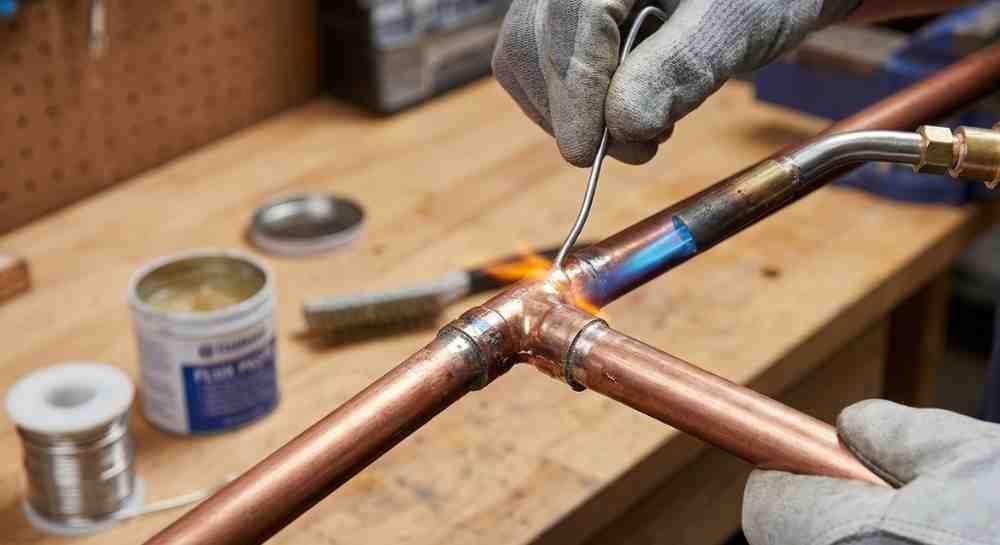
Moving the torch to avoid hot spots Don’t hold the flame in one spot. Move it slightly back and forth around the fitting.
This heats the copper evenly. If one side is hot and the other is cold, the solder won’t flow all the way around.
Watching flux behavior as a temperature cue Watch the flux. It will start to bubble, then sizzle, and then go quiet and clear.
When the flux looks wet and shiny, like liquid glass, the metal is close to the right temperature.
Knowing when the joint is ready
Color changes in copper As the copper gets hot, the shiny color will dull slightly. You might see faint iridescent colors.
If it starts glowing red, pull the torch away immediately! You are overheating it and weakening the metal.
The sound and movement of solder Tap the end of the solder wire against the joint. If it sticks, it’s not ready.
If it melts instantly and turns into a silver liquid, you are good to go. Pull the flame away and feed the solder.
Why patience beats cranking up the flame It takes a few seconds for the heat to soak into the fitting. Rushing leads to bad joints.
I count to ten while heating a 1/2-inch fitting. It gives me a rhythm and keeps me from panicking.
Feeding Solder and Letting It Flow
Good joints pull solder in on their own. Bad ones fight you.
How much solder is actually needed A good rule of thumb: Use a length of solder equal to the diameter of the pipe.
For a 1/2-inch pipe, bend a 1/2-inch hook at the end of your solder wire. When that hook disappears, stop.
Letting capillary action do the work You don’t need to chase the hole with the solder. Touch it to the joint, and physics takes over.
Capillary action sucks the molten solder deep into the fitting, fighting gravity. It’s actually pretty cool to watch.
When to stop before it blobs or drips Once you see a small silver ring appear all the way around the fitting edge, you are done.
Adding more just creates ugly drips inside and outside the pipe.
Cooling, Wiping, and Inspecting the Joint
The flame goes out, but the job isn’t done yet. The metal is still scorching hot.
Letting joints cool naturally Do not spray water on the joint to cool it down faster. This “shock cooling” can crack the solder.
Let it sit for a minute. The solder needs to solidify without being disturbed.
Wiping excess solder for clean results While the pipe is still warm (but the solder is solid), I take a dry cotton rag and wipe the joint.
This removes leftover flux, which is acidic. If you leave it, it turns green and ugly in a few months.
Visual checks before restoring water pressure Look for that silver ring. It should be unbroken around the pipe.
If you see a gap or a hole, you have a problem. It’s better to find it now than after you turn the water main back on.
Common Copper Pipe Soldering Problems
Leaks are rarely random. They follow patterns. Here is what usually goes wrong.
Why solder won’t stick or beads up
Dirty copper If the solder balls up and rolls off like water on a waxed car, the copper is dirty.
It usually means you touched it with oily fingers or didn’t sand it enough.
Cold joints If the solder looks clumpy or dull grey, the joint wasn’t hot enough.
This is called a “cold joint.” It is brittle and will leak eventually.
Burned or missing flux If the copper turns black and the solder won’t flow, the flux is gone.
You likely held the torch there too long and burned the flux away.
Fixing a joint that already failed
Reheating vs taking it apart I try to never just reheat a bad joint and add more solder. It rarely works.
The old flux is burned, and the new solder can’t get inside.
When fittings are no longer reusable The painful truth is that you usually have to cut the fitting out and start over with a new one.
It costs a few dollars for a new fitting, but it saves hours of frustration.
Safety Notes from Real Home Workshops
Most accidents happen when people feel “almost finished.” I’ve singed my fair share of arm hairs.
Fire risks near framing and insulation Dry wood in an old wall catches fire incredibly fast. Always use that heat shield cloth.
I check the area 15 minutes after I’m done, just to be sure nothing is smoldering inside the wall.
Ventilation in basements and crawl spaces Propane fumes and burning flux smoke aren’t good for you.
Open a window or set up a fan. If you are in a tight crawl space, take breaks for fresh air.
Simple OSHA-style habits that prevent damage Wear gloves when handling the pipe after soldering. It stays hot for a long time.
Also, clear the area of rags or paper towels before you light the torch.
When DIY Soldering Makes Sense—and When It Doesn’t
Knowing when to stop is part of doing good work. Sometimes, calling a pro is the cheaper option.
Single joint repairs vs long pipe runs If you just need to fix a leaking elbow or install a new shut-off valve, go for it.
But if you are repiping a whole bathroom, the time and complexity add up fast.
Older homes with unknown plumbing history In some older US homes, you might find strange piping or previous bad repairs.
If the pipe looks corroded or green all over, soldering might not work. The metal might be too thin.
Cold-climate risks like freeze-prone copper lines If you live in the Northeast or Midwest, be careful soldering pipes near exterior walls.
Make sure you aren’t removing insulation that protects the pipes from freezing. A good solder joint won’t save you from a burst pipe in January.
FAQs – How to Solder Copper Pipe
How do I solder copper pipe without leaks?
To solder copper pipe without leaks, clean the pipe well, use flux, and heat the fitting evenly. Let the solder flow into the joint. Do not rush cooling.
What tools do I need to solder copper pipe at home?
You need a propane torch, copper pipe cutter, flux, lead-free solder, and a fitting brush. Brands like Milwaukee or DeWalt tools work well for DIY jobs.
Why won’t solder stick to my copper pipe?
Yes, beginners can solder copper pipe safely with basic tools and care. Work in a ventilated area, keep water nearby, and protect wood with a heat shield.
Is propane or MAP gas better for soldering copper pipe?
Propane works for most home copper pipe jobs. MAP gas burns hotter and helps on thicker pipes, but it needs more control to avoid overheating joints.
As an Amazon Associate, We earn from qualifying purchases