Sharpening wood lathe tools used to intimidate me. I remember standing in my garage, holding a dull gouge, and wondering if I’d ever get it right. The first bowl I made with a blunt tool was a disaster. The wood tore instead of curling off in neat ribbons.
So, I decided to learn how to sharpen my tools properly. Over the years, I’ve tried different methods, made mistakes, and found what works best. In this article, I’ll share what I’ve learned about how to sharpen wood lathe tools.
My goal is to help you avoid my early struggles and enjoy smooth, safe turning.
Why Sharp Tools Matter
If you’ve ever used a dull chisel, you know how hard it is. The tool catches, the wood tears, and you end up frustrated. A sharp edge makes woodturning easier, safer, and much more fun. Clean cuts also mean less sanding later.
I found that sharp tools gave me better control and a smoother finish. It also reduced the risk of my tools slipping or catching, which can be dangerous.
Types Of Wood Lathe Tools And Their Edges
Before sharpening, you need to know what tools you have. I started with a few basics, but each one has its own edge shape and sharpening needs.
| Tool Type | Common Edge Angle | Sharpening Difficulty |
|---|---|---|
| Spindle Gouge | 35°–40° | Medium |
| Bowl Gouge | 40°–60° | Hard |
| Skew Chisel | 25°–30° | Medium |
| Parting Tool | 45° | Easy |
| Scraper | 70°–80° | Easy |
I learned early that you can’t sharpen all tools the same way. A bowl gouge needs a different angle than a skew chisel. If you mix them up, your tool won’t cut right.
Tools And Equipment You Need
When I first started, I thought I could sharpen with any grinder. But soon, I realized having the right equipment made a big difference.
- Bench Grinder: This is the main tool for shaping and sharpening. A slow-speed grinder (1750 RPM) works best. High-speed grinders heat up the metal too fast.
- Sharpening Jigs: These hold your tool at the correct angle. I used to freehand, but jigs made my edges much more consistent.
- Diamond Hones or Honing Stones: For refining the edge and removing burrs.
- Sharpening Platform: Helps with flat tools like skews and scrapers.
- Safety Gear: Always wear eye protection. I once got a hot spark in my eye—never again.
- Marker Pen: This little trick helps you see where you’re grinding the tool.
- Wheel Dresser: Keeps the grinding wheel flat and clean.
Here’s a quick comparison of the two grinders I’ve used:
| Grinder Type | Speed (RPM) | Best For | Downside |
|---|---|---|---|
| High-Speed | 3450 | Rough shaping | Heats up tools fast |
| Slow-Speed | 1750 | Sharpening | More expensive |
If you can, go for a slow-speed grinder. It’s worth the investment.
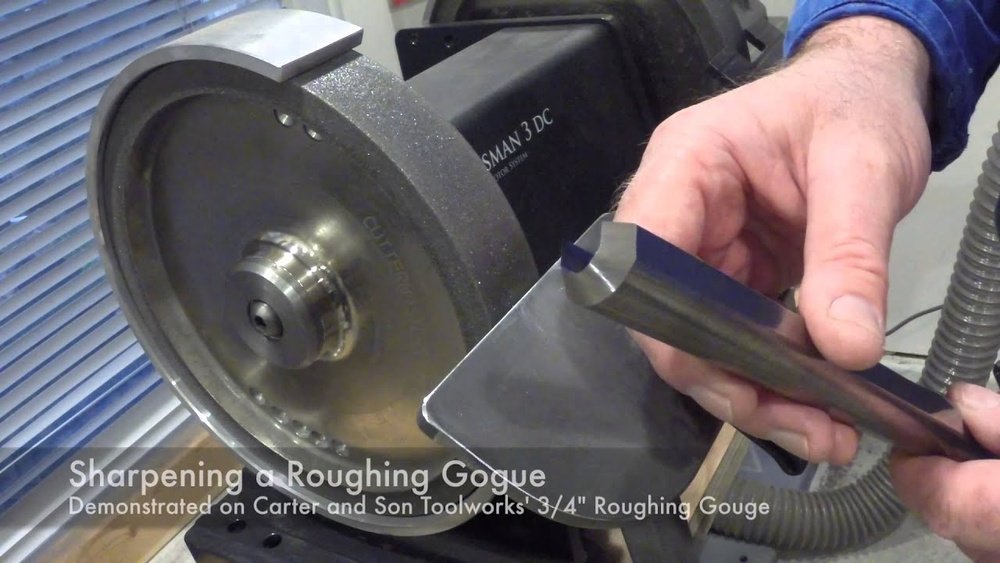
My Step-by-step Sharpening Process
Sharpening isn’t just about grinding metal. There’s a process to it. Here’s how I sharpen my wood lathe tools, step by step.
1. Inspect The Edge
Before I do anything, I look at the tool’s tip. Is it chipped? Is the shape still good? Sometimes, if the edge is just dull, you don’t need to reshape it—just touch it up.
2. Mark The Bevel
A simple marker can save you a lot of trouble. I color the bevel with a black marker. When I start grinding, the marker shows if I’m grinding the right spot. If color remains, I’m missing part of the edge.
3. Set Up The Jig
For gouges and skews, I use a sharpening jig. I set the angle to match the original bevel. Consistency is key. If you change the angle every time, your tool will lose its shape fast.
4. Sharpen On The Grinder
I touch the tool lightly to the wheel. I used to press hard, but that just made the tool hot and wore it down fast. Let the grinder do the work. I move the tool back and forth to avoid overheating one spot.
Pro tip: Dip the tool in water every few seconds to keep it cool. If it turns blue, it’s overheated and the steel is ruined.
5. Check Your Progress
After a few passes, I stop and look at the edge. If the marker is gone evenly, I’m on track. If not, I adjust the angle or my grip.
6. Hone The Edge
After grinding, there’s usually a small burr. I use a diamond hone to clean this up. Just a few strokes make a big difference. For skews and parting tools, honing can make the edge razor-sharp.
7. Test The Sharpness
I gently touch the edge to my thumb nail. If it bites, it’s sharp. If it slides, I sharpen a bit more. Never test sharpness on your finger pad—trust me, I’ve cut myself this way.
Sharpening Different Wood Lathe Tools
Each tool needs a slightly different approach. Here’s how I handle the most common ones.
Sharpening A Bowl Gouge
Bowl gouges are tricky at first. The “Irish grind” or “elliptical grind” is popular. I use a jig with a set angle, sweep the tool in an arc across the wheel, and keep the motion steady. It takes practice. Don’t rush—getting both wings even is important.
Sharpening A Spindle Gouge
These have a tighter curve. I use a jig and rotate the tool as I grind. Keeping the tip rounded helps with detail work.
Sharpening A Skew Chisel
A skew chisel should have a flat bevel. I use the platform, set at about 25-30 degrees. I grind one side, then flip and do the other. The edge should be straight or slightly curved. Honing is very important here.
Sharpening A Parting Tool
Parting tools are easy. I keep the blade flat on the platform and grind until the edge is crisp. No need for fancy jigs.
Sharpening A Scraper
Scrapers work best with a burr. I grind the bevel at a steep angle (70-80 degrees), then hone lightly. A fresh burr helps the scraper cut smoothly.
Common Mistakes And How To Avoid Them
I’ve made all the classic errors. Here are a few you should watch for:
- Grinding too much metal: Early on, I pressed too hard. My tools wore out fast. Go easy and let the wheel do the work.
- Overheating the edge: Blue steel means a ruined edge. Dip in water often.
- Changing the angle: Consistency is key. Use jigs or make a guide block.
- Not dressing the wheel: A clogged or uneven wheel gives a poor edge. Dress the wheel often.
- Ignoring the burr: Always remove the burr after grinding. It can break off during turning and ruin your work.
How Often Should You Sharpen?
When I started, I waited until the tool felt dull. Bad idea. Now, I sharpen more often—sometimes every 10-15 minutes for bowl gouges. Keeping tools sharp means less effort and better results. A quick touch-up is faster than fixing a badly worn edge.
Keeping Tools Sharp Between Grinds
Grinding removes metal, so I try to maintain my edge as long as possible. Here’s what works for me:
- Use a honing stone after every few cuts. It keeps the edge keen.
- Cut clean wood. Dirty or knotty wood dulls tools fast.
- Store tools safely. I once dropped a gouge, and the edge chipped. Now I use a tool rack with slots.

Tips That Made A Difference For Me
- Practice on cheap tools: I bought a set of budget chisels just for practice. This way, I wasn’t afraid to make mistakes.
- Watch the sparks: When grinding, the sparks should just kiss the edge. If they shoot off the top, you’re grinding too high.
- Sharpen before you turn: Starting with sharp tools is much easier than fixing a dull one mid-project.
- Use a light touch: It’s easy to take off too much metal. Patience pays off.
- Ask for help: I learned a lot from other turners at my local woodturning club. Don’t be afraid to ask for advice or watch videos.
A Real-world Example: Sharpening A Bowl Gouge
Let’s say I’m turning a bowl. My gouge starts to feel dull—the shavings get thicker, and I hear a scraping sound. I stop the lathe, mark the bevel with my marker, and set up the jig. I touch the gouge to the wheel, following the existing shape.
After a few passes, the marker is gone. I hone the edge, then test it on my thumb nail. It bites right in. Back to the lathe, and the difference is huge—clean cuts and smooth ribbons of wood.

Advanced Tips Most Beginners Miss
After many hours in the shop, I’ve picked up a few less obvious tricks:
- Check your grinder’s speed: Many cheap grinders run too fast. A variable speed model gives more control.
- Wheels matter: White aluminum oxide wheels or CBN (cubic boron nitride) wheels stay cool and cut clean.
- Use a shop light: Good lighting helps you see the edge and avoid mistakes.
- Keep the wheel’s face clean: A smooth, even wheel gives a better edge. Dress it every session.
- Maintain your jigs: Loose jigs give inconsistent results. Tighten them before each use.
Table: Quick Guide To Common Edge Angles
Here’s a handy reference I keep near my grinder:
| Tool | Edge Angle | Notes |
|---|---|---|
| Bowl Gouge | 40°–60° | Steeper for heavy cuts, shallower for fine work |
| Spindle Gouge | 35°–40° | Fine detail work |
| Skew Chisel | 25°–30° | Flat bevel, hone for best results |
| Parting Tool | 45° | Simple, easy to maintain |
| Scraper | 70°–80° | Burr is more important than sharpness |
Where To Learn More
If you’re serious about woodturning, I recommend joining a local club or checking out resources from the American Association of Woodturners. They offer classes, videos, and advice from experienced turners.
Frequently Asked Questions
How Do I Know If My Wood Lathe Tool Is Sharp Enough?
If the tool slices wood cleanly and produces shavings, it’s sharp. A sharp tool will also “bite” into your thumbnail when you touch it lightly.
Is It Okay To Sharpen My Tools Freehand?
Yes, but it takes practice. I started freehand, but using jigs made my results much better and more consistent.
What Grit Should I Use On My Grinder Wheel?
For most lathe tools, an 80-grit wheel is a good choice. It sharpens quickly but leaves a fine edge. Finer grits are better for finishing.
How Often Should I Dress My Grinding Wheel?
I dress my wheel every few sharpening sessions. A clean, flat wheel gives the best results and prevents uneven edges.
Can I Use A Belt Sander To Sharpen Lathe Tools?
You can, but be careful. Belt sanders work for quick touch-ups, but they can overheat the edge and change the shape if you’re not careful.
I hope sharing my journey helps you avoid the mistakes I made and get the best results from your wood lathe tools. With sharp tools, woodturning becomes a joy. Happy turning!

As an Amazon Associate, We earn from qualifying purchases