It’s early evening on a Tuesday. I’m out in the garage, trying to finish a project I started three weeks ago. I reach for the iron to make that final connection, but the solder just balls up. It rolls right off the tip and falls onto the workbench.
The tip is black, dull, and refuses to melt anything. It is incredibly frustrating, but take a deep breath. I have been there a dozen times. This is common, and unless you really abused it, we can usually fix it in about five minutes.

Table of Contents
Why Soldering Iron Tips Turn Black in the First Place
A blackened tip is not necessarily “burnt out” or broken. It is usually just a mix of chemistry, high heat, and bad habits working together against you.
Oxidation Is the Real Culprit
At its core, this is simple chemistry. Oxygen in the air loves to react with hot iron. When your soldering iron is hot, that reaction speeds up fast.
That black crust you see is oxide. The problem is that oxide acts like an insulator. It blocks the heat from traveling from the iron’s core to your solder. It’s not just cosmetic darkening; it’s a physical barrier stopping you from working.
Running the Iron Too Hot
Here in the U.S., we have a habit of cranking tools to the max. I used to turn my station dial all the way to the right, thinking “hotter is faster.” It is not.
When you run an iron above 750°F (400°C) for too long, oxidation happens almost instantly. Most solder melts way below that. If your dial is maxed out, you are cooking the tip, not the project.
Dry Tips and Skipped Tinning
The protective layer on a tip is solder. We call this “tinning.” Inside the solder, there is flux, which cleans the metal. But flux burns off quickly.
If you leave the iron sitting there “dry” without a fresh coat of solder, the bare metal is exposed to the air. Damage can start in just a few minutes of idling.
How to Tell If a Blackened Tip Is Still Salvageable

Not every black tip is worth saving. I keep a spare in my toolbox for this exact reason. A quick visual check can save you an hour of scrubbing and frustration.
Signs the Tip Can Be Fixed
Look closely at the tip after it cools down a bit. If the surface still looks smooth underneath the black soot, you are in luck.
Plug it in and touch solder to the very neck of the tip, just above the black part. If it melts there, the core is still hot and working. We just need to clean the surface.
When the Tip Is Truly Done
If you see deep pits or craters, the iron plating is gone. Once the outer plating is breached, the copper core inside dissolves into the solder.
If you see copper color showing through the silver tip, throw it away. Filing it down won’t help because you cannot put the plating back on. A pitted tip will never transfer heat evenly again.
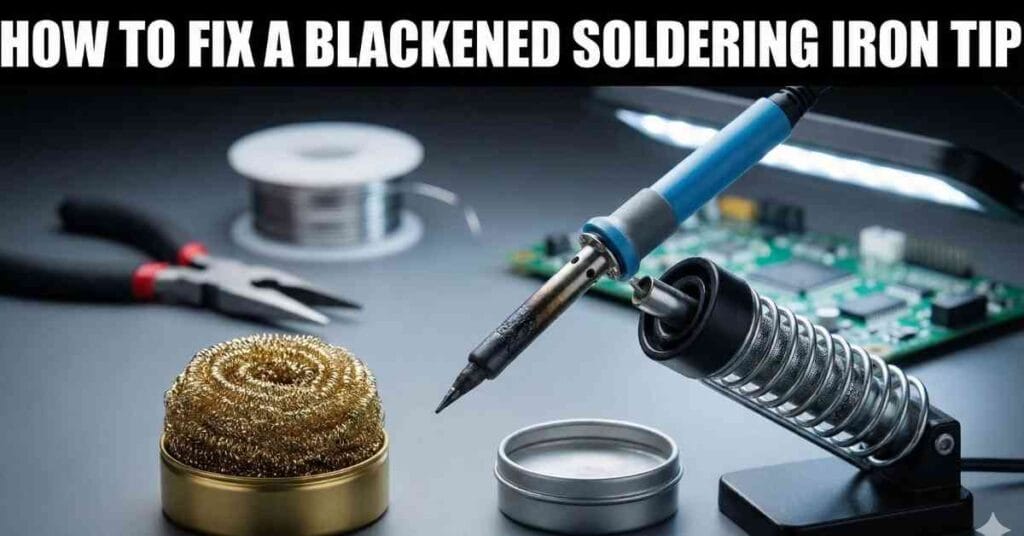
How to Fix a Blackened Soldering Iron Tip Step by Step
This is the exact order I use in my shop. I start with the gentle methods. I only get aggressive if the simple stuff fails. Stop as soon as the solder wets the tip again.
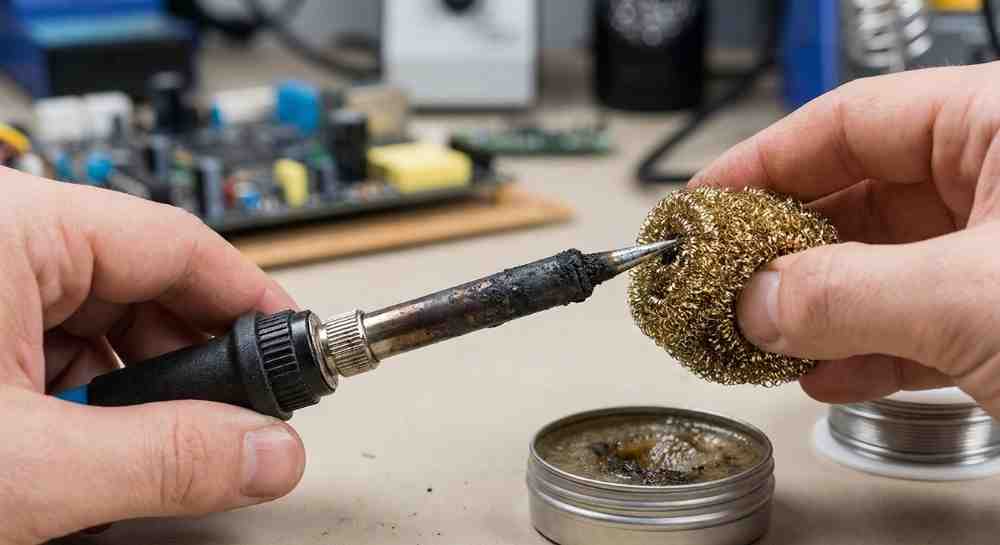
Start With Brass Wool (Not a Wet Sponge)
For years, I used a wet sponge. The problem is, the thermal shock of cold water can create micro-cracks in the plating. Brass wool is much better for oxidation.
Plunge the hot tip into the brass coil and twist it three or four times. You don’t need to scrub hard; the brass shavings will scrape off the oxide without hurting the iron. Watch for the shine to come back.
Re-tin the Tip While It’s Hot
As soon as you see a little bit of clean metal, feed fresh rosin-core solder onto it immediately. Do not wait.
Coat the tip, rotate it, and wipe it on the brass wool. Then coat it again. You want to see “good wetting.” This means the solder flows out like a shiny silver liquid, rather than balling up like water on a waxed car.
Use Tip Tinner or Activator (If Needed)
If brass wool didn’t work, I grab a small jar of “Tip Tinner.” You can find this at most local hardware stores or electronics shops. It is a mix of mild acid and solder powder.
Press the hot tip into the solid paste for a second or two. It will smoke and smell a bit funky. Wipe it off immediately and apply fresh solder. This stuff is magic for stubborn black spots, but don’t use it every day. It’s a bit harsh.
Emergency Method (Last Resort)
If the tip is still black, I use a very very fine abrasive. I’m talking about a gentle polishing bar or 600+ grit emery cloth.
Only do this if the plating is still intact. Rub it gently just until you see silver. As soon as you see clean metal, stop and flood it with solder. If you sand too much, you ruin the tip forever.
Mistakes That Kill Tips Fast
These are the habits I see in home workshops that ruin tips in weeks, not years. I have been guilty of most of them at some point.
Leaving the Iron Hot and Idle
It is easy to get distracted. You step away to check a schematic or answer a text, and the iron sits there cooking for 20 minutes.
Heat plus air equals oxidation. If you aren’t going to solder for more than five minutes, turn the temp down or switch it off. It saves the tip.
Using Plumbing Flux or Acid Flux
I once grabbed a tub of flux from my plumbing bag to fix a wire. Huge mistake. Plumbing flux is highly acidic to clean heavy copper pipes.
It eats through electronics and soldering tips like candy. Only use rosin-based flux meant for electronics. If the tub says “Acid Core,” keep it away from your circuit board.
Filing or Grind the Tip
I saw my grandpa do this, but modern tips are different. Old irons were solid copper; you could file them to a new point.
Modern tips have a thin layer of iron plating over a copper core. If you take a file to it, you remove that protective layer. The tip becomes useless instantly. Put the file away.
How to Prevent a Soldering Iron Tip From Turning Black Again
Prevention is boring, I know. But it saves money and keeps your blood pressure down when you just want to finish a repair.
Proper Tinning Before and After Use
This is the habit that matters most. Before you turn the iron off, melt a big blob of solder onto the tip and leave it there.
That blob creates an airtight seal as the iron cools down. The oxygen attacks the sacrificial solder blob, not your expensive tip. Next time you heat it up, just wipe that blob off, and the tip underneath will be shiny and new.
Set the Right Temperature
For most electronics work with lead-free solder, 650°F to 700°F is plenty. If you use leaded solder (common in many home shops), you can go even lower.
Higher temperatures do not always make you solder faster. They just burn the flux off faster and char the board. Keep it in the “safe zone” and your tips will last for years.
Storage and Workshop Conditions
I live in an area with cold, damp winters. Garages and basements in the U.S. can get pretty humid. Moisture promotes corrosion even when the tool is off.
I keep my iron in a drawer or a box, not just sitting out on the bench. If it’s going to be stored for a long winter, that “storage tinning” blob I mentioned earlier is absolutely critical.
Brand-Specific Notes (What I’ve Seen in Real Use)
Different irons behave differently. I’ve used everything from top-tier stations to the $15 stick irons from the discount bin. These patterns show up again and again.
Weller and Hakko Tips
If you own a Weller or Hakko, the plating is usually thick and high quality. They are very forgiving.
I have brought Hakko tips back from the dead that looked like total charcoal. They respond really well to tip tinner. It is worth spending the effort to clean them because they are built to last.
Budget Irons and Big-Box Brands
The generic red or orange irons you get in a kit are different. The plating is often very thin.
Once these turn black, they are harder to save. If you scrub them too hard, you strip the plating. Honestly, if a budget tip is badly oxidized, I usually just spend the $5 to replace it.
Safety and Best Practices You Should Not Skip
This is basic stuff, but it matters—especially in home shops where we might be working near flammable stuff or without great airflow.
Ventilation and Fume Awareness
When you clean a black tip, especially with tinner, it creates smoke. That smoke contains rosin acids and sometimes lead fumes.
I always crack the garage door or run a small fan to pull the air away from my face. You don’t need a lab setup, just don’t lean directly over the smoke while breathing in.
Burn and Fire Safety
A falling soldering iron has no handle. I learned that the hard way. Always use a proper stand.
When we are frustrated with a black tip, we tend to get careless. We push harder or fling solder. OSHA would not approve of some garage habits, but using a heavy stand that won’t tip over is non-negotiable.
When Replacing the Tip Is the Smarter Move
Sometimes, the fix costs more time than a new tip. There is no shame in admitting the part is dead.
Cost vs Time Reality Check
A new standard tip costs between $5 and $10. If you have spent 30 minutes scrubbing and the solder still won’t stick, you are losing money.
I value my Saturday afternoon time. If the abrasive method doesn’t work in two minutes, I toss the tip in the trash. It’s not worth the headache.
Choosing a Better Replacement Tip
When you do buy a new one, get a chisel tip. Many irons come with a sharp conical point, which is actually really hard to use because it holds very little heat.
A chisel shape has more surface area. It transfers heat better, which means you can solder faster and at lower temperatures. This actually prevents the new tip from turning black as quickly.
FAQs – How to Fix a Blackened Soldering Iron Tip
How to fix a blackened soldering iron tip at home?
You can fix a blackened soldering iron tip by cleaning it with brass wool, then re-tinning it with fresh solder. This often restores smooth heat flow and solder grip.
Why does my soldering iron tip turn black so fast?
A soldering iron tip turns black from oxidation. This happens when it runs too hot, stays dry, or is left on without solder coating the surface.
Can a blackened soldering iron tip still work properly?
Sometimes it can. If solder still melts after cleaning and tinning, the tip is usable. If solder beads and slides off, the damage may be permanent.
What should I not do when fixing a blackened soldering iron tip?
Do not file or grind the tip. This removes the protective coating and makes damage worse. Avoid acid flux meant for plumbing work.
How do I prevent my soldering iron tip from turning black again?
Always tin the tip before and after use. Set the right temperature and turn the iron off during breaks to slow oxidation and extend tip life.