Ever had your truck refuse to start on a freezing Midwest morning? You turn the key, hear a weak click, and wonder—is it the battery or something worse? I’ve been there too.
Knowing how to test a car battery with a multimeter can save you time, money, and a tow bill. The best part? You can do it yourself in minutes.
In this quick guide, I’ll show you exactly how I test my batteries in my own garage using a basic digital multimeter. No fancy shop tools. No guesswork.
Whether you’re standing next to your Craftsman toolbox on a cold morning or troubleshooting in a humid Florida workshop, this simple test will tell you fast if your battery is dead or just needs a charge.

Table of Contents
Why You Should Test a Car Battery Regularly
A car battery doesn’t always fail overnight — it slowly weakens until one cold morning it just gives up. I learned that the hard way one January morning in North Carolina when my truck wouldn’t start. The headlights flickered, the starter clicked once, and then… silence. That’s when I realized how important regular testing really is.
Testing your car battery with a multimeter isn’t about being overly cautious — it’s about catching problems before they leave you stranded. A weak battery forces the alternator to work harder, which can shorten its life too. Think of it as checking your heart rate before it becomes a heart problem.
In colder states like Minnesota or Michigan, winter drains a battery fast. The chemical reactions inside slow down, and even a healthy battery can struggle. Down south, in places like Texas or Florida, extreme heat is just as tough — it evaporates electrolyte and accelerates wear. That’s why regular checks matter no matter where you live.
Common Signs of a Weak or Failing Battery
From my experience in the garage, most batteries give plenty of warnings before dying. You just have to notice them early.
- Slow engine crank when starting
- Dim headlights or interior lights
- Clicking sound when turning the key
- Dashboard warning light (“Battery” or “Check Charging System”)
- Frequent need for jump starts
If you notice more than one of these signs, don’t wait — test your car battery right away with a multimeter. It takes only two minutes and can tell you a lot about your battery’s health.
How Often Should You Test Your Battery?
Battery health depends on climate, driving habits, and storage conditions. Here’s what’s worked best for me:
- Every 3–6 months in normal climates
- Once a month during cold winters (Minnesota, Michigan, New York)
- After heatwaves in the southern states (Florida, Texas, Arizona)
I also like to check mine before long road trips or after the car sits unused for more than a week. Batteries naturally discharge over time, especially when parked in extreme temperatures.
What You’ll Need to Test a Car Battery at Home
You don’t need fancy shop equipment to test your car battery. If you have a good-quality digital multimeter and basic safety gear, you’re ready. I use a Fluke meter in my garage, but Klein Tools and Milwaukee meters work great too. They’re accurate, rugged, and perfect for DIY use.
Testing a car battery with a multimeter is one of those simple garage habits that makes you feel in control of your car’s health. And the best part? You can do it right in your driveway.
Essential Tools and PPE
Here’s my short checklist before I start any test:
- Digital multimeter (Fluke, Klein Tools, or Milwaukee — reliable and accurate)
- Safety glasses and insulated gloves — protect your eyes and hands from sparks
- Battery terminal cleaner or wire brush — ensures a clean contact for accurate readings
- Notebook or phone — to record voltage readings for future comparison
You can find all of these in any U.S. hardware store or automotive aisle at Home Depot or Lowe’s. They’re affordable, and once you have them, you can use them for dozens of other electrical projects.
Safety First — Don’t Skip These Steps
Before you grab your multimeter, take a minute for safety prep. It’s not just about protecting your tools — it’s about protecting you.
- Park the vehicle on a flat surface and turn off the engine.
- Remove the keys and engage the parking brake.
- Keep metal jewelry and tools away from the battery terminals.
- Follow OSHA/ANSI guidelines for electrical PPE (especially gloves and eyewear).
I’ve seen people skip these basics and short out their battery or fry their meter. A quick setup check prevents that. Once you’re ready, testing becomes easy and safe.
Step-by-Step — How to Test a Car Battery With a Multimeter
Testing a car battery might sound technical, but it’s really just a few simple readings. When I started doing this years ago, I realized how quickly a multimeter can reveal what’s going on — even before a battery tester or shop machine does.
This process takes about five minutes and tells you three things:
- Whether your battery is charged
- How it behaves under load
- Whether your alternator is working right
Let’s go through it step-by-step.
Step 1 — Set Your Multimeter to DC Voltage
Set the dial to 20V DC (look for the “V⎓” symbol).
Plug in the red lead to the “VΩ” port and the black lead to “COM.”
Before testing the car, I like to check my meter on a 9V battery. It’s a quick accuracy check. If it reads close to 9V, you’re good to go.
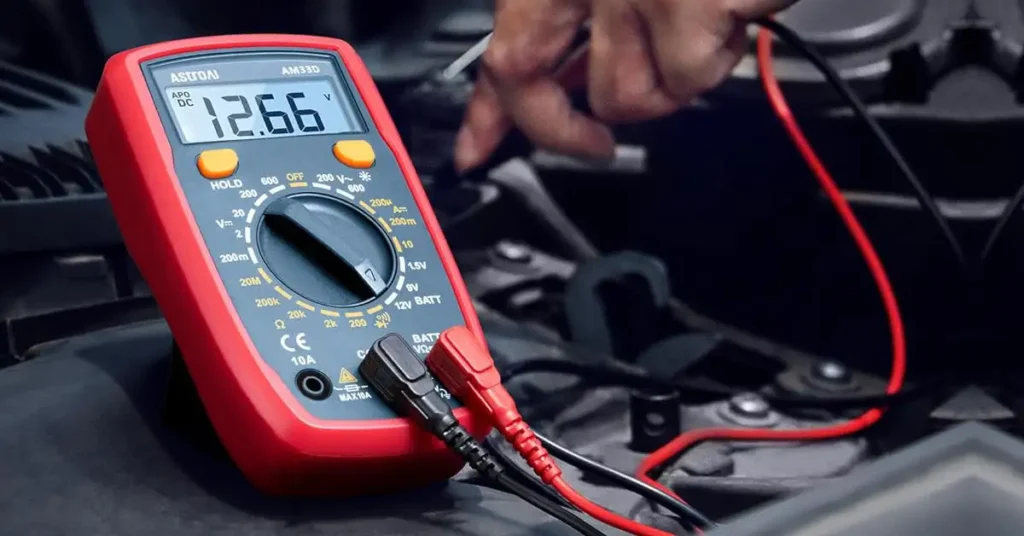
Step 2 — Measure Resting Voltage (Engine Off)
With the engine off, touch the red probe to the positive (+) terminal and the black probe to the negative (–) terminal.
Read the number on your multimeter screen and compare it to the chart below:
| Reading (V) | Condition | Action |
| 12.6–12.8V | Fully charged | Good |
| 12.4–12.5V | 75% charged | OK |
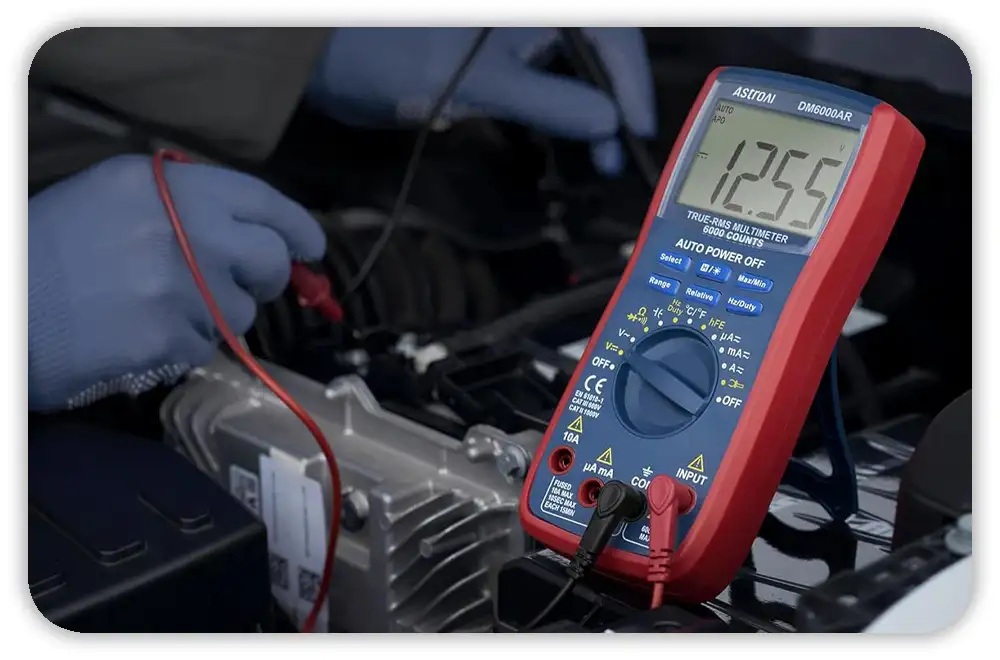
| 12.2–12.3V | 50% charged | Recharge soon |
| 12.0V or below | Discharged | Replace battery |
If your reading is below 12.2V, don’t panic — it just means your battery needs a recharge. I usually hook it up to a smart charger overnight and retest the next day.
Step 3 — Check Cranking Voltage (During Start-Up)
Ask a helper to start the engine while you keep an eye on the multimeter. The voltage will dip for a second as the starter draws power.
Watch the number: it shouldn’t drop below 10.0V.
If it does, that usually means internal resistance is high — a sign the battery is nearing the end of its life. I had a Craftsman lawn tractor that showed 9.6V during crank; a week later, it wouldn’t start at all.
Step 4 — Test Charging Voltage (Engine Running)
Now let the engine idle and measure again. This time, you’re checking the alternator’s output, not just the battery.
A healthy charging system will show 13.7V to 14.7V. If it’s below 13V, your alternator might not be charging properly. If it’s above 15V, it could be overcharging — which can boil the battery and damage electronics.
When I worked on a friend’s Ford F-150, his battery kept dying even though it was new. The multimeter showed 12.8V running — the alternator was weak. Replacing it fixed the issue immediately.
How to Interpret Your Test Results
Numbers alone don’t tell the full story. Here’s what those readings really mean — in plain language.
When I first learned how to test a car battery with a multimeter, I stared at the numbers and had no clue what they meant. A reading of 12.3V sounds okay, right? But that means your battery is already halfway drained. Over time, I learned to read those numbers the way a mechanic listens to engine sounds.
If the Battery Voltage Is Low
If your resting voltage is below 12.4V, don’t rush to buy a new battery. It might just need a good charge.
Here’s what I do:
- Recharge it with a smart charger — not a trickle charger. Smart chargers stop on their own when full.
- Let it rest for about 12 hours after charging. Then test it again.
- If it drops below 12.4V again, the internal cells are likely sulfated and can’t hold power anymore.
I had a DieHard battery that looked fine but kept falling from 12.6V to 12.2V overnight. After a few recharges, I gave up and replaced it. That saved me from another cold morning with no start.
If the Charging Voltage Is High or Low
When the voltage goes outside the 13.7–14.7V range with the engine running, check your alternator.
- High voltage (15V or more): The voltage regulator may be bad. That can overheat the battery and even damage electronics. I’ve seen dashboards flicker from it.
- Low voltage (below 13V): You might have a loose belt, corrosion, or a weak alternator.
Before replacing anything, clean the terminals and test again. Corrosion can fake low readings. Once, I thought my alternator was shot — it was just a crusty ground cable. A quick brush fixed everything.
My Rule of Thumb
“If a car battery can’t hold 12.4 volts overnight after a full charge, it’s done.”
That’s my simple rule after years of testing batteries — from my truck in North Carolina to a friend’s snow blower in Michigan. Replace it before you get stranded.
What About AGM, Gel, and Lithium Car Batteries?
Modern cars use more than one type of battery. AGM, gel, and lithium batteries all act a little different. Testing them right helps you avoid confusion.
The first time I tested an AGM battery, I panicked. It showed 12.9V, and I thought my multimeter was wrong. Later, I learned AGM batteries naturally read higher than standard ones.
AGM (Absorbent Glass Mat) Batteries
AGM batteries are common in newer Ford and GM cars with start-stop systems. They’re sealed, spill-proof, and tough — but they need care.
- Fully charged voltage: 12.8–13.0V
- Avoid deep discharges below 12.2V
- Use an AGM-compatible charger only
I once ruined a great AGM battery using a cheap charger. It overcharged and dried it out. Spend a few extra dollars on the right charger — it’s worth it.
Lithium (LiFePO₄) Batteries
Lithium batteries show up in race cars, RVs, and some off-grid systems. They act very differently from lead-acid ones.
- Resting voltage: 13.0–13.4V
- Wait 30 minutes after driving before testing
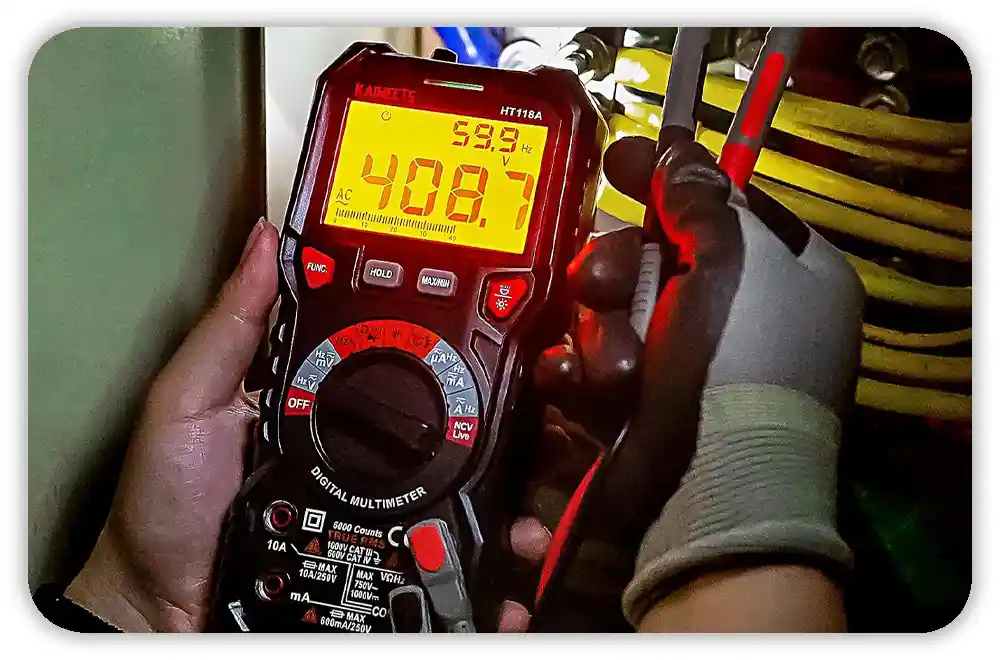
- Use a True RMS multimeter for accurate readings
When I tested a lithium jump pack, the readings jumped all over the place — until I switched to my Fluke meter. Then it showed a steady 13.2V. Accuracy matters more with lithium than any other type.
Common Mistakes to Avoid When Testing a Car Battery
Testing a car battery is simple, but small mistakes can ruin the reading — or your meter. I’ve seen it too many times.
Even after years of testing, I still remind myself of these basics. A small slip, like touching probes in the wrong order, can pop a fuse or fry your multimeter.
Mistakes to Watch Out For
- Forgetting to turn off accessories: Headlights or radios draw power and lower readings. Always test with everything off.
- Mixing up terminals: Red to positive (+), black to negative (–). Simple, but easy to mess up in tight spaces.
- Testing too soon after charging: A freshly charged battery shows a false high reading. Wait a few hours before testing.
- Skipping PPE: Metal rings or watches can spark. Wear insulated gloves and remove jewelry.
- Using a cheap meter: Low-quality meters give bad readings. I tested one battery with a $10 meter (12.8V) and my Fluke (12.5V). The Fluke was right.
In U.S. garages, cold weather and humidity can make batteries act strange. Always test in a dry, stable spot. If the numbers look odd, wait and test again before replacing parts.
Mistakes happen fast, but a calm, careful setup saves time, money, and your tools.
Real-Life Garage Lessons That Saved Me Time and Cash
Some of my best battery lessons came from my own garage. Over the years, a quick check with my multimeter has saved me money, stress, and cold mornings with a dead truck.
Example 1 — My Truck Before Winter
A few winters ago, my truck’s starter sounded slow. I pulled out my Fluke multimeter. The battery showed 12.1 volts at rest and 9.8 volts while cranking. That drop below 10V told me one thing — a bad cell. I replaced the battery that weekend. When the first frost hit North Carolina, the truck started like new.
Example 2 — My Friend’s Lawn Tractor
My buddy called one weekend. His Craftsman tractor wouldn’t hold a charge. I tested it — 12.4V resting, but only 11.9V when running. That meant the alternator wasn’t charging. He was ready to buy a new battery, but the meter showed the truth — the battery was fine. The alternator wasn’t. We swapped it, and it’s been cutting grass ever since.
Example 3 — The DeWalt Jump Pack Test
Once, I tested a DeWalt jump pack on a work truck that wouldn’t start. The meter read 11.8V. After checking the ground cable, I found corrosion. A quick clean with a wire brush brought the reading back to 12.6V, and the truck started right up.
These small garage checks taught me one big thing — a $50 multimeter can save hundreds in wrong guesses and wasted parts.
Pro Tips for a Longer-Lasting Battery
Testing your battery is smart. But good habits keep it healthy for years. After many winters up north and hot summers down south, here are my go-to tricks.
Clean the Terminals Twice a Year
Corrosion creeps up fast. I clean my battery posts with baking soda and water every spring and fall. It takes five minutes and saves hours of trouble.
Keep It Charged in Winter
Cold weather kills weak batteries. In states like Michigan or Minnesota, I plug in a small smart charger once a week. It keeps the battery full and ready to start, even on freezing mornings.
Avoid Short Drives
Trips under ten minutes drain your battery. The alternator needs time to recharge. I combine errands when I can — it helps both the battery and gas mileage.
Use a Battery Tender for Storage
If your car or mower sits for weeks, hook it to a tender. It keeps the charge steady without overdoing it.
Protect From Heat
Heat is the silent battery killer. In my North Carolina garage, summer temps hit triple digits. Parking in the shade or using a battery cover makes a real difference.
These small habits add years to your battery’s life — and save you from surprise breakdowns.
When to Replace the Battery (or Call a Pro)
Even with care, every battery wears out. Knowing when to replace it saves money and stress.
If voltage drops below 12.4V after charging and resting overnight, it’s time. I’ve tried “one more charge” many times — it never lasts. Once a battery stops holding power, it’s done.
Before buying a new one, check the basics:
- Clean the terminals to clear corrosion.
- Check the cables for frays or loose ends.
- Measure charging voltage — below 13V or above 15V means the alternator may be off.
Many people replace good batteries when the real issue is a weak cable or loose clamp.
If you’re unsure, stop by a local auto parts store. Places like AutoZone or Advance Auto Parts test batteries and alternators for free. It’s quick and worth it before spending a dime.
Final advice: trust your meter, stay alert to early signs, and act fast. A few minutes with a multimeter can save hours of frustration later.
FAQ — Can You Test a Car Battery With a Multimeter?
I get this question all the time. When I first started tinkering in my garage, I asked the same ones. Here are the quick, no-fluff answers I’ve learned from real experience.
Can I test a car battery while it’s still in the car?
Yes, you can. I almost always test batteries while they’re still installed.
Just make sure the engine is off, the car is in park, and all accessories are off.
Then set your multimeter to DC volts and touch the probes to the battery terminals. It’s fast, safe, and just as accurate as testing it off the vehicle.
What voltage means my car battery is bad?
If your reading is below 12.0 volts, your battery is weak or dying.
Once, my truck showed 11.9V — it started one morning but failed the next. After a full charge, it dropped again overnight. That’s the sign it’s done.
Can I test the alternator with a multimeter too?
Yes — and you should. Start your car and check the voltage again. You should see 13.7 to 14.7 volts.
Anything lower means your alternator isn’t charging right. I learned this from a friend’s F-150 that showed 12.8V running. The alternator was weak. We replaced it, and the problem vanished.
Should I test my battery after jump-starting?
Yes, but wait about 30 minutes first.
Your alternator needs time to recharge the battery and stabilize the reading.
I once tested right after a jump and got 13.5V, which looked fine. The next morning it dropped back to 12.1V. Waiting gives you real numbers.
What’s the best multimeter for testing car batteries?
Any good digital multimeter works. I’ve used Fluke, Milwaukee, and Klein Tools over the years.
Fluke is my go-to for accuracy. Milwaukee holds up well in my humid North Carolina garage. Klein gives pro quality without the high price tag.
Conclusion — Testing a Car Battery Builds Confidence and Saves Money
Learning how to test a car battery with a multimeter changed how I handle car care. I used to guess when a battery was weak — now I know in minutes.
When I first picked up a multimeter, I was nervous. After a few tries, it became second nature. Today, I test my own vehicles and help friends before road trips or cold spells. It’s simple, fast, and gives you peace of mind.
If you live in cold northern states, make testing part of your winter prep. If you’re in hot southern states, check voltage after long heat waves. Both extreme temps hurt batteries, and quick tests help you stay ready.At the end of the day, testing your car battery with a multimeter is about control and confidence. You don’t need a mechanic — just your hands, a good meter, and five minutes of your time.