
Carving wood with a Dremel changed how I think about creativity and working with my hands. When I picked up my first Dremel tool, I was nervous. The idea of spinning bits and the smell of sawdust felt exciting, but I worried I might ruin my wood or hurt myself.
I soon learned, though, that with patience and the right steps, you can create wonderful carvings—even as a beginner. I want to share everything I’ve learned, from the tools I use to the mistakes I made. Whether you’re just curious or already own a Dremel, this guide will help you carve with confidence and joy.
Why Carve Wood With A Dremel?
When I tried traditional wood carving, I found it slow and tiring. Hand tools like chisels are great for some, but they need a lot of practice. Using a Dremel felt easier and faster. The tool’s speed lets you carve fine details and smooth shapes with less effort.
It’s also lighter than many other tools, so my hands didn’t get tired as quickly.
Another big reason I love using a Dremel is the variety. With different bits, I can cut, sand, engrave, and polish. This means I don’t need a whole box of tools. I can switch between bits in seconds and work on many projects with just one machine.
Plus, Dremels are affordable and easy to store, which is great if you have a small workspace like I do.
Choosing The Right Dremel And Accessories
Before I started, I was overwhelmed by the number of Dremel models and attachments. I spent hours reading reviews and watching videos. Here’s what I learned from my own experience.
Which Dremel Should You Use?
Dremel offers both corded and cordless models. I started with a basic corded Dremel 3000. It was reliable and had enough power for most tasks. Cordless models like the Dremel 8220 are more flexible, but the battery can run out fast if you carve for a long time. If you plan to work outdoors or move around, cordless might be better. For longer sessions, a corded model saves trouble.
Here’s a simple comparison I made before choosing:
| Feature | Corded Dremel | Cordless Dremel |
|---|---|---|
| Power | Consistent | Varies (depends on battery) |
| Portability | Limited by cord | Very portable |
| Run Time | Unlimited | 1-2 hours per charge |
| Weight | Usually lighter | Slightly heavier (battery) |
| Price | Lower | Higher |
Essential Dremel Bits
When I first started, I bought a large bit kit. But I quickly realized I used only a few bits most of the time:
- High-speed cutters – For rough shaping and removing lots of wood.
- Engraving bits – For fine lines and details.
- Sanding drums – For smoothing surfaces.
- Diamond bits – For extra-hard woods or finishing.
I made the mistake of using the wrong bit once and burned my wood. Now, I always check the bit type and speed for each step.
Other Useful Accessories
A few extras made my work easier:
- Flex shaft attachment: Makes the tool lighter in your hand. My hands felt less tired.
- Safety glasses: Essential. I got dust in my eye once—never again.
- Dust mask: Wood dust is not safe to breathe. I use a simple mask.
- Clamps or a vise: Keeps the wood steady so it doesn’t jump or spin.
Preparing Your Workspace
A good workspace is more important than I first thought. My first carving was on a wobbly table, and it made clean lines impossible. Now, I always work on a solid surface and keep my area well-lit. A small lamp helps me see details better.
I cover my table with an old towel to catch dust and bits of wood. I also open a window or use a small fan to keep the air fresh. Even a small Dremel makes a lot of dust, especially with soft woods.
Picking The Right Wood
I tried carving on many types of wood. Some were easy, some were a nightmare. Here’s what I learned:
- Basswood: Soft and easy to carve. Great for learning.
- Pine: Cheap, but can be “splintery.” Watch out for knots.
- Mahogany and walnut: Harder, but the details look beautiful.
- Oak: Very hard. My bits wore out fast. I avoid it for fine carving.
Soft woods are best for beginners. They don’t burn as easily and mistakes are easier to fix. When I carved hardwood too soon, my hands got tired and the bits clogged up.
Here’s a quick comparison from my experience:
| Wood Type | Hardness | Carving Ease | Finish Quality |
|---|---|---|---|
| Basswood | Soft | Very easy | Good |
| Pine | Soft to Medium | Easy | Fair (knots) |
| Mahogany | Medium-Hard | Moderate | Excellent |
| Oak | Hard | Difficult | Excellent |
If you’re not sure, start with basswood or pine. They’re cheap and easy to find.
Planning Your Project
When I started, I jumped in without a plan. My first piece looked messy because I didn’t draw a design. Now, I always sketch my idea on paper first. Then, I draw simple guide lines on the wood with a pencil.
Start with small projects—a spoon, a pendant, or a simple animal. I learned more from finishing three small pieces than from working on a big, unfinished project for weeks.
Some tips I wish I knew from the start:
- Keep designs simple at first.
- Don’t worry about mistakes—they can become new ideas.
- Practice straight lines and curves before trying complex shapes.
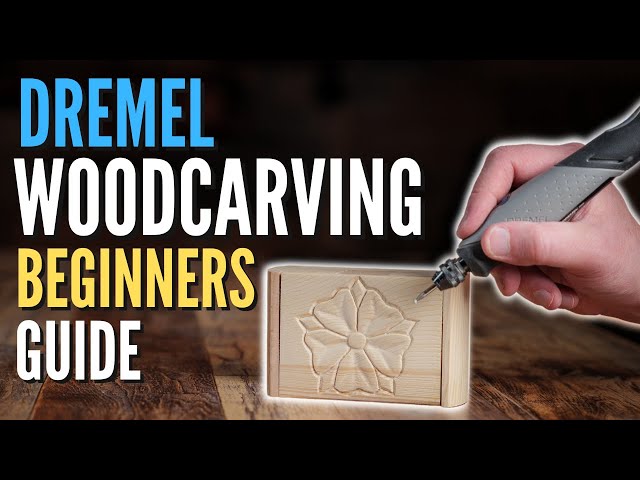
Step-by-step: How I Carve Wood With My Dremel
I want to walk you through my typical process. This is how I carved my first wooden leaf, and it’s still how I start most projects.
1. Set Up Your Workspace
Put on safety glasses and a mask. Clamp your wood down. Make sure your Dremel is plugged in or charged.
2. Sketch The Design
Draw your design right on the wood. Use a soft pencil—lines are easy to erase or sand off later.
3. Choose The Right Bit
For rough shapes, I use a high-speed cutter. For details, I switch to an engraving bit. Double-check the bit before you start. The wrong bit can ruin your project or even break.
4. Start Carving Slowly
Turn the Dremel to a medium speed. High speed burns soft wood. I learned this the hard way—my first project had black marks everywhere. Take light passes. Don’t push too hard; let the tool do the work.
5. Carve The Outline First
I trace the outer lines of my design first. This gives me a guide to follow. If you mess up the outline, the whole piece can look uneven.
6. Remove Extra Wood
Once the outline is set, I switch to a bigger bit and remove the background or extra wood. This step is messy, so I vacuum often.
7. Add Details
Switch to smaller bits for details. I always test the bit on a scrap piece first. It helps me get a feel for the speed and pressure.
8. Smooth And Finish
I use sanding drums to smooth the surface. For tight spots, I use a sanding disc or even sandpaper by hand. After sanding, I brush off dust and check the shape.
9. Clean Up
Wipe the carving with a soft cloth. Sometimes I use a small brush to get dust out of crevices. If you want, you can stain or paint your piece. I like to use natural oils—it brings out the wood’s color.
Common Mistakes I Made (so You Don’t Have To)
I want to be honest. I made lots of mistakes. Here are a few, and what I learned:
- Using the wrong bit: Once I used a metal bit for wood. It clogged and burned.
- Going too fast: Rushing made me slip and gouge the wood.
- Not wearing safety gear: Wood dust got in my nose and eyes. Don’t skip safety.
- Forgetting to clamp the wood: The piece spun out of control and chipped.
- Trying to carve hard wood as a beginner: It was frustrating and slow.
If you learn from these, you’ll save yourself a lot of trouble.
How To Finish Your Carved Project
Finishing makes your work look professional. Even my simple carvings look better with a good finish.
- Sand with finer grits: Start with 120, then move to 220 or even 400 grit.
- Brush off all dust: Dust ruins paint or oil finishes.
- Apply finish: I like beeswax or mineral oil for a natural look. For outdoor pieces, use a clear varnish.
I always let the finish dry fully before touching the piece. Patience pays off.

Cleaning And Maintaining Your Dremel
A clean tool lasts longer. After each project, I unplug the Dremel and brush off all dust. I use a small brush or a can of air for tiny crevices. I also check the bits for wear. Dull bits burn wood and can break.
Once a month, I oil the flex shaft and check the cord for damage. This small habit saved me from tool failures more than once.
Advanced Tips And Insights
After a few months, I found ways to improve my results:
- Use light passes: Deep cuts often tear the wood. Light, repeated passes look cleaner.
- Change bits often: Don’t try to do everything with one bit.
- Work with the grain: Carving against the grain can cause splinters.
- Try layered designs: Once you’re comfortable, try carving in layers for a 3D effect.
One thing beginners miss is bit speed control. Some woods need slow speeds, others need fast. Always test on scrap first.
Projects You Can Try
Here are some ideas that helped me learn:
- Simple pendants (stars, hearts, leaves)
- Wooden spoons
- Name plaques
- Small animal shapes
- Decorative boxes
Start small. Each finished project builds your confidence.
Safety Comes First
Never skip safety gear. Even a small sliver can hurt your eyes, and wood dust builds up fast. I always wear glasses, a mask, and sometimes ear plugs if I work for a long time.
Keep your workspace tidy. A clean bench means fewer accidents.

Useful Resources
If you want to see other carvers, I recommend checking out online forums and video tutorials. The Woodcarving Illustrated site has great ideas and advice for all skill levels.
Frequently Asked Questions
What Type Of Wood Is Best For Beginners Using A Dremel?
I recommend basswood or pine. Both are soft, easy to carve, and forgiving if you make a mistake. Stay away from hardwoods until you are comfortable.
How Do I Stop The Dremel From Burning The Wood?
Burn marks happen when the tool spins too fast or you press too hard. Use lower speeds for soft woods and let the tool do the work. If you see smoke, stop and let the bit cool.
How Do I Clean Wood Dust Safely?
Always wear a mask and use a small vacuum or brush. Never blow dust with your mouth. Fine wood dust is bad for your lungs.
Which Dremel Bits Should I Buy First?
You only need a few to start: a high-speed cutter, an engraving bit, and a sanding drum. These cover most basic projects.
Is Dremel Carving Safe For Kids?
I don’t recommend it for young kids. Dremels spin fast and can hurt fingers. Older teens can try with close adult help, good safety gear, and simple projects.
Carving wood with a Dremel is fun and rewarding. I made many mistakes, but each one taught me something new. If you start small and stay patient, you’ll be amazed by what you can create. If you ever get stuck, remember—every expert was once a beginner.
Happy carving!
As an Amazon Associate, We earn from qualifying purchases