If you’ve ever wanted to paint a wall, a car, or even a piece of furniture and get that perfectly smooth finish, you might have thought about using a spray gun with an air compressor. I know I did. My first time was scary. I was worried about making a mess, wasting paint, or even damaging my compressor. But after some trial and error, and a few honest mistakes, I learned a lot. I want to share everything I’ve learned so you can skip the hard parts.
Maybe you already own a compressor or you’re just curious about what’s involved. I’ll walk you through the whole process. I’ll cover what you need, how to set up, how to spray, and all the tips I wish someone had told me earlier.
Using a spray gun with an air compressor is easier than you think, but there are things you need to know to get that smooth, even coat.
What You Need To Get Started
Before I ever sprayed my first coat, I spent hours trying to figure out what tools I really needed. It can get confusing fast. Let me break it down.
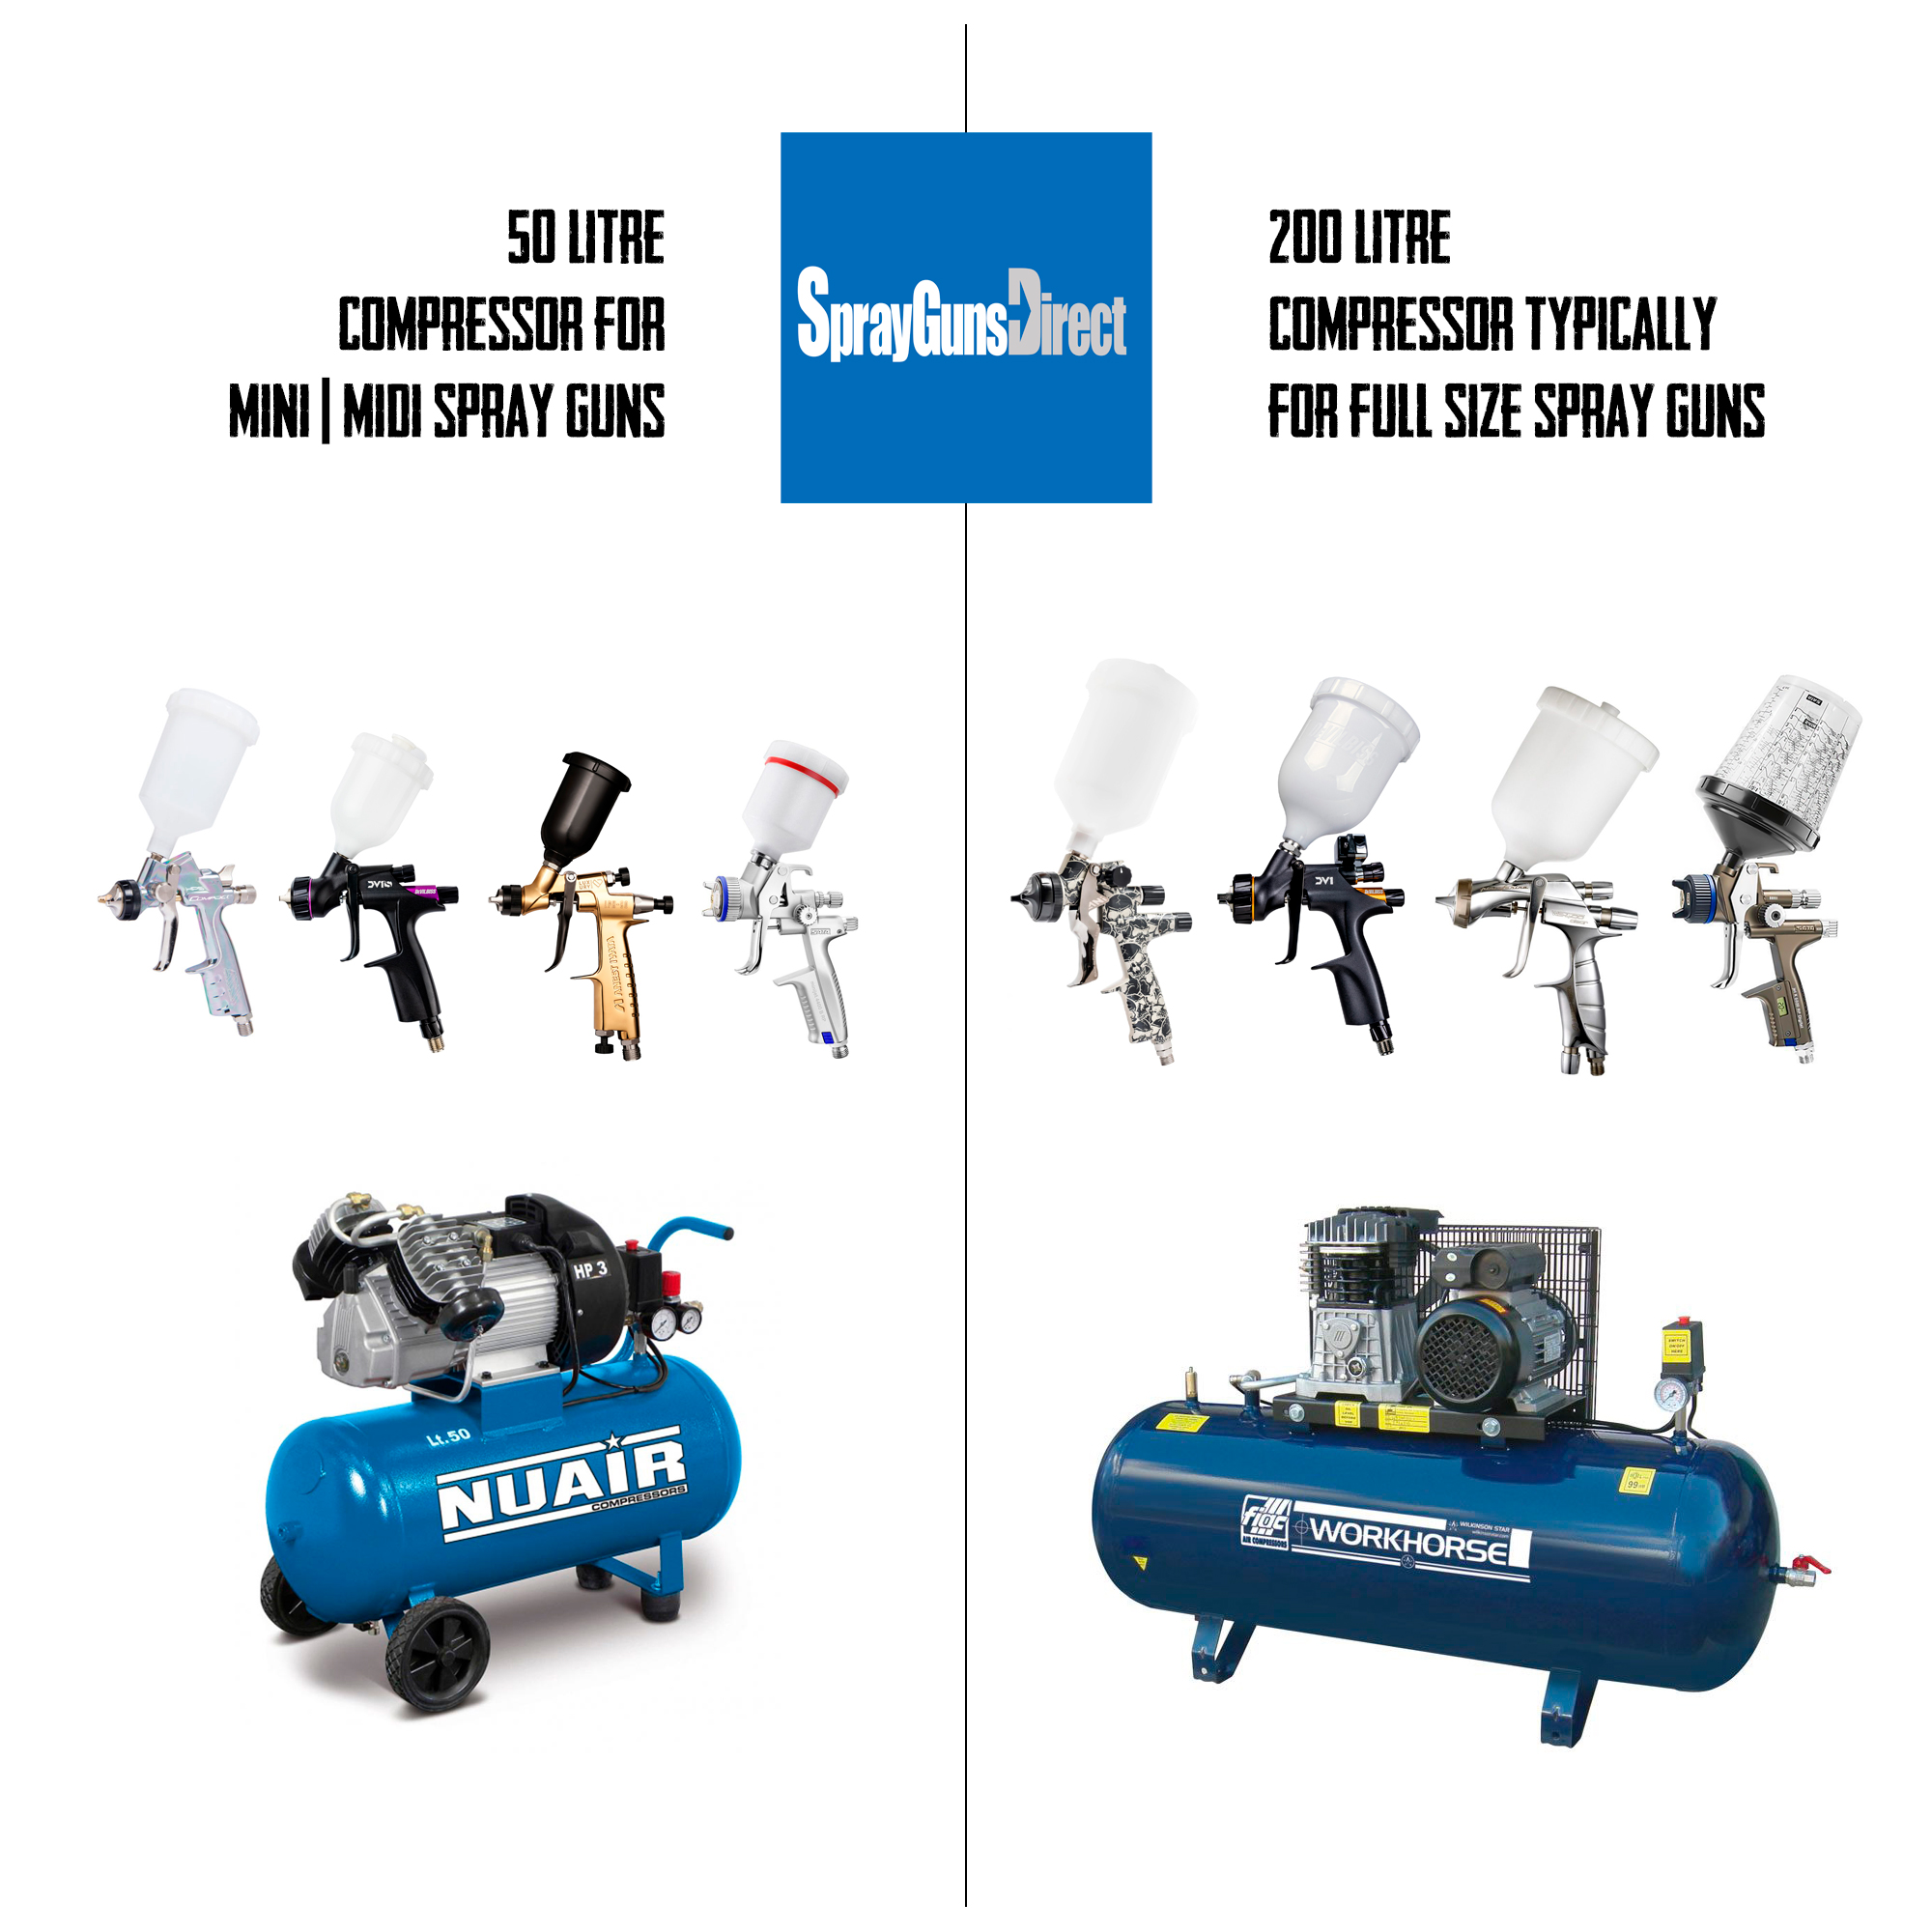
- Air Compressor: You need one that can deliver enough air (measured in CFM – cubic feet per minute). Most spray guns need at least 4-6 CFM at 40 PSI. Check your gun’s manual.
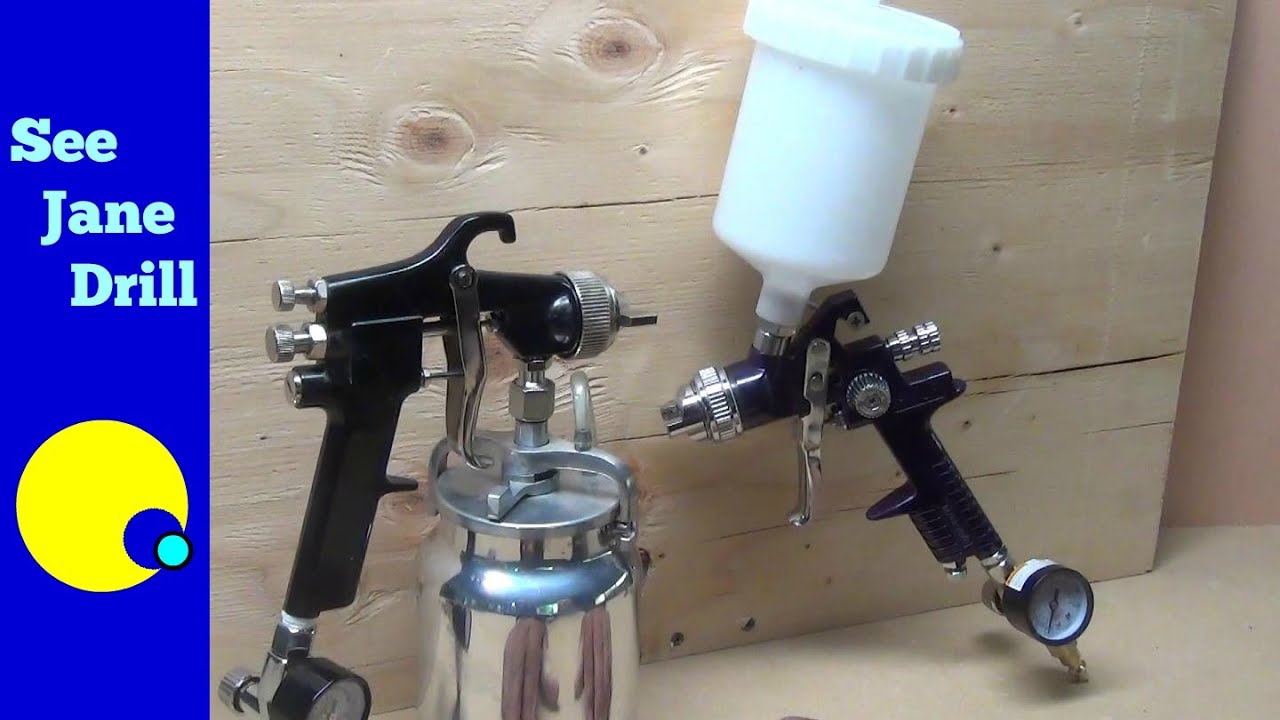
- Spray Gun: There are different types—HVLP (High Volume, Low Pressure) is great for detail and less overspray. Conventional guns use higher pressure and more air. I started with an HVLP gun.
- Air Hose: Make sure it’s long enough to reach your work area. I use a 25-foot hose.
- Regulator and Water Trap: The regulator controls air pressure. The water trap keeps moisture out of your paint (this is more important than most people realize).
- Paint: Choose paint made for spraying. Some paints need to be thinned.
- Safety Gear: Always use a mask, goggles, and gloves. Paint fumes are no joke.
- Cleaning Supplies: You’ll need solvent or water, depending on your paint.
I once tried spraying with a smaller compressor and skipped the water trap. My paint job looked great at first, but water drops in the air line made the finish bubble up. Lesson learned: don’t skip the water trap.
Here’s how the main equipment compares in terms of what you’ll need:
| Item | Must-Have | Optional | Why It Matters |
|---|---|---|---|
| Air Compressor | ✔ | – | Powers the spray gun |
| Spray Gun | ✔ | – | Applies paint evenly |
| Regulator & Water Trap | ✔ | – | Controls pressure and removes moisture |
| Safety Gear | ✔ | – | Keeps you safe from fumes |
| Extension Cord | – | ✔ | Helps reach power source |
Setting Up Your Spray Gun And Air Compressor
The first time I connected my spray gun, I was nervous about making a mistake. But the steps are simple once you know them.
1. Choose A Good Work Area
Pick a well-ventilated space. Outdoors is fine if there’s no wind. Indoors, open windows and use a fan.
2. Connect The Air Hose
Attach one end to the compressor and the other to your spray gun. Use the quick-connect fittings if you have them—it makes things easier.
3. Install The Water Trap And Regulator
I put mine right at the end of the hose, near the gun. This stops moisture and lets you adjust the pressure right where you need it.
4. Check The Compressor Settings
Set the regulator to match your spray gun’s needs. Most HVLP guns work well at 25-30 PSI at the gun.
5. Prepare The Paint
Follow the instructions for thinning if needed. I always strain the paint through a mesh filter to remove clumps.
6. Fill The Paint Cup
Pour the strained paint into the gun’s paint cup. Don’t overfill—it makes the gun heavy and can spill.
7. Test Spray On Scrap Material
Never start on your real piece! I always spray a piece of cardboard first to check the pattern and flow.
I learned the hard way that missing even one step—like skipping paint straining—can ruin your finish. Take your time with setup.
Adjusting The Spray Gun For Best Results
Getting the spray gun adjusted is more art than science. When I started, I just squeezed the trigger and hoped for the best. That was a mistake. Here’s what works for me:
1. Fan Pattern Adjustment
There’s usually a knob on the side. Turn it to make the spray wide or narrow. A wide fan covers more area but can waste paint. I like to use a wide fan for big surfaces, and a narrow one for detail.
2. Fluid (paint) Control
The knob on the back controls how much paint comes out. Too much, and you get drips. Too little, and the surface is dry and rough.
3. Air Pressure
Use the regulator to fine-tune. Too much pressure makes overspray and wasted paint. Too little and the paint spits out unevenly.
4. Distance And Speed
Hold the gun about 6-8 inches from the surface. Move at a steady speed. If you go too slow, you get runs. Too fast, and it’s thin and patchy.
Here’s a quick comparison of common adjustments and what they affect:
| Adjustment | Too Much | Too Little | Just Right |
|---|---|---|---|
| Fan Pattern | Overspray, waste | Streaks | Even coverage |
| Fluid Control | Drips, runs | Dry finish | Smooth surface |
| Air Pressure | Overspray, mist | Spitting | Fine mist |
What most people don’t realize is that humidity and temperature also affect how paint flows. On humid days, I’ve had to adjust the air pressure higher to get the same results.
Spraying Techniques: Getting A Smooth Finish
Spraying is where the fun (and challenge) really starts. My first attempts were patchy and uneven, but with practice, I found what works.
1. Keep The Gun Moving
Always start moving the gun before you pull the trigger, and release the trigger before you stop moving. This stops thick spots at the start and end.
2. Overlap Each Pass
Aim for about 50% overlap on each pass. This means the edge of your spray covers half of the last line. It gives a smooth, even look.
3. Watch The Angle
Keep the gun straight and parallel to the surface. If you tilt it, you get more paint at one end.
4. Thin Coats Are Best
It’s better to do two or three thin coats than one thick one. Thick coats drip and sag.
5. Let Each Coat Dry
Follow the paint’s instructions for drying time. If you rush, the paint can wrinkle or peel.
One thing I learned that surprised me: the weather really matters. On a hot day, the paint can dry before it hits the surface, leading to a rough finish. On cold days, it can take forever to dry. I try to spray in mild temperatures, around 65-75°F (18-24°C).
Cleaning And Maintaining Your Spray Gun
Cleaning is the part everyone hates, but it’s so important. I ruined a gun by not cleaning it well. Dried paint will clog the gun and ruin future projects.
1. Empty The Paint Cup
Pour leftover paint back into the can or dispose of it safely.
2. Flush With Solvent Or Water
Run the right cleaner (check your paint type) through the gun. I spray it into a waste container until it runs clear.
3. Disassemble The Gun
Take off the nozzle, needle, and other parts. Soak them if needed.
4. Scrub With A Brush
Use a small brush to scrub paint from every part. Even small bits can cause problems next time.
5. Dry And Reassemble
Let all parts dry, then put the gun back together.
6. Lubricate Moving Parts
A few drops of oil on moving parts can keep them working smoothly.
A surprising thing: even if you use water-based paints, don’t leave water inside the gun. It can rust. Always dry it completely.
Common Mistakes And How To Avoid Them
I’ve made every mistake in the book. Here are the ones I see most often, and how to fix them:
1. Wrong Air Pressure
Too high or too low ruins the finish. Always check the gun’s manual.
2. Skipping The Water Trap
Moisture causes bubbles and ruined paint. Always use a water trap.
3. Not Thinning Paint
Thick paint spits and clogs. Always strain and thin your paint if needed.
4. Holding The Gun Too Close Or Far
Too close causes runs, too far is patchy. Stay about 6-8 inches away.
5. Not Cleaning Right Away
Dried paint is almost impossible to remove. Clean the gun right after you finish.
6. Painting In Bad Weather
High humidity or cold can ruin the finish. Choose a mild, dry day.
7. Not Using Enough Safety Gear
Paint fumes can make you sick. Always wear a mask and goggles.
Real-world Example: My First Car Panel
I remember spraying my first car panel. I was nervous, but I followed all the steps above. My first coat was a bit rough—too much paint in one spot. I adjusted the fluid control, moved faster, and the next coats were much better.
By the end, I was amazed at how shiny and even it looked. It wasn’t perfect, but it was way better than I expected.
Here’s a quick look at how different surfaces react to spray gun painting, based on my experience:
| Surface Type | Best Technique | Common Problem | Solution |
|---|---|---|---|
| Car Body | Thin, even coats | Runs | Faster movement, less paint |
| Wood Furniture | Sand smooth, prime first | Rough finish | Sand between coats |
| Walls | Wide fan, overlap passes | Overspray | Mask edges, use drop cloths |
Safety Tips You Should Never Ignore
When I first started, I underestimated how important safety is. Paint fumes are dangerous. Overspray can get everywhere—even in your lungs.
- Always wear a respirator mask rated for paint fumes.
- Use goggles to protect your eyes from mist.
- Wear gloves to keep paint off your skin.
- Cover your hair and wear old clothes.
- Keep the work area well-ventilated.
- Never spray near open flames or heat sources.
I once painted in a closed garage and felt dizzy after an hour. That was a wake-up call to always use a mask and open the doors.
For a deeper dive into safety, the CDC’s spray painting safety page has great advice.

Frequently Asked Questions
How Do I Know If My Compressor Is Big Enough For My Spray Gun?
Check the spray gun manual for the required CFM (cubic feet per minute) at a certain PSI. Your compressor needs to deliver at least this much. If the compressor is too small, it won’t keep up, and the spray will become uneven.
Can I Use Any Type Of Paint In A Spray Gun?
Not all paints work in spray guns. Look for paint labeled for spraying or check the label. Some thick paints need thinning. Always strain the paint to avoid clogs.
Why Does My Spray Gun Spit Or Sputter?
Usually, this means there’s not enough air pressure, the paint is too thick, or there’s a clog in the nozzle. Check and clean the gun, thin the paint, and adjust the air pressure.
How Do I Avoid Runs And Drips?
Use thin coats, keep the gun moving, and don’t hold it too close. If you see a run, wipe it off before it dries and spray again.
Is Cleaning The Spray Gun Really Necessary After Every Use?
Yes! If you don’t clean your gun right away, paint dries inside and can ruin your spray gun. It’s much easier to clean when the paint is still wet.
Spray painting with an air compressor changed how I approach DIY projects. It’s fast, gives a pro finish, and is honestly a lot of fun. With the right setup, a little practice, and these tips, you’ll be spraying like a pro in no time.
Good luck, and don’t be afraid to experiment—you’ll learn something new with every project.
As an Amazon Associate, We earn from qualifying purchases