
Connecting a hose to an air compressor might sound easy, but I remember my first time. I stood in my garage, hose in one hand, compressor in the other, and thought, “This should click together, right? ” It didn’t. Air hissed.
Fittings wobbled. And I realized, there’s a real method to making this simple job work—safely and without leaks. Over the years, I’ve learned the right way. I’ve made mistakes so you don’t have to. Let’s walk through everything you need to know, step by step, with a few stories and tips I wish someone had told me.
Understanding The Basics
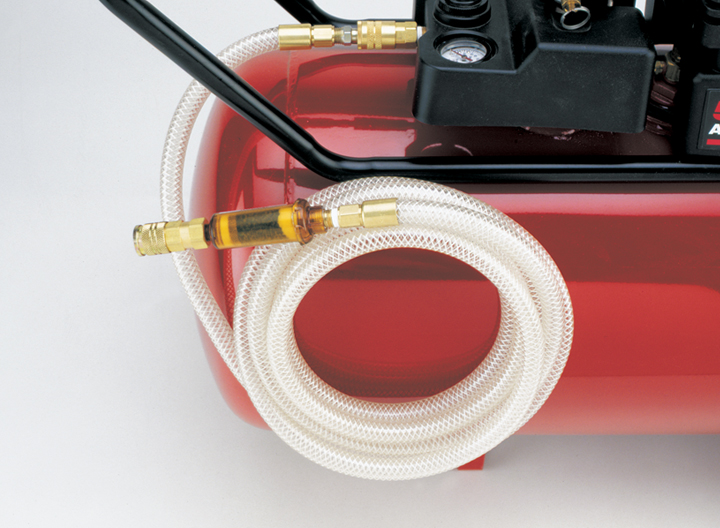
Before we jump in, let’s get clear on what we’re dealing with. An air compressor is a machine that takes in air and squeezes it into a small space, making it high-pressure. You use a hose to carry that air to your tools—like a nail gun, airbrush, or tire inflator. The goal is a leak-free, safe connection.
Why does this matter? If you connect things wrong, you waste air, your tools won’t work right, and you could even get hurt. I’ve seen hoses whip around when they aren’t attached properly. It’s not fun.
Tools And Parts You’ll Need
Here’s what I keep handy every time I set up a compressor:
- Air hose – Make sure it’s the right type and length for your job.
- Compressor – Check the specs: Tank size, max PSI (pressure).
- Fittings and couplers – These help join hose to compressor and tools.
- Thread tape (Teflon tape) – Seals threaded connections to stop leaks.
- Wrench or pliers – Tightens things up.
- Safety gear – Goggles and gloves (trust me, compressed air can be risky).
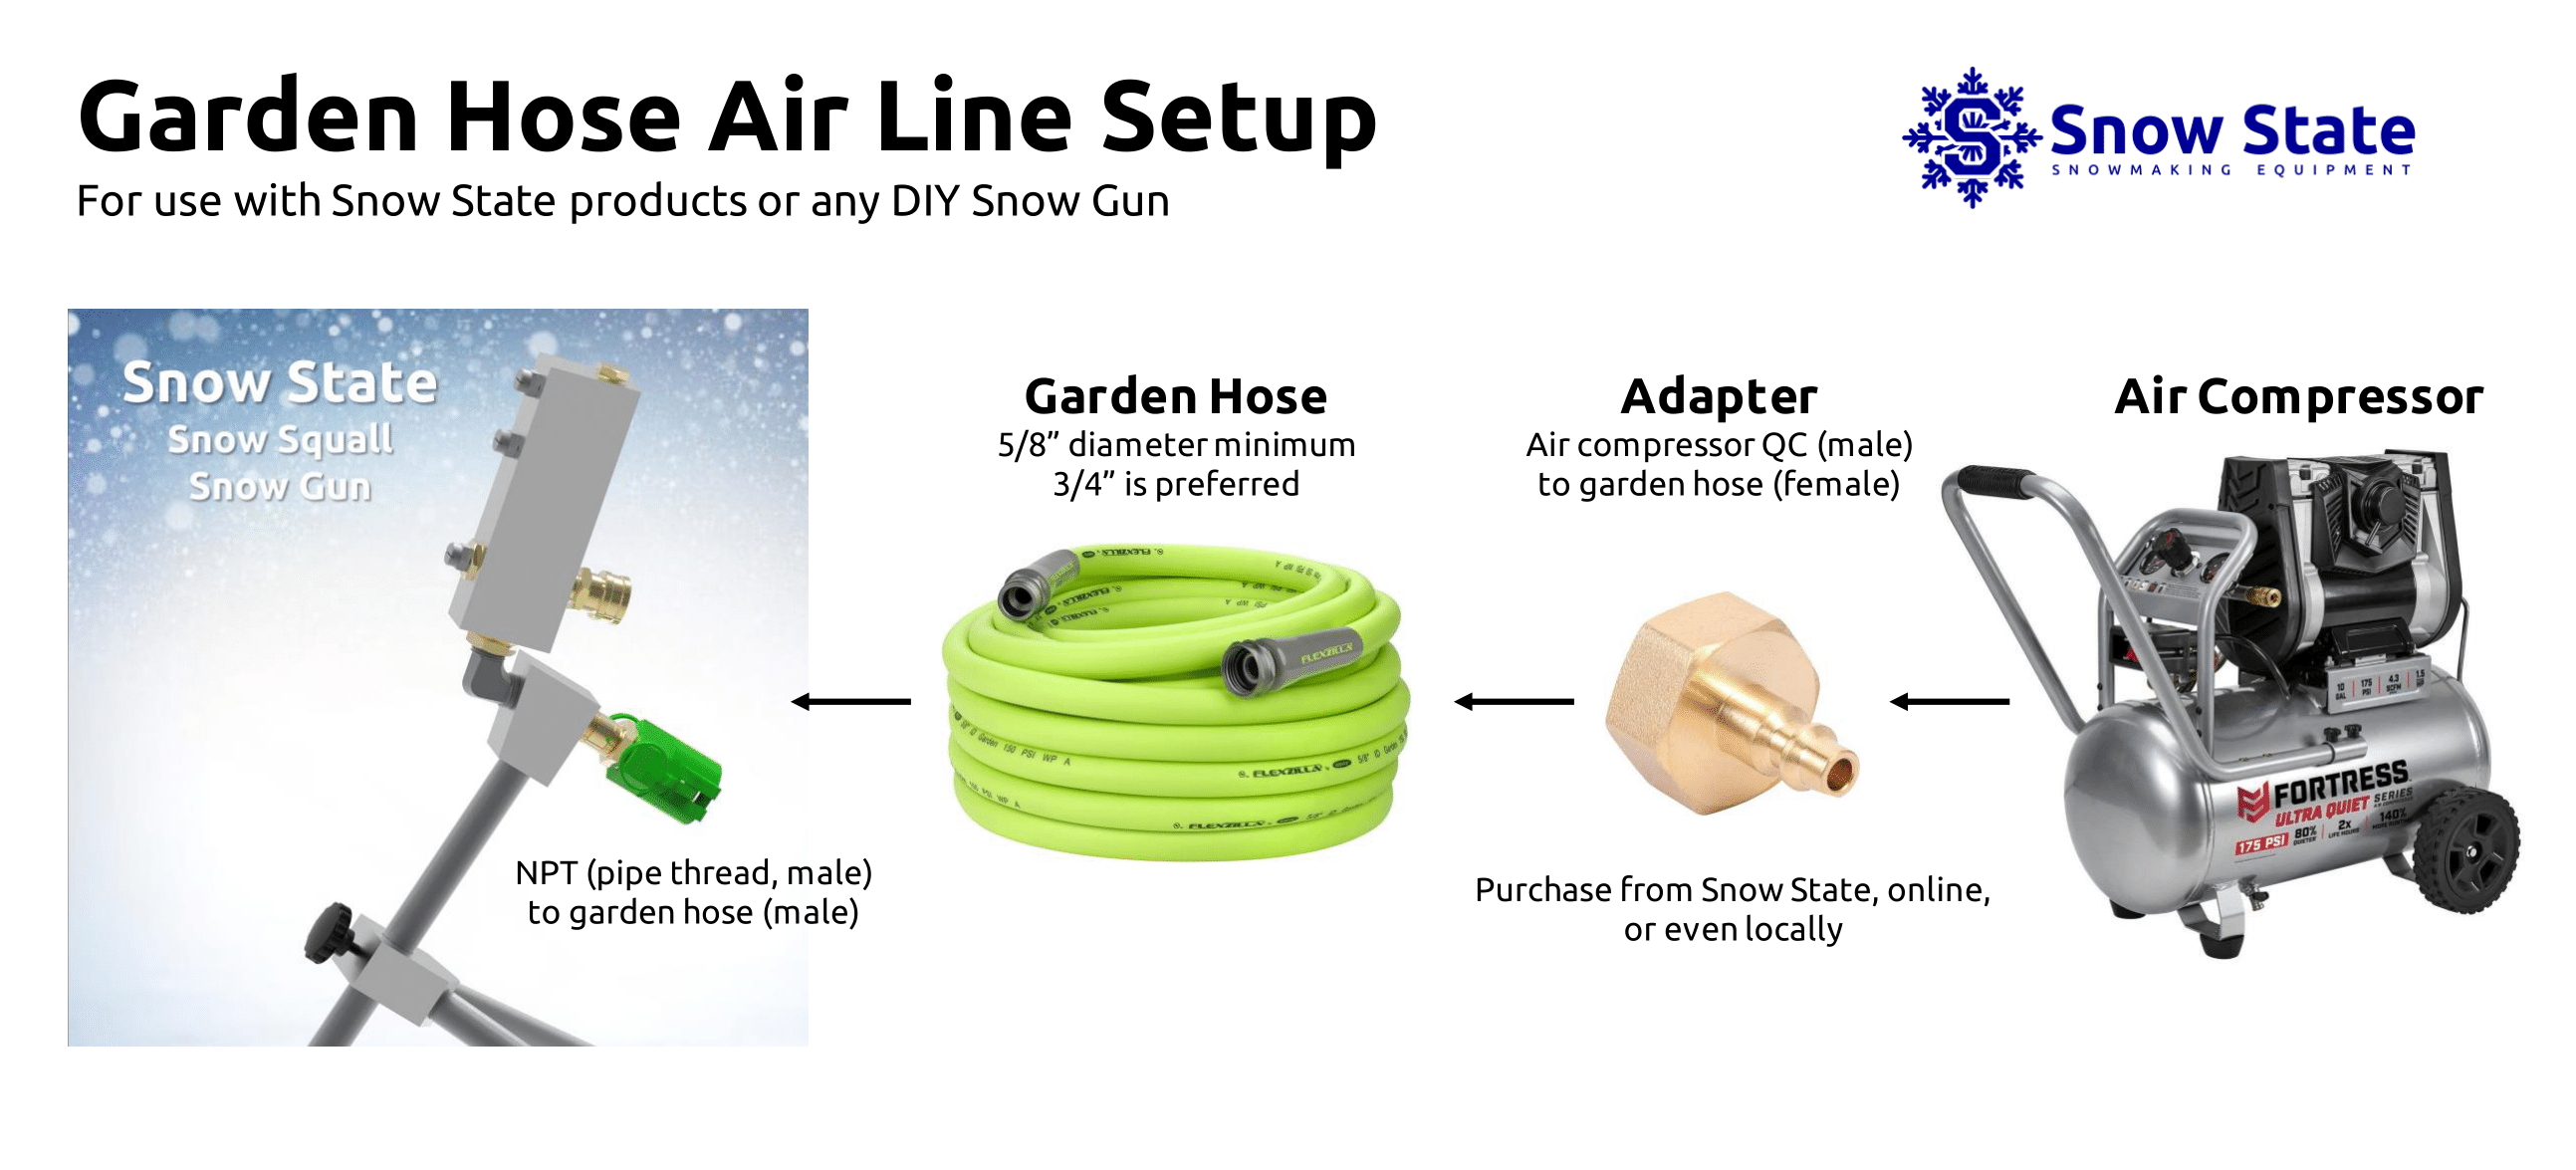
You may also need an adapter if your hose and compressor fittings don’t match. I’ve had to buy a few over the years—don’t feel bad if you need one.
What’s The Difference? Quick Comparison
Let me show you how different hoses and fittings compare. Here’s what I’ve learned from trial and error.
| Type | Best For | Durability | Flexibility |
|---|---|---|---|
| Rubber Hose | Cold Weather, General Use | High | Great |
| PVC Hose | Lightweight Jobs | Medium | Stiff (in cold) |
| Polyurethane Hose | Lightweight, Portable | High | Very Flexible |
I use a rubber hose when I need it to stay flexible in winter. For quick, light jobs, PVC works fine. Polyurethane hoses are my pick for painting or when I’m moving around a lot.
Getting To Know Your Fittings
This is where most people (including me, at first) get stuck. There are two common types of fittings:
- Quick-connect couplers: These snap on and off fast. They have a sleeve you pull back.
- Threaded fittings: These screw together, often with thread tape.
I once tried forcing two different types together. All I got was frustration and a sore hand. Match your fittings! Here’s a handy reference:
| Fitting Type | Common Size | How to Identify |
|---|---|---|
| 1/4″ NPT | Most home compressors | Screw threads, looks like a bolt |
| Quick-connect | Industrial & home | Pull-back sleeve, smooth end |
If your air hose doesn’t fit the compressor, don’t panic. Measure the size (usually in inches), and grab an adapter at the hardware store.
Step-by-step: How I Connect My Hose To An Air Compressor
Let’s get to the part you came for. Here’s my personal process, from opening the box to powering your tools.
1. Check Everything First
I learned the hard way that missing a part stalls the whole project. Lay out your compressor, hose, fittings, and tools. Check that the hose ends and the compressor outlet are the same size and type.
2. Wrap Threaded Fittings With Tape
If you have threaded connections (they look like screws), wrap them with Teflon tape. Go around the threads 2-3 times. This stops leaks. I always keep tape in my toolbox. Air leaks waste power and money.
3. Attach The Fitting To The Compressor
Screw the fitting (or quick-connect coupler) onto the compressor’s air outlet. Use a wrench to make it snug, but don’t overtighten. Too tight can strip the threads. I learned this after a ruined fitting.
4. Attach The Hose To The Fitting
Push the hose end onto the fitting. If it’s quick-connect, pull back the sleeve, insert the hose end, then release. You’ll hear a click. For threaded connections, screw it on by hand, then tighten with a wrench.
Tip: If it doesn’t fit, double-check the size. Sometimes, the package says “fits most,” but your compressor might need a different fitting.
5. Connect Your Tool
Now, connect the other end of the hose to your tool. This is usually a quick-connect fitting. Again, pull back the sleeve, insert, and let go. Tug gently to make sure it’s secure.
6. Check For Leaks
Before turning on your compressor, double-check everything. I spray a little soapy water on the connections. If bubbles form, there’s a leak. Tighten the fitting or add more tape.
7. Turn On The Compressor
Plug in the compressor, switch it on, and let it fill with air. Watch the gauges. The tank pressure will rise first, then the regulated pressure. Adjust the regulator to match your tool’s needs.
8. Test The Setup
Press the tool’s trigger. You should hear steady air flow—no hiss, no leaks. If something feels wrong, stop and check again.
Common Mistakes I’ve Made (so You Don’t Have To)
I wish someone had told me these from the start. Here are mistakes I’ve made, and how you can avoid them:
- Forcing wrong fittings – I once used pliers to jam a fitting on. It ruined the threads. Always match type and size.
- No thread tape – Skipping tape means leaks. Always use it on threads.
- Not checking for leaks – I thought I was done, but air hissed out. The soapy water trick works every time.
- Wrong hose for the job – PVC hoses get stiff in cold. I once snapped one like a twig in winter. Rubber or polyurethane is best for flexibility.
- Ignoring safety – I’ve had hoses pop off and hit my leg. Always wear goggles and gloves when testing.
Choosing The Right Hose And Fittings
There’s no one-size-fits-all. Here’s how I decide what to use:
- Length: Short hoses (10-25 feet) lose less pressure, but longer hoses (50+ feet) let you move around more.
- Diameter: Thicker hoses (3/8″) carry more air, which is better for big tools.
- Material: Rubber is heavy but flexible. PVC is light but stiff. Polyurethane is light and flexible.
- Fitting type: Quick-connect is fastest, but threaded is more secure for permanent setups.
If you’re not sure, take your hose or fitting to the store. I’ve done this many times. The staff can help you match parts.

Air Compressor Maintenance After Connecting
Once everything is set up, don’t just forget about it. Here’s my simple maintenance routine:
- Drain the tank after each use. Water builds up from compressed air.
- Check for leaks every month. Hoses and fittings can loosen over time.
- Store hoses coiled and off the ground. I ruined a hose by leaving it in oil and sunlight.
- Oil your tools if they need it—some air tools require a drop of oil in the fitting.
Keeping things clean and dry gives your setup a longer life and better performance.
Advanced Tips: What Most Beginners Miss
After years of using compressors, I picked up a few tricks that aren’t obvious at first.
1. Use a quick-connect set on both ends of your hose.
This lets you swap tools fast or even switch hoses in seconds. I keep a spare set handy—saves a ton of time.
2. Label your hoses.
If you use different hoses for paint, air, or tools, label them. I once used a paint hose for air, and it made my tools sticky.
3. Use a filter and regulator.
Moisture or dust in the air can hurt your tools. Adding a filter keeps air clean, and a regulator lets you set exact pressure. My spray gun works much better since I added these.
4. Don’t run the compressor without a load.
Letting the compressor run with nothing attached can waste energy and stress the motor. I learned to always attach a tool or close the valve.
5. Check the manual for max PSI.
Each compressor and hose have a max pressure. Going over can burst the hose or damage your tools. I once blew out a hose by cranking the pressure too high.
Safety Reminders
Compressed air is powerful. I always follow these safety steps:
- Never point an air hose at people or pets.
- Wear eye protection, even for quick jobs.
- Never use a damaged hose—replace it if you see cracks.
- If a fitting feels loose, stop and fix it before using the compressor.
Real-world Example: Inflating Tires
Let me walk you through a quick story. Last winter, my car tires were low. I grabbed my compressor and hose, set everything up as above, and made sure the fittings were snug. Used the soapy water trick—no leaks. I set the pressure to 35 PSI and attached the tire chuck.
In minutes, all four tires were ready for the road. If I’d skipped checking for leaks, I might have wasted air or, worse, damaged the compressor. Small steps make a big difference.
Troubleshooting: What If It Still Leaks Or Won’t Connect?
Even if you do everything right, sometimes things don’t work. Here’s what I check:
- Wrong fitting type? Try swapping the coupler or adapter.
- Damaged threads? Replace the fitting. Cross-threaded parts won’t seal.
- Cracked hose? Time for a new hose.
- Compressor outlet clogged? Clean with a soft brush or replace.
If you’re stuck, bring your parts to a hardware store. I’ve done this, and the staff often solve the problem in minutes.
Frequently Asked Questions
How Do I Know What Size Fitting My Compressor Needs?
Most home compressors use 1/4″ NPT fittings, but check your manual or measure the threads. Bring the old fitting to the store if you’re not sure.
Can I Connect Any Air Hose To Any Compressor?
Not always. You need to match both the size and type of fitting. If they’re different, use an adapter. I keep a few adapters in my toolbox just in case.
Why Do I Need Teflon Tape On Threaded Fittings?
Teflon tape seals the threads and stops air leaks. Without it, you’ll lose pressure and waste energy.
What Should I Do If My Hose Keeps Popping Off?
Check that you’re using the right type and size of fitting. Make sure the coupler is locked. If it still pops off, the fitting might be worn out—replace it.
How Often Should I Check My Compressor And Hose For Leaks?
I check mine every month. Spray soapy water on the connections and watch for bubbles. A quick check saves a lot of trouble down the road.
Connecting a hose to an air compressor is simple once you know the steps. With the right parts, a little care, and these tips, you’ll have a safe, leak-free setup every time. Don’t be afraid to ask for help at the hardware store—everyone starts as a beginner. For more technical details, you can check out the Wikipedia entry on air compressors. Happy DIYing!
As an Amazon Associate, We earn from qualifying purchases