Replacing an air conditioner compressor is not something I thought I’d ever do myself. But when my AC stopped cooling last summer, I faced a hard choice—call for expensive repairs or tackle it on my own. I’m not a professional HVAC technician, but I’m pretty handy and love learning how things work.
Here, I’ll share my step-by-step experience, the mistakes I made, and what you need to know if you’re thinking about replacing your own AC compressor.
Why I Needed To Replace My Air Conditioner Compressor
One hot July afternoon, I noticed my air conditioner was running but the air inside my house felt warm. I checked the thermostat, changed the filter, and even reset the system, but nothing worked. After some research, I learned that a failing compressor is a common cause of this problem. The compressor is like the heart of your AC. It pumps refrigerant and helps remove heat from your home. When it fails, the AC can’t cool at all.
I also found out that replacing just the compressor is much cheaper than replacing the entire AC unit, especially if the rest of the system is still in good shape. But it’s a big job. If you’re not comfortable with tools or electrical work, you might want to call a pro.
But if you’re like me—curious and careful—you can do it safely with the right guidance.
How I Prepared For The Job
Before diving in, I spent time gathering what I needed. Preparation made everything smoother and safer.
Tools And Materials I Used
Here’s what I had to get:
- New compressor (matched to my AC model)
- Refrigerant recovery machine
- Manifold gauge set
- Vacuum pump
- Wrenches and screwdrivers
- Safety goggles and gloves
- O-rings and gaskets (usually come with the new compressor)
- Refrigerant (the right type for my system)
- Nitrogen tank (for leak testing)
- Multimeter (for electrical checks)
Having the right tools made a huge difference. I borrowed a few from a friend and rented the recovery machine from a local tool shop.
Safety First
I can’t stress this enough—safety is everything. Air conditioners use high voltage and refrigerants that can be dangerous if handled wrong. Here’s what I did:
- Turned off power at the breaker.
- Wore gloves and goggles at all times.
- Worked outside in a well-ventilated area.
- Double-checked every connection before starting.
Don’t skip these steps. Even a small mistake can cause injury or damage.

Step-by-step: How I Replaced My Ac Compressor
Now, let’s get into the main event. I’ll walk you through each step, including the details that tripped me up.
1. Identifying The Correct Compressor
First, I had to make sure I bought the right compressor. AC units use different sizes and models. I took a photo of my old compressor’s label and matched the model number at the parts store. If you don’t, you can end up with a part that doesn’t fit or work.
2. Recovering The Old Refrigerant
It’s illegal and unsafe to just release refrigerant into the air. I rented a refrigerant recovery machine and followed the instructions to pull all refrigerant out of the system. This step took about 30 minutes. It’s important to do this slowly and make sure the system is completely empty.
3. Disconnecting The Old Compressor
Here’s where I made my first mistake. I didn’t take enough pictures. When I started disconnecting wires and pipes, I got confused about where each one went. I recommend taking close-up photos before touching anything.
I used wrenches to carefully disconnect the electrical wires and refrigerant lines from the compressor. Some bolts were tight, so a little spray lubricant helped.
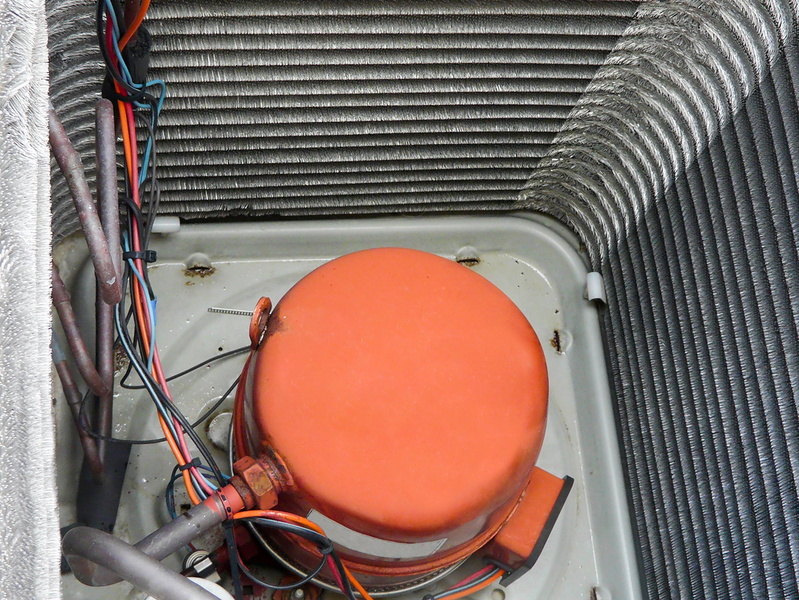
4. Removing The Compressor
Lifting the compressor out was tough. It’s heavy—mine weighed about 30 pounds. I slid it out gently so I wouldn’t damage any pipes or the base.
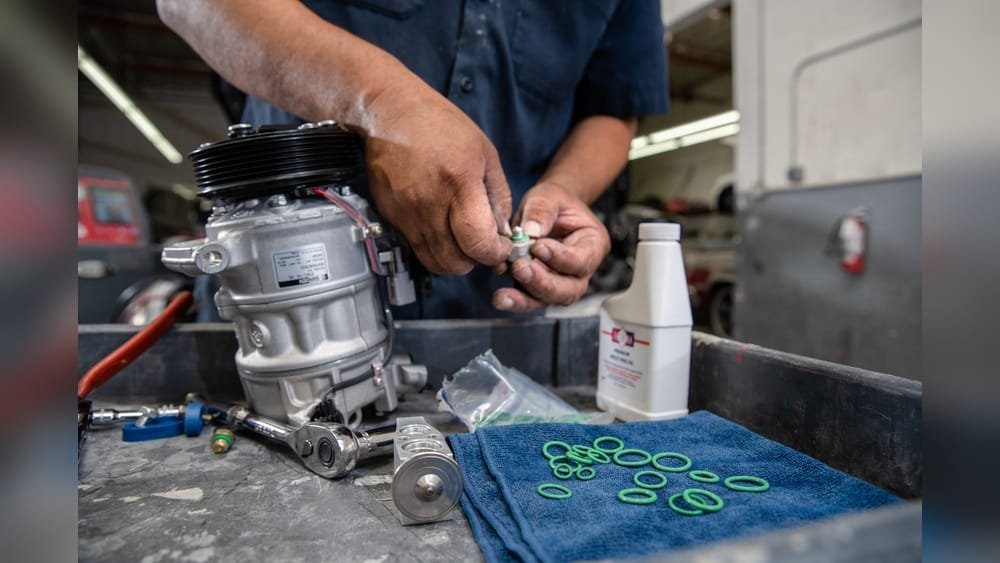
5. Installing The New Compressor
I set the new compressor in place, lined up the fittings, and attached it using the original bolts. I replaced all O-rings and used a little refrigerant oil on them to prevent leaks. This is a detail many people miss, but it makes a big difference.
6. Reconnecting The Pipes And Wires
Using my photos as a guide, I reconnected the refrigerant lines and wires. I made sure every connection was tight but didn’t over-tighten, which can crack fittings.
7. Leak Testing And Vacuuming The System
Before adding new refrigerant, I used a nitrogen tank to pressure test the system. This step helps find any leaks before you waste expensive refrigerant. No leaks? Good. Then I used a vacuum pump for about 45 minutes to remove all air and moisture from the lines.
This keeps the system running efficiently.
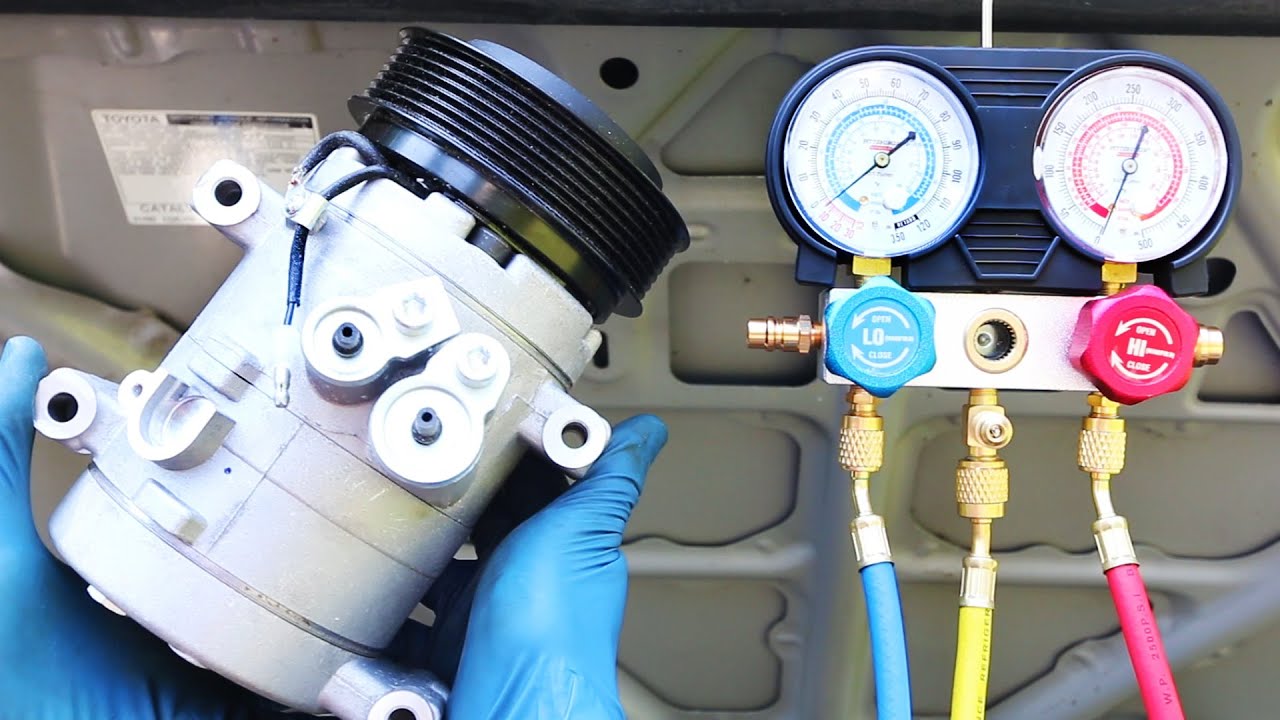
8. Refilling With Refrigerant
Using a manifold gauge set, I slowly refilled the system with the correct amount of refrigerant. This part takes patience. Too much or too little can damage your compressor. I followed the manufacturer’s chart for the right pressure.
9. Testing The System
After everything was back together, I turned the power on and started the AC. It worked! Cool air was flowing again. I checked all connections for leaks and listened for any strange noises.
Comparing Diy Vs. Professional Replacement
At first, I wondered if it was even worth doing this myself. Here’s a breakdown that helped me decide:
| DIY Replacement | Professional Service | |
|---|---|---|
| Cost | $250-$500 (parts & tools) | $1,200-$2,000 (parts & labor) |
| Time Needed | 4-6 hours | 2-3 hours |
| Skill Required | High (mechanical, electrical) | None |
| Warranty | Parts only | Parts & labor |
| Risk | Higher (DIY mistakes possible) | Low (pro handles it all) |
If you’re handy and want to save money, DIY is possible. But if you’re unsure, hiring a pro is safer.
Common Mistakes And How I Avoided Them
Looking back, there are a few things I wish I’d known before starting:
- Not labeling wires: Take photos and label everything. It’s easy to forget where each wire goes.
- Skipping the vacuum: Air and moisture in the system can ruin a new compressor. Never skip the vacuum pump step.
- Wrong refrigerant type: Always check your AC’s label. Using the wrong refrigerant can cause big problems.
- Ignoring small leaks: Even a tiny leak can waste refrigerant and hurt performance. Double-check all fittings.
- Rushing the job: I was tempted to hurry, but taking my time prevented costly mistakes.
How Long Does A Replacement Take?
For me, the whole process took about six hours. The hardest part was disconnecting old, rusted pipes. If you have help or newer equipment, you might finish faster.
Costs Involved
Here’s a cost breakdown from my project:
| Item | Cost (USD) |
|---|---|
| Compressor | 200 |
| Refrigerant | 60 |
| O-rings & Seals | 20 |
| Tool Rental | 75 |
| Nitrogen (leak test) | 25 |
| Miscellaneous | 20 |
| Total | 400 |
This was much less than the $1,500 quote I got from a repair company.
Should You Replace Or Repair?
Sometimes, a compressor can be fixed instead of replaced. Here’s how I decided:
- My compressor was making loud noises and not starting.
- The unit was less than 10 years old.
- The rest of the AC looked good.
If your AC is older than 15 years or keeps having problems, it might be better to replace the whole system. But if everything else works, a new compressor is often enough.
Extra Tips I Learned
- Keep the area clean: Dirt and leaves can block airflow. Clean around the unit before and after the job.
- Check the capacitor: Sometimes, a bad start capacitor causes compressor problems. Test it before spending money on a compressor.
- Register your parts: Many compressors come with a warranty if you register them online. Don’t forget this step.
When You Should Call A Professional
I felt confident doing this because I have experience with electrical work and a friend who’s an HVAC tech. If you’re not sure, it’s safer to call someone. Things like refrigerant handling and electrical wiring can be dangerous if you’re not careful.
If your AC uses R22 refrigerant, be aware that it’s being phased out. Upgrading to a newer system might be a smarter long-term move.
Where To Learn More
I found some great resources online. If you want to see videos and diagrams, check out Energy.gov’s central air conditioning page. It covers everything from basic maintenance to advanced troubleshooting.
Frequently Asked Questions
How Do I Know If My Ac Compressor Is Bad?
Some signs include warm air blowing from vents, loud noises from the outdoor unit, and the outdoor fan running but the compressor not starting. You can also check with a multimeter, but if you’re unsure, get a pro to diagnose.
Is It Worth Replacing Just The Compressor?
If your AC is under 10 years old and everything else works well, yes. If the unit is old or needs other repairs, replacing the whole system might be better.
Can I Replace The Compressor Myself?
Yes, if you’re comfortable with electrical and mechanical work and have the right tools. If not, it’s safer to hire a licensed technician.
How Long Does A New Compressor Last?
Most compressors last 10–15 years with good maintenance. Keep the unit clean and serviced to get the most life out of it.
Do I Need Special Tools For This Job?
Yes. You need a refrigerant recovery machine, vacuum pump, manifold gauges, and leak test equipment. Some tools can be rented, but don’t skip any—using the right tools is key for safety and performance.
Replacing my AC compressor was challenging but rewarding. I saved money and learned a lot. If you decide to do it yourself, take your time, stay safe, and double-check every step. It’s a big job, but with care and patience, you can do it too.
As an Amazon Associate, We earn from qualifying purchases