Removing an axle seal without a puller can feel like a big challenge, especially when you don’t have all the “right” tools. I’ve been there myself, kneeling in my driveway, hands covered in grease, staring at a stubborn seal that just would not budge.
Prime Day Pick
Limited-time Prime Day price. Check current discount on Amazon.
Over the years, I’ve learned that with some patience, the right steps, and a few common tools, you can get the job done safely—no fancy puller needed. In this article, I’ll walk you through everything I’ve learned about removing an axle seal without a puller, so you can avoid mistakes and feel confident tackling this repair.
Why Axle Seals Matter
Let me start with a quick story. A few years ago, I ignored a small oil stain under my car. I kept telling myself, “It’s just a minor leak.” A month later, my axle was making strange noises and, before long, I was facing an expensive repair. The cause? A bad axle seal that let gear oil escape.
Prime Day Pick
Limited-time Prime Day price. Check current discount on Amazon.
Axle seals keep the oil or grease inside your axle housing. If they fail, you get leaks, contamination, and—if you wait too long—serious damage to your vehicle. That’s why replacing a bad seal is so important.
Prime Day Pick
Limited-time Prime Day price. Check current discount on Amazon.
Signs Your Axle Seal Needs Replacement
You don’t want to remove a seal if it’s not bad. Here’s what I look for before starting:
- Oil spots under your car, especially near the wheels.
- Grease or oil on the inside edge of the tire.
- Whining or grinding noises from the axle.
- Low gear oil level if you check the differential.
If you see these signs, the seal probably needs attention.
Tools And Items You’ll Need
When I first did this, I didn’t have a seal puller. But I found that many household tools can work. Here’s what has helped me:
- Flathead screwdriver (a wide one works best)
- Hammer (regular claw hammer is fine)
- Pry bar (optional, but helpful)
- Needle-nose pliers (for grabbing the seal)
- Seal driver or large socket (to install the new seal)
- Gloves and eye protection
- Drain pan (to catch oil)
- Shop rags or paper towels
- Jack and jack stands
- Breaker bar or wrench (for removing axle parts)
Always have the new axle seal ready before you start. Double-check the size for your vehicle.
Preparing Your Vehicle
Safety first! I always make sure my car is parked on a flat surface. Here’s my routine:
- Loosen the lug nuts on the wheel (if needed).
- Jack up the car and support it with jack stands.
- Remove the wheel for easier access.
- Put a drain pan under the axle to catch any oil.
This step is simple but so important. I’ve seen friends skip the jack stands—please don’t! The last thing you want is the car slipping while you work.
Removing Other Parts
Before you can reach the seal, you often need to remove some parts:
- Brake caliper and rotor: Take these off and set them aside.
- Axle shaft: Depending on your car, you may need to slide the axle shaft out a few inches.
- Dust shield or other covers: Move these out of the way if needed.
When I did my first axle seal, I rushed this step and bent my dust shield. Slow down, and use gentle force.
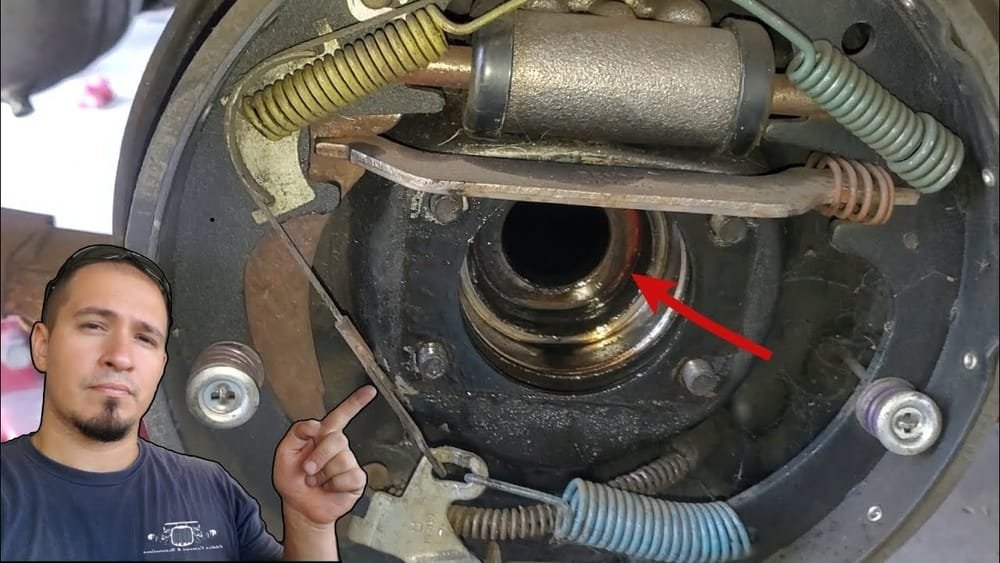
Step-by-step: Removing The Axle Seal Without A Puller
Now for the main event. Here’s exactly what has worked for me, even when the seal felt stuck:
1. Clean The Area
Wipe away dirt and oil from around the seal. This helps you see what you’re doing, and prevents debris from falling inside the axle.
2. Loosen The Seal Edge
I slide a flathead screwdriver between the axle housing and the seal lip. Work gently—if you dig in too hard, you can scratch the metal surface.
I like to tap the handle with a hammer, turning the screwdriver into a mini lever. Go around the seal, loosening it little by little. Patience is key here.
3. Pry Out The Seal
Once the edge is free, I wedge the screwdriver in deeper and twist. Sometimes I use a second screwdriver on the opposite side for more leverage. If the seal moves, but won’t come out, needle-nose pliers can help grip and pull.
If you have a pry bar, it works even better—just be careful not to damage the axle housing.
4. Remove The Seal
When the seal is loose, it should pop out. Sometimes, it takes a few more taps with the hammer or twists with the screwdriver. If the seal breaks apart, grab the pieces with pliers.
I’ve had seals come out in two or three chunks before. As long as you don’t scratch the housing, it’s fine.
Example: My First Time
The first time I did this, I got frustrated. I was prying with all my strength, sweating in the sun. I walked away for five minutes, took a breath, and came back. Working the screwdriver around the edge, bit by bit, finally did the trick.
The seal popped free with a satisfying “plop. ”

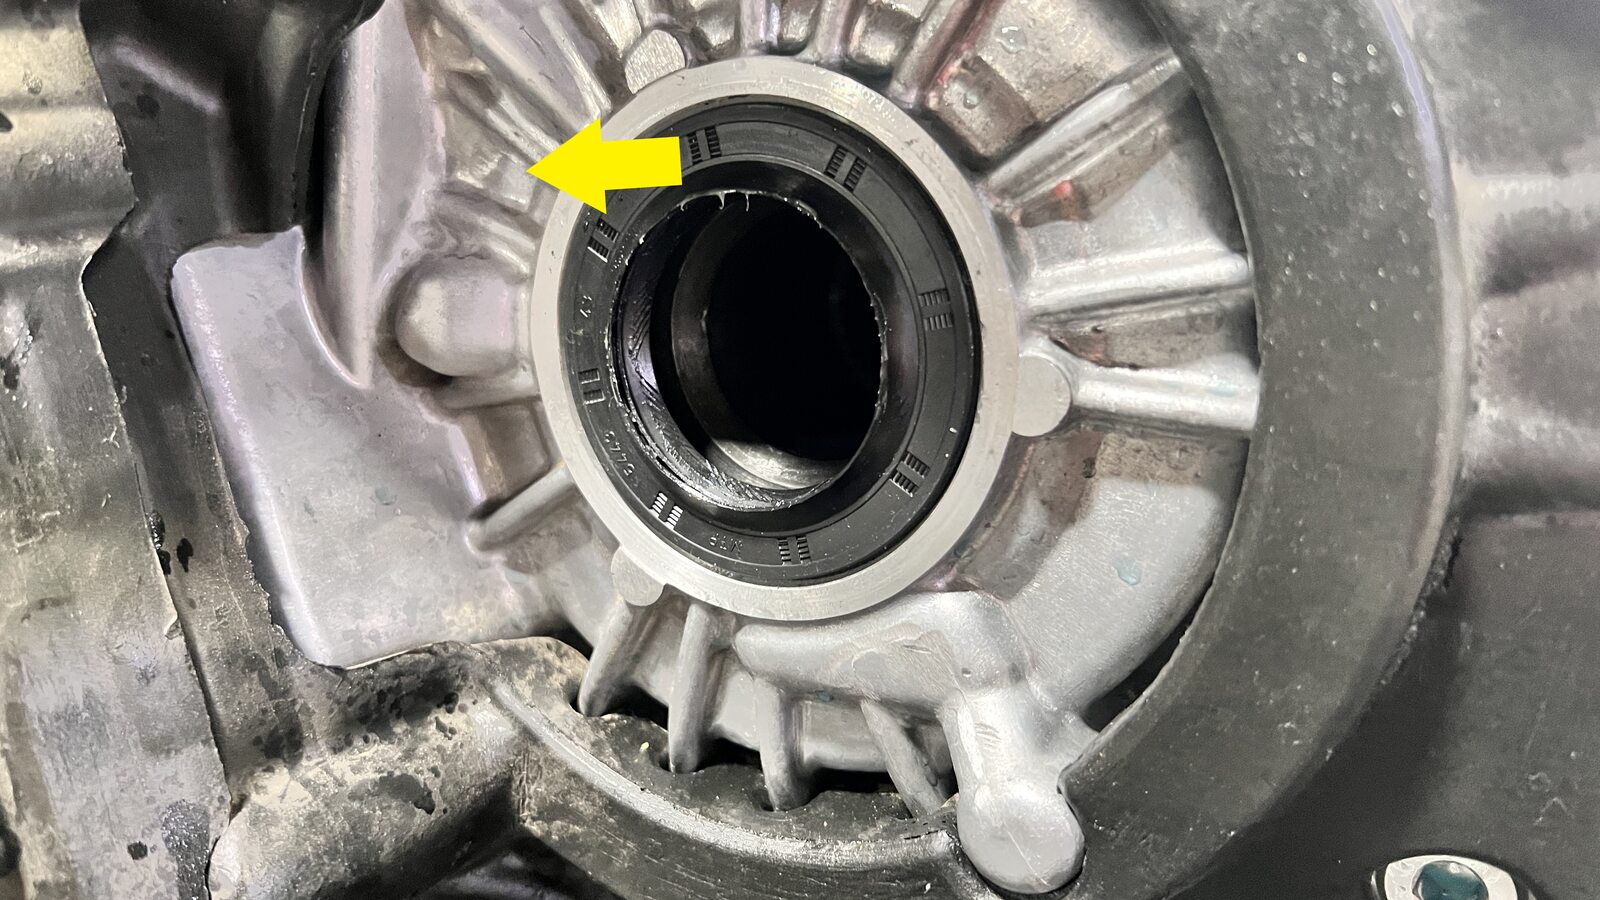
Installing The New Axle Seal
Getting the old seal out is half the battle. Here’s how I install the new one:
- Clean the seal seat with a rag. No dirt, no old seal bits.
- Oil the edge of the new seal. This helps it slide in smoothly.
- Line up the seal evenly with the hole.
- Use a large socket (the same size as the seal) and tap it in with a hammer. Go slow and keep it straight. If you have a seal driver, even better.
I learned the hard way: if you hammer the seal in crooked, it will leak. Take your time and keep checking that it goes in evenly.
Comparing Puller Vs No-puller Methods
Sometimes people ask me if not using a puller is risky. Here’s a quick comparison from my own experience:
| Method | Pros | Cons |
|---|---|---|
| Puller Tool | Fast, less risk of damage | Requires special tool, extra cost |
| No Puller (DIY) | Cheap, uses common tools | More time, risk of scratching surface |
I prefer the no-puller method if I’m only doing one seal and don’t want to buy a tool I’ll use once.
Common Mistakes And How To Avoid Them
I wish someone had warned me about these when I started:
- Scratching the axle housing: Go slow with your screwdriver or pry bar.
- Damaging the new seal: Tap it in gently and evenly.
- Forgetting the oil: Always lube the new seal before installing.
- Not cleaning up: Dirt in the axle can lead to leaks.
- Losing track of parts: Keep bolts and small parts in a tray or bag.
Tips That Make A Real Difference
Here are a few extra tricks I picked up after doing several seals:
- Heat helps: On a cold day, a hairdryer can warm the old seal, making it softer and easier to remove.
- Mark the orientation: Before pulling the seal, snap a photo or mark how it sits. It’s easy to forget.
- Replace both sides: If one seal is leaking, the other might not be far behind.
- Double-check the new seal: Even new seals can have defects. Inspect before installing.
Real-world Example: Time And Difficulty
Every car is a bit different. On my old Toyota, the whole job took about two hours. On a friend’s Ford, it took three because the seal was rusted in place. Here’s a rough idea:
| Car Type | Time Needed | Difficulty (1-5) |
|---|---|---|
| Small Car | 1.5-2 hours | 2 |
| Truck/SUV | 2-3 hours | 3 |
| Rusty/Old Car | 3+ hours | 4 |
If it’s your first time, set aside a full afternoon so you don’t have to rush.
What To Do After Installing The New Seal
Once the new seal is in place, the rest is pretty simple:
- Slide the axle shaft back in.
- Reinstall the brake parts and wheel.
- Fill the axle with the correct gear oil.
- Check for leaks after a test drive.
The first time I did this, I forgot to refill the oil—don’t make that mistake! Always double-check the fluid level before you drive.
When To Call A Mechanic
I believe most people can do this repair at home. But if you:
- See deep scratches on the axle housing,
- Can’t get the old seal out after many tries,
- Or feel unsure about reassembling the brakes,
It’s okay to call a pro. No shame in getting help if you need it.
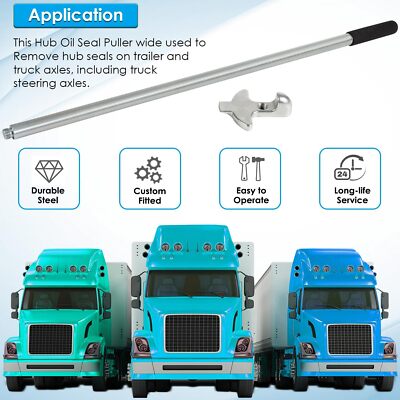
Why Not Just Buy A Puller?
People ask why I don’t just buy a puller. For most cars, the tool costs $20–$30. If you do a lot of seals, it’s worth it. But for one repair, I’d rather save the money and use what I have. If you want to see what a puller looks like or learn more, check out this Wikipedia page on pullers.
Final Thoughts
Taking out an axle seal without a puller can be messy and take some effort, but it’s totally doable. With patience, simple tools, and the tips I’ve shared from my own garage, you can save money and feel good about fixing your own car.
The key is to go slow, use the right technique, and double-check your work. If you’re careful, you’ll avoid leaks and keep your axle running strong.
Frequently Asked Questions
How Do I Know If My Axle Seal Is Leaking?
Look for oil spots under your car, especially near the wheels. You might also see oil on the inside edge of the tire or hear odd noises from the axle.
Can I Drive With A Leaking Axle Seal?
It’s risky. You might not notice problems right away, but over time, the axle can run dry and get damaged. It’s best to fix the leak soon.
What If The Seal Breaks While Removing It?
Don’t worry. Use needle-nose pliers to grab the broken pieces. Take your time and make sure to remove all bits of the old seal before installing the new one.
Will This Method Work For All Cars?
Most cars and trucks use similar seals, so these steps should work. But some vehicles have unique designs. Always check your repair manual for your specific car.
What If I Accidentally Scratch The Axle Housing?
Small scratches can usually be smoothed with fine sandpaper. Deep gouges, though, might cause leaks. If you’re unsure, it’s smart to ask a mechanic to check your work.
As an Amazon Associate, We earn from qualifying purchases