Have you ever stood over your bathtub, looking down at a slow or clogged drain, feeling annoyed? That was me not long ago. My bathtub drain was stuck, and water wouldn’t go down. I tried everything—plungers, drain cleaners, even coat hangers. Nothing worked. I realized I had to take out the drain, but I’d never done it before. I did some research, watched a few videos, and learned that a simple tool—a pipe wrench—could help. If you’re in the same spot, I want to walk you through exactly how I did it. I’ll share what worked, what didn’t, and the little things nobody tells you.
Prime Day Pick
Limited-time Prime Day price. Check current discount on Amazon.
Removing a bathtub drain sounds simple, but it can get tricky fast. With the right steps, patience, and a good grip on your pipe wrench, you can do it yourself and save a call to the plumber. Here’s my real experience and advice for anyone who needs to remove a bathtub drain with a pipe wrench.
Why I Needed To Remove My Bathtub Drain
My drain was slow for months. At first, I ignored it, hoping it would clear up on its own. Then, one day, it stopped draining almost completely. The water would just sit in the tub for hours. No store-bought cleaner worked.
Prime Day Pick
Limited-time Prime Day price. Check current discount on Amazon.
I even tried baking soda and vinegar. Still, nothing. That’s when I realized I needed to remove the drain and check for a deeper clog.
Prime Day Pick
Limited-time Prime Day price. Check current discount on Amazon.
But there was another reason: the metal drain itself was corroded and ugly. It had lost its shine and looked dirty no matter how much I cleaned. I figured, if I’m going to open it up, I might as well replace it.
Tools And Materials I Used
Before I started, I gathered all the tools I needed. Here’s what I used and why:
- Pipe wrench – This is the main tool. It gives you a strong grip for turning the drain.
- Flathead screwdriver – For prying up the drain cover or unscrewing any screws.
- Plumber’s putty – This helps seal the new drain when you put it back.
- Bucket and towels – To catch any water and keep things dry.
- Gloves – Old drains can be sharp and dirty.
- Flashlight – To see inside the drain.
- WD-40 or penetrating oil – For loosening stuck, rusty drains.
Tool Comparison: Pipe Wrench Vs. Other Tools
I was curious if a pipe wrench was the best choice. Here’s what I found based on my experience and some research.
| Tool | Grip Strength | Ease of Use | Best For |
|---|---|---|---|
| Pipe Wrench | Very Strong | Medium | Stuck or corroded drains |
| Drain Removal Tool | Strong | Easy | Modern drains |
| Channel Lock Pliers | Average | Easy | Loose drains |
| Screwdriver | Weak | Very Easy | Drain covers |
I found that the pipe wrench was the only tool that gave me the torque I needed to break the old drain loose.
Step-by-step: How I Removed My Bathtub Drain With A Pipe Wrench
Let me walk you through each step, just like I did it. I’ll share some of the simple things that made a big difference for me.
Step 1: Get The Area Ready
Before anything else, I cleared the area around the tub. I laid down a towel to kneel on, since my knees hate cold tile. I put another towel in the tub to catch any dropped tools. I also placed a bucket under the drain (in the access panel area) to catch any water that might spill out.
Step 2: Remove The Drain Cover Or Stopper
My tub had a simple metal drain cover. I used a flathead screwdriver to pry it up gently. Some tubs have a twist-style stopper or a lever. If you have one of these, unscrew it or pull it out first. Underneath, you’ll see the actual drain fitting.
Step 3: Clean Around The Drain
I used an old toothbrush and a rag to wipe away soap scum and hair around the drain. This gave me a better grip and let me see what I was working with. It’s a small thing, but it really helped.
Step 4: Spray With Penetrating Oil
This is something I almost skipped, but I’m glad I didn’t. Old drains can be stuck tight—especially if they haven’t moved in years. I sprayed a little WD-40 around the edge and let it sit for 10 minutes. This helped loosen the gunk and rust.
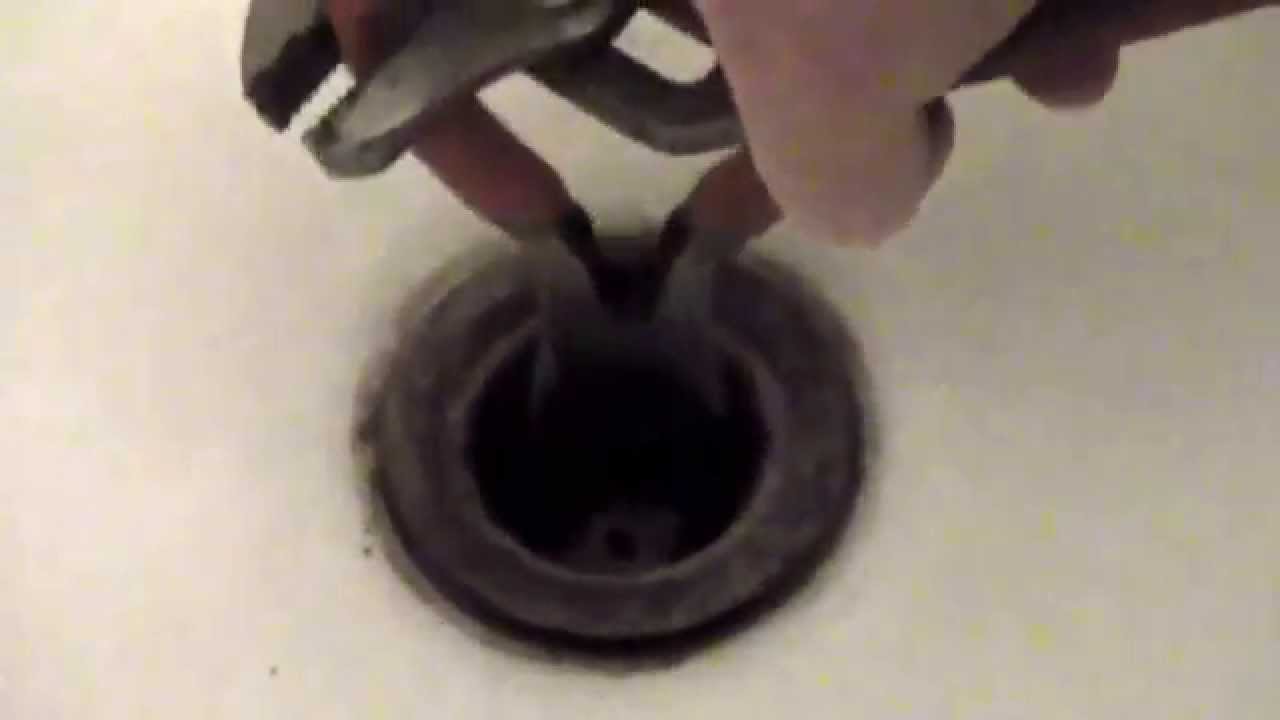
Step 5: Fit The Pipe Wrench
I opened my pipe wrench wide and clamped it around the metal crossbars inside the drain. You want it tight, but not so tight that you bend the metal. I made sure the wrench was straight, not at an angle. If you don’t have crossbars, you can try gripping the outer edge, but be careful not to crack the tub.
Step 6: Turn Counterclockwise
Here’s where things got tough. I pushed down and turned the wrench counterclockwise (to the left). At first, nothing happened. I thought it was stuck for good. I gave it a few strong tugs, and finally, it started to move.
If you feel resistance, don’t rush. Keep steady pressure, and eventually, the drain will loosen.
Step 7: Lift Out The Drain
Once the drain was spinning freely, I unscrewed it the rest of the way by hand. It was covered in black gunk and hair. I pulled it out and dropped it in my bucket. Success! Underneath, I could see years of buildup that caused my clog.
Step 8: Clean The Drain Opening
With the drain out, I used a rag to clean the opening. I scraped away old plumber’s putty and wiped out any leftover debris. I used my flashlight to check for any deep clogs. If you see a big clog further down, use a drain snake or call a professional.
Step 9: Install The New Drain (optional)
If you’re replacing the drain, roll a small rope of plumber’s putty and press it around the edge of the new drain. Screw the new drain in by hand, then tighten it gently with the pipe wrench (not too tight). Wipe away any extra putty that squeezes out.
What Surprised Me During The Process
I thought this job would take 10 minutes. It took about 45 minutes from start to finish. The hardest part was breaking the old drain loose. I actually bruised my knuckles a bit. Wearing gloves is a must!
I also didn’t expect so much gunk under the drain. It was really gross. If you’re squeamish, be ready for some smells and sights you won’t like. But the satisfaction of pulling out years of buildup? Totally worth it.

Mistakes I Made (so You Don’t Have To)
Let me be honest—I made a few mistakes. Here’s what I learned:
- I almost stripped the crossbars inside the drain by using too much force. If the wrench slips, stop and reset your grip.
- I forgot to put a towel over the drain hole after removing the drain. A small screw fell in, and I had to fish it out.
- I didn’t check the size of my replacement drain before starting. Luckily, it fit, but always check first.
Comparing Drain Removal Methods
I tried a few ways before settling on the pipe wrench. Here’s how they compared for me:
| Method | Success Rate | Time Needed | Difficulty |
|---|---|---|---|
| Pipe Wrench | High | 30-45 min | Medium |
| Drain Removal Tool | Medium | 20-30 min | Easy |
| Channel Lock Pliers | Low | 15-30 min | Easy |
| Calling a Plumber | Very High | 1-2 hours (wait time) | Easy (but costly!) |
Safety Tips I Wish I Knew Earlier
Safety isn’t just about gloves. Here’s what I learned the hard way:
- Wear safety glasses. Rust and debris can fall when you loosen the drain.
- Don’t use too much force. You can crack your tub or damage the pipes below.
- Keep small tools and screws away from the open drain. Drop something, and you’ll have a new problem.
- Ventilate the area. WD-40 and old gunk can smell strong.
When To Call A Plumber Instead
I like doing things myself, but there are times when you should let a pro handle it. For example:
- If your drain won’t budge, even with oil and a wrench.
- If the crossbars are broken or missing (no way to grip).
- If you see cracks or damage in the pipes below.
- If water is leaking under the tub.
In those cases, you might save money and headaches by calling a plumber. But for many clogged or stuck drains, a pipe wrench will do the trick.
How To Avoid Drain Problems In The Future
After fixing my drain, I didn’t want the problem to come back. Here’s what I do now:
- Use a drain catcher. This simple screen stops hair and soap from going down.
- Clean the drain monthly. I use baking soda and vinegar, then flush with hot water.
- Don’t pour grease or oil down the drain. It hardens and causes clogs.
- Check for slow draining early. Don’t wait until it stops completely.
These steps keep my tub draining well and save me trouble in the long run.
My Honest Advice For Beginners
If you’ve never used a pipe wrench before, practice on something else first. The wrench is heavy and can slip. Be patient. Use oil and let it sit. Don’t force things—steady pressure works better than brute strength. If you get stuck, step away and try again in a few minutes.
Remember, most drains are designed to come out. If yours feels impossible, it’s okay to ask for help. Don’t let frustration get the best of you. I was ready to give up, but taking it slow made all the difference.
:max_bytes(150000):strip_icc()/dirty-stainless-steel-bath-shower-drain-in-modern-style-plumbers-fixtures-and-monkey-wrench-1190264737-8f8e133a41954e87b6a474a4d124646f.jpg)
Common Questions About Bathtub Drain Removal
Here are a few questions I had (and you might too) before I started.
Frequently Asked Questions
How Do I Know If I Need To Remove My Bathtub Drain?
If your tub drains slowly even after cleaning the surface, or if you see rust and leaks, it might be time to remove and inspect the drain. A very old or corroded drain should be replaced.
Can I Remove A Bathtub Drain Without A Pipe Wrench?
You can try using channel lock pliers or a special drain removal tool, but they may not give enough grip. For old or stuck drains, a pipe wrench is the most reliable.
What If The Crossbars Inside My Drain Are Broken?
If the crossbars are gone, it’s much harder to remove the drain. You can try a drain extractor tool or call a plumber. Avoid using too much force, as you might damage the tub.
Is It Safe To Use Wd-40 Or Other Oils On The Drain?
Yes, using WD-40 or a similar oil helps loosen rust and grime. Just use a small amount and let it soak for several minutes before trying to turn the drain.
How Tight Should I Install The New Drain?
Hand-tighten the new drain first, then use the pipe wrench to snug it up. Don’t over-tighten—just enough to create a watertight seal with the plumber’s putty. Over-tightening can crack the tub or strip the threads.
Fixing my bathtub drain with a pipe wrench was messy and took some patience, but it was also satisfying. I learned a lot, saved money, and now I know my tub drains like it should. If you’re ready to try, take it slow, follow the steps, and remember: you’ve got this. If you want extra tips or step-by-step videos, check out Family Handyman for more ideas. Good luck with your project!
As an Amazon Associate, We earn from qualifying purchases