Using a tail pipe cutter was one of those moments where I felt both nervous and excited. It’s not something you do every day, but if you love working on cars or just want to fix your exhaust system, learning to use this tool is a big step. I remember my first time, standing by my old sedan, thinking, “This can’t be too hard, right?” But like most things, it’s easy if you know what you’re doing. I want to share what I learned, including tips you won’t find in most manuals. By the end, you’ll feel confident using a tail pipe cutter—even if you’ve never touched one before.
Prime Day Pick
Limited-time Prime Day price. Check current discount on Amazon.
What Is A Tail Pipe Cutter?
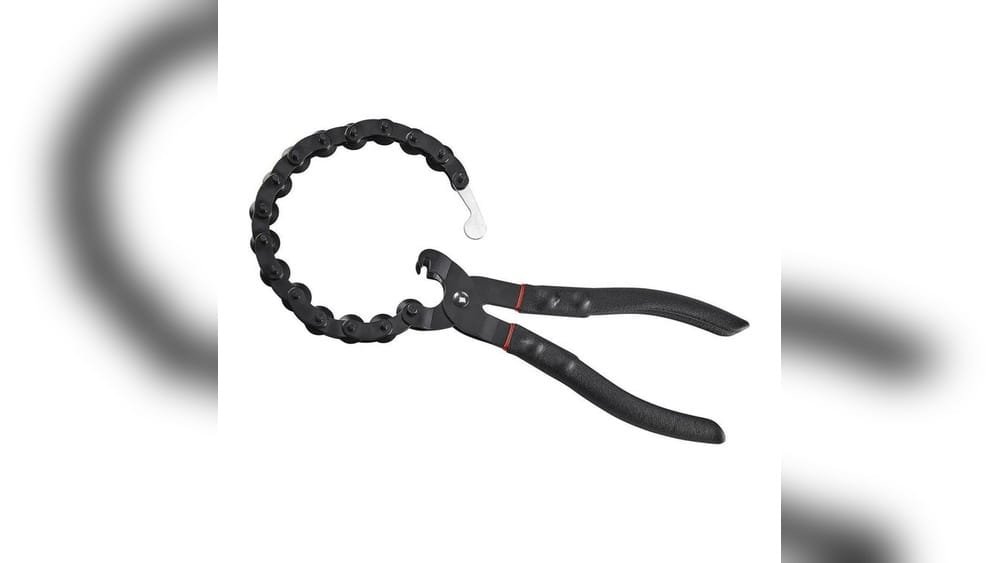
A tail pipe cutter is a tool for cutting exhaust pipes cleanly and quickly. It looks a bit like oversized pliers or a chain with cutting wheels. You wrap it around the pipe, squeeze, and turn. The cutter slices through metal, giving you a neat edge. Most are hand-powered, though some shops use bigger, hydraulic versions. You’ll see them in garages, but they’re also handy for DIY mechanics.
There are two main types:
Prime Day Pick
Limited-time Prime Day price. Check current discount on Amazon.
- Chain-style cutter – This one uses a chain with small cutting wheels. You wrap it around the pipe and rotate it. The wheels cut as you squeeze and turn.
- Rotary cutter – This is more like a pipe cutter for plumbing. It has a single cutting wheel and a handle. You clamp it onto the pipe and twist.
I’ve used both. For exhaust pipes, the chain-style is faster and works better on larger pipes.
Prime Day Pick
Limited-time Prime Day price. Check current discount on Amazon.
Why Use A Tail Pipe Cutter?
If you’re working with exhaust pipes, you need a tool that cuts cleanly. Hacksaws leave rough edges and take forever. Power tools can be risky if you’re not careful. The tail pipe cutter gives you a straight, clean cut without much effort. It’s great for:
- Replacing exhaust sections
- Installing performance parts
- Removing damaged pipes
A clean cut means you can fit new parts easily. Less metal dust, fewer jagged edges. I learned this the hard way after using a hacksaw—my replacement muffler didn’t fit, and I had to grind the pipe for hours.

Choosing The Right Tail Pipe Cutter
Not all cutters are the same. I made the mistake of buying a cheap one online. It looked sturdy, but the cutting wheels wore out fast, and the chain snapped. Here are some things I wish I’d known before buying:
| Feature | Why It Matters | My Experience |
|---|---|---|
| Chain Length | Fits larger pipes | Short chain = can’t wrap around big pipes |
| Cutting Wheels Quality | Lasts longer, cuts faster | Cheap wheels = slow, rough cuts |
| Handle Comfort | Less hand fatigue | Good grip = easier turning |
| Build Material | Resists rust and damage | Steel body = more durable |
| Price | Better tools cost more | Low price = low performance |
If you work on cars often, spend a bit more for quality. Brands like Lisle or GearWrench make cutters that last.
Safety First: Preparing To Cut
Before using a tail pipe cutter, safety is key. Exhaust pipes are dirty, sometimes rusty, and sharp after cutting. Here’s what I always do before starting:
- Wear gloves – Protects your hands from cuts and grime.
- Eye protection – Metal shavings can fly off.
- Work on a cool pipe – Never cut a hot exhaust. Wait until the car cools.
- Support the pipe – Pipes can drop or swing after cutting. Use a jack stand or have a friend hold it.
One thing I learned: If the pipe is rusty, spray some penetrating oil first. It makes turning the cutter easier.
Step-by-step: How To Use A Tail Pipe Cutter
Let me walk you through the process. The first time, I was nervous. The second time, it felt natural. Here’s how I do it:
1. Find The Right Spot
Mark where you want to cut. Use a marker or chalk. Make sure you leave enough pipe to attach new parts. If you’re unsure, measure twice. I once cut too close to the muffler and had to buy a new extension.
2. Wrap The Cutter Around The Pipe
Open the cutter and fit the chain around the pipe. The wheels should touch the metal all around. If your pipe is large, make sure the chain is long enough.
3. Adjust The Cutter
Tighten the handle or knob until the wheels press against the pipe. It should feel snug but not too tight. If you over-tighten, it’s harder to rotate.
4. Start Rotating
Hold the handle and rotate the cutter around the pipe. With chain-style cutters, squeeze and turn. With rotary cutters, twist the handle. Go slow. Each turn scores the metal deeper. After a few turns, you’ll feel the cutter breaking through.
5. Check Your Progress
Pause after a few turns. Look for a groove forming. If the groove is uneven, adjust the cutter. Keep rotating until the pipe snaps cleanly.
6. Remove The Cutter And Inspect
Take off the cutter. The pipe should have a clean edge. If it’s rough, use a file to smooth out burrs.
7. Clean Up
Wipe away metal shavings. Check for sharp edges. If you’re installing a new part, clean the pipe with sandpaper.
When I first tried, I rushed and ended up with a jagged cut. Now, I take my time. The result is always better.
Common Mistakes And How To Avoid Them
Everyone makes mistakes. I’ve made plenty. Here are some problems I faced and how you can avoid them:
- Cutting on a hot pipe – Burns and damaged tools. Always let the car cool.
- Using a dull cutter – Slow cuts, rough edges. Sharpen or replace wheels if needed.
- Wrong spot – Cutting too close to a joint means trouble fitting new parts.
- Not tightening enough – The cutter slips and doesn’t score the pipe.
- Over-tightening – Hard to rotate, damages the pipe.
If you avoid these mistakes, the job goes smoother. The first time I used a dull cutter, I spent 45 minutes on one pipe. With a sharp cutter, it took less than 5.
Tips For A Perfect Cut
Through trial and error, I picked up some tips that make a big difference:
- Spray oil on the pipe before cutting. It reduces friction and makes turning easier.
- Score the pipe first – Rotate the cutter a few times to make a light groove, then tighten and finish the cut.
- Use a file afterwards. Even with a good cutter, there can be small burrs.
- Check pipe diameter – Make sure your cutter fits. Exhaust pipes range from 1.5 to 3 inches.
- Work in good light – It’s easy to miss the groove if your garage is dark.
One non-obvious tip: If the pipe is old and thin, don’t over-tighten. It can crush the pipe instead of cutting.
Comparing Tail Pipe Cutters With Other Tools
I tried different tools before settling on a tail pipe cutter. Here’s how they compare:
| Tool | Ease of Use | Cut Quality | Safety |
|---|---|---|---|
| Tail Pipe Cutter | Easy | Clean, straight | Safe if used right |
| Hacksaw | Hard | Rough, uneven | Risk of slips |
| Angle Grinder | Medium | Fast but messy | Risky, sparks |
| Reciprocating Saw | Medium | Decent | Can jam, noisy |
If you want a clean cut and less mess, the tail pipe cutter wins every time.
Real-world Example
Last summer, I helped a friend fix his exhaust. His car had a rusty tailpipe, and we needed to replace it. He wanted to use an angle grinder, but I suggested the tail pipe cutter. It took us less than ten minutes.
The cut was smooth, and the new muffler fit perfectly. No sparks, no mess.
Afterwards, I realized how much easier it is when you know the right tool. He was surprised by how clean the cut was. That’s the kind of result you want.
Maintenance And Care
Taking care of your cutter means it lasts longer. Here’s what I do after each use:
- Clean the wheels – Wipe off metal bits with a rag.
- Oil the chain – Stops rust and keeps the wheels moving smoothly.
- Store in a dry place – Moisture can ruin the cutting wheels.
If you use it often, check the wheels for wear. Replace them if they look dull or chipped. I once forgot to oil my cutter, and the chain rusted. It made the next job much harder.

When Not To Use A Tail Pipe Cutter
It’s a great tool, but not for every job. If the pipe is too thick or has odd bends, a cutter may not fit. Sometimes, pipes with double walls or reinforced sections are too tough. In those cases, you may need a reciprocating saw or grinder.
If your pipe is painted or coated, a tail pipe cutter can strip off the finish. Make sure you’re okay with that.
How Much Time Does It Take?
A typical exhaust pipe cut takes about 3–10 minutes. With practice, you’ll get faster. The first time, I took 20 minutes—mostly because I was nervous. Now, it’s a five-minute job.
Pipe Sizes And Compatibility
Not all cutters fit every pipe. Most chain-style cutters handle pipes from 1. 5 inches to 3 inches. Check your pipe before buying. If you work on trucks or larger vehicles, you’ll need a bigger cutter.
| Pipe Size | Type of Cutter Needed | Common Vehicle |
|---|---|---|
| 1.5 – 2.5 inches | Standard chain cutter | Cars, small SUVs |
| 2.5 – 3.5 inches | Heavy-duty cutter | Trucks, vans |
| Above 3.5 inches | Specialized cutter | Commercial vehicles |
Where To Buy And What To Look For
You’ll find tail pipe cutters at auto parts stores and online. Look for reviews and ratings. Avoid cheap, no-name brands. A good cutter costs $30–$80. It’s worth the investment.
If you want more details on pipe cutters and their uses, check Wikipedia.

Frequently Asked Questions
How Do I Know If My Pipe Is Too Thick For A Tail Pipe Cutter?
Most cutters list their pipe size range. If your pipe is thicker than 3 inches, check the specs. Try wrapping the chain around the pipe; if it doesn’t fit, you need a bigger cutter.
Can I Use A Tail Pipe Cutter On Stainless Steel Pipes?
Yes, but it takes more effort. Stainless steel is harder. Use a cutter with strong wheels. Spray oil for easier turning.
Is It Safe To Cut Exhaust Pipes Myself?
If you follow safety steps—gloves, eye protection, cool pipe—it’s safe. Go slow, and don’t rush. Support the pipe so it doesn’t swing.
What Should I Do If The Cut Is Rough?
Use a metal file or sandpaper. Smooth the edge before installing new parts. This helps prevent leaks and makes fitting easier.
How Often Should I Replace The Cutter Wheels?
If you notice slow cuts or rough edges, check the wheels. Replace them if they’re dull or chipped. For regular use, inspect monthly.
—
Using a tail pipe cutter changed the way I work on cars. It’s a simple tool, but knowing how to use it saves hours and avoids frustration. If you’re starting out, take your time, use the right safety gear, and don’t be afraid to ask questions.
Each job teaches you something new. I hope my experience helps you make your next exhaust repair easier and safer.
As an Amazon Associate, We earn from qualifying purchases