
I still remember the first time I tried using my string trimmer as an edger. I was excited but also a little unsure. My neighbor’s yard always looked perfect, with those sharp lines between grass and sidewalk. Mine, well, not so much. I wanted that crisp, clean look too. But I didn’t want to buy another tool if I could help it.
Prime Day Pick
Limited-time Prime Day price. Check current discount on Amazon.
So, I learned how to use what I already had. Over time, with a bit of trial and error, I figured out what works. In this article, I want to share everything I learned about using a string trimmer for edging.
Whether you’re a beginner or you just want a few tips, I’ll walk you through the whole process.
Prime Day Pick
Limited-time Prime Day price. Check current discount on Amazon.
Understanding The Difference: Trimming Vs. Edging
Before I got started, I didn’t really know the difference between trimming and edging. I thought they were the same. But they’re not.
Prime Day Pick
Limited-time Prime Day price. Check current discount on Amazon.
Trimming is when you cut grass in places your mower can’t reach. Think around trees, fences, or walls.
Edging is about creating a sharp, defined line between your lawn and another surface, like a driveway or flower bed.
When I realized this, it made sense why my lawn never looked “finished. ” I was trimming, but not edging. Once I started edging, the whole yard looked tidier—almost professional.
Can You Really Use A String Trimmer As An Edger?
The big question I had: can you actually use a string trimmer as an edger? The answer is yes. Most people do. You don’t need to buy a separate edger unless you want the absolute cleanest cut.
But there are some things to keep in mind:
- String trimmers are designed to cut horizontally. Edgers cut vertically.
- You’ll need to adjust how you hold and move the tool.
- It takes a little practice to get a straight line.
I’ve found that with the right technique, a string trimmer can edge well enough for most yards. And you save money and storage space.
Getting Ready: What You Need
Before you start, make sure you have:
- String trimmer (also called a weed eater or weed whacker)
- Eye protection (small rocks can fly up)
- Long pants and closed shoes
- Hearing protection if your trimmer is loud
- Gloves (optional, but helps with grip)
It’s important to check your trimmer’s manual. Some models can flip easily for edging, while others are a bit harder to maneuver.
The Right String Matters
One thing I didn’t know at first: trimmer line (the string itself) comes in different sizes and shapes. For edging, you want a line that is:
- Thicker (0.080” or above)
- Heavy-duty if you have tough grass or weeds
- Shaped (round or twisted lines cut better on edges)
A thin or weak line breaks easily. I learned this the hard way—my string kept snapping every few feet. Once I switched to a thicker line, edging became much less frustrating.
Here’s a simple comparison of trimmer line types I’ve tried:
| Line Type | Best For | Durability | Edging Quality |
|---|---|---|---|
| Thin Round | Light trimming | Low | Fair |
| Thick Round | Edging & thick grass | High | Good |
| Twisted/Serrated | Heavy-duty edging | Very High | Best |
Setting Up Your Trimmer For Edging
Here’s what I do to get my trimmer ready for edging:
- Check the spool. Make sure the string is the right length.
- Flip the trimmer. Hold it so the string spins vertically, not flat.
- Adjust the guard if your model allows. Some trimmers have an edging guide.
- Test the balance. Find a grip that feels comfortable and controlled.
It felt awkward the first few times. But after a little practice, holding it vertically became second nature.
How To Edge With A String Trimmer: Step-by-step
Let me walk you through the exact steps I use. I’ll add some tips I wish I knew earlier.
1. Start With A Clean Edge
If your grass has never been edged, the first time will be the hardest. Sometimes, I used a spade or a flat shovel to cut a rough line before using the trimmer. This makes the first edging much easier.
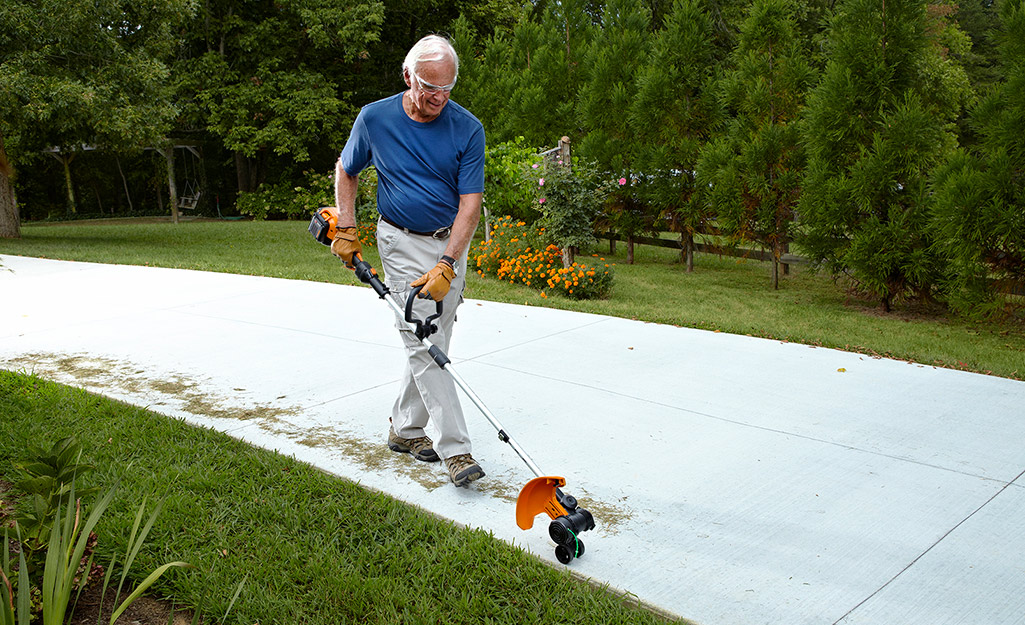
2. Position The Trimmer
Stand with your feet shoulder-width apart. Hold the trimmer so the spinning string is vertical—imagine the line as a little blade cutting down between the grass and the sidewalk.
3. Move Slowly And Steadily
Walk forward at a slow, even pace. Don’t rush. If you move too fast, the line will be wavy.
Keep your eyes on the edge you want to cut. I like to focus a few inches ahead of the trimmer.
4. Let The String Do The Work
Don’t force the trimmer. Let the spinning line cut through the grass. If you push too hard, the line will wear out quickly and the cut won’t look clean.
5. Watch For Obstacles
I’ve hit rocks, sprinkler heads, and even my own toes (once!). Go slow around anything that isn’t grass or soil.
6. Clean Up Afterwards
When you’re done, there will be grass clippings everywhere. I use a broom or a blower to clear the sidewalk and edges. This step really makes the lines stand out.
Here’s a quick overview of my routine:
| Step | Action | Why It Matters |
|---|---|---|
| 1 | Mark the edge (optional) | Straighter first cut |
| 2 | Hold trimmer vertically | Proper cut angle |
| 3 | Move slowly | Smoother edge |
| 4 | Let the line cut | Cleaner results |
| 5 | Clean up debris | Sharp final look |
Common Mistakes I Made (and How To Avoid Them)
I’ve messed up a few times. Here are the biggest mistakes I made, and how you can avoid them:
1. Going Too Fast
My first try, I rushed. The edge was crooked and uneven. Now, I go slow and focus on control.
2. Using Thin String
Thin lines snap and make the job longer. I always use a thicker, tougher line now.
3. Forcing The Trimmer
If you push too hard, you’ll wear out the line and maybe even damage the sidewalk.
4. Not Wearing Safety Gear
I once got a pebble in my eye. Now, I never skip glasses.
5. Ignoring The Weather
Wet grass is harder to edge. I learned to wait for a dry day.
Edging Around Different Surfaces
Not all edges are the same. Here’s what I do for each type:
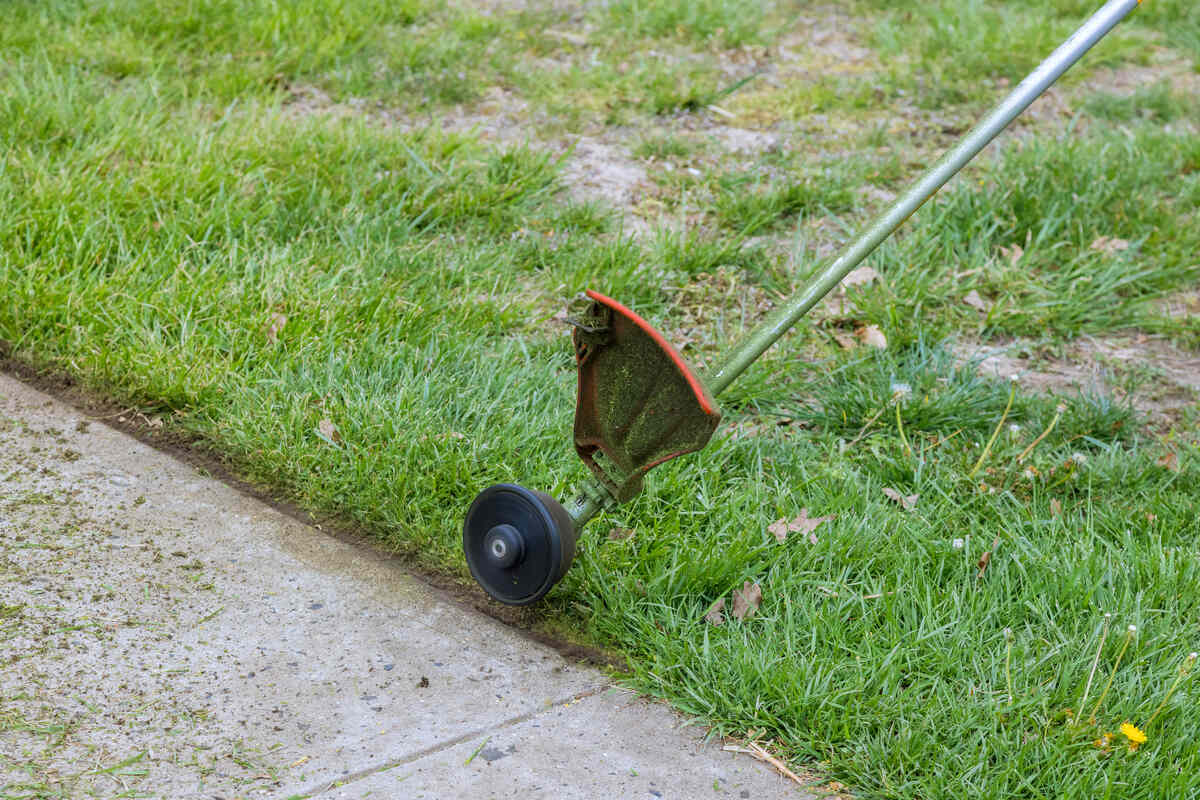
Sidewalks And Driveways
These are the easiest. Just follow the straight line, keeping the trimmer close to the concrete.
Flower Beds
I’m extra careful here. I don’t want to cut my flowers. Sometimes, I use a cardboard shield to protect the plants.
Curved Edges
Curves are tricky. I move even slower and use small steps to keep the line smooth.
Fences And Walls
I avoid hitting the fence. Instead, I edge a little farther out and finish by hand if needed.
My Top Tips For A Clean Edge
Here are a few things I wish someone told me from the start:
- Edge when the grass is dry. Wet grass pulls and tears instead of cutting cleanly.
- Replace the string often. A fresh line cuts better.
- Edge before mowing. That way, the mower picks up the clippings.
- Practice makes perfect. My first few edges looked rough, but after a few tries, I got much better.
- Check for pets and kids. The spinning line can hurt if someone gets too close.
How Often Should You Edge?
I’ve found that edging every 1-2 weeks keeps things looking sharp. If you wait too long, the edge gets lost and the job takes much longer. During the fast-growing season, I edge once a week. In the winter, I can go a bit longer.
Manual Edging Vs. String Trimmer Edging
I’ve tried both methods. Here’s how they compare:
| Feature | Manual Edger | String Trimmer |
|---|---|---|
| Speed | Slow | Fast |
| Precision | Very High | Good |
| Effort | High | Low |
| Cost | Low | Already owned |
If you want a perfect, razor-sharp edge every time, a manual edger is best. But I use my string trimmer for 90% of jobs because it’s faster and easier.
Is It Safe To Use A String Trimmer As An Edger?
Yes—if you’re careful. Here’s what I always do:
- Wear safety glasses
- Keep pets and people away
- Don’t edge near loose stones
- Hold the trimmer firmly
The only accident I had was when I ignored these rules. Now, I always take a few extra seconds to set up safely.
Saving Money And Time
Using my string trimmer for edging means I didn’t need to buy another tool. It also saves me time—I can trim and edge in one go. I’ve spent maybe $10 a year on new trimmer line, but that’s it.
A dedicated edger can cost $60–$150 or more. If you’re just maintaining a normal yard, a trimmer does the job well.
When To Consider A Dedicated Edger
There are times when a separate edger is better:
- Big yards with lots of edges
- Very thick or tough grass
- Perfectly straight, deep edges are a must
For most people, though, a string trimmer is all you need.

Final Thoughts
Learning to use my string trimmer as an edger changed how my yard looks. Those crisp lines made everything feel cleaner. It took a bit of practice, but it was worth it. My biggest advice? Start slow, wear safety gear, and don’t get discouraged if the edge isn’t perfect right away.
Over time, you’ll get the hang of it. And if you ever want to see more techniques, there are great guides at Family Handyman.
Your yard will thank you—and so will your wallet.
Frequently Asked Questions
How Do I Hold The String Trimmer For Edging?
Hold the trimmer so the string spins vertically. This means turning the tool sideways, so the line cuts down into the edge, not across the grass. It feels odd at first but gets easier with practice.
Can All String Trimmers Be Used For Edging?
Most can, but some models are easier to flip and control. Curved-shaft trimmers are a bit trickier, while straight-shaft trimmers usually work best for edging.
What Size Trimmer Line Is Best For Edging?
I recommend using at least 0.080-inch line or thicker. Thicker lines last longer, especially against concrete or stone.
How Do I Get A Straight Edge With A String Trimmer?
Go slow and keep your eye a few inches ahead of the trimmer. For first-time edges, you can use a rope or garden hose as a guide.
Is It Okay To Edge Wet Grass?
It’s better to wait until the grass is dry. Wet grass tears instead of cutting cleanly, and the edge will look ragged.
If you follow these tips and my personal advice, you’ll have sharp, clean lawn edges in no time.
As an Amazon Associate, We earn from qualifying purchases