Stringing an Echo trimmer can feel tricky the first time. I remember standing in my backyard, sweating, and feeling a bit lost. I had grass growing wild, and my trimmer was useless with no string. But after a few tries (and some mistakes), I figured it out.
Prime Day Pick
Limited-time Prime Day price. Check current discount on Amazon.
Now, I can do it with my eyes closed. In this guide, I’ll walk you through the steps, share the little things nobody tells you, and help you avoid the problems I faced. Whether you’re new to yard work or just want a faster way, I’ll make it easy and clear.
Why Stringing An Echo Trimmer Matters
A string trimmer, or weed eater, is only as good as its string. If the line is too short, too long, or wound wrong, it won’t cut well. I’ve seen friends get frustrated when the line breaks every few minutes.
Prime Day Pick
Limited-time Prime Day price. Check current discount on Amazon.
But when you string it right, your trimmer runs smooth, cuts evenly, and doesn’t stall. Plus, you save time and money, since you use less string.
Prime Day Pick
Limited-time Prime Day price. Check current discount on Amazon.
Types Of Echo Trimmer Heads
Before you start, you should know your trimmer’s head type. Echo has different models, and the stringing method can change a bit.
| Trimmer Head Type | Common Models | Main Feature |
|---|---|---|
| Speed-Feed | SRM-225, SRM-230 | Easy, fast reload |
| Bump Feed | SRM-210, GT-225 | Tap to advance string |
| Manual Wind | Older models | Traditional winding |
Most people have a Speed-Feed or Bump Feed head. If you’re unsure, check the label on your trimmer or the user manual.
Tools And Supplies You Need
You don’t need much to string an Echo trimmer. Here’s what I always grab before I start:
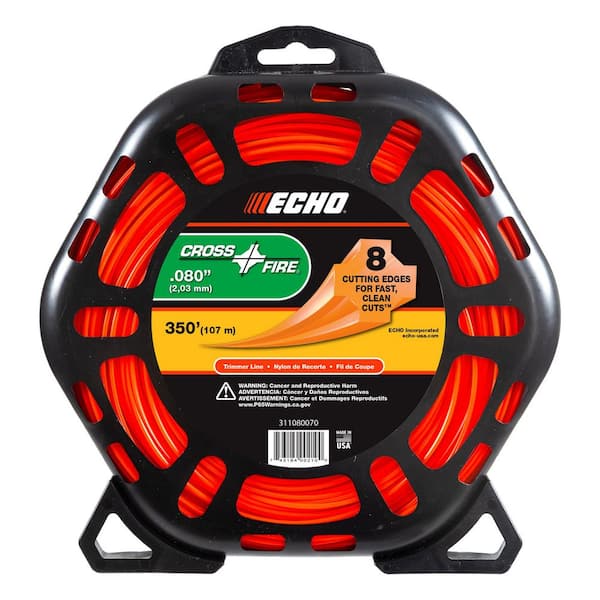
- Replacement trimmer line (usually .080″ or .095″ diameter, but check your manual)
- Scissors or garden shears
- A clean rag (to wipe grass or dirt)
- Gloves (optional, but helps if you have sensitive hands)
A quick tip: Always buy good quality trimmer line. Cheap line breaks easily, and you end up working harder. I learned that the hard way when I tried a budget brand.
Preparing Your Echo Trimmer
Safety first! Before you touch the head, make sure the trimmer is off. Unplug the spark plug wire if it’s gas-powered, or remove the battery if it’s electric. I once forgot this step and almost got a nasty surprise when the trimmer spun by accident.
Wipe the trimmer head clean. Dirt and grass can clog the mechanism, making it harder to open and wind.

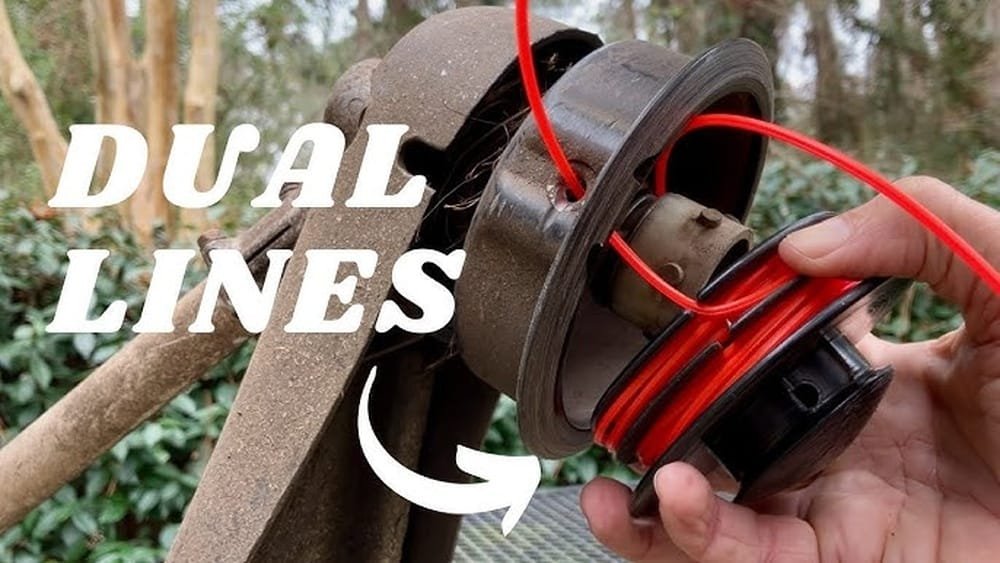
How To String A Speed-feed Echo Trimmer
The Speed-Feed head is the most popular and my favorite. It makes things quick and easy. Here’s how I do it:
1. Cut Your Line To Size
You’ll need about 15-20 feet of line. Pull out a length, measure roughly arm’s length three times, and cut it. If you use too little, you won’t fill the spool. Too much, and it jams.
2. Align The Arrows
On the head, there are two small arrows. Twist the bottom so the arrows line up. This opens the path for the string.
3. Insert The Line
Push one end of the line straight through both eyelets. Keep pushing until the line comes out the other side. Pull until both ends are equal.
4. Wind The Line
Hold the head steady and twist the knob in the direction of the arrows (usually clockwise). The line will wind inside the head. Keep turning until only 6 inches of line stick out on each side.
5. Test The Feed
Tug gently on both ends. If the line slides out or feels loose, unwind and start again. If it’s tight, you’re set.
6. Reattach And Go
Snap the head back on (if you took it off). Reconnect power and test the trimmer on a patch of grass.
One thing I learned: Don’t overfill the spool. If you try to stuff too much line, it binds and won’t feed out. Less is more with these heads.
How To String A Bump Feed Echo Trimmer
Some Echo trimmers use a bump feed head, which you “bump” on the ground to release more string. The winding is a bit different.
1. Open The Head
Press the tabs on the sides and pull off the cover. Some models twist off instead.
2. Remove The Spool
Take out the inner spool. Clean off any debris.
3. Cut And Prepare The Line
Most bump feed heads use two equal lengths of line, about 8-10 feet each.
4. Find The Anchor Holes
The spool has two holes or slots. Insert one end of the first line into the hole and pull it through about half an inch.
5. Wind The Line Evenly
Wind the line tightly and evenly in the direction of the arrow (usually clockwise). Don’t cross lines over each other. Stop with about 6 inches left.
6. Repeat With Second Line
Anchor and wind the second piece on the other side.
7. Feed Through Eyelets
Push the line ends through the holes in the trimmer head and reassemble. Make sure the lines aren’t tangled.
8. Snap The Head Back On
Press or twist the head until it clicks. Check that the line pulls out evenly.
A common mistake is winding the lines too loosely. I did this once and spent more time fixing jams than cutting grass. Keep the line tight and smooth for best results.
How To String A Manual Wind Echo Trimmer
Older Echo trimmers may use a manual wind head. The steps are similar to bump feed, but you may have only one line to wind.
1. Open The Trimmer Head
Usually, this means unscrewing the cap or pressing tabs.
2. Remove The Old Line
Pull out any leftover line. Clean dirt and grass.
3. Cut A Single Length
About 15 feet is enough for most manual heads.
4. Anchor And Wind The Line
Insert the line into the starter hole and wind it tightly, following the arrow.
5. Thread And Reassemble
Feed the end through the eyelet. Reattach the cap.
Manual heads take a bit more patience. Don’t rush—if you wind it messy, you’ll get jams later.
Comparing Echo Trimmer Heads
To help you decide which head you have (or want to buy), here’s a quick comparison:
| Type | Reload Time | Ease of Use | Common Issues |
|---|---|---|---|
| Speed-Feed | 1-2 minutes | Very easy | Overfilling jams line |
| Bump Feed | 3-5 minutes | Moderate | Line crossovers, jams |
| Manual Wind | 5-7 minutes | Harder | Messy winding, uneven feed |
My Personal Tips For Success
Over the years, I’ve picked up a few tips that save time and headaches:
- Always keep extra line on hand. I’ve run out mid-job and had to drive to the store, sweaty and annoyed.
- Wear gloves if your hands are sensitive. The line can be sharp and rough.
- Clean the spool every time. Dust and grass build up fast and cause jams.
- Don’t rush the winding. A neat spool means smooth feeding.
- Check the line diameter in your manual. Using the wrong size can damage the head or reduce cutting power.
- Trim the ends to the right length. If the line is too long, it slaps the guard and can snap.
One thing most people miss: If your trimmer line keeps breaking, check for tiny cracks or burrs inside the eyelets. I found a nick in mine once, and every line broke in the same spot. I smoothed it with a file and stopped the problem for good.
Troubleshooting Common Problems
Sometimes, things go wrong even if you follow every step. Here are a few issues I’ve faced and how to fix them.
The Line Won’t Feed
Check if the line is tangled inside the spool. Rewind it neatly and try again. If you overfilled, remove some line.
The Line Breaks Too Fast
Use a thicker line, especially for heavy weeds. Also, check for burrs or cracks in the eyelets.
The Head Jams
Dirt or grass inside the head can cause jams. Clean it out and rewind the line. Make sure lines aren’t crossed.
The Line Slides Out
If the line keeps slipping out, make sure it’s anchored properly in the starter holes or slots. Pull to test before reassembling.
How Often Should You Change The Line?
I usually replace the line after every two or three yard sessions, depending on the size of my yard and the thickness of the weeds. If you hear a whining sound or the trimmer stops cutting well, check the line length.
Don’t wait until it’s too short—replace it before you’re forced to stop mid-job.
Echo Trimmer Line Sizes And Which To Choose
Echo trimmers use different line sizes. Here’s a simple guide I wish I had when I started:
| Line Diameter | Best For | Pros | Cons |
|---|---|---|---|
| .080″ | Light grass, home use | Flexible, easy to wind | Breaks on thick weeds |
| .095″ | Medium grass, weeds | Stronger, lasts longer | Harder to wind by hand |
| .105″ | Heavy brush, thick weeds | Very strong, durable | May not fit all trimmers |
Always check your user manual to see the recommended size. Using the wrong diameter can damage your trimmer head.
When To Replace The Trimmer Head
If you notice the bump knob is cracked, the head is hard to open, or the string keeps jamming, it might be time for a new head. I replaced mine after three years, and it made a world of difference. New heads are smoother and less frustrating, and the Speed-Feed heads are worth the investment for most people.
Where To Learn More
If you want to see video guides or read more about Echo trimmers, the official Echo website has good resources. I often check their maintenance tips when I’m stuck. You can visit the Echo Official Site for more details.

Frequently Asked Questions
How Do I Know Which Echo Trimmer Head I Have?
Check your user manual or look for the model number on the trimmer head. Most Echo heads are labeled, and the Speed-Feed head is round with arrows on top.
What Is The Best String Size For Echo Trimmers?
For most home yards, .080″ or .095″ works well. If you cut thick weeds or brush, try .105″, but make sure your trimmer can handle it.
Why Does My Trimmer Line Keep Breaking?
It could be low-quality line, burrs in the eyelets, or using line that’s too thin for your job. Always check for nicks and use fresh, quality string.
How Long Should The Trimmer Line Be?
For Speed-Feed heads, use 15-20 feet. For bump feed, about 8-10 feet per slot. Too much line can jam; too little won’t last.
Can I Use Other Brands Of String In My Echo Trimmer?
Yes, as long as the diameter matches your trimmer’s requirements. Quality matters more than brand. I’ve had good luck with Echo, Husqvarna, and Oregon lines.
Taking the time to string your Echo trimmer right saves you trouble down the road. I’ve learned these lessons hands-on, and I hope sharing them helps you get your yard looking sharp—without the stress I had when I started. Happy trimming!
As an Amazon Associate, We earn from qualifying purchases