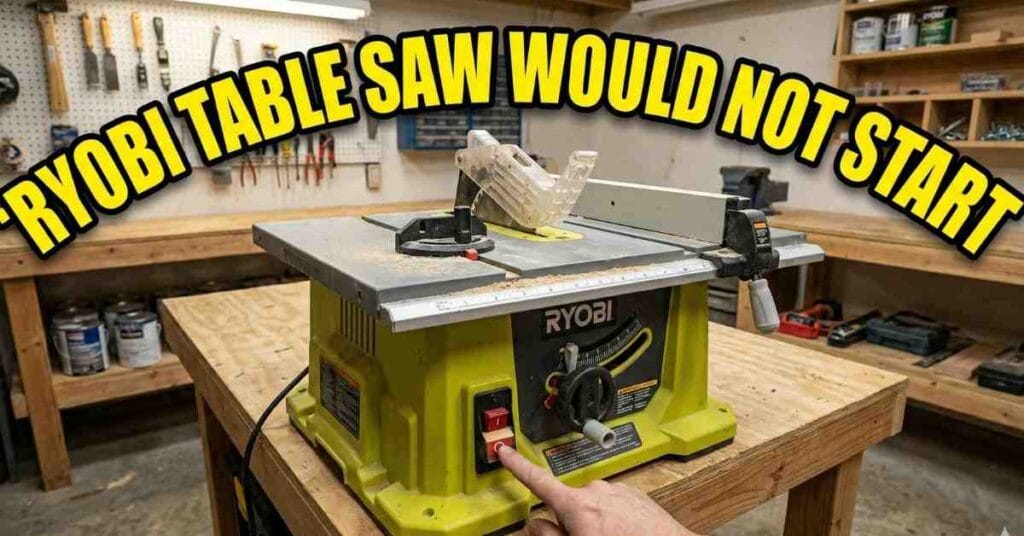
It was a very hot Tuesday in my Florida workshop. The air was thick and felt like a wet blanket. I had a big pile of pine wood on my bench for a new project. My dog was fast asleep in the corner right by the fan. I flipped the power switch on my Ryobi saw to start my first cut.
Nothing happened at all. The saw did not roar and it did not even hum. I felt a pit in my stomach as I stood there in the heat. I have used this saw for a long time and it is a workhorse. But that day, it just sat there like a heavy rock. I had to find out why it died.
A dead tool is a big pain for any shop owner. It stops your work in its tracks and ruins your flow. I wiped the sweat from my face and tried to stay calm. I knew I had to find the fault before the sun went down. I took a deep breath and started to look for the cause.
The First Place To Look For Power
I always start with the most simple things first. You should do the same to save time and stress. I looked at the wall plug to see if it was loose. My saw was plugged into a power strip on the floor. I saw that the little light on the strip was off.
I had too many tools on one line that day. I unplugged the saw from the strip and went to the wall. I put the cord right into the grounded wall outlet. I checked the house breaker box next to the garage door. Sometimes the saw draws too much juice and trips the switch.
I saw that my breaker was fine and still in the on spot. I also checked my GFCI plug on the workbench. These have a small test button that pops out sometimes. I pushed the reset button on the wall and heard a click. I went back to my saw and tried it one more time.
Quick Power Check List
| Part to Check | What to Look For | Fix Action |
| Wall Outlet | No power at the plug | Reset the breaker |
| Power Cord | Frayed or cut wires | Replace the cord |
| GFCI Plug | Popped reset button | Press the red button |
| Extension Cord | Cord is too thin | Use a thicker cord |
The cord itself can be a weak point on old saws. I ran my hands down the black cable to feel for bumps. I looked for any cuts or burns in the rubber skin. A bad cord is very dangerous and can cause a fire. My cord looked clean and thick so I moved on.
That Tiny Red Reset Button
Ryobi saws have a special safety part to protect the motor. It is a thermal overload protector that stops the heat. If the saw gets too hot, it cuts the power fast. It was a very hot day in my Florida shop. I had been cutting thick oak the day before.
I looked for the small red button on the front of the saw. It sits right by the main power switch in a small hole. I pushed it with my thumb to see if it would click. It felt soft and did not move at all for me. This meant the saw was not tripped by heat.
If it had tripped, it would click back into place. You must wait a few minutes before you press it. The motor needs to cool down so the metal can reset. I gave my saw ten minutes while I drank some water. I tried the button again later but it still did not work.
Checking The Yellow Safety Key
The power switch on these saws is very unique. It has a bright yellow key that you can pull out. This key must be in the switch for the saw to run. This keeps kids and others safe from the sharp blade. Sometimes the key can get loose from the vibration.
I pulled my yellow key out to look at the slot. I saw a lot of fine sawdust packed inside the hole. This dust can block the metal parts from touching. I used my air gun to blow it out into the yard. The dust flew everywhere but the switch was clean.
I wiped the key with a dry cloth to make it shine. I put the key back in the slot and pushed hard. It should snap into place so it does not fall out. I tried to flip the switch up to the on spot. The saw still stayed quiet and would not start.
How To Inspect The Carbon Brushes
Most Ryobi table saws use a brush motor for power. These are small blocks of carbon that rub on the motor. Over time, they wear down and get very short. If they get too short, the electricity cannot flow. This is a very common issue with older tools.
I turned the saw on its side to see the motor. I looked at the black housing for two round caps. One is on the top and one is on the bottom. I used a flat head screwdriver to turn them to the left. A small spring popped out with the carbon brush.
I looked at the carbon block in the bright light. It was very short and looked like a tiny pebble. It was less than 1/4 inch long and had a burn mark. I knew this was my main problem for the day. The brush could not touch the spinning part of the motor.
Tools You May Need To Fix Your Saw
| Tool Name | Why You Need It |
| Screwdriver | To open the motor caps |
| Air Compressor | To blow out the dust |
| Multimeter | To test the power flow |
| Pliers | To pull out small wires |
Replacing The Motor Brushes
I went to my parts bin to find a new set. I keep spare brushes for my tools just in case. New brushes are about an inch long and have a wire. I put the new brush into the hole very slowly. I made sure the spring was straight and not bent.
I pushed the black cap back on and turned it. I did the same for the other side of the motor. You must always change both at the same time. If one is bad, the other is likely very close to failing. I tightened the caps with my hand so they stayed tight.
I did not want to crack the plastic with a tool. I put the saw back on its legs on the shop floor. I was feeling very good about the fix now. I plugged the saw back into the wall outlet. I put on my eye gear to stay safe from dust.
Testing The Fix In The Shop
I pushed the yellow key in as hard as I could. I flipped the switch to the on spot with my finger. The motor spun up with a loud and happy roar. I saw a few small sparks inside the motor vent. This is normal for new brushes as they seat.
The saw felt strong and ready to cut my pine wood. I was glad I did not have to buy a new saw today. It only took a few minutes to fix the issue. I felt proud of my work and my shop skills. Woodworking is more fun when your tools work well.
I started my cuts and the blade went through like butter. The new brushes gave the motor more pep and speed. I could tell the saw was happy to be back at work. I finished my shelf before the sun went down. My dog even woke up to see the finished job.
When The Saw Only Makes A Hum
Sometimes the saw will not spin but it makes a hum. This is a different kind of fault for the motor. A hum means the motor has power but cannot turn. This is often a bad start capacitor on the side. It can also be a jammed blade under the table.
I checked my blade first to be very safe. I unplugged the saw so it could not start on me. I tried to turn the blade by hand with a glove. It felt very stiff and did not want to move. I looked under the table with a bright shop light.
There was a large chunk of wood stuck in the gears. It was wedged between the blade and the metal plate. I used a stick to poke it out of the way. Once the wood was gone, the blade spun very fast. I cleaned out the gears with a small brush.
Read More: Ridgid Table Saw Stopped Working
Dealing With A Bad Power Switch
If your brushes are good, look at the power switch. The switch can wear out after many years of use. Fine dust gets inside the plastic housing over time. It can burn the metal contacts and stop the flow. I have seen this happen on many Ryobi saws.
I took the two screws out of the black switch plate. I pulled the switch out from the front of the saw. I looked at the four wires on the back side. They were tight and did not look burnt or loose. I used my meter to test the flow of power.
The switch did not show a circuit when I flipped it. This meant the switch was dead on the inside. I had to buy a new one from the tool store. A new switch is not very pricey for a shop owner. I put the new one in and it worked.
Tips To Keep Your Saw Running
A clean saw is a happy saw in any workshop. Dust is the biggest killer of electric tools today. I use my shop vac after every big job I do. I blow out the motor holes with high air pressure. This keeps the brushes cool and the switch clean.
I also check my blade for sticky sap or pitch. Sap can make the motor work much too hard. This leads to heat and trips the red reset button. I use a spray cleaner on my blades every week. It makes the cuts smooth and very easy to do.
Do not force the wood through the saw too fast. Let the blade do the work at its own pace. If the motor slows down, you are pushing too hard. This will burn out your new brushes very fast. Slow and steady is the best way to cut wood.