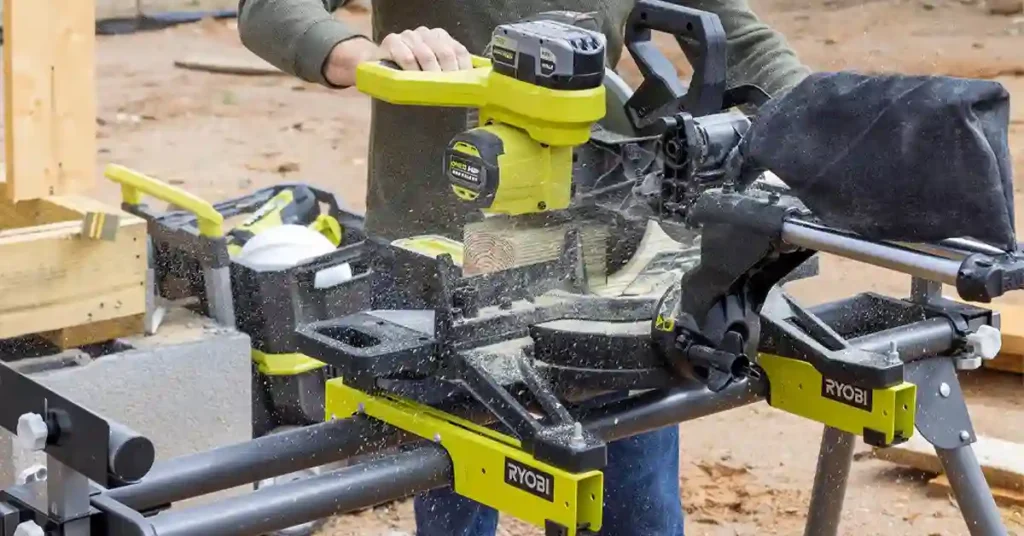
I’ll be honest. When my ryobi miter saw not cutting straight started ruining projects, I thought I was just bad at woodworking. I was in my small garage, on a cold weekday night, trying to knock out a simple frame, and every joint had a gap.
Once I slowed down and treated it like a real problem, not just “bad luck,” I found a few clear issues. I’ll break them down as problem + how I fixed it, so you can scan and go.

Table of Contents
Problem 1: Cuts Out of Square at 90°
Sometimes the joint looked tight at the back and open at the front. Other times the opposite. That’s when I knew something was off with the saw, not just the board.
Problem:
My 90° crosscuts were not truly square, even though the miter was set to 0°. When I checked with a speed square, I could see a thin line of light at one side of the cut.
How I fixed it:
I unplugged the saw and checked the fence first. I cleaned out packed dust, loosened the fence screws, and used a straight edge to line both sides up. Then I put a square against the fence and the side of the blade and adjusted the miter stop until 0° actually matched the square.
Problem 2: Bevel Slightly Off, Messing Up Joints
This showed up most when I was doing small trim cuts for a shelf project. The edges looked straight, but when pieces met, there was a tiny twist in the joint.
Problem:
The bevel angle was not truly at 0°, even though the scale said it was. The blade was leaning just a bit, which made the face of the cut lean too.
How I fixed it:
I set the bevel to 0° and placed a square on the table, up against the blade. When I saw a gap, I knew the bevel stop was off. I adjusted the stop until the blade and square touched clean with no light. After that, my straight cuts actually looked straight.
Problem 3: Cheap, Dull Blade Pulling to One Side
One hot afternoon, cutting studs in the driveway, I noticed the saw felt like it was drifting. The motor tone changed, and the wood smelled burnt, especially on soft pine.
Problem:
The stock blade had gotten dull, and it was a cheap one to begin with. It left burn marks, wandered in the cut, and sometimes even left a rough edge that looked like it had been chewed.
How I fixed it:
I swapped to a better crosscut blade with more teeth and a stiffer body, the kind you see a lot in U.S. shops. I cleaned the arbor and flange so the blade sat flat, then tightened the bolt snug. With a sharp, solid blade, the saw stopped pulling and started tracking straight again.
Problem 4: Wood Moving During the Cut
This hit me when I was cutting longer boards for a small deck repair. I was in a slightly humid space, close to what you’d feel in a Gulf Coast garage, and the lumber wasn’t perfect.
Problem:
The board was not tight to the fence and had no support at the far end. As I cut, the weight of the board pulled it away from the fence, so the blade followed the movement instead of the line.
How I fixed it:
I started using the built-in clamp or a quick clamp almost every time. I added a stand or sawhorse to support the long end of the board. Once the wood sat flat on the table, tight to the fence, my cuts became way more repeatable.
Problem 5: Forcing the Cut and Bending the Blade
On long days, especially working outside in dry, dusty conditions, I rushed. I just wanted the cut done and the project over.
Problem:
I was pulling the saw down too fast and pushing hard through the wood. That pressure made the blade flex, so even a good blade wanted to curve in the cut.
How I fixed it:
Now I wait for the blade to hit full speed, then lower it with a smooth, easy motion. I let the motor torque and sharp teeth do the work. Slower cut, better line. It also feels safer and calmer.
Problem 6: Wobbly Stand and Twisted Setup
In my garage, the floor is not perfect. One day I noticed the stand rocked a little when I leaned on it.
Problem:
The saw stand was not level, so the base of the saw was twisted. Even if the internal angles were right, the whole saw body was slightly torqued, which showed up in the cuts.
How I fixed it:
I leveled the stand, adjusted the legs, and made sure all four feet were solid. When I could push on the top and feel no wobble, I locked it in and, where I could, I bolted the saw down. That gave me a much more stable, predictable setup.
Quick Checklist I Use Now When My Ryobi Cuts Crooked
Here’s what I run through fast whenever my ryobi miter saw not cutting straight feeling comes back. It works the same in a small U.S. garage, on a driveway, or on a basic job site.
- Is the blade sharp, clean, and tight?
- Are miter and bevel actually at the angles I set?
- Is the fence clean and straight, with the board tight against it?
- Is the stand or bench solid, with no twist or wobble?
- Am I letting the blade hit full speed and cutting with steady pressure, not force?
Once I started looking at the saw this way—problem and fix, one by one—my projects finally began to look like I knew what I was doing, not just guessing with power tools.
FAQs – Ryobi Miter Saw Not Cutting Straight
Why is my Ryobi miter saw not cutting straight?
Most Ryobi miter saw not cutting straight issues come from bad alignment, a dull blade, or loose work support. Check the fence, bevel, and blade, then test cut on scrap.
How do I fix a Ryobi miter saw not cutting straight at 90 degrees?
Set miter and bevel to zero, then square the blade to the fence with a small square. Adjust the stops, tighten all locks, and cut a test board to confirm.
Can a dull blade make my Ryobi miter saw cut crooked?
Yes, a dull or cheap blade can wander in the cut and burn the wood. Swap to a sharp crosscut blade, clean the arbor, and see if the cut line improves.
Why does my board move during the cut on a Ryobi miter saw?
If the board is not tight to the fence or lacks support, it will shift and the cut will drift. Use the clamp, add stands for long boards, and hold it firm.
When should I replace or upgrade my Ryobi miter saw?
If the arm has play, parts are bent, or it stays inaccurate after careful setup, it may be time to repair or upgrade. Test other saws and match one to your work.
As an Amazon Associate, We earn from qualifying purchases