I run my own Florida workshop. My name is Maruf. I cut a lot of wood every day. Last week, I had a big stack of pine to cut. I grabbed my trusty Makita saw. I lined up my first line to cut.
I pulled the switch to cut the wood. The tool was completely dead. It made no sound at all. This is a very bad feeling. You have a job to do right now. You do not want to stop working.
I felt very mad at my dead tool. But I did not throw the saw. I put it on my work bench. Over the years, I have fixed many dead saws. Most of the time, the fix is cheap. I knew I could fix it fast.

Step One Is The Power Cord
We must start with the simple things. Sometimes the plug just falls out of the wall. I always look at the wall plug first. I plug my work light into the same wall box. If the light turns on, the wall has power. Then I look at the saw plug.
Tool cords take a lot of bad hits. We pull them on the hard shop floor. We drag them on sharp wood edges. I run my bare hand down the whole cord. I feel for any deep cuts in the thick black rubber. I feel for soft spots too.
The worst spot is near the saw handle. The wire bends a lot right there. If the thin wire breaks inside, the tool gets no power. You can not see this break with your eyes. You have to test the wire to know for sure.
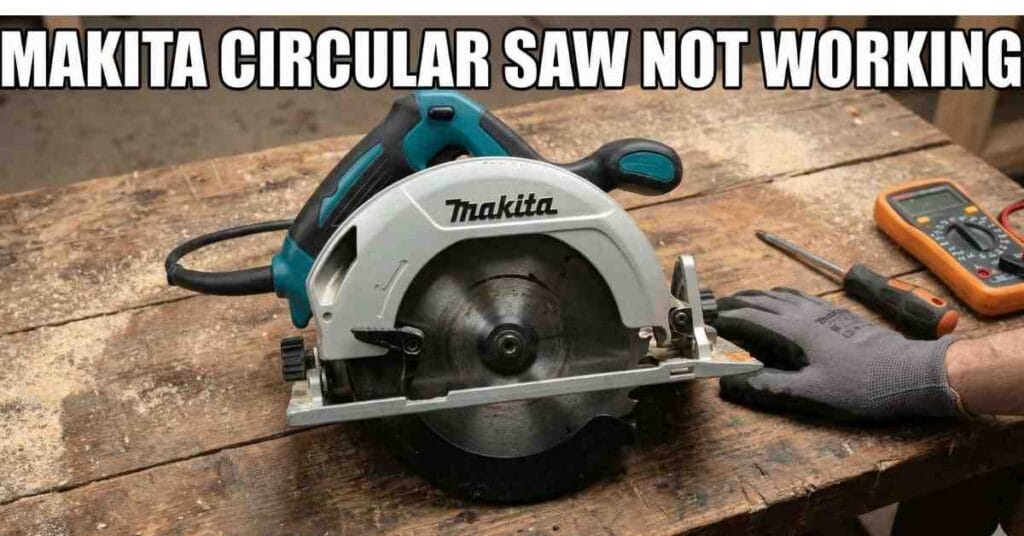
How I Test The Long Black Cord
I keep a simple meter on my bench. I set the meter to make a loud beep. I touch one metal pin to the wall plug. I touch the other pin to the wire inside the saw.
If the meter beeps, the cord is good. The power can flow clear. If it is quiet, the cord is bad. I cut the bad part off. Then I wire the good part back to the main switch.

Step Two Is The Carbon Brush
If the cord is good, I check the brushes next. This is the top reason a Makita tool will fail. Inside the main motor, there are two small black blocks. They rub on the spinning part of the motor. This makes the tool run strong.
Over time, these soft black blocks wear down. They get very small and short. Soon they can not touch the motor at all. When this happens, the tool will just sit there. It will not make any noise. You have to put new blocks in.
You will see two flat black caps on your tool. I use a flat tool to take them off. A small spring pops out with the black block. I look at the block closely. I check to see how much of it is left.
My Guide To Motor Brushes
| Brush Look | What It Means | My Quick Fix |
| Long and smooth | Brushes are brand new | Put them back in |
| Short and flat | Brushes are wearing out | Buy a new pair soon |
| Very tiny and chipped | Brushes are totally dead | Put in new ones now |
If the blocks are too short, they can not reach the motor. I keep a spare set of parts in my tool drawer just for this. They cost less than ten bucks. They save my whole work day from ruin.
Step Three Is The Trigger Switch
If my blocks look good, I check the tool handle. Cutting wood makes a lot of fine dust. In my humid shop, that dust gets very wet. It turns into a thick paste. That wet dust gets right inside the main trigger.
The dust packs in tight over time. Soon, the small metal parts inside can not touch. When you pull the trigger, the power stops right there. The tool stays dead in your hands.
Dust Kills The Switch
I make sure the saw has no power. I never skip that rule. Then I open the main handle. I take out the screws holding the plastic together. I pull the two sides apart.
I use my air hose to blow all the dust out. A strong blast of air fixes the switch most of the time. If the switch looks melted, I buy a new one. If it feels crunch when I press it, I buy a new one online.
Step Four Is A Stuck Blade
Sometimes the power parts are perfectly fine. The real problem is a physical jam. The motor wants to turn, but it can not move. I always unplug the tool before I check this. I never want to lose a finger. Safety is my top rule.
I grab the metal blade with my bare hand. I try to spin it in a circle. It should move with a little bit of smooth push. If it will not move at all, I look closer. Something is holding it back hard.
Sometimes a tiny piece of hard wood is stuck. It wedges tight inside the metal blade guard. Other times, the metal gears inside the saw are locked. I clear out any wood chunks I see. If the blade spins free by hand, I test the tool again.
Why Tools Get Too Hot
A hot tool is a sad tool. Heat is the main thing that kills a good saw. When you cut thick wood, the motor works very hard. It pulls a lot of power from the wall. This power turns into pure heat inside the plastic shell.
The tool has a fan inside to stay cool. It blows air through the side vent holes. If you block those holes with your hand, the tool gets hot fast. You must let the tool breathe while you cut. If it gets too hot to hold, stop cutting.
Let the tool run free for a minute. Do not push it into the wood. The spinning fan will pull fresh air inside. This cools the hot wires down. A cool tool will last for many years in your shop. Treat your gear with respect.
How I Clean My Saw Every Month
I like to keep my tools very clean. A clean tool is a happy tool. Once a month, I put my saw on the bench. I take a dry brush and wipe the whole thing down. I wipe the metal base plate until it shines.
Then I take my air hose. I blow air into every small hole. I blow air into the motor vents. A big cloud of dust always comes out. This keeps the fan clear and strong. It keeps the motor running cool.
I also check all the main screws. Sometimes they get loose from the daily cuts. I take a tool and make them tight again. A loose tool shakes a lot in your hands. This makes your wood cuts look very bad.
Step Five Is A Bad Motor
This is the part I really hate to see. Sometimes, a saw is just dead for good. Last year, I was cutting thick wet oak wood. I pushed the tool way too hard. I heard a sad whining noise from the motor. It sounded very bad.
Then I smelled a very bad smell. It smells exactly like burning plastic and bad fish. It makes your nose hurt. That smell means the thin coat on the motor wires is melting. When that happens, the tool is fully cooked. You can not fix that easily.
I look through the vent holes on the tool. If I see black burn marks inside, the game is over. Buying a new motor costs too much money. It costs almost as much as a brand new tool. At that point, I just go buy a new saw.
My Quick Check List
| Tool Sign | My First Guess | How I Fix It |
| No sound at all | Bad cord or wall plug | Test wall plug, check cord |
| Tiny clicks | Worn out black blocks | Put in new motor blocks |
| Switch is stiff | Dust stuck in handle | Open handle, blow out dust |
| Loud deep hum | Jammed metal blade | Pull plug, clear stuck wood |
| Bad hot smell | Fried tool motor wires | Go buy a brand new saw |
My Final Thoughts On Tool Repair
Fixing your own tools saves a ton of cash. It also makes you feel like a real pro. You get to know exactly how your gear works inside. You do not have to wait for a repair shop. You can get right back to cutting wood.
Take your time and do not rush the job. Always pull the plug out first. Go step by step down my short list. You will find the exact problem fast. Most of the time, you will be back to work in ten minutes.