It was a cold Tuesday morning in my garage. I held a hot cup of black coffee. I had a long piece of fresh pine wood. I set the wood flat on my saw base.
I flipped the main power switch on. The loud hum of the heavy motor filled the room. The smell of fresh pine dust hung in the air. But something was very wrong with my next cut.
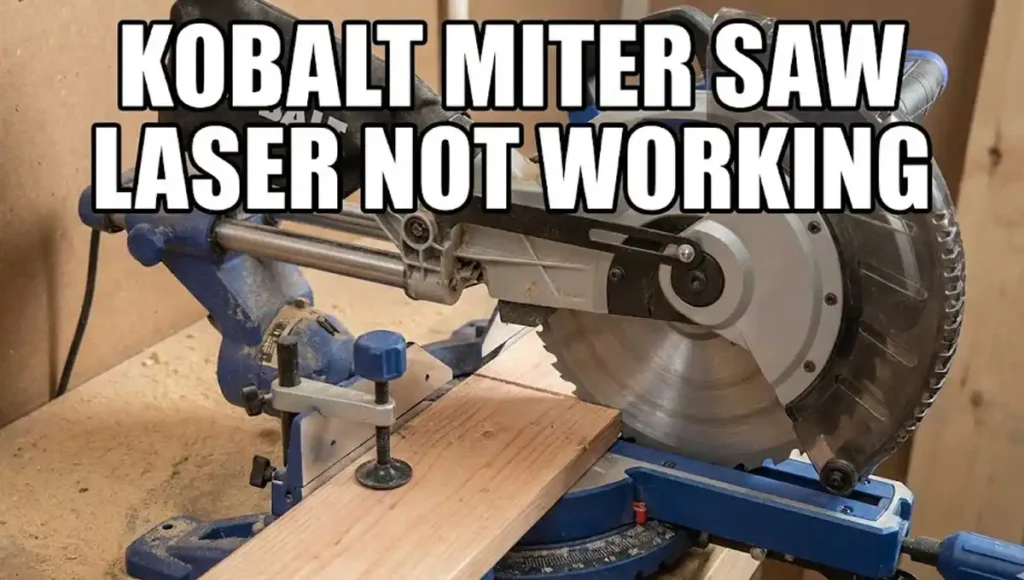
The bright red laser line was totally gone. My Kobalt miter saw laser stopped working right when I needed it most. I felt a quick wave of pure panic. I tapped the plastic laser cover with my bare hand.
I thought a firm tap might fix a loose wire connection. That simple trick did not work at all. I had to stop my fun project right there. I test and fix big power tools every single day.
I know how to fix these complex machines safely. So I put down my warm coffee mug. I unplugged the thick black power cord from the wall. I started to look for the real root problem.
You are reading this because your saw laser died today too. I know exactly how annoying it feels in the shop. You just want to make a fast straight cut. A broken guide light slows down your whole working day.
Do not worry about this issue right now. You do not need to buy a brand new saw. You do not even need to call a pricey repair shop. I will show you exactly how to fix it fast.

Why Miter Saw Lasers Fail in the Shop
Power tools take a lot of hard daily abuse. Miter saws vibrate very hard when cutting thick hard wood. They also make tons of fine flying sawdust. This dry dust gets into every single small tight crack.
The laser module is a very sensitive small electronic part. It sits right in the direct path of flying wood chips. It is easy to see why it stops working so often. Sometimes the fast repair takes only one short minute.
Other times it takes about ten quiet minutes to fix. Most clear fixes will cost you nothing at all. I have gathered real solid data from my own work bench. I also talk to many other local busy wood workers.
Here is a clear look at the most common laser faults. This data shows why your red light goes dark. It helps you find the right fast fix much faster.
| Problem Source | How Common Is It | Time to Fix | Cost to Fix |
| Dead Batteries | Very High | 2 Minutes | Under Five Dollars |
| Dirty Glass Lens | High | 1 Minute | Free |
| Clogged Switch | Medium | 5 Minutes | Free |
| Bad Beam Alignment | Medium | 5 Minutes | Free |
| Broken Wire Harness | Low | 15 Minutes | Varies |
Step One Check the Hidden Battery Compartment
This is the absolute biggest secret of the Kobalt miter saw. Many smart people think the laser gets direct wall power. They think the thick black plug runs everything on the tool. This is a very common and very simple user mistake.
Many common Kobalt models use small hidden batteries just for the light. The main thick wall plug runs the big heavy motor. The small hidden batteries run the tiny red laser light. I learned this silly hard lesson the long hard way.
I took my entire heavy saw apart looking for a bad wire. Then I found a tiny plastic battery door near the handle. I felt quite silly sitting there covered in the dry sawdust. Unplug your heavy saw from the wall right now.
Always do this important safety check step first. Personal safety is the most important rule in my daily shop. Look closely behind the clear plastic safety blade guard. Look right near the main black rubber grab handle.
You will see a small black square plastic cover plate. It usually has one tiny metal screw holding it very tight. Take your small hand screwdriver and open that tiny cover. Look deep inside the small square plastic box.
You will probably see two small round silver batteries. Some older saw models use standard small AAA size batteries. Others use flat round silver coin cell style batteries. They are usually the common size LR44 or size 357.
Pop the old dead batteries out with your pointer finger. Put fresh new ones in the small empty black slots. Make sure the plus and minus sides match the plastic signs. Put the plastic cover back on very tight and secure.
Tools You Need for a Fast Repair
You do not need a massive heavy tool box for this job. You only need a few simple cheap things. You probably have them in your warm house right now. Here is the exact list of simple items I use for this repair.
| Tool Name | Why You Need It | Cost |
| Small Screwdriver | To open the small black battery door | Free |
| Cotton Swab | To clean the tiny clear glass lens | Free |
| Rubbing Alcohol | To melt the sticky wet pine sap | Low |
| Compressed Air | To clean the dirty packed power switch | Low |
| Fresh Batteries | To power the red laser light module | Low |
Having these simple basic items ready saves you much time. You will not have to stop your fun work later. You will not have to search the cold garage for a lost tool. You can just grab them and start fixing the broken saw immediately.
Step Two Clean the Dusty Glass Lens
If fresh new batteries do not help we move to step two. Your red laser might be turned on perfectly right now. You just cannot see the red light hitting the flat wood. Think about how a big power saw really works.
The sharp metal steel blade spins very fast and hard. It throws dry heavy sawdust everywhere in the open room. Even with a great loud shop vacuum dust flies around. Raw pine wood is very bad for this specific light problem.
Raw pine has thick sticky wet sap hidden deep inside it. The dry fine sawdust mixes with the wet heavy sap. It lands right on the small clear glass lens of the laser. Over time this wet dust builds up very thick and dark.
It fully blocks the bright red light from shining out. The laser looks dim and weak at the very first. Then it goes completely dark and totally useless. You need to clean that small clear piece of delicate glass.
Do not use a hard metal wire brush for this step. You might scratch the soft fragile glass lens for good. I use a simple soft white cotton swab stick. A soft clean dry cloth works great for this too.
Wipe the tiny clear glass gently with your bare hand. If the wet sap is very sticky use some rubbing alcohol. Dip the soft cotton swab in the clear cold liquid. Rub the glass slowly until it is totally clear and clean again.
Step Three Fix a Sticky Power Switch
Sometimes the battery box is totally full of fresh power. The tiny glass lens is perfectly clean and very clear. But the bright red light still will not turn on at all. The next fast thing to check is the small plastic switch itself.
The laser box has a very tiny on and off switch. You press it with your finger right before a fresh cut. This plastic switch is not perfectly sealed from the open dusty air. Fine dry sawdust floats everywhere in a busy wood shop.
It lands right on the flat top of the power switch. It works its way deep inside the tiny plastic cracks. The fine dust packs in very tight over a long time. Soon the tiny inside metal contacts cannot touch each other.
The raw electricity cannot flow through the thick packed dirt. The laser simply stays off when you push the red button. Press the switch right now with your pointer finger. Does it feel soft when you push it straight down?
Does it feel very mushy instead of firm and strong? A good clean power switch gives a very crisp sharp click sound. If it feels thick or sticky you have a dust packing problem. Grab your loud shop air compressor blow hose.
A cheap light can of compressed air works perfectly well too. Put the plastic air nozzle right up to the tight switch edges. Blow short hard fast bursts of air into the small gaps. You will probably see a big cloud of brown dust fly out.
Step Four Adjust the Laser Beam Alignment
This specific light problem tricks a lot of very smart people. The red laser module actually works perfectly fine. The bright red light is shining very hard and strong. But it is shining in the totally wrong open place.
A big heavy miter saw is a violent power machine. The big electric motor jumps hard when you first start it. The steel spinning blade chops deep into very hard thick wood. This makes the whole heavy saw base shake and rattle hard.
This heavy constant daily shaking can loosen the small laser box. The little metal holding screws vibrate out of place very slowly. The laser module shifts slightly to the left or the right side. Sometimes it shifts so far that it shines inside the dark plastic guard.
You cannot see it on your flat bright wood below. You think the whole light system is totally broken and dead. Turn the small laser power switch on right now. Do not plug the main thick saw cord in yet.
Keep the main big motor power off for pure shop safety. Look very closely at the black plastic laser housing box. Look for a tiny red glow inside the dark plastic space. If you see a bright red glow it just needs an adjustment fix.
Look for small metal set screws on the box side. You might need a small hex wrench to turn them tight. You might need a tiny flat head metal screw driver. Move the laser module until it shines exactly on the cut mark.
Step Five Look for Broken Internal Wires
This exact step is only for older hardwired power shop saws. Some older Kobalt models wire the laser straight to the main plug. If your laser does not have a small secret battery box you have one. You have a hardwired model sitting on your heavy bench.
This makes fixing the light a little bit harder to do today. The heavy miter saw head moves up and down all day long. You pull the heavy handle down to cut the hard flat wood. You lift it back up to rest between the long deep cuts.
This constant moving action bends the black wires inside the saw joint. Over the long years this endless bending takes a heavy toll. The thin copper inner wire gets pinched near the main metal hinge. Sometimes the wire breaks completely inside the thick black rubber cover.
Keep the heavy saw totally unplugged from the wall socket. Trace the thin black wire down from the top laser box. Follow it back to the main thick motor handle grip. Look for flat crushed bad spots on the black rubber wire.
If you find a broken crushed wire you have two main choices. You can strip the bad wire and solder it back together well. Use a tight heat shrink tube to keep the new repair safe. Or you can order a whole new wire harness from the main factory.
Step Six Try a Cheap Arbor Laser Upgrade
Sometimes old plastic power tool parts just die for good. Cheap small inside electronics do not last forever in a cold damp garage. If you try all these clear steps and nothing works it is dead. Winter wet moisture in your garage can ruin the small green circuit board.
A sudden power line surge can fry the tiny red glass bulb. It happens to the very best heavy power tools over time. You can order a factory replacement laser from an online parts store. It usually costs about twenty to forty whole American dollars.
But factory metal parts can be very hard to find for older tools. Sometimes they are sold out for many long slow months. I hate waiting for slow metal parts to ship in the mail. I have a great fast cheap trick for this exact annoying problem.
I use a cheap simple aftermarket metal arbor laser part. An arbor laser is a tiny flat round metal disk. It fully replaces the flat metal washer on your sharp saw blade. It sits right next to the fast spinning steel saw blade.
These are truly amazing little smart backup tools for your shop. They run on three tiny silver round watch style batteries. They do not even need a manual finger power switch. They use simple physics and strong centrifugal force to work.
When you turn the saw on the heavy steel blade spins. The fast spinning motion turns the laser on automatically right away. When the big blade stops spinning the laser turns completely off. I keep one of these round lasers in my red tool box always.
How to Keep Your Tool Running Great
Fixing broken shop power tools is a very good life skill. But stopping them from breaking is much better for your wallet. I like to take great daily care of my expensive shop gear. I have learned a few good clean habits over the long years.
These simple easy daily habits keep my saw running perfectly smooth. They will surely help your good tools last much longer too. First always use a dust bag or a good loud shop vacuum. Dust is the absolute worst enemy of all moving machine parts.
Sucking the loose flying dust away keeps the clear laser lens totally clean. Second do not leave your good saw out in the heavy cold rain. Do not leave it in a very damp dark backyard shed over winter. Wet dark heavy moisture ruins small inside electronics very fast.
Third check your small plastic battery door screw very often. Heavy daily cutting saw vibration can loosen that tiny screw over time. If the plastic door falls off you will lose your fresh power batteries. I put a small piece of blue tape over my door to be completely safe.
Final Thoughts on Your Saw Repair
A broken miter saw laser is a very annoying bad thing. It ruins your calm peaceful happy focus in the wood shop. It makes your long complex cuts much slower to line up. But it is almost never a fatal big problem for the whole heavy tool.
Most of the time the easy fast fix is very cheap. Most of the time it is very fast to do yourself. You just need to know exactly where to look for the packed dirt. Remember my basic simple steps next time you go to the cold garage.
Check the secret hidden power batteries first before anything else. Clean off the sticky wet raw pine sap from the tiny glass. Blow the dry brown dust out of the plastic push switch. Check the exact red line alignment on a safe scrap board.
FAQs: Kobalt Miter Saw Laser Not Working
Do all Kobalt miter saw lasers use AA batteries?
No, many tools use small flat coin batteries. Look at the small plastic door near the main grip. Swap them out now to fix your Kobalt miter saw laser fast.
Why does my saw laser shine in the wrong spot?
Heavy daily wood cutting shakes the whole tool very hard. This heavy shaking moves the small laser box out of place. Turn the side screws to fix the red line.
How do I clean a dim miter saw laser lens safely?
Wet tree sap and dry wood dust will block the clear red light. Use a soft white cotton stick and some rubbing alcohol. Rub the small glass softly to fix it.
Can shop dust cause the saw laser switch to fail?
Yes, fine dry dust packs tight inside the small plastic switch. This hard dirt blocks the raw power flow. Blow strong canned air into the switch space to fix it.