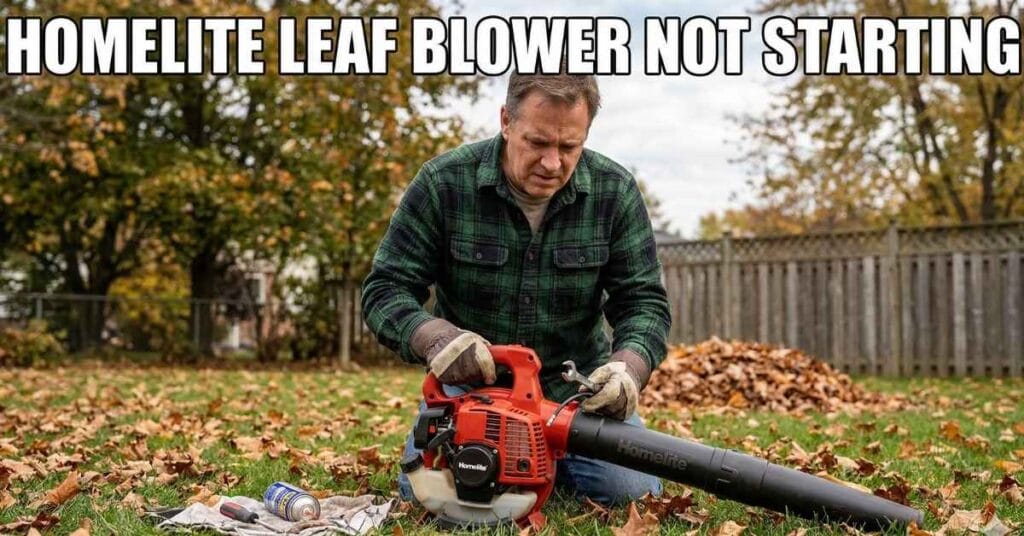
It was a cool Saturday morning in late October. Bright red leaves covered my green grass completely. I walked to the shed with a clear goal in mind. I wanted to clean the yard up fast. I picked up my blower and gave the cord a hard pull. Nothing happened at all, and the motor stayed silent. Having a Homelite leaf blower not starting is very frustrating. I pulled the cord ten more times in a row. My arm began to ache badly from the hard work. The engine stayed completely dead despite my best efforts.
I stood there feeling totally stuck and very annoyed. I bought this yard tool to save me precious time. Now, it was just wasting my whole morning. I thought about taking it to a local repair shop. But shop repairs cost a lot of money these days. The wait time is also very long during the busy fall season. I decided to fix it right there in my driveway. I have learned a lot from this messy morning. Let me share my simple repair journey with you. You can save time and money by fixing it yourself.

Starting with the Simple Checks First
Sometimes, the biggest engine problems have very small fixes. I learned this simple truth the hard way. I checked the main on and off switch first. It is very easy to bump it by pure mistake. Mine was sitting firmly in the correct spot. Then, I checked the small plastic choke lever. A cold engine always needs the choke fully closed. A warm engine needs the choke completely open. I set the choke lever to the closed spot.
Next, I pressed the clear primer bulb with my thumb. You should press it five or six times to work. This action pulls fresh gas into the tiny carburetor. My primer bulb felt a bit stiff and hard. It did not fill up with gas like it should. This gave me my very first big clue. The fuel was not moving right inside the machine. I had to look much deeper into the motor parts. The core problem was hiding inside the fuel system.
Stale Gas Causes Really Big Problems
Gas goes bad much faster than you might think. It can lose its firing power in just one month. Old gas turns into a thick, sticky mess over time. It clogs up all the tiny parts inside the motor. I leaned in and smelled the plastic gas tank. It smelled exactly like old, rotten house paint. This was a clear sign of totally bad fuel. I had left last year’s gas in the tank all winter. That was a huge and careless mistake on my part.
I took the blower straight to my flat driveway. I poured the old gas into a safe metal pan. The plastic tank looked very dirty on the inside. I wiped it out firmly with a clean shop rag. Then, I made a fresh batch of engine fuel. Homelite blowers need a mix of standard gas and oil. Read your user manual for the exact mix ratio. Usually, it is fifty parts gas to one part oil. I filled the clean tank with this fresh mix.
Inspecting and Replacing the Spark Plug
Fresh gas is great, but you also need a spark. The spark plug ignites the gas inside the deep motor. If it is dirty, the motor will absolutely not run. A Homelite leaf blower not starting often has a bad plug. I grabbed my handy metal wrench from the red box. I pulled off the thick black rubber wire. Then, I slowly unscrewed the metal spark plug. It looked very black and fully covered in dark soot.
A dirty plug cannot make a strong, bright spark. You can clean it well with a stiff wire brush. But buying a brand new plug is very cheap. I drove straight to the local hardware store in town. I bought an exact match for just three dollars. I screwed the new plug into the cool motor base. I made sure it was snug but not overly tight. Then, I pushed the thick black wire back on tightly.
Cleaning Out the Dirty Air Filter
Engines need to breathe clean air to run smoothly. The air filter stops dry dust from getting inside. If the filter is clogged, the engine slowly chokes out. It will refuse to start up at all for you. I found the black plastic cover on the side. I turned the small knob and took the cover off. The small foam filter was sitting right inside there. It was totally covered in dry dirt and cut grass.
I took the dirty foam piece out of the base. I washed it deeply in warm, soapy tap water. I squeezed it gently until it looked perfectly clean. You must let it dry completely before using it. A wet filter will ruin the running engine fast. Once it was dry, I put a drop of clean oil on it. I squeezed the extra wet oil out completely. Then, I placed it back safely inside the plastic case.
Checking the Thin Fuel Lines and Carburetor
This part sounds scary, but it is actually not. The fuel lines are just thin, clear plastic tubes. They carry wet gas from the tank to the engine. Over time, these soft tubes get hard and crack open. I looked very closely at my two fuel lines. One of them had a tiny split near the top edge. This let dry air get into the closed system. The engine simply cannot run on thin air alone.
I bought new clear fuel lines for a few dollars. I pulled the old, broken ones off very carefully. I pushed the new tubes tightly into their proper place. Next, I looked straight at the shiny metal carburetor. It mixes the outside air and the wet gas together. I bought a cheap can of special cleaner spray. I sprayed it inside to melt any old, hidden dirt. This helps the fresh gas flow freely and fast.
A Quick and Easy Repair Guide
Here is a simple table to help you out today. It shows the most common issues and their fast fixes. You can use it as a basic quick reference guide. It saves you from reading long, boring paper manuals.
| The Problem You See | What Is Probably Wrong | How You Can Fix It Fast |
| Engine stays fully dead | Bad or dirty spark plug | Buy and install a fresh plug |
| Pull cord feels stuck | Engine flooded with gas | Let it sit for ten minutes |
| Will not stay running | Clogged or dirty air filter | Wash the foam or buy a new one |
| Primer bulb is cracked | Old and hard plastic bulb | Swap out the broken clear bulb |
| Smells like old paint | Gas has gone bad inside | Drain tank and mix fresh fuel |
This basic table shows how simple most fixes really are. You do not need to be a master mechanic at all. You just need a bit of pure, quiet patience. Taking things step by step always works the best. Just check one single machine part at a time.
Trying to Start It Up Again
I finally had fresh gas inside the clean tank. I had a brand new spark plug correctly installed. The soft air filter was washed and fully dry. The broken fuel line was now completely new and tight. It was time for the final, big engine test. I set the blower flat on the hard driveway. I pushed the clear primer bulb exactly six times. I saw fresh gas flow through the new, clear tubes.
I flipped the red switch to the on spot. I moved the plastic choke to the closed side. I grabbed the top handle tightly with one hand. I pulled the start cord hard with my other hand. It sputtered loudly on the very second strong pull. I moved the choke over to the open spot. I pulled the cord just one more final time. The engine roared to life with a loud, strong hum.
The Pure Joy of a Working Tool
A huge wave of pure relief washed right over me. Hearing that loud, steady engine sound was truly amazing. A Homelite leaf blower not starting is a bad memory now. I let the cold engine warm up for three minutes. It ran very smooth and did not blow any smoke. I picked it up proudly and walked to the messy yard. The heavy leaves blew away fast and very easily.
Fixing it totally by myself felt like a huge win. I saved good money by avoiding the busy repair shop. I also learned exactly how my yard machine works. It is not a confusing magic box to me anymore. It is just a simple motor with easy parts. If it ever breaks again, I know exactly what to do. I feel much more confident in my own basic skills.
Keeping It Running Next Year
I do not ever want to face this problem again. I fully changed how I care for my yard tools. Good daily habits stop future headaches from happening later. Here are my top rules for good yard tool care.
- Drain the tank fully. I never leave old gas in the tank anymore. When fall ends, I empty the tank completely out.
- Run the lines dry. After draining the tank, I run the motor. I let it run loud until it dies entirely. This keeps the tiny carburetor clean and fully dry.
- Check the vital parts. I check the metal spark plug every single spring. I also wash the soft foam air filter twice a year.
Taking good care of tools makes them last much longer. Ten short minutes of care saves hours of hard work. I hope my honest story helps you fix your blower today.
Final Thoughts on My Repair Journey
Yard work should be a peaceful and fun outdoor chore. Having broken yard tools makes it feel like hard work. We all want our tools to run on the very first try. Sometimes, they just need a little extra love and care. Do not get mad if yours acts up on you today. Take a deep breath and start checking the small parts. You can definitely fix it just like I easily did.