Ever had your Fluke multimeter refuse to turn on right when you needed it most? I’ve been there—standing in a cold Midwest garage, trying to find a dead circuit while my meter stayed blank. In places like humid Florida or dusty Arizona, even tough tools can fail. That’s why it’s important to know how to check and fix your multimeter, not just how to choose one.
In this guide, I’ll show you what really causes a Fluke to stop working, how to test each part safely, and what has worked for me after years of real troubleshooting. Here’s what I found after breaking down the most common power issues side by side.

Table of Contents
Why Your Fluke Multimeter Might Not Power On
If your Fluke multimeter won’t turn on, don’t stress — it’s often something simple. I’ve had mine go dark right in the middle of a job, and most times it wasn’t a major failure. It was just a small power issue. The good news is, you can often fix it yourself in a few minutes with a little patience and a new battery. Let’s go through the basics before opening the case or calling support.
Dead or Weak Battery
This is the most common reason a Fluke multimeter won’t power up. I’ve lost count of how many times I thought something inside had failed, only to find the 9V battery was weak. Fluke models like the 87V, 117, and 179 are very sensitive — even a small drop below 8 volts can stop them from starting.
Always use a high-quality 9V alkaline battery, not a rechargeable one. Rechargeable types often run at 1.2V per cell, which is too low for reliable startup. I keep a pack of Duracell ProCells in my toolbox because they last long and hold voltage steady, even in cold garages.
To check, test the battery with another meter. If it reads under 8.0 volts, replace it. Most of the time, your meter will come back to life right away.
Battery Terminal Corrosion
If the battery’s fine but your Fluke still won’t turn on, corrosion might be the issue. I’ve seen this happen after leaving a battery inside all winter. You’ll spot white, crusty residue on the terminals from alkaline leaks. That buildup blocks power, even if the battery is brand new.
Here’s how to clean it:
- Remove the battery.
- Dip a cotton swab in white vinegar and dab it on the corrosion.
- When it stops fizzing, gently brush the metal with a small wire brush or fiberglass pen.
- Wipe it clean with 90% isopropyl alcohol and let it dry fully before reinstalling the battery.
A few minutes of cleaning now can save you from a costly repair later.
Misinstalled or Loose Battery Connection
Another easy mistake is putting the battery in backward. Some Fluke meters have tight compartments, and it’s easy to snap the connector the wrong way, especially in low light or while wearing gloves.
Remember: the larger hex terminal is negative (–), and the smaller round one is positive (+). Models like the 87V use a firm snap connector that can feel stiff. Push it on gently but firmly — a loose fit can break the connection and make the meter look dead.
If the polarity is right but it still won’t start, inspect the wires. Tug them lightly. If one feels loose or frayed, it may need resoldering.
Moisture or Environmental Stress
Sometimes, the issue isn’t the battery — it’s the environment. I’ve had my Fluke freeze up after a night in a cold garage and once after working in humid Florida air. Moisture inside the case can cause shorts or oxidation, stopping the meter from powering up until it dries.
Here’s what to do:
- Remove the battery.
- If it’s out of warranty, open the case slightly.
- Let it air out for at least 24 hours in a warm, dry place.
- Store it later with silica gel packs to prevent moisture buildup.
If you work outdoors or near the coast, this step can make a big difference.
Quick Safety Checklist Before Troubleshooting
Even when your Fluke won’t turn on, always treat it as if it could still hold a charge. That habit has kept me safe many times when working around live circuits. Before you start checking things, take one minute to review this checklist:
- Disconnect all test leads from any power source.
- Follow OSHA and ANSI safety rules — wear gloves and safety glasses.
- Work on a rubber mat or wooden bench to reduce static and shock risks.
- Keep a second multimeter (I use a Milwaukee or Klein) nearby to verify voltages.
Skipping these steps can ruin your meter in seconds.
Step-by-Step: How I Diagnose a Fluke That Won’t Turn On
Over the years, I’ve built a simple process for troubleshooting a dead Fluke. It starts with the easy stuff — the battery — and moves step by step to deeper checks. This method has saved me time and helped me find issues others missed.
Step 1 — Check the Battery and Leads
First, test the 9V battery with another working meter. If it’s fine, check the lead jacks for dust or loose fit. You’d be surprised how much debris collects in those tiny ports.
Once, I thought my meter was fried — but the issue was a cheap pair of test leads that didn’t fit right. Switching to my Fluke leads fixed it instantly.
Step 2 — Test the Battery Connector and Wires
Next, tug gently on the battery snap wires. If one feels loose, that’s a warning sign. These wires can break inside the insulation from bending over time.
To confirm, set another multimeter to continuity mode and test the connector. If there’s no beep, the wire is open and needs replacing. Replacement clips are inexpensive and easy to find at any hardware store.
Step 3 — Check for Display Signs
Sometimes, the meter isn’t dead — it’s just not showing it. When you turn the dial, listen for a faint beep. Many Fluke models do a quick self-test when powered. If you hear the beep but see no display, the LCD or zebra connector may be the issue.
On my 87V, I once saw a faint flicker on the screen. Reseating the ribbon fixed it right away.
Step 4 — Open the Case for Inspection (If Out of Warranty)
If nothing else works, it’s time to look inside — but only if your meter is out of warranty.
Use the right screwdriver and work on a clean, static-free surface. Once open, check for burnt parts, corrosion, or a blown reverse polarity diode (marked “CR1” on many boards).
I once installed a battery backward and blew the diode. Luckily, replacing it brought the meter back to life. Take your time and clean any damage before reassembling.
Common Internal Causes of Power Failure
If the simple fixes didn’t work, something inside your Fluke multimeter might be causing the problem. These are deeper issues I’ve seen over the years — usually after a battery leak, a drop, or an accidental reverse connection. They take a little more care to diagnose, but each one can be fixed if you know what to look for.
Faulty Reverse Polarity Diode
This tiny part has saved many meters, including mine. The reverse polarity diode protects your Fluke if you ever install the battery backward — which happens more often than you’d think. I once did it myself late at night in the garage and instantly killed the power. The diode (usually marked “CR1” on the board) shorted to protect everything else.
Here’s how to test it:
- Remove the battery.
- Set another meter to diode mode.
- Touch the probes across the diode terminals. You should get a reading one way but not the other.
- If it reads both ways, the diode is bad.
You can replace it with a Schottky diode of the same type — I’ve used the 1N5819 successfully. It’s an easy fix if you’re comfortable with soldering.
Damaged PCB Traces or Cold Solder Joints
Another issue I’ve seen in older or heavily used meters is cracked or oxidized solder joints. Over time, small drops and vibrations can cause microcracks. I once had a Fluke 179 that turned on only sometimes. Under a magnifier, I spotted a dull, cracked joint near the battery terminal.
To check this:
- Use a magnifying glass and bright light.
- Look for dull, ringed, or gray joints — these are cold solder points.
- Reflow them using a soldering iron and 60/40 rosin-core solder.
It’s a careful job but worth doing once you’ve ruled out power problems. Reflowing joints has brought more than one “dead” meter back to life.
Corroded Power Rails or Shorted Capacitors
If your Fluke still won’t power up after cleaning, corrosion may be eating away at the copper traces inside. Battery leaks or humidity — especially in coastal areas — can break the power path to the main IC.
I’ve opened meters that smelled faintly acidic, a sure sign of an old battery leak. I traced the power line in continuity mode and found open spots where the copper was gone. A short jumper wire repair fixed it.
Sometimes a shorted capacitor causes the same problem. Older Fluke meters often use tantalum capacitors that can fail shorted. They’ll feel slightly warm to the touch after a few seconds. I check this by powering briefly (battery only) and touching the parts carefully.
Display System Issues (When It Has Power but Looks Dead)
Sometimes your Fluke isn’t really dead — it just looks that way. The power circuit may work fine, but the screen stays blank. These display issues are easy to mistake for a full failure.
The “Zebra” Connector Problem
Inside the meter, there’s a flexible strip called a zebra connector that links the LCD to the main board. Over time, it can shift or dry out, especially if your meter’s been stored in heat or humidity.
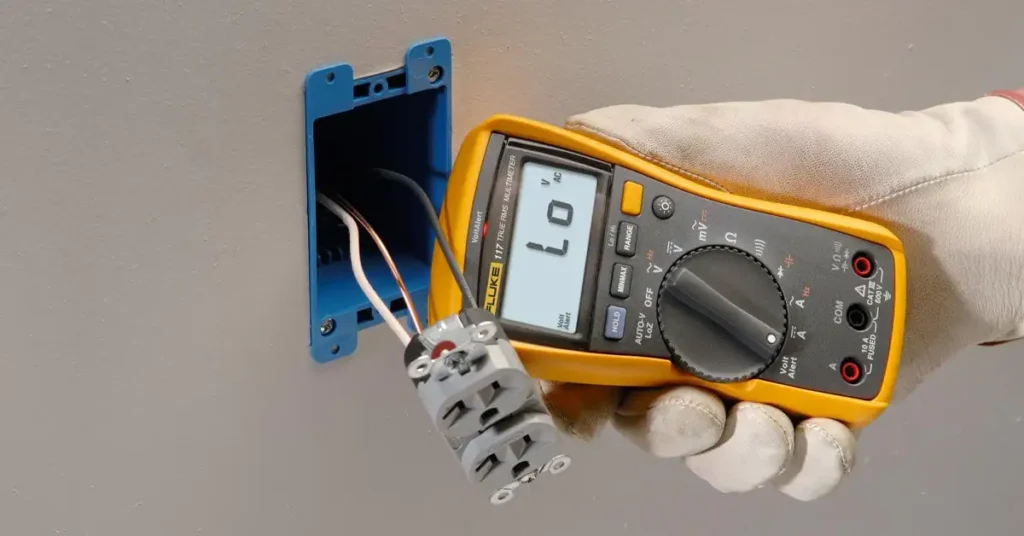
I once opened a Fluke 117 that had gone dark after years of use. The zebra strip had shifted just slightly. I cleaned both sides with 90% isopropyl alcohol, re-seated it evenly, and tightened the frame screws in a cross pattern. The display came right back.
Be gentle — over-tightening can warp the screen or make digits fade.
Dim or Faded LCD Segments
If your screen shows faint or missing digits, it’s often a contact issue. On my Fluke 179, some numbers faded on one side. It wasn’t the LCD — it was uneven frame pressure.
My quick fix was adding a thin foam strip behind the LCD to press it evenly. It worked perfectly and cost nothing.
This problem is common in meters used outdoors, where temperature swings cause plastic parts to expand and loosen over time.
When to Replace vs. Repair
Knowing when to fix a tool and when to move on is part of being a smart technician. I’ve repaired plenty of meters, but sometimes replacement is the smarter choice — especially when the problem runs deep.
Here’s how I decide:
- Repair it yourself if it’s a simple issue: dead battery, corrosion, bad diode, or display connector. These are safe and cheap fixes.
- Send it in if you see processor faults, calibration drift, or major liquid damage. Fluke’s flat-rate repair program is quick and fair — I’ve used it once myself.
- Check your warranty first. Opening the case can void it, especially on newer models like the 87V MAX.
- Repair high-end models like the Fluke 289 or 87V — they’re worth saving. For smaller budget models, replacement often costs about the same.
Preventing Future Power-On Problems
After fixing a Fluke that won’t turn on, the next goal is simple — keep it that way. Over the years, I’ve learned most power issues don’t come from design flaws. They come from neglect. A few small habits can make your Fluke last for decades, even in tough U.S. garages or job sites.
Battery Care
Nothing ruins a Fluke faster than a forgotten battery. I’ve seen more damage from corrosion than from drops or rough use. Now, I swap my battery every 6 to 12 months — even if it still works fine. It’s cheap protection against leaks.
Always use a good 9V alkaline battery like Duracell ProCell or Energizer Industrial. They hold voltage well through cold winters and hot, humid summers. Avoid rechargeables. They don’t keep the same voltage, and many Flukes need that full 9 volts to start up right.
Never store your meter with a battery inside. I once left mine in a toolbox all winter and found white crust on the terminals. Now, I remove the battery anytime I know it’ll sit unused.
Proper Storage
Where you store your meter matters as much as how you use it. I’ve had meters fog up in humid Florida garages and freeze in cold Midwest shops. Both cause condensation — the silent killer of electronics.
I keep my Fluke in a padded case with silica gel packs inside. It keeps out moisture and protects the screen. If you live near the Gulf Coast, this step is even more important.
Also, skip the metal toolbox. Steel boxes trap moisture. Use a dry, padded case or drawer instead.
Regular Cleaning and Inspection
A multimeter may not move, but it still needs care. I wipe down the leads and input jacks with contact cleaner every few months. It takes minutes and keeps readings stable.
I also check the fuses and connectors once in a while. Many people use cheap fuses that fit but aren’t HRC-rated (High Rupture Capacity). That’s risky if you test high-energy circuits. Always use real Fluke fuses.
It’s small steps like these that keep the meter dependable for years.
Final Thoughts — How I Keep My Fluke Alive
After years of use in garages, job sites, and even icy driveways, I’ve found most “dead” Flukes fail from neglect, not electronics. It’s usually the battery, corrosion, or moisture creeping in.
What’s kept my meters strong is simple care. I treat them like my best hand tools — clean them, keep them dry, and avoid extreme temps. My oldest Fluke is over ten years old and still passes calibration like new.
So if your Fluke ever goes dark, don’t panic. Work through the basics, stay patient, and fix what you can. With a little care, your multimeter will outlast half the tools in your truck.
FAQs — Fluke Multimeter Not Turning On
Why is my Fluke multimeter not turning on?
It’s usually a weak battery, dirty contacts, or trapped moisture. Start by checking the 9V battery. Most meters come back to life after a quick swap.
Can a blown fuse stop my Fluke from turning on?
No. Fuses only protect the current test ranges. Even with a blown fuse, your meter should still turn on and read voltage or resistance.
How do I clean corrosion inside a Fluke multimeter?
Use a cotton swab with white vinegar to dissolve battery residue. Then wipe with rubbing alcohol and let it dry completely before putting the battery back.
What should I do if my Fluke stopped working after being in the cold?
Let it warm up and dry for 24 hours. Cold air can cause condensation that shorts the contacts. Once dry, reinstall the battery and test it again.
Is it worth fixing a Fluke that won’t power on?
Yes, if it’s a high-end model like the Fluke 87V or 289. They’re tough and supported with factory repairs. For smaller models, replacement may be cheaper and faster.