Ever tried cutting aluminum with a miter saw and wondered if it’s safe or smart? I have. I’ve done it in a humid Florida garage where chips stuck like glue, and in a cold Midwest shop where grease turned stiff overnight. The truth is, the right blade and setup make all the difference.
In this guide, I’ll show what actually works — from blade choice and feed speed to the safety gear I trust most. No matter if you’re using a DeWalt, Milwaukee, or Craftsman saw, these tips will help you get clean, accurate cuts without burning your blade or damaging your rails.
Quick answer: Yes, you can cut aluminum with a miter saw — but only if you use a non-ferrous metal blade, clamp your work tight, and keep the saw clean and cool. I’ve tested this across different tools and climates, and these simple steps make it both safe and effective.
Table of Contents
Can You Cut Aluminum with a Miter Saw?
Yes — you can cut aluminum with a miter saw, but only if you use the right blade and safety steps. I’ve done it many times — from trimming light aluminum extrusions in my humid Florida garage to cutting thicker pieces during cold Midwest winters. The trick is keeping things clean, cool, and steady.
When I first tried, I treated aluminum like wood. Big mistake. The saw cut fine for a few seconds, then started dragging and spitting hot chips. That’s when I learned aluminum acts differently. It’s soft, gummy, and builds heat fast — not like pine or oak that just makes dust.
Once I switched to a non-ferrous metal blade and slowed my feed speed, everything changed. The cuts came out smooth, burrs were minimal, and my saw stopped binding. So yes, your miter saw can cut aluminum — but it needs respect and the right setup.
The Key Difference Between Wood and Metal Cutting
Wood and aluminum behave very differently under a spinning blade. Wood has low friction. The blade slices through easily, making light sawdust. Aluminum, on the other hand, creates resistance. It’s soft enough to smear but hard enough to dull a wood blade fast.
When you cut aluminum at high RPMs, friction makes it hot. Tiny molten chips can stick to the teeth — that’s called chip welding. Once that happens, the blade drags, burns, and can even kick back.
That’s why blade design and speed matter. Wood blades have a positive hook angle that pulls the material in. Metal blades have a negative hook angle that scrapes instead of grabs. It’s safer and gives you control.
If you’ve used both cold saws and miter saws, you’ll notice the difference. Cold saws spin slower and use torque. Miter saws rely on speed. That’s fine for aluminum, but only if your blade is rated for it and your feed rate stays slow.
What Type of Aluminum Can You Cut?
Not all aluminum stock behaves the same. The shape and thickness change everything.
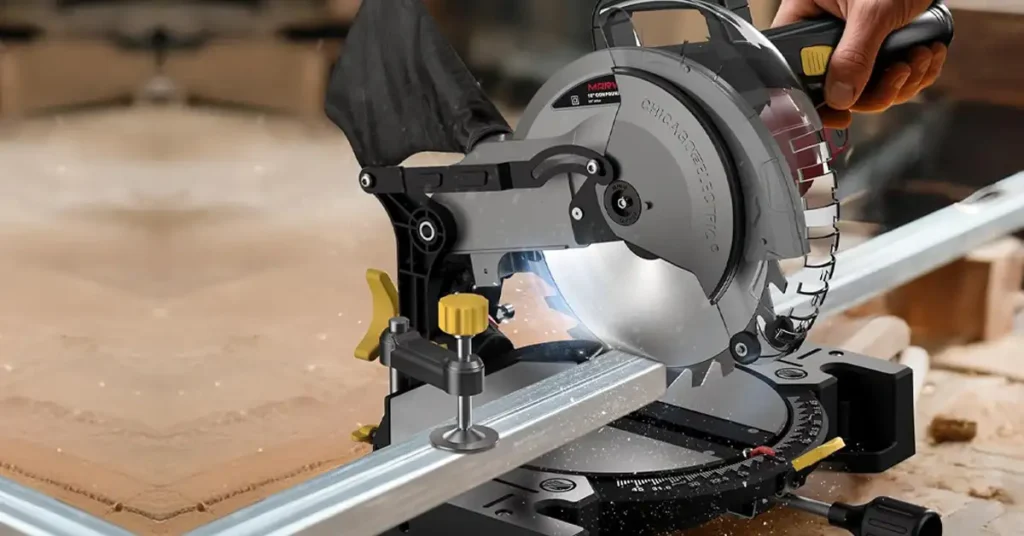
- Extrusions (angle, flat bar, tube, or T-slot): These cut cleanly. I’ve used my DeWalt DWS780 to trim extrusions for a patio frame — they came out glass-smooth with the right blade.
- Thin sheet aluminum (up to ¼ inch): Also fine — just clamp it tight. Thin sheets vibrate, and that chatter can make the blade grab.
- Thick or round stock: This is trickier. The saw can bog down, and round pieces can spin. For that, I switch to a band saw or cold-cut saw.
If you’re in a home garage or small shop, stay under ¼-inch thickness. That’s the sweet spot for clean cuts without strain.
What Blade Should You Use to Cut Aluminum?
Use a carbide-tipped, non-ferrous metal cutting blade with Triple Chip Grind (TCG) teeth and a negative rake angle between –2° and –7°. I’ve used blades from Diablo, Freud, and DeWalt — all performed well when matched to the material.
When I first tried a wood blade, it worked for ten seconds before clogging. The aluminum smeared on the teeth, and the blade squealed. Once I switched to a proper metal blade, it felt like night and day.
The Ideal Blade Setup
For most projects, a 10″ or 12″ blade with 80–100 teeth works best for medium aluminum. I use tungsten carbide teeth (C3 or C4 grade) because they resist heat and last longer.
If you live somewhere humid, like the Gulf Coast, pick blades with anti-stick coatings such as Perma-SHIELD. Always check the RPM rating on the blade — it must meet or exceed your saw’s top speed (around 3,800–5,000 RPM).
A clean, coated, high-tooth blade makes the difference between a smooth slice and a smoking mess.
Hook Angle and Tooth Geometry Explained
It sounds technical, but it’s simple once you see it.
- Positive rake (wood blades): Teeth lean forward and pull the material. Great for wood, dangerous for aluminum.
- Negative rake (metal blades): Teeth lean backward, scraping instead of biting. That’s safer and steadier.
- Triple Chip Grind (TCG): Teeth alternate between flat and trapezoid shapes to clear chips and prevent clogging.
I once switched from an ATB blade to a TCG blade — the improvement was instant. No clogging, no chatter, just smooth cuts.
The blade geometry, not the brand, determines how safely and smoothly your saw cuts aluminum.
Tooth Count Recommendations by Thickness
| Aluminum Thickness | Blade Size | Recommended Teeth | Notes |
| < 1/16″ (thin) | 12″ | 120+ | Fine finish and smooth feel |
| 1/8″–¼” (medium) | 10–12″ | 80–100 | Balanced for power and precision |
| > ¼” (thick) | 10–12″ | 60–80 | Allows chip clearance and prevents clogging |
More teeth for finesse, fewer for clearance.
How to Cut Aluminum Safely with a Miter Saw
Safety first. Cutting aluminum is louder, hotter, and riskier than wood. I’ve had hot chips bounce off my face shield — it’s no joke. Treat this like metalwork, not carpentry.
Always clamp the workpiece, wear full PPE, and move slow. A clean setup prevents most accidents.
PPE Checklist (Non-Negotiable)
Here’s what I use every time:
- Full-face shield over safety glasses — aluminum chips are sharp and fast.
- Hearing protection — cuts are loud, especially in small shops.
- Fitted gloves and snug sleeves — no loose clothing near the blade.
- N95 or shop respirator — aluminum dust isn’t safe to breathe.
- Keep flammables away — fine dust can ignite.
Simple rule: If you wouldn’t grind metal without gear, don’t cut aluminum without it either.
Workpiece Clamping and Support Tips
This step makes or breaks the job. Never hold aluminum by hand — it’s slippery. One snag can pull your fingers toward the blade.
Use two or more clamps to lock the piece against the fence and table. For short offcuts, use a wooden backer block to catch the drop piece — it keeps it from flying.
On wide extrusions, I sometimes place a sandbag or scrap board on the far end to stop vibration. It’s a small thing that makes a big difference.
Lubrication and Cooling
Here’s what most people skip — lubrication. Aluminum builds heat fast. A dry blade gums up or grabs.
I’ve tested everything from WD-40 to machine oil, and nothing beats PTFE dry spray or cutting wax. They lower friction without collecting dust. A light coat before each session keeps the blade cooler and sharper.
Avoid liquid oils — they splash and attract grit. In dry areas like Arizona, reapply lube often. In humid states, wipe rails after cutting to prevent buildup.
Step-by-Step Process for Cutting Aluminum with a Miter Saw
When I first started cutting aluminum with my miter saw, I treated it like wood. Big mistake. The cut wasn’t clean, the blade got hot, and chips flew everywhere. After a few scorched blades, I figured out a workflow that keeps things smooth, safe, and accurate. Here’s how I do it.
Step 1 — Prepare the Material and Workspace
Start clean. Aluminum dust and debris can mess with your cut and even cause sparks. I always wipe the material with a rag to remove dirt and oxidation before marking my cut line.
Use a machinist square or fine-tip marker for accuracy. Pencil marks vanish fast under bright shop lights — especially in sunny garages.
Before turning on the saw, clear your bench. I once melted a shop rag because it sat too close to the blade — lesson learned. Aluminum sparks aren’t as flashy as steel, but they can still ignite flammables.
Step 2 — Install and Align the Blade
Unplug the saw first — always. Then mount your non-ferrous metal blade. Most aluminum-rated blades fit tight on the arbor, but if yours wobbles, use an adapter ring to center it.
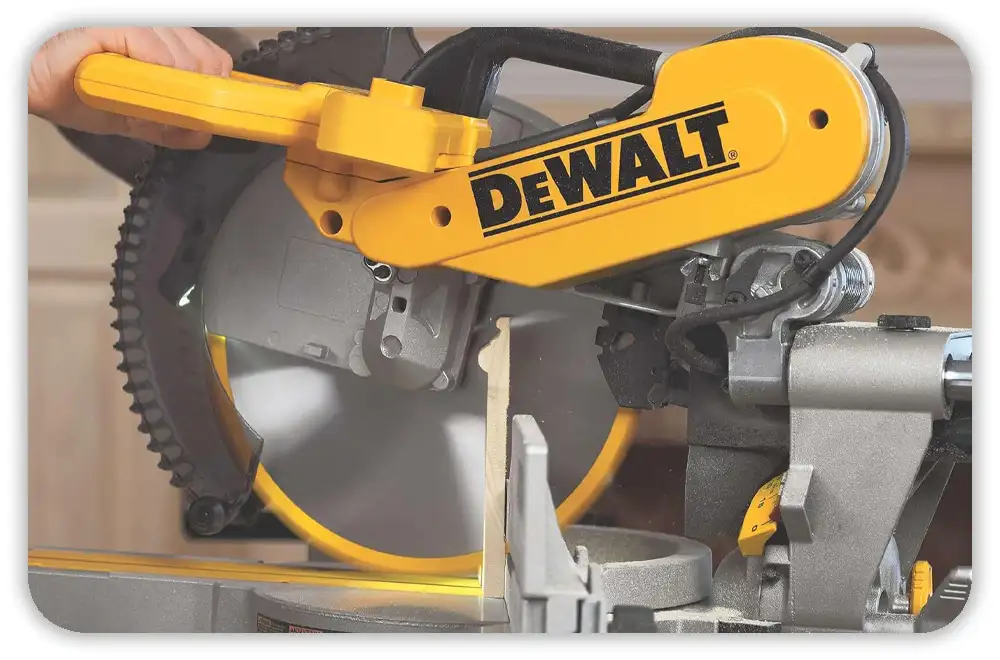
I like to check blade alignment with a square before cutting. On my DeWalt DWS780, a quick fence check saves me from crooked miters later. Even small misalignments can throw off joints in frames or trim work.
Step 3 — Secure and Lube
Never skip clamping. Aluminum slides faster than wood once the blade touches it. I always use at least two clamps — one on each side — and make sure the stock sits flat against the fence.
Before cutting, I mist a thin layer of PTFE dry lube on the blade teeth and rails. It keeps things cool and stops the gummy buildup that slows your cut. In dry places like Arizona, I reapply more often; in humid states, I just wipe and relube after the session.
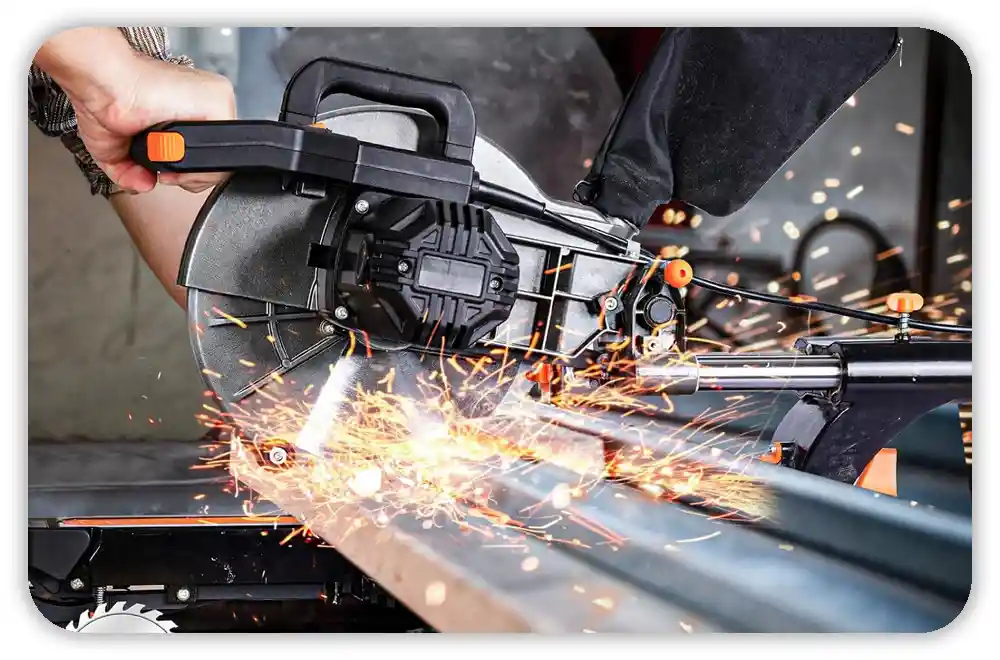
Step 4 — Execute the Cut
Here’s where patience pays off. Let the blade reach full speed before it touches the metal. Once it’s spinning steady, lower it slowly with even pressure — don’t push. Aluminum cuts best when you let the blade do the work.
If you feel resistance, back off slightly and re-engage. Forcing it only builds friction and heat, which can dull even the best Diablo or Freud blades. Always wait for the blade to stop before lifting it — I learned that after an offcut shot across my bench like a dart.
Step 5 — Deburr and Finish
After each cut, grab a deburring tool or fine file to smooth the edges. Aluminum burrs are sharper than they look — I’ve sliced gloves brushing them off.
A few light passes clean the edge and make assembly easier, especially for frames or extrusions. For bigger jobs, I sometimes use a scotch-brite wheel for a polished look.
Always deburr — it’s safer and gives a clean, professional finish.
Common Mistakes to Avoid
Most issues when cutting aluminum come from rushing or using the wrong blade. I’ve made these mistakes myself — and paid for them in dull blades and wasted stock.
Don’t use wood blades, don’t force your cuts, and keep your saw clean. Small habits prevent heat, friction, and kickback.
Mistake #1: Using a Wood Blade
I tried it once out of curiosity — never again. The teeth clogged, smoked, and even started to melt aluminum to the edge. Wood blades spin too fast and grab too hard. Sometimes, the teeth can even snap.
Mistake #2: Forcing the Cut
Pushing harder doesn’t make it faster — it just makes it hotter. I used to think a slow feed wasted time, but slower passes protect the blade and give cleaner results. The saw is built to do the work; your job is to guide it.
Mistake #3: Not Cleaning the Blade or Rails
Aluminum dust builds fast, especially outdoors or in humid shops. I clean my blade every 10–15 cuts using a brass brush or blade cleaner. Sticky rails make the saw feel rough and uneven.
Miter Saw vs. Other Metal-Cutting Tools
If you’re cutting small aluminum pieces for DIY or light shop work, a miter saw with the right blade works great. But if you cut thicker or frequent metal stock, other tools do it better — and safer.
A miter saw handles light aluminum well, but cold saws or band saws are better for heavy jobs that need more control and less heat.
Miter Saw (with Non-Ferrous Blade)
I love using my miter saw for fast, precise cuts — especially for extrusions and trim angles. It’s loud and sprays chips, so I always wear full PPE and set up chip guards.
Pros: Fast, accurate, and clean for light aluminum.
Cons: Noisy, messy, and limited by material thickness.
Cold Saw / Dry Cut Saw
I borrowed a cold saw once for a batch of 2″ bar stock — the difference was night and day. These saws spin slower with more torque, giving crisp, burr-free cuts without sparks.
They cost more, but for regular metalwork, they pay off in precision and blade life.
Band Saw Comparison
For thick or uneven stock, I often grab my horizontal band saw. It’s quieter, safer, and less likely to throw chips. The trade-off? It’s slower and not as neat for angles.
Maintenance Tips for Long-Term Precision
If there’s one thing I’ve learned after years of cutting aluminum with a miter saw, it’s this — precision fades fast if you skip maintenance. Aluminum dust is sneaky. It works its way into rails, bearings, and even under the fence. I’ve seen saws lose their smooth glide in just a few weeks because they weren’t cleaned. Here’s how I keep mine running like new.
After Each Use
After every cut, I give the saw a quick cleanup. A small air compressor or shop vac blows off the fine aluminum dust fast. Don’t skip this step. If that dust sits, it mixes with moisture and turns into a gritty paste — especially in humid or coastal garages.
Once the dust is gone, I wipe the rails and blade body with a dry cloth. This takes seconds and prevents buildup later. About once a month, I spray the rails and blade sides with PTFE dry lube. It creates a slick layer that keeps things smooth and helps the saw glide like new.
Periodic Calibration
Even the best saws drift over time. Every couple of months, I check the fence and bevel angles using a small machinist square. It’s quick but important — especially when cutting aluminum frames where every joint needs to line up perfectly.
If I notice the saw cutting off-angle or the bevel feeling rough, it’s time to inspect the pivot bearings and bushings. Dust and vibration wear them down faster when cutting metal. On my DeWalt DWS780, a short tune-up each season keeps the bevel lock crisp and the motion smooth.
Storage and Environment
Where you store your saw matters more than most people think. I learned that the hard way. One winter, I left my saw in an unheated Midwest garage. The cold made the grease stiff, and the next cut felt like dragging a sled through gravel.
Now, I always cover my saw when I’m done and avoid damp garages or truck beds. Sudden temperature changes mess with lubrication and alignment.
If you live in a humid area, toss a few silica gel packs under the cover to keep moisture out.
FAQs — Cutting Aluminum with Miter Saw
Can you cut aluminum with a wood-cutting blade?
No — never try it. Wood blades clog and overheat fast. The aluminum melts, sticks to the teeth, and can cause kickback. Always use a non-ferrous metal blade with TCG teeth and a negative rake for clean, safe cuts.
What’s the safest way to cut aluminum at home?
Clamp the material tight, wear full protective gear, and move slow. A face shield and ear protection are musts. Use steady pressure — never force the saw. Slow, smooth cuts keep things safe, even in a small garage.
Can I use WD-40 when cutting aluminum?
Only for cleaning — not cutting. WD-40 collects dust and gets sticky. Use PTFE dry lube or cutting wax instead. They keep the blade cool and prevent buildup. In my tests, PTFE gave the smoothest results.
What DeWalt miter saw works best for aluminum?
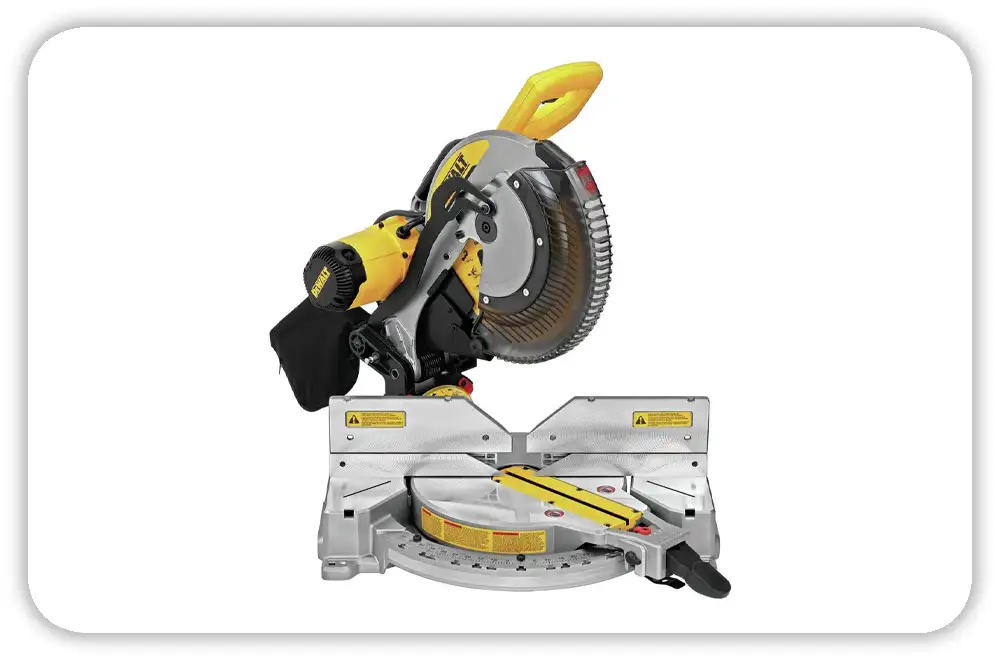
The DeWalt DWS780 handles light aluminum jobs beautifully with a 100-tooth Diablo non-ferrous blade. It’s powerful and precise, perfect for trim and angle cuts — just make sure everything is clamped securely.
Final Take — Safe, Sharp, and Smooth Cuts Every Time
In the end, cutting aluminum with a miter saw isn’t about power — it’s about control. A good blade, firm clamping, and a steady pace give better results than any fancy setup.
I’ve used this same process in every kind of workshop — hot Florida summers, cold Midwest winters, and dry Arizona garages — and it always delivers clean, accurate cuts.
So here’s the short version:
- Keep your saw clean.
- Use the right blade.
- Clamp your work.
- Feed slowly.
Follow those four steps, and your miter saw will stay safe, sharp, and smooth for years.
A well-tuned saw and a little patience turn aluminum cutting from a risky job into a routine part of your workshop. Clean, safe, and precise — every single time.