Removing wallpaper is one of those home projects I thought would be quick and easy. Spoiler: it wasn’t—at least, not until I tried using a heat gun. If you’re staring at old wallpaper that just won’t budge, you might be wondering, can I use a heat gun to remove wallpaper? Here’s everything I learned, mistakes and all, to help you decide if a heat gun is the right tool for your wallpaper-removal mission.
My First Attempt: The Old-school Methods
Before I even considered a heat gun, I tried the usual tricks. Warm water, a spray bottle, and a scraper. I sprayed, waited, and scraped. Some bits peeled off, but most of the wallpaper clung tightly. It was exhausting, and I made a mess.
Next, I tried store-bought wallpaper remover solution. It helped a little, but the glue underneath was still stubborn. That’s when someone suggested a heat gun. I’d used one for paint, but never for wallpaper.
How A Heat Gun Works For Wallpaper Removal
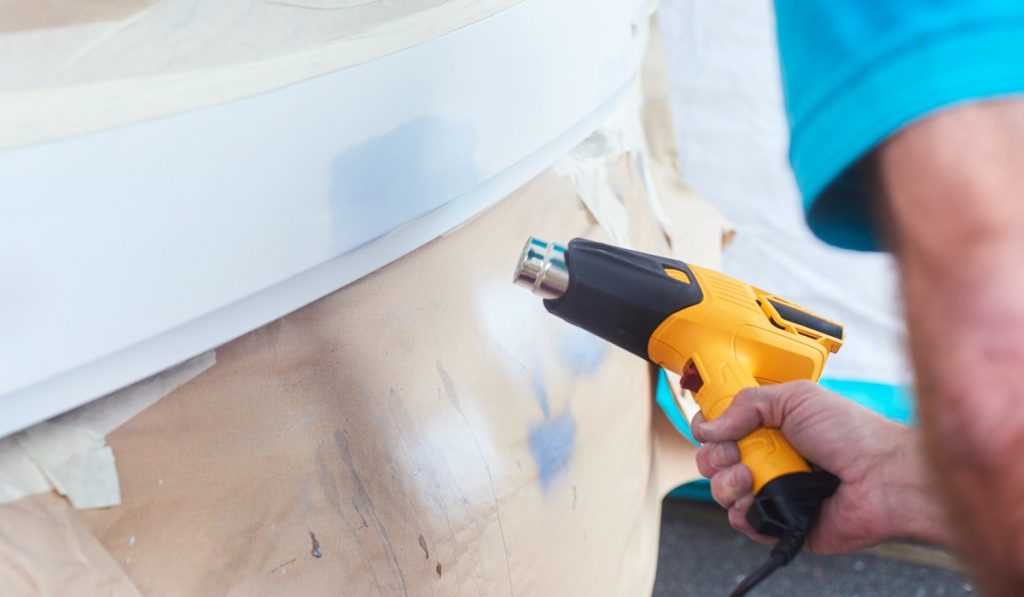
A heat gun blows hot air, like a super-charged hair dryer. The idea is simple: heat softens the glue behind the wallpaper, making it easier to peel away. Unlike steamers, there’s no water. This sounded promising, especially because my wallpaper was thick and the glue was old.
When I first used the heat gun, I noticed the paper started to bubble and loosen after a few seconds. If I timed it right, I could peel off large pieces instead of tiny strips. It felt like magic—until I learned a few lessons the hard way.
What You Need Before You Start
Here’s what I gathered before diving in:
- Heat gun (mine was a basic, two-setting model)
- Wallpaper scraper or wide putty knife
- Protective gloves
- Safety glasses
- Drop cloths or old sheets
- Masking tape (to protect outlets and switches)
- Bucket and sponge (for glue residue)
You don’t need anything fancy, but gloves and glasses are important. The heat gun gets very hot, and tiny bits of glue or old paint can fly up.
My Step-by-step Process
Here’s how I used a heat gun to remove wallpaper, with every honest detail.
1. Prepped The Room
I moved furniture away, laid down drop cloths, and taped over outlets. The heat can damage plastic, so cover what you can’t move.
2. Tested A Small Area First
I started with a corner behind a door. I held the heat gun about 4 inches from the wall, moving it slowly in circles for 10–20 seconds. The wallpaper began to bubble.
3. Started Peeling
While the paper was warm (not too hot), I used my scraper to lift the edge. Most of it came off in big sheets. If it cooled, the glue hardened again, so I had to work quickly.
4. Worked In Sections
I moved the gun, heated another small area, and peeled. Some stubborn spots needed a second pass. Patience was key.
5. Cleaned Up Glue
After the paper was off, glue and bits of backing were left. I used a sponge and warm water to wipe these away.
6. Ventilated The Room
The heat can release old paint fumes, so I kept windows open. If your home is old, be extra careful—there could be lead paint under the wallpaper.
What Worked Well (and What Didn’t)
The Good:
- Speed: I removed wallpaper much faster than with water and scraping alone.
- Less Mess: No drippy walls or soggy paper to clean up.
- Big Sheets: When it worked, sheets of wallpaper peeled off instead of tiny scraps.
The Not-so-good:
- Risk of Damage: If I held the heat gun too long, the wall got scorched. I left a few brown marks by mistake.
- Safety Hazards: The tool gets very hot. I burned my hand slightly the first time I touched the nozzle.
- Not for All Wallpaper: Very thin or vinyl wallpaper didn’t react as well. Sometimes the top layer peeled off, but the backing stayed.
Comparing Heat Gun Vs. Other Methods
I tried almost every method before settling on the heat gun. Here’s a quick comparison based on my experience:
| Method | Speed | Messiness | Risk of Wall Damage | Best For |
|---|---|---|---|---|
| Heat Gun | Fast | Low | Medium | Thick paper, stubborn glue |
| Steamer | Medium | High (wet) | Low | Large areas, multiple layers |
| Spray Solution | Slow | Medium | Low | Thin paper, small rooms |
| Dry Scraping | Very slow | Low | High | Small repairs |
When A Heat Gun Works Best
Based on my experience, a heat gun is most useful when:
- The wallpaper is old and thick
- The glue is hard and dry
- Other methods have failed
- You need to remove small sections (like behind radiators)
- You want to avoid adding moisture (for example, on drywall that gets damaged by water)
If the wallpaper is thin or new, water or a steamer may work better. For painted-over wallpaper, the heat gun helps soften both the paint and glue.
Step-by-step: How I Used A Heat Gun Safely
Using a heat gun sounds simple, but a few mistakes can cause damage or injury. Here’s what I wish I knew on day one:
1. Set The Right Temperature
I started on the low setting. High heat removed wallpaper faster but increased the risk of burns and wall damage. I found that moving the gun slowly was better than blasting one spot.
2. Keep The Gun Moving
If I held the gun still, the wall started to discolor. Always keep the gun moving, just like ironing clothes.
3. Don’t Rush
I got impatient and tried to peel before the glue softened. That just ripped the paper. Waiting a few extra seconds made a big difference.
4. Ventilate The Room
Heating old wallpaper can release fumes. Open windows and take breaks.
5. Wear Protection
Gloves and glasses saved me from burns and flying bits of glue.
Common Mistakes I Made (so You Don’t Have To)
Looking back, here are the beginner mistakes I made:
- Overheating one spot: This scorched the wall and melted some old paint.
- Touching the nozzle: It stays hot for minutes after use. Let it cool before putting it down.
- Ignoring safety gear: I skipped gloves once and burned my knuckles.
- Not cleaning residue right away: Warm glue is easier to wipe off. If it dries, it hardens and takes more effort.
Extra Tips For A Smoother Process
After a few walls, I picked up some tricks that made a big difference:
- Score the wallpaper lightly with a knife before heating. This helps the heat reach the glue.
- Work in small sections. Large areas cool down before you can scrape.
- Use a metal, not plastic, scraper. Plastic can melt.
- If your home is old, check for lead paint. If you’re not sure, get a test kit first. Safety is more important than speed.
Is A Heat Gun The Right Tool For You?
If you’re dealing with stubborn wallpaper and nothing else works, a heat gun can save hours. But it’s not always the best first choice. For thin wallpaper, try water or a steamer first. If you have thick, painted, or really old wallpaper, the heat gun is worth a shot.
Don’t forget, using a heat gun takes practice. Start in a hidden corner to get the feel. And always keep safety in mind—these tools are hot!
How Long Did It Take Me?
On my first wall (about 12 feet wide), it took me about 2 hours with the heat gun. With water and scraping, I spent nearly double that time and ended up with soggy drywall. The difference was huge, but the heat gun did require more focus to avoid burning the wall.

How Much Does It Cost?
Heat guns aren’t expensive. I bought mine for about $25 at a hardware store. You can rent one for less if you don’t plan to use it often. Compared to renting a steamer, it’s a good deal.
Here’s a quick look at typical costs:
| Tool | Buy Price (USD) | Rent Price (per day) | Reusable? |
|---|---|---|---|
| Heat Gun | $20–$50 | $10–$15 | Yes |
| Wallpaper Steamer | $40–$80 | $15–$20 | Yes |
| Scraper | $5–$15 | – | Yes |
| Spray Solution | $8–$20 | – | No |
Is It Safe To Use A Heat Gun On All Walls?
Most of my walls were drywall, but I also tried it on plaster. The heat gun worked fine on both, but drywall is more sensitive to heat. If you overdo it, the paper facing can bubble up. That means more patching later.
I learned to keep the gun moving and never use the highest setting unless absolutely needed. For old homes, always check for possible hazards like lead paint. If you’re unsure, read more at EPA’s official site.
Final Thoughts: Would I Use A Heat Gun Again?
Yes, but only when other methods fail. The heat gun made a huge difference with thick, stubborn wallpaper. It was faster and less messy than water or steam. But it’s not foolproof. You need to be careful, patient, and always put safety first.
If you’re on the fence, test a small area. See if the wallpaper peels cleanly. If it does, you’ll save yourself a lot of frustration. If not, you haven’t damaged the whole wall.
Removing wallpaper is never truly easy, but the right tool can make it a lot less painful. For me, the heat gun was a game changer—just not a miracle worker.
Frequently Asked Questions
Does A Heat Gun Work Better Than A Steamer For Wallpaper Removal?
It depends on your wallpaper type. For thick, painted, or old wallpaper, the heat gun softened glue faster in my tests. Steamers work better for large areas with multiple layers, but they’re messier.
Can I Use A Hair Dryer Instead Of A Heat Gun?
I tried this, but hair dryers just aren’t hot enough. They may help with small stickers or decals, but for full wallpaper removal, a heat gun is much more effective.
Will A Heat Gun Damage My Walls?
If you overheat one spot or use the highest setting, you can scorch drywall or peel paint. Always keep the gun moving and use the lowest setting that works.
Is It Safe To Use A Heat Gun Indoors?
Yes, but ventilate the room. Heating old materials can release fumes. Wear gloves, glasses, and never leave the heat gun unattended.
Do I Need To Remove All The Glue After Peeling Wallpaper?
Yes. Any leftover glue can cause problems when you paint or apply new wallpaper. I used a sponge and warm water to clean up residue while it was still soft.
If you want to see more about wallpaper removal tools and safety, you can check the guidelines at Family Handyman.
I hope my experience helps make your own wallpaper project smoother, safer, and a little less frustrating. Good luck, and don’t forget the gloves!