If you’re like me, you’ve probably stood in your garage or basement, stared at that old belt sander, and wondered: Can I use a belt sander on concrete? I’ve been there. My first time, I was frustrated with rough, uneven concrete in my workshop. I didn’t own a fancy concrete grinder, but I did have a sturdy belt sander. So I took the plunge—and learned a lot along the way. If you’re thinking about tackling concrete with a belt sander, let me share my honest experience, tips, and things I wish I’d known from the start.
Why Would You Use A Belt Sander On Concrete?
Most people use belt sanders for wood, not hard surfaces like concrete. But sometimes, you just want to smooth out a small patch, fix a rough step, or remove a stubborn paint spot. Renting a concrete grinder can be expensive and overkill for small jobs. That’s why I tried using my belt sander on concrete—I needed a budget-friendly way to tidy up a few ugly spots without calling in the pros.
Can A Belt Sander Actually Sand Concrete?
Yes, you can use a belt sander on concrete. But, and this is important, it’s not as simple as sanding wood. Concrete is hard. Really hard. Standard sanding belts designed for wood will wear down almost instantly. When I first tried, my regular 80-grit belt was toast after just a few minutes.
What you need are silicon carbide or diamond grit sanding belts. These are made for tough surfaces. Even then, progress is slow compared to using a real concrete grinder. Don’t expect miracles, but for small areas, it’s possible.
What Kind Of Results Should You Expect?
This is where I want to be 100% honest. If you hope your belt sander will make concrete as smooth as glass, you’ll be disappointed. Here’s what I found:
- Leveling minor bumps: Works okay if you’re patient.
- Smoothing rough patches: You’ll see improvement, but not a perfect finish.
- Removing paint or glue: It can help, but belts clog quickly.
- Large areas: Not realistic. Your arms will tire out fast, and the sander will overheat.
A belt sander is best for small touch-ups, not for resurfacing a whole patio.
Choosing The Right Belt Sander And Abrasives
Let me break down what worked (and what didn’t) for me.
Belt Sander Type
I used a heavy-duty, corded belt sander with a wide belt (3″x21″). Battery-powered models usually lack the power for concrete. The heavier the sander, the less force you need to press down.
Abrasive Belts
This is critical. After burning through wood belts, I found these to be best:
- Silicon carbide belts: Good for small concrete jobs. Available at hardware stores.
- Diamond grit belts: Harder to find and pricier, but last longer and cut faster.
- Grit size: Start with coarse grit (24-40) for rough areas, then move to finer grits (60-80) for smoothing.
Here’s a quick comparison that helped me choose:
| Belt Type | Durability | Cost | Availability |
|---|---|---|---|
| Standard Aluminum Oxide | Poor | Low | Common |
| Silicon Carbide | Good | Medium | Hardware Stores |
| Diamond Grit | Excellent | High | Specialty Shops |
If you can’t find the right belt, your sander won’t do much on concrete.

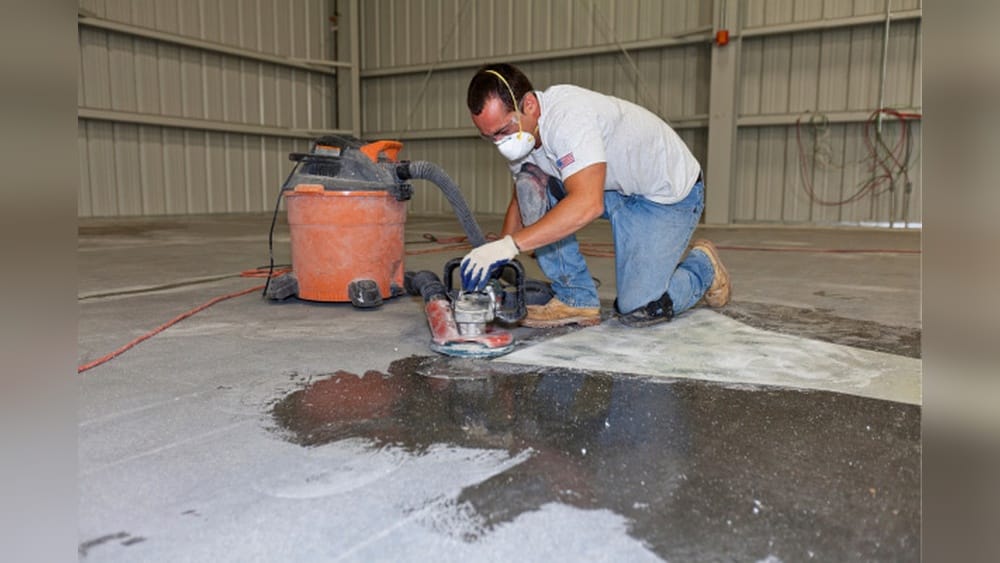
Safety First: How To Prepare
Before you start, let’s talk safety. Sanding concrete creates a lot of dust, and it’s not the kind you want to breathe in. Concrete dust contains silica, which can cause health problems if inhaled. Here’s what I always do:
- Wear a dust mask or respirator—not just a paper mask.
- Use safety glasses to protect your eyes.
- Wear ear protection—belt sanders get loud.
- Gloves are a good idea. Concrete dust dries out skin.
- Cover nearby items—dust travels far.
I also recommend working in a well-ventilated area or outdoors if possible.
Step-by-step: How I Used A Belt Sander On Concrete
Let me walk you through exactly how I did it. My goal was to smooth out a rough patch in my basement floor, about the size of a dinner plate.
- Clear the area. I swept and vacuumed to remove dirt and stones.
- Set up my sander. I attached a silicon carbide belt (36 grit).
- Marked the patch. I outlined the area with chalk so I wouldn’t sand too far.
- Started sanding gently. I let the weight of the sander do most of the work, moving it slowly back and forth.
- Checked progress often. Every minute or so, I stopped to vacuum the dust and see how it was going.
- Changed belts as needed. The first belt wore down after about 10 minutes.
- Switched to a finer grit. Once the worst roughness was gone, I used a 60-grit belt for smoothing.
The whole process took about 30 minutes, including breaks to check the surface and change belts. It wasn’t fast, but it worked for my small patch.
What Problems Did I Run Into?
If you try this, be ready for a few surprises. Here’s what caught me off-guard:
- Belt clogging: Concrete dust builds up fast, especially if the surface is painted or has glue.
- Quick wear: Even tough belts wear out quickly. Have extras on hand.
- Dust everywhere: No matter how careful I was, dust spread all over the room.
- Overheating: My sander got hot after 15-20 minutes. I had to let it cool down.
- Uneven sanding: If you press too hard, you can gouge the concrete or leave marks.
These challenges are why I’d only use this method for small fixes, not big jobs.
Tips I Wish I’d Known Before Starting
Looking back, I learned a few things the hard way. Here are some tips to help you avoid my mistakes:
- Use the right belts. Regular sanding belts are useless on concrete.
- Go slow. Rushing just wears out your belts and can damage your sander.
- Vacuum often. Clean dust from the work area every few minutes so the belt can cut better.
- Let the sander do the work. Pressing down hard doesn’t help and can cause uneven spots.
- Expect to use more belts than you think. I needed three for a small patch.
And here’s one non-obvious tip: if your sander has a dust bag, it will fill up in minutes. It’s easier to remove it and vacuum the dust directly.
When Is A Belt Sander Not The Right Tool?
There are times when a belt sander just isn’t up to the job. If you have any of these situations, consider renting a concrete grinder or calling a professional:
- Large areas: Anything bigger than a few square feet will take forever.
- Deep leveling: Belt sanders are not made to remove more than a thin layer.
- Polished finish: You won’t get a shiny, smooth surface.
- Major repairs: Cracks or holes need patching, not sanding.
Here’s a simple comparison from my experience:
| Task | Belt Sander | Concrete Grinder |
|---|---|---|
| Small patch smoothing | Good | Excellent |
| Paint/glue removal (small) | Fair | Excellent |
| Large surface leveling | Poor | Excellent |
| Polished finish | Poor | Good |
If your needs are bigger, save yourself the frustration and get the right tool.
Cost Considerations
One reason I tried my belt sander was to save money. Here’s what I found:
- Sanding belts: Specialized belts cost more than wood belts. Expect to pay $8–$20 each for silicon carbide or diamond grit.
- Belt sander wear: Concrete is rough on power tools. My sander survived, but it worked hard.
- Time vs. money: For a small patch, I spent about $30 on belts, compared to at least $75 to rent a grinder for a day.
For very small jobs, using a belt sander can make sense. But if you need to buy lots of belts or risk burning out your sander, renting a grinder is smarter.
Alternatives I Considered
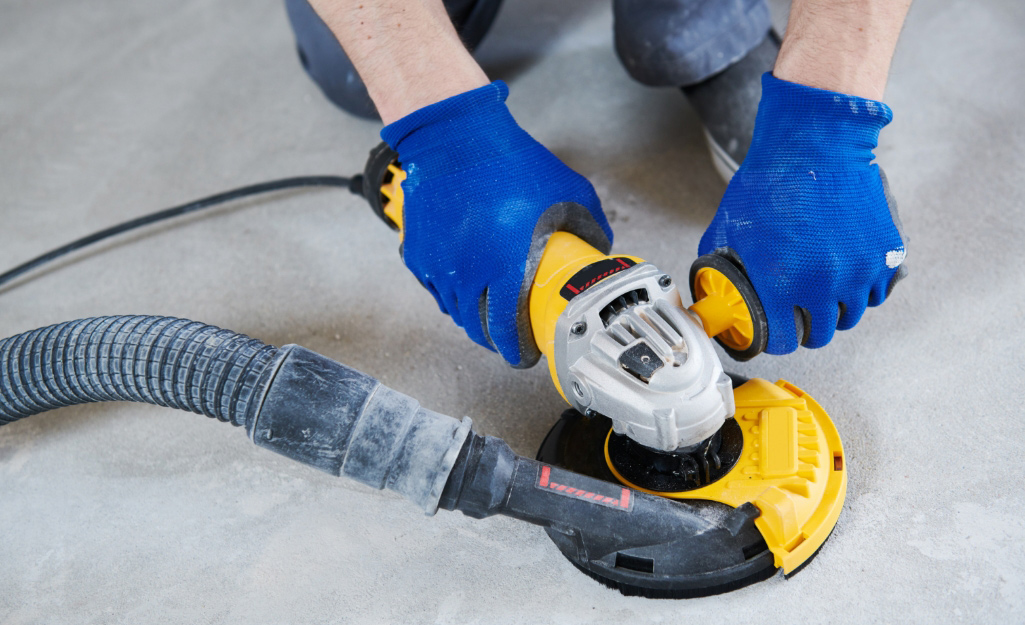
If your belt sander isn’t up to the task, there are other ways:
- Handheld angle grinder: With a diamond cup wheel, this tool is more aggressive and faster for concrete.
- Concrete rubbing stone: Cheap and effective for tiny areas, but takes lots of elbow grease.
- Concrete grinder rental: For large or important surfaces, this is the best option.
Sometimes, a combination works best. I used a rubbing stone to finish the edges after sanding.
The Hidden Dangers: What Most People Miss
Here are two things I didn’t realize at first:
- Silica dust lingers. Even after cleaning, fine dust can stay in the air for hours. Open windows, and vacuum with a HEPA filter after sanding.
- Sander warranty risks. Many power tool warranties don’t cover “improper use”—and sanding concrete usually counts. I made sure my sander was out of warranty first.
Don’t skip these details. They can affect your health and your wallet.

Is Using A Belt Sander On Concrete Worth It?
In my experience, a belt sander can be a lifesaver for small, simple concrete jobs. It’s not perfect. The process is slow, noisy, and messy. But if you use the right belts and take care, you can smooth out rough patches, fix small bumps, or remove paint without spending a fortune.
If you want more info on the dangers of silica dust and how to protect yourself, the OSHA website has solid, practical advice.
Frequently Asked Questions
Can I Use A Regular Sanding Belt On Concrete?
Regular wood sanding belts will not last on concrete. They wear out in minutes. You need silicon carbide or diamond grit belts for concrete work.
Will Using A Belt Sander Damage My Tool?
Sanding concrete is hard on your sander. It can overheat, wear out bearings, and create fine dust that gets inside the motor. Use short sessions and clean your sander often to reduce damage.
How Much Concrete Can I Remove With A Belt Sander?
A belt sander can remove a thin layer—about 1/16 inch or less at a time. For deep grinding or big leveling, a concrete grinder is necessary.
What Grit Sanding Belt Should I Use On Concrete?
Start with a coarse grit (24–40) for rough areas. Switch to a medium grit (60–80) for smoothing. Always use belts made for masonry.
Is It Safe To Sand Concrete Indoors?
It’s possible, but only if you use strong dust control. Wear a respirator, open windows, and vacuum dust immediately. Silica dust is dangerous if inhaled.
If you’re still wondering “can I use a belt sander on concrete,” my honest answer is yes—but only for small, simple jobs. Use the right belts, take safety seriously, and know your limits. For bigger projects, invest in the right tool.
It’ll save you time, money, and headaches down the line.