When my Black & Decker cordless drill stopped working in the middle of a deck job, I realized how much the right tool matters. Real work puts tools to the test — and American weather doesn’t make it easy. In humid Florida garages, icy Midwest winters, or dusty Arizona sites, performance changes fast.
I’ve used Black & Decker, DeWalt, and Milwaukee drills side by side. Each feels different in power, battery life, and comfort. After testing them on real jobs, here’s what I learned — and how to choose the one that truly lasts.

Table of Contents
Why Do Black and Decker Cordless Drills Stop Working?
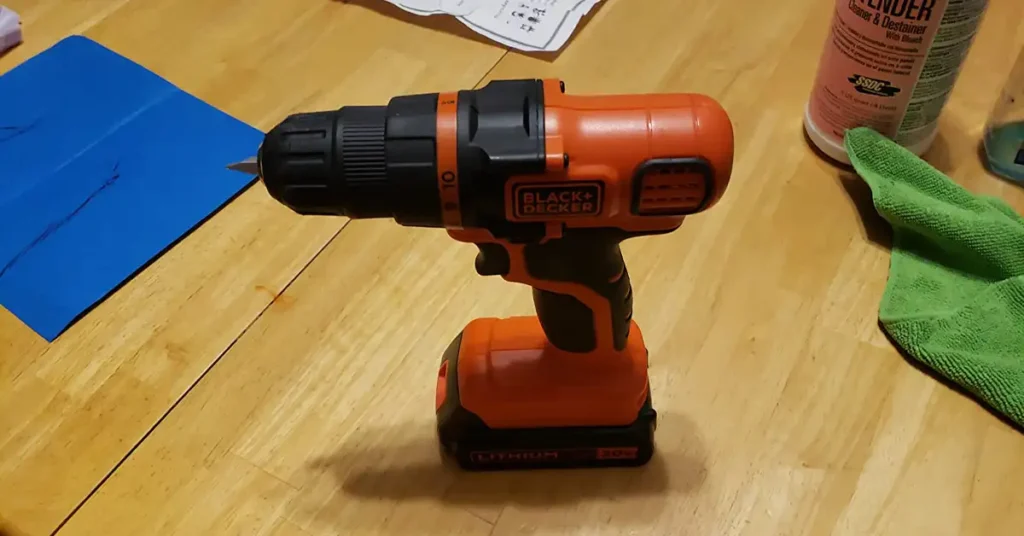
I’ve had my Black and Decker cordless drill stop working more times than I’d like to admit. And it always seems to happen in the middle of a project when I’m short on time. The first time it died, I was building a small workbench in my garage. The drill just went quiet — no spin, no hum, nothing. I thought it was done for good.
But over the years, I’ve learned something important — when a cordless drill stops working, it’s rarely the end. Most of the time, it’s something small: a weak battery, a loose connection, or worn motor brushes. These are common problems that show up with age, heavy use, or bad storage.
I’ve seen it in every kind of condition across the U.S. — humid garages in Florida that corrode contacts, cold Michigan winters that drain batteries fast, and dusty Arizona air that clogs vents. Once you notice these patterns, it’s easier to spot the cause before it becomes a bigger issue.
Most Common Reasons a Black and Decker Drill Won’t Start
- Dead or weak lithium-ion battery — may show a charge but drops under load.
- Faulty charger or bad outlet — test another outlet to rule it out.
- Corroded battery contacts — dust and humidity can block current flow.
- Trigger switch or safety lock failure — worn contacts stop power to the motor.
- Burnt motor brushes or jammed gearbox — common after years of heavy drilling.
Each of these issues links back to a few key parts: the lithium cells, battery management system (BMS), motor brushes, clutch, and gearbox. When you know how these parts work together, you can troubleshoot faster — no guessing needed.
Check the Power System First
In my experience, nine times out of ten, the problem starts with the power system. Before you grab a screwdriver, test the battery and charger. It’s the fastest way to find the issue and avoid opening a perfectly fine drill.
How to Test a Black and Decker Battery with a Multimeter
When my drill doesn’t respond, I always test the battery first. Here’s how:
- Set your multimeter to DC volts (200V range).
- Touch the red probe to the positive (+) terminal and the black probe to the negative (–).
- A healthy 20V MAX battery should read about 20.3V when full.
- If it’s below 18V, the pack is weak or near the end of its life.
If the reading is close to zero volts, the battery’s BMS has likely tripped. This can happen after deep discharge or extreme temperatures. My fix? Let the battery sit at room temperature for about 30 minutes, then charge it again. Many times, it comes right back to life.
Understanding Black and Decker Charger Light Codes
Your charger tells you a lot — if you know what the lights mean.
| LED Pattern | Meaning | Action |
| Solid red | Charging | Wait for full charge |
| Green | Fully charged | Ready to use |
| Flashing red | Battery too hot, too cold, or over-discharged | Let it cool or warm up, then retry |
When I first saw a flashing red light, I thought my charger was broken. But it turned out my battery was too hot after driving a bunch of deck screws in summer heat. I let it cool indoors, and it charged just fine afterward.
If you’re in a cold state like Michigan, the same flashing red can mean the opposite — the pack is too cold. Warming it to room temperature (around 70°F) usually solves it.
Inspect Contacts and Battery Fit
Sometimes your drill isn’t dead — it just isn’t connecting well. I’ve had this happen after leaving my tools in a damp garage for a few weeks. The drill looked fine, but a thin film on the contacts kept it from powering up.
A weak or corroded contact can act just like a dead battery. Luckily, it’s an easy fix that takes only a few minutes.
Quick Cleaning Checklist
- Unplug the charger and remove the battery.
- Use 70% isopropyl alcohol and a cotton swab to clean the metal contacts.
- Avoid using sandpaper or metal brushes — they scratch and make corrosion worse.
- Let everything dry before reconnecting.
After cleaning, I give the battery a firm tap to make sure it seats tight. A loose fit can cut power during vibration — especially on older models.
If you live near the coast, like along the Gulf or Carolina shores, salt air can speed up corrosion. A quick wipe each month keeps your drill ready to go.
And for anyone wondering, “How do I clean my Black and Decker battery terminals safely?” — this alcohol-and-cotton method is all you need.
Test the Trigger Switch and Forward/Reverse Lever
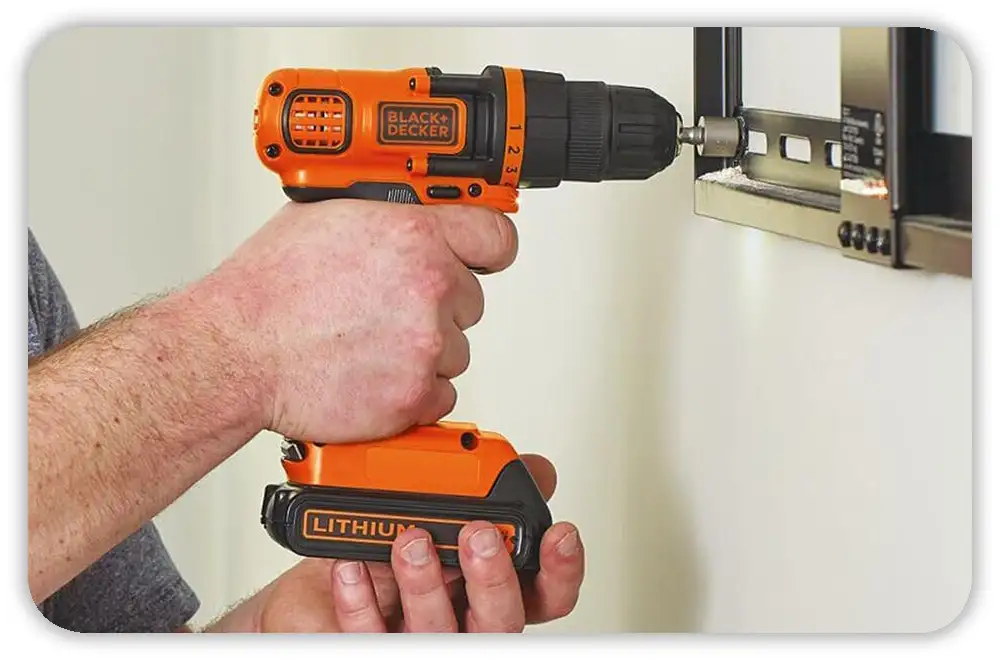
I’ve learned the hard way that when a Black & Decker cordless drill stops working, it’s not always the battery. Sometimes, it’s the trigger. I still remember one cold morning when the LED light came on, but the motor didn’t move an inch. I pressed harder, flipped the direction, and still — nothing. That day taught me how often a simple switch can fail.
If your drill has power but won’t spin, check the trigger switch and the forward/reverse lever. These parts wear out over time. After years of squeezing that trigger on heavy jobs, the metal contacts can lose tension or build up carbon. Dust and sawdust make it worse — especially if you work outdoors or in open garages.
Signs of a bad trigger switch:
- The LED light turns on, but the motor won’t spin.
- The drill cuts out while running.
- You lose variable speed — it’s either full power or nothing.
- You smell a faint burning near the trigger.
When I see these symptoms, I start with a quick continuity test before replacing anything.
How to Test Continuity with a Multimeter
- Remove the battery for safety.
- Open the drill housing to reach the switch terminals.
- Set your multimeter to continuity mode (the setting that beeps).
- Press the trigger. If you hear a beep or see a change in resistance, the switch works.
- No sound or movement? The switch has failed.
The good news — these switches are cheap and easy to swap.
Inspect the Motor and Carbon Brushes
If the battery and switch check out, move on to the motor. In my experience, a Black & Decker drill that stops working after years of use often has worn carbon brushes. These tiny parts carry power into the spinning motor. They wear down naturally — faster if you work in dusty areas or drill tough materials like treated wood.
The first warning sign is sparks through the vents. The drill still runs, but power drops and you might smell burning. That’s your cue to inspect the brushes.
Typical symptoms of worn brushes:
- Sparks while running.
- Weak torque or uneven speed.
- A burning smell near the motor vents.
If your drill is a few years old, it’s worth checking.
How to Replace Carbon Brushes
- Remove the rear motor cap.
- Slide out the old brushes — they’ll look short or chipped.
- Clean the copper commutator with a soft cloth or contact cleaner.
- Insert new brushes of the same model and make sure they seat well.
It’s a quick job that can bring your drill back to life.
I’ve noticed brushes last longer in dry areas like Arizona. In humid states like Florida, dust buildup makes them wear faster. Cleaning your drill often keeps the motor healthy for years.
Check for Mechanical Problems (Chuck and Gearbox)
If the motor runs but the chuck doesn’t spin, the issue is mechanical. I once had this happen while drilling through thick oak — the motor whirred, but the bit didn’t move. The chuck was jammed solid.
Mechanical issues like stuck chucks, stripped gears, or worn bearings are common in older drills. They make it seem like your Black & Decker stopped working even though the motor’s fine.
How to Free a Jammed Chuck
- Insert a large Allen wrench into the chuck and tighten it.
- Strike the wrench sharply with a hammer, counterclockwise.
- Once it loosens, clean the chuck threads and jaws.
- Add a touch of lithium grease to keep it smooth.
One winter, my chuck froze tight after sitting overnight in my truck. A bit of grease and a few taps got it turning again.
Gearbox and Clutch Troubles
If the chuck spins but sounds rough, listen for clues:
- Grinding sound: stripped gears.
- Chuck spins freely: broken clutch.
- Stuck in one speed: jammed gear selector.
From my experience, rebuilding gearboxes isn’t worth the hassle for most users. Replacing the full motor-and-gear unit is usually cheaper and lasts longer.
Safety and Repair Best Practices
I’ve learned over the years that fixing a Black & Decker cordless drill isn’t just about skill — it’s about safety. The first time I opened a drill without removing the battery, I got a small jolt and a big lesson. Even a quick power surge can shock you or damage the tool.
Now, before I touch anything, I always remove the battery and check twice that it’s off. It’s a simple habit, but it prevents almost every workshop accident.
When I repair drills — swapping brushes, testing a switch, or cleaning a chuck — I keep my work area clean and dry. A cluttered bench or metal shavings can cause a short. I also use a towel or rubber mat for insulation.
Safety reminders I follow every time:
- Remove the battery before opening the housing.
- Wear safety glasses — springs can pop out when disassembling.
- Follow OSHA and ANSI safety rules if you’re on a job site.
- Work on a clean, dry surface, especially when using cleaners or grease.
If you ever ask, “What’s the safest way to repair a cordless drill at home?” — the answer is simple: slow down, stay grounded, and disconnect power before touching metal.
When to Repair, Replace, or Claim Warranty
After years of fixing tools, I’ve learned one big truth — not every repair is worth doing. Sometimes, the smart move is to replace your Black & Decker drill instead of fixing it. I once spent half a day trying to rebuild a gearbox, only to realize a new drill cost almost the same.
When I decide what to do, I look at three things: cost, performance, and age. Small fixes like switches or brushes are worth it. But when motors or gears fail, I usually replace the drill.
Here’s how I break it down:
- Switch or brushes: Worth fixing — usually $10–$25 in parts.
- Motor or gearbox: Not worth it — often costs over $50.
- Battery or charger: Check warranty before buying new.
From my experience, Black & Decker’s U.S. warranty is fair for home users. Most tools come with a 2-year limited warranty. You’ll need proof of purchase, and it doesn’t cover normal wear or misuse.
Black & Decker U.S. Warranty Overview:
- 2-year limited warranty for home use.
- Proof of purchase required.
- Excludes wear, accidents, and misuse.
- Find service centers at Black+Decker Support or call 1-800-544-6986.
I once had a charger replaced under warranty with zero hassle — one call, quick form, and a free replacement in the mail.
Preventive Maintenance to Keep Your Drill Running Strong
After fixing more drills than I can count, I’ve found that most failures are preventable. Small habits — like cleaning vents and storing batteries right — can add years to your drill’s life.
I do a quick check once a month, especially after big projects. Dust is the silent killer of cordless tools. Whether it’s sawdust from woodworking or grit from concrete work, it sneaks inside fast.
My simple 10-minute maintenance routine:
- Clean vents with compressed air or a soft brush.
- Wipe battery contacts with isopropyl alcohol.
- Lubricate the chuck every 3 months for smooth action.
- Store batteries at 50–80% charge in 60°F–80°F temps.
Smart habits for U.S. conditions:
- Cold states (Michigan, Minnesota): Store drills indoors — cold drains batteries fast.
- Hot states (Florida, Texas): Don’t leave tools in cars or sheds — heat kills batteries.
- Coastal areas: Wipe metal parts after use — salt air causes rust quickly.
One small trick that’s saved me countless times is marking battery purchase dates with a Sharpie. It helps me track how long they’ve lasted and spot weak ones early.
Frequently Asked Questions — Black and Decker Cordless Drill Not Working
After years of fixing my own Black and Decker cordless drill, I’ve noticed most people ask the same few questions. These are short, honest answers based on real use — simple enough for voice search but detailed enough to help you fix the problem fast.
Why won’t my Black and Decker drill turn on?
Most of the time, it’s one of two things — a dead battery or a bad trigger switch. Try a battery that you know works first. If that fails, test the switch with a multimeter. Once, I thought my drill had died, but it was just a dirty contact.
How do I reset my Black and Decker battery?
If your drill battery won’t charge, let it warm up or cool down first. I found this out after leaving mine in a cold garage. If it still won’t charge, the battery’s safety system (BMS) may have shut it off for protection.
What does a flashing charger light mean?
That blinking light is a signal, not a failure. In most cases, it means the pack is too hot, too cold, or too low on power. I’ve seen this happen after long screw jobs in summer heat or when batteries sit in a cold truck.
Can I use WD-40 in my drill?
No — avoid it. WD-40 leaves a film that traps dust and can harm the motor. I learned this the hard way. Use contact cleaner for electrical parts or silicone spray for smooth movement instead.
Final Thoughts — From Frustration to Fix
When my Black and Decker drill stopped working the first time, I thought it was done for good. I was mid-project and stressed. But it turned out to be a weak battery. That small fix taught me a big lesson — most drill problems seem worse than they are.
Over the years, I’ve brought old drills back by cleaning contacts, replacing switches, and changing brushes. None of it was hard — just careful steps and patience. Each fix saved me money and helped me trust my tools more.
From humid garages in Florida to freezing mornings in Minnesota, one thing stays true: good care and simple checks keep your drill running longer.
So if your Black and Decker cordless drill stops working, don’t panic. Take your time, follow the steps, and you’ll likely bring it back to life — just like I did.