Sharpening garden tools was something I once feared. I used to think it was hard, maybe even dangerous. But, over the years, I learned it’s not only simple—it’s also rewarding. When you use sharp tools, gardening feels easier. You get better cuts, your hands don’t tire as fast, and plants heal faster.
I want to share everything I’ve learned about how to sharpen garden tools, so you can enjoy those same benefits.
I still remember the first time I tried to prune a rose bush with dull shears. The stems crushed instead of cutting clean. My hands ached. The roses didn’t bloom as well the next year. That’s when I realized: sharp tools are not just nice—they’re necessary.
Let me walk you through the best ways to sharpen your garden tools. I’ll share tips, mistakes I made, and my favorite tricks. I’ll also compare sharpening tools, explain which method works best for each garden tool, and help you avoid the errors I made when I started.
Why Sharp Garden Tools Matter
You might wonder: why does sharpness matter so much? I asked myself the same question when I started gardening. Here’s what I found out.
Sharp tools make clean cuts. Clean cuts heal faster, so your plants stay healthy. Dull tools crush stems and branches, which makes it easier for disease to enter.
Sharp tools save you effort. You use less force, so your hands and wrists don’t get tired. This is huge if you have a big garden or if you’re older, like me.
Sharp tools last longer. When your tools are sharp, you use them the right way. You don’t twist or force them, which means they don’t break as often.
Safety improves. This might surprise you. Dull blades can slip, causing injuries. Sharp blades cut where you want, when you want.
Once I learned these things, I started sharpening my tools regularly. The difference was amazing.
Tools And Supplies You Need For Sharpening
When I first started, I tried sharpening everything with one old file. Sometimes it worked, sometimes not. Over time, I learned there are a few tools that make the job easier. Here’s what I use now:
| Sharpening Tool | Best For | My Experience |
|---|---|---|
| Mill file | Hoes, shovels, mower blades | Gives a fast, rough edge—great for big tools. |
| Sharpening stone (whetstone) | Pruners, shears, knives | Makes a fine, smooth edge; takes patience. |
| Diamond file | Hard steel, awkward angles | Works well for old or tough blades. |
| Honing oil or water | Whetstones | Prevents clogging, keeps stone smooth. |
| Protective gloves | All sharpening | Saved me from more than one cut. |
| Wire brush | Cleaning before sharpening | Removes rust and dirt fast. |
| Clamp or vise | Holding large tools steady | Keeps hands safe and tools still. |
| Rag or paper towel | Wiping blades | Helps with oil and metal filings. |
If you only buy one thing, get a mill file and a small sharpening stone. That’s what I started with, and it covers most needs.

How To Prepare Your Tools For Sharpening
I used to skip cleaning. I’d grab a rusty shovel and start filing. That was a mistake. Dirt and rust clog your sharpening tools and make the job much harder. Here’s what I do now, every time:
- Wash off dirt. I use a stiff brush and water. Dry the tool well, or it will rust more.
- Remove rust. A wire brush or steel wool works great. For thick rust, I sometimes use a bit of vinegar first.
- Tighten bolts and screws. If a tool is wobbly, sharpening can make it worse. I always check pruners and shears before I start.
- Check for damage. If a blade is bent or cracked, sharpening won’t help. Replace broken parts first.
Cleaning first makes sharpening smoother and faster. It also helps your tools last longer.
Sharpening Different Garden Tools: Step-by-step
Each garden tool needs a slightly different approach. I’ll share how I sharpen the most common ones—and what I wish I’d known when I started.
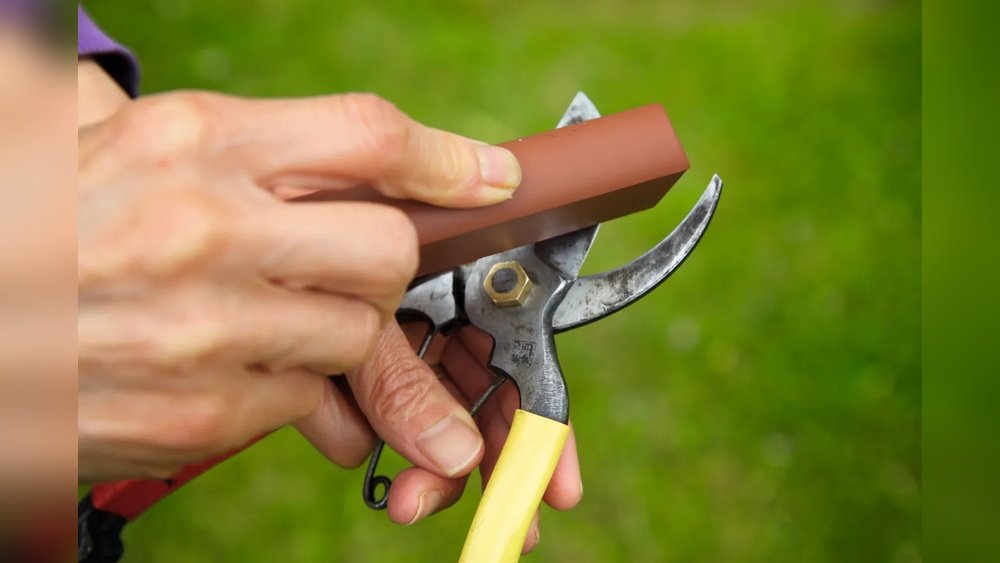
How To Sharpen Pruners And Shears
Pruners and shears are some of my most-used tools. When they’re sharp, pruning feels easy.
What You Need
- Sharpening stone or diamond file
- Honing oil (for the stone)
- Gloves
Steps
- Take them apart if possible. I used to sharpen them assembled, but taking them apart helps you reach all the edges.
- Clean the blades. Remove sap and rust first.
- Find the beveled edge. Only sharpen the beveled (angled) side, not the flat side.
- Hold the stone at the correct angle. Usually 20 to 25 degrees. I test the angle by matching the stone to the blade’s slope.
- Move the stone along the edge. I use small, smooth strokes, always in the same direction.
- Check your progress. I look for a shiny, sharp edge. If I see nicks, I keep going.
- Lightly smooth the flat side. Just a few passes to remove burrs.
- Wipe clean and oil the blade. This prevents rust.
Common mistake: Pushing too hard. Let the stone do the work. If you press hard, you might change the blade’s shape or slip.
How To Sharpen Garden Hoes
A sharp hoe glides through soil. Dull hoes make weeding a chore.
What You Need
- Mill file
- Gloves
- Clamp or vise (optional)
Steps
- Secure the hoe. I clamp mine to a workbench.
- File along the existing edge. I follow the original angle, usually about 30 degrees.
- Push the file away from me. I use long, steady strokes, not back and forth.
- Sharpen both sides if needed. Some hoes have two beveled edges.
- Wipe off filings and oil the blade.
Non-obvious tip: Don’t aim for a razor edge. Hoes need a sturdy, slightly blunt edge to avoid chipping when hitting rocks.
How To Sharpen Shovels And Spades
Digging is much easier with a sharp shovel. The first time I tried sharpening mine, I was shocked at the difference.
What You Need
- Mill file
- Wire brush
- Gloves
Steps
- Clean the edge. Remove all soil and rust.
- Secure the shovel. I hold mine between my knees or use a vise.
- File the blade. I follow the original bevel, usually about 45 degrees, and file in one direction.
- Test the edge. It doesn’t need to be sharp like a knife—just enough to cut through roots.
- Oil to prevent rust.
Common mistake: Sharpening both sides. Most shovels have one beveled edge. If you sharpen both, you weaken the blade.
How To Sharpen Loppers
Loppers are like big pruners. The steps are similar, but the blades are thicker.
What You Need
- Sharpening stone or diamond file
- Gloves
Steps
- Clean and inspect.
- Find the beveled edge.
- Sharpen at the correct angle.
- Remove burrs from the flat side.
- Oil the moving parts.
Non-obvious tip: Loppers often get sap buildup. I use a bit of rubbing alcohol to clean sticky spots before sharpening.
How To Sharpen Lawnmower Blades
Sharp mower blades give a clean, even cut. Dull ones tear grass, making lawns look brown.
What You Need
- Mill file or bench grinder (if you have one)
- Wrench (to remove blade)
- Gloves
Steps
- Disconnect the mower’s spark plug. This prevents accidents.
- Remove the blade.
- Clean off grass and dirt.
- Sharpen following the existing angle. I use a file for small jobs, grinder for big nicks.
- Balance the blade. I hang the blade on a nail to see if one side is heavier. I file the heavier side until balanced.
- Reinstall and reconnect the spark plug.
Common mistake: Not balancing the blade. An unbalanced blade makes the mower vibrate and can damage the engine.
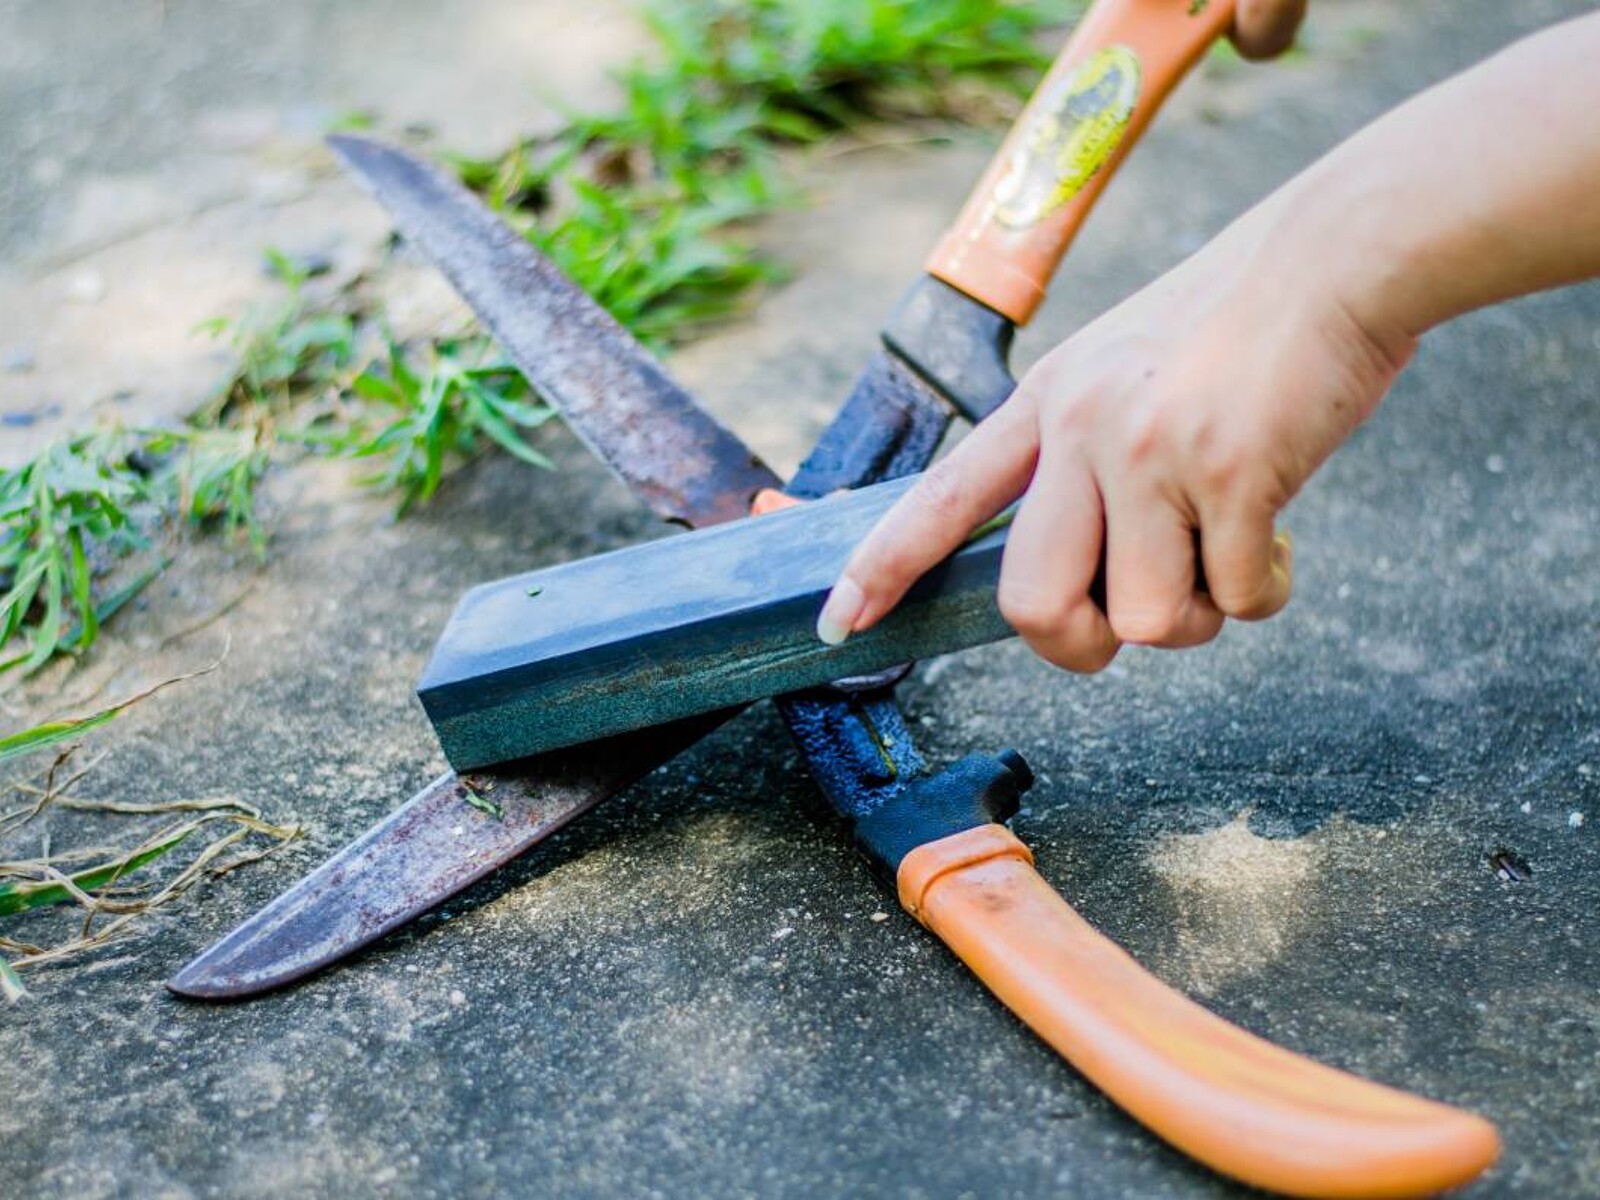
How To Sharpen Garden Knives
I use my garden knife all the time—for weeding, dividing plants, and even opening bags.
What You Need
- Sharpening stone
- Honing oil
- Gloves
Steps
- Clean the blade.
- Hold the stone at 20 degrees.
- Sharpen in one direction. I use short strokes, from heel to tip.
- Flip and repeat if double-edged.
- Wipe and oil.
Non-obvious tip: Some garden knives have a serrated edge. For these, I use a small round file or a diamond rod to sharpen each tooth.
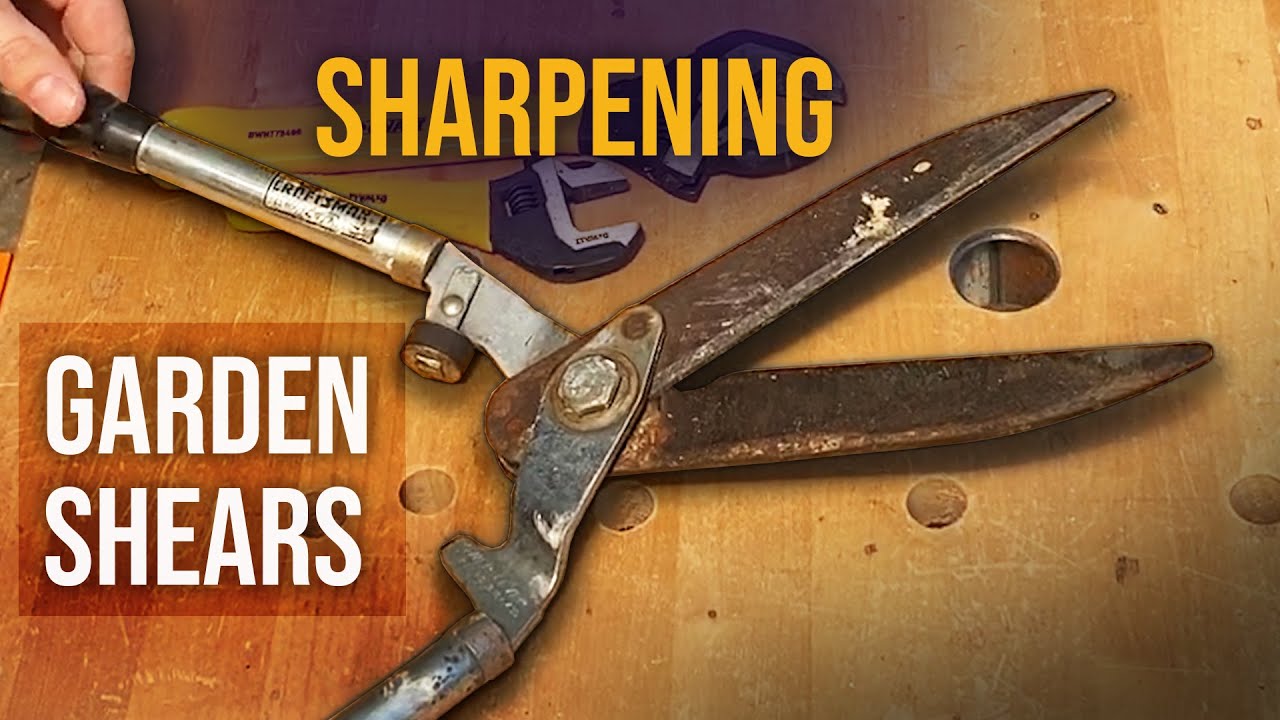
How To Sharpen Hedge Shears
Hedge shears have long blades. If they’re dull, trimming becomes exhausting.
What You Need
- Sharpening stone or file
- Gloves
Steps
- Clean and tighten bolts.
- Sharpen the beveled edge only. I use smooth, even strokes.
- Remove burrs from the flat side.
- Oil the blades and pivot point.
Common mistake: Sharpening both sides. Like pruners, only the beveled edge should be filed.
How To Sharpen Axes And Hatchets
I don’t use these daily, but they’re important for bigger jobs.
What You Need
- Mill file
- Sharpening stone
- Gloves
- Clamp or vise
Steps
- Secure the tool.
- File the edge to shape it. I use a steady, even motion.
- Finish with a stone for smoothness.
- Wipe and oil.
Non-obvious tip: Always file from the center out. Don’t try to make it razor-sharp—axes need a tough edge.
How To Sharpen Serrated Tools
This one took me a while to master. Serrated blades, like those on some pruners or knives, need a different approach.
What You Need
- Round file or diamond rod
- Gloves
Steps
- Find the beveled side. Only sharpen the side with teeth.
- Match the file to the size of the teeth.
- File each tooth gently.
- Remove burrs from the back.
Non-obvious tip: Go slow. Serrated blades don’t need to be as sharp as smooth ones—they just need their points restored.
How Often Should You Sharpen Garden Tools?
I used to wait until tools got really dull. Now, I sharpen more often. Here’s what I found works best for me:
| Tool | Sharpening Frequency | Why |
|---|---|---|
| Pruners, shears, loppers | Every 2-4 weeks (or after heavy use) | Stay sharp and cut cleanly |
| Hoes, shovels, spades | Monthly (or after hitting rocks) | Easy digging and weeding |
| Lawnmower blades | Twice per season | Healthy grass and smooth mowing |
| Garden knives | Monthly | Precision and safety |
| Axes, hatchets | As needed | Depends on use |
My rule: if a tool feels harder to use, it’s time to sharpen it. Don’t wait until it’s totally dull.
Sharpening Tools: Which One Should You Use?
There are many ways to sharpen tools. I’ve tried almost all of them. Here’s a quick comparison to help you pick the right tool:
| Sharpening Tool | Pros | Cons | Best For |
|---|---|---|---|
| Mill file | Cheap, fast, simple | Edge not as smooth | Hoes, shovels, mower blades |
| Sharpening stone | Very sharp edge, precise | Takes longer | Pruners, shears, knives |
| Diamond file | Works on hard steel, lasts long | More expensive | All tools, especially old ones |
| Bench grinder | Very fast, removes deep nicks | Easy to remove too much metal | Mower blades, axes |
| Electric sharpener | Quick, easy for beginners | Costly, not always precise | All tools (if you have many) |
Most of the time, I use a mill file and a sharpening stone. For my heavy-use tools, I invested in a small diamond file—it’s worth it.
Cleaning, Oiling, And Storing Your Tools After Sharpening
After sharpening, don’t forget to clean and protect your tools. This step is as important as sharpening itself.
- Wipe off filings and oil. I use a rag to remove all metal dust.
- Apply a thin layer of oil. I like linseed oil for wooden handles and light machine oil for metal blades.
- Store in a dry place. I learned this the hard way. My shed was damp, and tools rusted fast. Now, I hang tools or keep them off the ground.
- Check for loose parts. Tighten screws and bolts before storing.
Non-obvious tip: For extra protection, I sometimes rub a bit of beeswax on the metal. It keeps moisture away.
Common Sharpening Mistakes (and How I Learned The Hard Way)
I’ve made every mistake in the book. Here are a few you can avoid:
- Using too much force. Early on, I pressed hard, thinking it would sharpen faster. Instead, I damaged blades. Gentle, steady pressure works best.
- Wrong angle. If you change the original bevel, tools don’t work right. Always follow the factory angle.
- Skipping cleaning. Sharpening dirty blades just wears out your files and stones.
- Ignoring safety. I once cut myself badly because I didn’t wear gloves. Now, I never skip them.
- Not balancing mower blades. This mistake cost me a mower repair.
- Forgetting oil. After sharpening, blades rust quickly if not oiled.
If you remember these lessons, your tools will last longer, and gardening will be much more fun.
When To Replace Instead Of Sharpen
Sometimes, sharpening just isn’t enough. Here’s how I decide when to replace a tool:
- Cracks or deep chips in the blade. If I see these, I replace the blade or tool.
- Loose, bent, or broken handles. Handles can be replaced, but sometimes it’s easier and safer to buy new.
- Excessive rust. If sharpening removes too much metal, the tool is done.
- Doesn’t hold an edge. Cheap tools sometimes get dull too fast. Upgrading saves money in the long run.
Personal tip: I keep old tools for digging in rocky soil, but I use my best, sharpest tools for pruning and planting.
Sharpening Tools For Special Garden Jobs
Some garden jobs need extra care. Here’s how I handle a few tricky tasks:
Sharpening For Delicate Plants
When I prune roses or fruit trees, I use my sharpest pruners. I check and sharpen them right before I start. Clean cuts mean less disease and faster healing.
Sharpening For Heavy-duty Jobs
For tough roots or thick branches, I use my heaviest loppers and sharpen them to a medium edge—not razor-sharp, but strong enough to handle the stress.
Sharpening For Lawn Care
A sharp mower blade makes a huge difference. I sharpen mine more often in spring, when grass grows fast.
How To Stay Safe While Sharpening
Safety was something I didn’t take seriously at first. After a few close calls (and one trip to the clinic), I always do the following:
- Wear gloves. Even dull blades can cut.
- Sharpen away from your body. Never pull a file or stone toward you.
- Clamp tools when possible. This keeps both hands free and away from the edge.
- Use eye protection. Filing can throw tiny metal bits.
It’s easy to get caught up in the job and forget safety. Now, I always pause to check my setup before I start.
How I Stay Motivated To Sharpen Regularly
I’ll admit, sharpening tools used to feel like a boring chore. But now, I treat it like part of my gardening routine. Here’s how I make it enjoyable:
- Set up a sharpening station. I keep all my files, stones, and oil together.
- Sharpen with a friend. Sometimes, my neighbor and I do it together and chat.
- Notice the results. Every time I use a newly sharpened tool, gardening feels easier.
- Reward myself. After sharpening, I enjoy a cup of tea in the garden.
Resources That Helped Me
When I was learning, I found great advice on the Royal Horticultural Society website. Their tips on tool care made a big difference for me. If you want more details, check out RHS Tool Care Guide.
Frequently Asked Questions
How Do I Know When My Garden Tools Need Sharpening?
If you feel extra resistance, see torn plant tissue, or notice that jobs take longer, your tools are probably dull. I check by cutting a piece of paper—if it’s a struggle, it’s time to sharpen.
What Is The Safest Way To Sharpen Garden Tools?
Always wear gloves and eye protection. Secure the tool, sharpen away from your body, and go slow. Never rush.
Can I Use A Power Tool To Sharpen Garden Tools?
Yes, a bench grinder or electric sharpener works well for big blades like mower blades and axes. But for small tools, I prefer a file or stone for more control.
How Do I Prevent Rust After Sharpening?
Wipe tools dry, then apply a thin layer of oil. Store them in a dry place, and check them often—especially in humid weather.
Is It Better To Sharpen By Hand Or Use A Machine?
For most garden tools, sharpening by hand is best. You keep control and avoid removing too much metal. Machines are good for very dull, damaged, or large blades, but go slowly.
Gardening with sharp tools changed my experience. I hope these tips help you enjoy your time in the garden as much as I do. If you take a little time to sharpen, every cut, dig, and prune will feel smoother and easier.
Happy gardening!
As an Amazon Associate, We earn from qualifying purchases