
Ever had your Ryobi cordless brad nailer stop firing right in the middle of a trim job? I sure have. It happened in my hot Florida garage, sweat dripping, while I tried to guess if it was the battery, a jam, or just plain bad luck.
Picking the right nailer really matters. Heat, dust, or cold air can change how well it works. Humid Florida air or dry Midwest winters both test these tools.
I’ve tried many cordless nailers — Ryobi, DeWalt, and Milwaukee. Some fire smooth every time, while others stall for no reason. After testing them side by side, I learned what makes the difference.
Here’s what I found — and how you can keep your nailer working strong in real-world American workshops.
Table of Contents
What Does It Mean When a Ryobi Cordless Brad Nailer Won’t Fire?
I remember the first time my Ryobi cordless brad nailer wouldn’t fire. No click. No sound. Nothing. I thought it was dead.
But after using this tool for years on trim and small builds, I learned that “not firing” can mean a few things. Sometimes it’s silent. Sometimes you hear a faint click. Other times it fires once and quits. Each sound points to a different cause.
If you pull the trigger and get no response, it often means the tool has no power or the safety isn’t pressed. Reseating the battery can fix it fast.
If you hear a click but no nail fires, that means the striker moved but didn’t finish its stroke. That’s usually friction or a dry seal inside.
If it fires once then stops, the tool may have built pressure once but not enough to reset. That’s often from low power or a sticky striker.
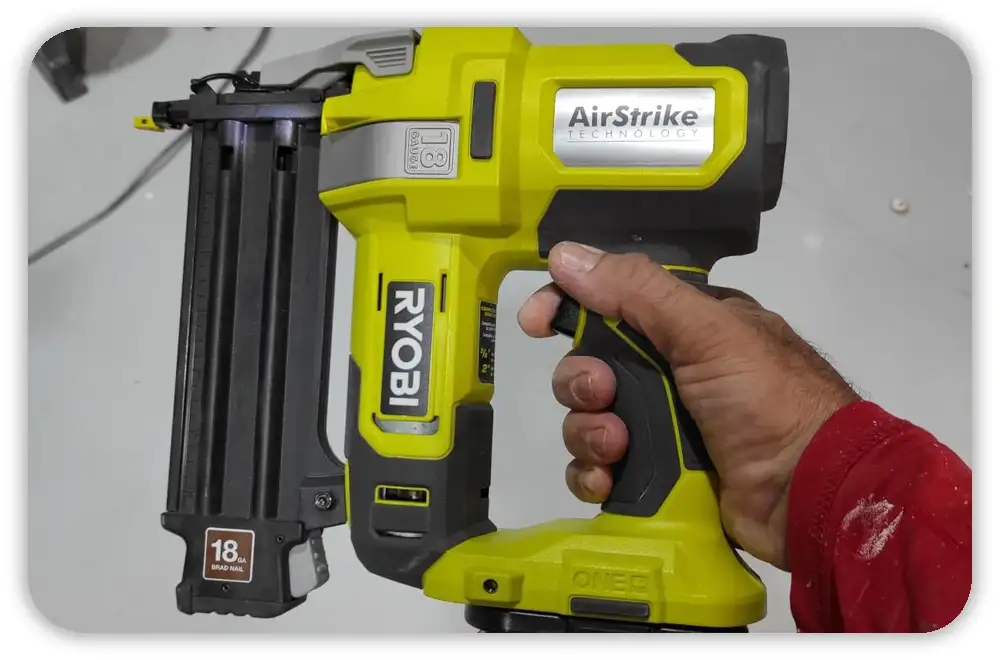
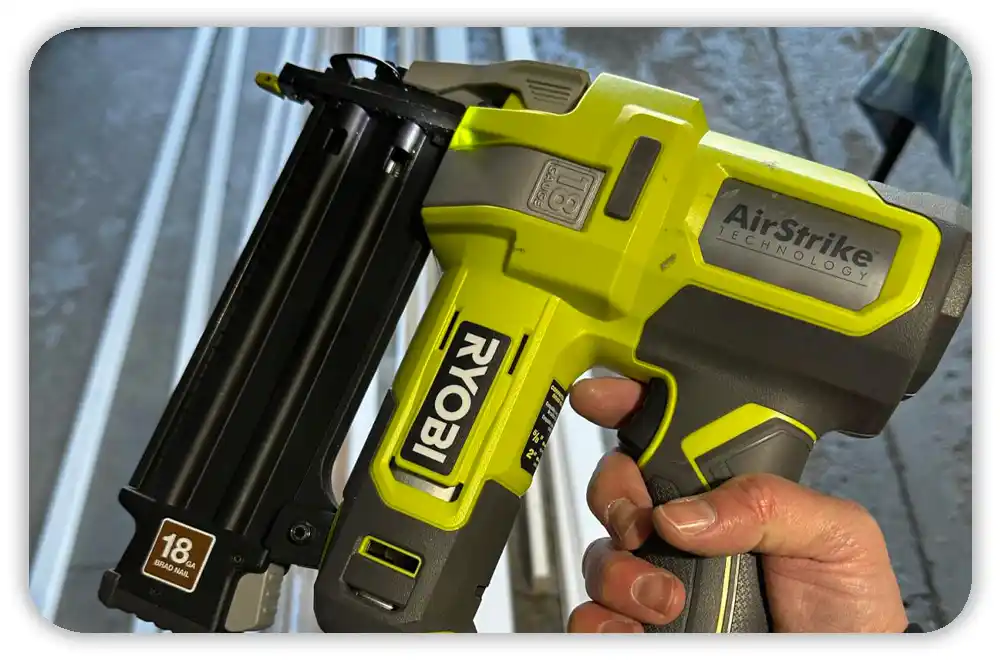
The Ryobi Airstrike system is smart. It makes its own air pressure instead of using a big compressor. That means it depends on strong battery power and smooth parts inside. If either drops, it won’t fire.
From my experience, three things cause most issues: weak power, dry parts, and a safety lock that isn’t pressed. Fixing these will solve most firing problems.
So when your Ryobi brad nailer won’t fire, don’t panic. It’s rarely broken — just a small issue that needs a quick check.
Quick Fix First — The 5-Minute Reset
Before you grab tools or call service, do this five-minute check. It often gets the nailer working again. Think of it as a quick reset.
1. Check the Battery
It sounds simple, but it’s the top cause. Even if your battery shows three bars, it can fail under load. The nailer needs full power to build pressure.
Make sure the battery clicks in tight. A loose fit can stop the connection.
2. Wake It From Sleep Mode
If the LED hasn’t been pressed in a while, the nailer may sleep. It looks dead but isn’t. Press the LED button once. When the light turns on, try again.
Many DIYers in cold or dark garages think their tool died — it’s just sleeping.
3. Check the Nails
If the battery’s fine, check your nails. Ryobi uses 18-gauge C1 brads from 5/8” to 2”. Off-brand nails can jam.
Make sure the strip sits flat and the latch closes tight. If nails sit at an angle, they won’t feed.
I’ve found DeWalt and Grip-Rite nails feed smoother, especially in humid air where cheap nails swell.
4. Press the Safety Tip Firmly
The nose lock stops dry firing, but it’s sensitive. Push the tip flat against the surface before pulling the trigger.
If you’re working on soft wood or corners, the tip may not press enough. A solid press makes all the difference.
5. Check for a Jammed Nail
If you hear a click but no fire, check the drive channel. A bent nail may block the striker.
Open the front latch. If you see a nail sideways, pull it out. Then check that the striker moves freely.
Sometimes the striker sticks from friction. Add a drop or two of silicone oil to free it. This one step has saved me many times.
The Two Biggest Causes — Power and Lubrication
After years with the Ryobi Airstrike, I’ve found that 80% of firing problems come from low battery power or lack of oil. These are small things but make a huge difference.
Why a 4.0Ah Battery Is a Must
The nailer’s compressor draws a lot of power each time it fires. If your battery can’t keep up, it stalls.
Small batteries — 1.5Ah or 2.0Ah — drop power fast, especially in cold weather. When that happens, the tool cuts out mid-cycle.
I’ve had my nailer come back to life just by swapping in a 4Ah Ryobi PBP005. A friend in Michigan had the same fix.
If you work in cold states or outdoors, a 6Ah battery (Ryobi PBP007) holds power longer. It’s the easiest fix for random misfires.
How to Fix a Sticking Striker
If your tool clicks but no nail fires, the striker might be stuck. The first clue is a dull “thud” sound. Cold weather or dry grease can cause that.
Here’s my quick fix:
- Open the jam door.
- Add 2–3 drops of silicone oil into the drive channel.
- Fire a few blank shots to spread the oil.
That usually gets it moving again. If not, you can clean the striker manually — but that’s rare.
A small drop of oil every month or two keeps it smooth, even on long trim jobs or cabinet work. Once I started doing this, my nailer stopped misfiring completely.
Other Common Reasons a Ryobi Brad Nailer Won’t Fire
Even after you check the battery and add oil, your Ryobi brad nailer might still not fire. When that happens, the cause is often small — nails, dust, or even the weather. These sound minor, but they can stop your tool just like weak power can.

Wrong Nails or Poor-Quality Fasteners
I learned early that not all brad nails are equal. One day, I was redoing baseboards and grabbed a cheap pack of off-brand nails. They looked fine — until halfway through the job, the nailer started clicking but wouldn’t fire. When I checked, I found bent nails jammed halfway down the magazine.
Ryobi nailers use 18-gauge C1 brad nails, from 5/8” to 2” long. If the nails are the wrong size or the glue strip is uneven, they won’t feed right.
I’ve had the best luck with DeWalt, Grip-Rite, Bostitch, and Hart brads. They’re consistent and slide smoothly through the magazine.
In humid places like Florida, cheaper nails can swell or rust. That tiny bit of moisture can make them stick. Keeping your nails sealed in a dry box helps a lot.
Dirty Magazine or Nail Channel
After a few months, dust and glue can build up inside the magazine. I once thought my nailer was broken — turns out, it was just clogged. A simple cleaning fixed it.
Now I make it a habit: after every few projects, I slide out the magazine and wipe it clean with a soft cloth. Then I spray a light coat of silicone spray or air tool oil and let it dry.
This small step keeps the nails moving freely and prevents jams. Even a little sawdust can slow the driver or block the striker.
Over-Tightened Screws
This one caught me by surprise. My nailer clicked but didn’t drive a nail — even after cleaning and oiling. When I opened it up, I saw that a few screws near the striker were too tight.
They squeezed the mechanism just enough to cause drag. I loosened them about a quarter turn with a Torx T25 driver, and the tool fired perfectly again.
It’s rare, but I’ve seen it more than once. If your nailer feels “tight” or slow to reset, check those screws. Don’t overdo it — just enough to free the movement.
Temperature and Storage
Cold weather can slow your Ryobi nailer more than you think. Last winter, I left mine in my cold garage overnight. The next morning, it clicked weakly but wouldn’t fire. The grease had thickened, and the cold battery lost power.
Now, I keep both the tool and battery inside — between 60°F and 80°F. In summer, I also avoid direct heat. Hot garages can dry the seals faster.
Temperature swings affect battery power, seals, and grease. Keeping the nailer in a stable, dry place helps it perform better.
Reading the LED Light
That little LED on the Ryobi Airstrike isn’t just for light — it helps you troubleshoot. I didn’t know that at first. One day mine flashed red, and I thought it was dead. But it was only a low battery warning.
Here’s what the lights mean:
| LED Behavior | What It Means | Quick Fix |
| No light | Battery is dead or loose | Reseat or charge the battery |
| Solid white/green | Ready to fire | Normal operation |
| Flashing red | Low battery | Recharge or swap to a 4Ah+ pack |
| Flashing white | Jam or stall | Clear jam and oil striker |
| Slow flashing | Internal fault | Contact Ryobi service |
In most cases, a flashing LED means low power, not a fault. Swapping to a full Ryobi 4Ah battery usually clears it.
If it still flashes after that, then call service. But 7 times out of 10, it’s just asking for more power.
Operator Technique — The Hidden Factor
Even when the tool is perfect, how you use it matters. I’ve made mistakes myself — quick taps, too much pressure, or firing too fast. These habits cause misfires more than you’d think.
Use a Full Trigger Pull
A light tap won’t do. The Ryobi needs a full pull to finish the firing cycle. Let the trigger complete its sound before releasing. That ensures each nail drives clean.
Don’t Fight the Recoil
I used to press too hard against the wood, thinking it would help. It didn’t — it stopped the tool from resetting. Now I keep firm contact but let the tool move a little. That small recoil helps it reload for the next shot.
Take Short Breaks
When I fired too fast during a crown molding job, the nailer got hot and slowed down. Now, I pause for 20–30 seconds every few dozen nails. That keeps it cool and consistent.
Preventative Maintenance for Long-Term Reliability
After years of using the Ryobi AirStrike, I’ve learned one thing — this tool rewards a little care. Think of it like a tiny air compressor. It needs clean parts and a bit of oil to keep firing smooth. Skip care for a while, and you’ll notice problems. Keep up with it, and it works like new every time.
After Each Use
After every job, I give my Ryobi a quick wipe. Dust and glue build up fast inside the magazine and around the striker. I use a soft cloth to clean the body and nail track. It takes less than a minute and keeps the tool from clogging later.
I also remove the battery before storage. This keeps the terminals clean and stops slow power drain. In hot Florida garages, that small habit makes a big difference. A quick clean and battery pull — that’s my end-of-day routine.
Monthly Maintenance
Once a month, I go a little deeper. I slide open the magazine, wipe it down, and add a drop or two of 100% silicone oil into the nail channel. Then I dry-fire a few times without nails to spread the oil.
If the striker feels stiff, I add another drop. This small habit has saved my nailer more than once, especially after back-to-back home projects.
Seasonal or Heavy-Use Tune-Up
Every few months, or after big renovation work, I give my Ryobi a “mini service.” I open the front latch, clean around the striker, and apply fresh silicone oil to the seals.
In cold states, I do this before winter hits. Cold air can thicken grease and slow the tool. I also check O-rings and screws. Worn or cracked O-rings cause weak pressure and misfires. Keeping them fresh keeps firing power strong.
A short tune-up every season saves time and prevents costly repairs.
When to Seek Professional Repair or Warranty Help
I like fixing tools myself, but some problems need a pro. If you’ve checked the battery, nails, and oil — and it still won’t fire — it’s time for service.
Some issues go deeper than you can safely fix at home. I once had a slow flashing white LED no matter what I did. It turned out to be a control board fault. Only Ryobi service could handle that.
You can find authorized centers through Ryobi’s U.S. support site or at most Home Depot service desks. Under warranty, repairs often cost $30–$90. Out of warranty, expect $100–$150, depending on the part.
And here’s a key warning — don’t take the nailer apart past the striker. Doing that voids your warranty fast. I learned that lesson the hard way. Keep your fixes light; let the experts go deeper.
Pro Tips from DIYers and Contractors
Over the years, I’ve talked with pros from Texas to Michigan. Everyone has their own trick to keep the Ryobi AirStrike running smooth. Here are the best ones I’ve learned:
- Use a dedicated battery. Label one “nailer only.” It keeps a full charge ready and prevents weak fires.
- Warm it in winter. Keep the tool and battery inside until right before use. Cold batteries lose power fast.
- Test-fire after oiling. Shoot into scrap wood first. It spreads oil and clears any leftover dust.
- Treat it with care. Think of it like precision gear, not a rough jobsite tool. It’ll reward you with years of clean firing.
Key Takeaways — Fixing a Ryobi Cordless Brad Nailer That Won’t Fire
After years of using my Ryobi cordless brad nailer on trim and cabinet jobs, I’ve learned that most firing issues are small. They’re not real breakdowns — just easy fixes you can spot if you know what to check.
Most of the time, a weak battery or dry parts cause the problem. I’d say that covers about 80% of the “not firing” cases I’ve seen.
Start simple. Make sure the battery is fully charged and locked in place. Check that your nails are the right size and that the magazine is clean. Then clear any jam and add a few drops of 100% silicone oil into the striker area. These steps alone often get the tool working again.
In colder parts of the U.S., battery life drops fast. I always keep a 4Ah or 6Ah Ryobi ONE+ battery ready to go. It keeps the compressor strong and prevents mid-cycle stalls. Combine that with light oiling and a quick clean each month, and your AirStrike will stay reliable for years.
In short — clean parts, full power, and light oiling keep your Ryobi nailer firing like new.
Frequently Asked Questions — Ryobi Cordless Brad Nailer Not Firing
Why does my Ryobi brad nailer click but not fire?
That click means the striker might be stuck or a nail is jammed. Open the front latch, clear any bent brad, and add a few drops of silicone oil to loosen the striker.
Can I use WD-40 to lubricate my Ryobi AirStrike?
No. WD-40 can damage the rubber seals inside. Always use 100% silicone oil or air tool oil. They protect the seals and keep everything running smooth.
What battery works best with the Ryobi cordless brad nailer?
From my testing, the Ryobi ONE+ 4Ah (PBP005) and 6Ah (PBP007) batteries give the best results. Smaller packs like 1.5Ah or 2.0Ah often stall mid-cycle, especially in cold weather.
My Ryobi nailer fires once, then stops — why?
That means the tool doesn’t have enough power to reset the compressor. Swap in a fully charged 4Ah or larger battery. It should fire again right away.
How often should I oil my Ryobi AirStrike?
I oil mine once a month or before long storage. Just 2–3 drops of silicone oil in the nail channel keep the striker smooth and prevent jams.
Final Thoughts
The Ryobi cordless brad nailer gives back what you put into it. Take care of it, and it’ll stay reliable for years. Most “won’t fire” issues aren’t major — they’re just signs the tool needs a quick charge, clean, or drop of oil.
I’ve used mine through Florida humidity, Michigan winters, and everything in between. The difference always came down to care. A charged battery, clean magazine, and light oiling turn this tool into a long-lasting workhorse for any DIYer or pro.
Keep it powered, keep it clean, and it’ll keep firing — job after job.
As an Amazon Associate, We earn from qualifying purchases