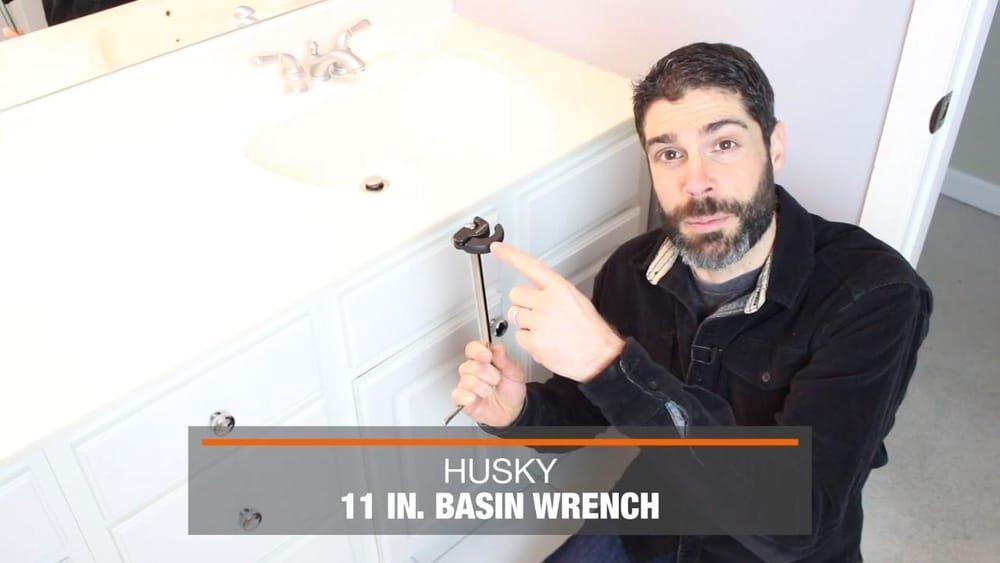
When I first tried fixing the faucet under my kitchen sink, I had no idea what a Husky basin wrench was. I spent almost an hour struggling with a regular wrench, banging my knuckles and getting frustrated. Then, a plumber friend suggested I try a basin wrench—specifically, a Husky one. I bought one, and honestly, it changed everything. If you’re dealing with hard-to-reach nuts under a sink, the Husky basin wrench is a tool you’ll want to have. Let me walk you through how to use it, what makes it special, and why I now recommend it to everyone, even if you’re new to plumbing.
What Is A Husky Basin Wrench?
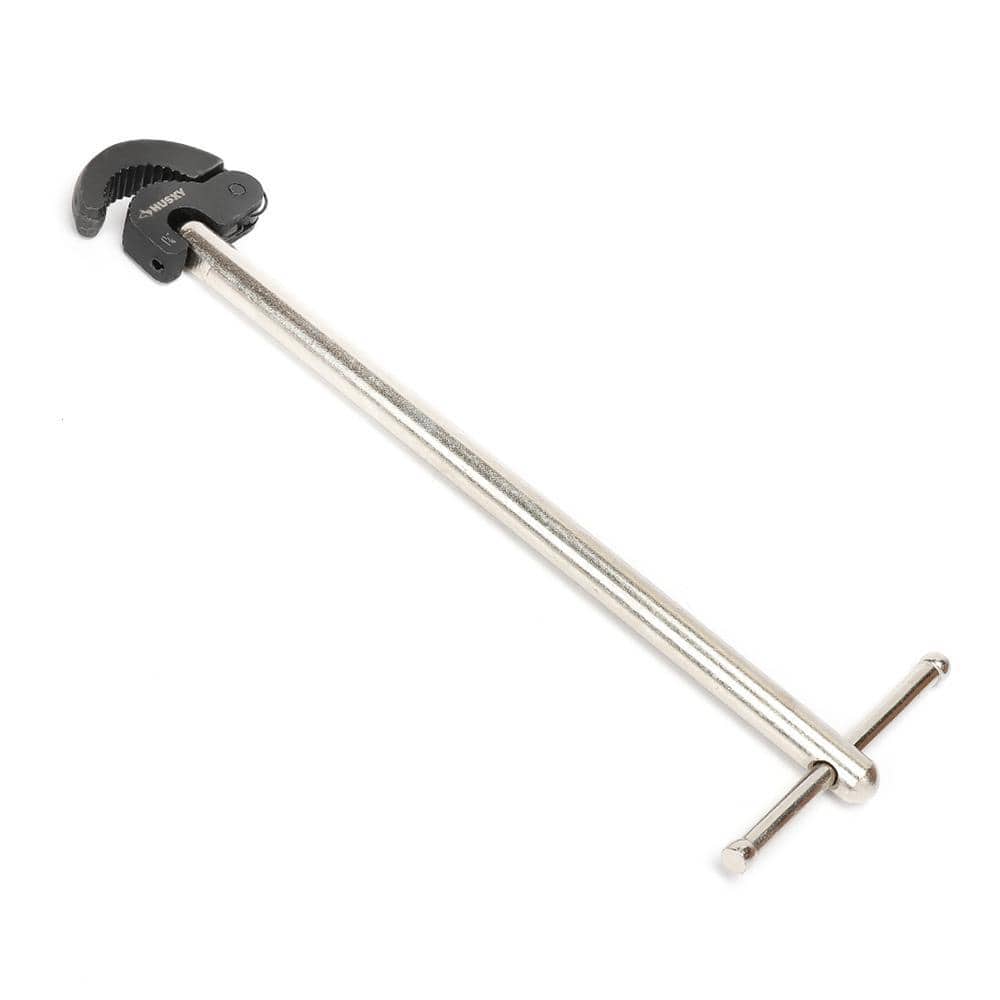
A Husky basin wrench is a special plumbing tool made for tight spots. It has a long shaft, a spring-loaded jaw, and a handle that lets you reach nuts tucked far behind sinks. The tool is designed for jobs like removing or installing faucet nuts, where a regular wrench just doesn’t fit.
What I like about the Husky brand is that their tools are easy to find, affordable, and built to last. I’ve dropped mine a few times, and it still works like new. The head pivots, making it easier to grip nuts at different angles.
If you’ve ever tried to loosen a faucet nut with a regular wrench, you know how impossible it feels. That’s why the basin wrench is so useful. It grabs onto the nut from below, so you don’t have to twist your body into weird positions.
When Should You Use A Basin Wrench?
Let’s be honest: most people don’t need a basin wrench every day. But when you do need it, nothing else works as well.
You should use a basin wrench if:
- You need to loosen or tighten nuts in hard-to-reach spots, like behind a sink.
- You’re installing or removing a faucet.
- The nuts are too high up for your hand to reach comfortably.
I keep mine in my toolbox for those moments when I see a leaky faucet or need to swap out an old fixture. It’s saved me from calling a plumber more than once.

Getting Ready: What You Need Before Using A Husky Basin Wrench
Before you start, gather a few things:
- Husky basin wrench (make sure it’s clean and working)
- Flashlight (sinks are dark)
- Small towel or sponge (for leaks)
- Bucket (to catch water)
- Adjustable pliers (just in case)
- Gloves (to protect your hands)
Turn off the water supply before you do anything. I forgot this step once and ended up with water everywhere. Also, clear out the space under your sink. You’ll need room to move the wrench.
Step-by-step: How I Use A Husky Basin Wrench
I’ve used this tool many times, so I’ll share the steps that work best for me.
1. Turn Off The Water Supply
Always start here. There are usually two shut-off valves under the sink—one for hot water, one for cold. Turn both clockwise until they stop.
2. Clear The Area
Remove cleaning supplies, trash cans, or anything else under the sink. Trust me, you’ll want as much space as possible.
3. Place A Bucket Under The Pipes
Even if you turn off the water, there’s usually a bit left in the pipes. The bucket catches drips.
4. Shine A Light On The Nut
Use a flashlight to find the faucet mounting nut. It’s usually a big brass or plastic nut holding the faucet to the sink.
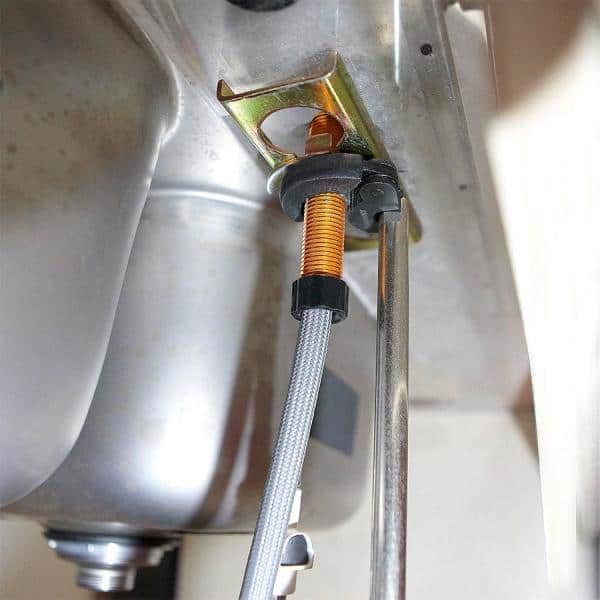
5. Position The Basin Wrench
Here’s where the Husky tool shines. Slide the long shaft up behind the sink bowl, aiming for the nut.
- The pivoting jaw should face the nut.
- The teeth bite into the nut as you turn.
If you’re removing the nut, turn the handle counter-clockwise. If you’re tightening, go clockwise.
6. Adjust The Head As Needed
The Husky basin wrench has a head that pivots up to 180 degrees. This helps you reach the nut from odd angles. If the jaw slips, flip it to the other side.
7. Turn The Handle
The T-shaped handle gives you leverage. I usually hold the shaft with one hand and turn the handle with the other. Sometimes, the nut is stuck. If that happens, spray a little WD-40 and wait a few minutes.
8. Remove Or Tighten The Nut
Keep turning until the nut is loose enough to twist off by hand, or tight enough to hold the faucet in place. Don’t over-tighten, or you could crack a plastic nut.
9. Check For Leaks
Once you’re done, turn the water back on and look for drips. If you see any, tighten the nut a bit more.
Here’s a quick look at how the Husky basin wrench compares to using pliers or a regular wrench:
| Tool | Best For | Can Reach Tight Spots? | Risk of Damaging Nut |
|---|---|---|---|
| Husky Basin Wrench | Faucet nuts under sinks | Yes | Low |
| Pliers | General plumbing | No | Medium |
| Adjustable Wrench | Larger, open spaces | No | High |
Tips For First-time Users
Here are a few things I wish I’d known before using a basin wrench for the first time.
Don’t Rush
The first time I used mine, I got impatient and ended up cross-threading the nut. Go slow. Make sure the jaw is gripping the nut firmly before you start turning.
Use The Pivot Head
The pivot head is what makes this tool so useful. If you can’t get a good grip, adjust the angle until it feels right.
Keep The Wrench Straight
If the shaft is at an angle, the jaw can slip off. Try to keep the tool as straight as possible for the best grip.
Don’t Over-tighten
This is a mistake I see a lot. Tightening too much can break the mounting hardware. Just make it snug.
Clean The Tool After Use
Plumbing jobs can get messy. Wipe down the wrench after you’re done so it doesn’t rust.
What Makes The Husky Basin Wrench Special?
There are many brands out there, but I stick with Husky for a few reasons:
- Durable build: Mine has survived drops and water exposure.
- Affordable price: Usually under $20.
- Pivoting head: Lets you work at different angles.
- Comfortable handle: The T-handle is easier on my hands than others I’ve tried.
Here’s a quick comparison with other common brands:
| Brand | Price Range (USD) | Pivot Head | Warranty |
|---|---|---|---|
| Husky | 15-20 | Yes | Lifetime |
| Ridgid | 25-35 | Yes | Lifetime |
| HDX | 10-15 | No | 1 Year |
Common Mistakes And How To Avoid Them
I’ve made a few mistakes with my basin wrench, so here’s how you can avoid them.
Gripping The Wrong Nut
Under the sink, there are often two nuts: one for the water line, one for the faucet. Make sure you’re gripping the faucet nut, not the supply line nut.
Forcing The Tool
If the wrench doesn’t fit, don’t force it. Reposition the jaw or try flipping the head.
Forgetting To Check For Leaks
Even if everything looks fine, always check for leaks after you turn the water back on. I once skipped this step and woke up to a puddle under my cabinet.
Not Using Enough Light
A dark workspace makes everything harder. Use a bright flashlight or even a headlamp.
Real-life Example: Replacing My Kitchen Faucet
The first time I changed a faucet, I tried using pliers. I scraped my knuckles and barely moved the nut. With the Husky basin wrench, I finished the job in fifteen minutes.
Here’s what happened:
- I shut off the water but forgot to put down a bucket. Water spilled everywhere.
- I slid the basin wrench over the mounting nut, adjusted the head, and turned the handle.
- The nut came loose with little effort. I didn’t have to force anything.
- Installing the new faucet was just as easy. The tool held the nut steady while I tightened it.
- Afterward, I checked for leaks and everything was dry.
That experience sold me on always keeping a basin wrench in my toolbox.
Maintenance And Care For Your Husky Basin Wrench
Taking care of your tools keeps them working longer. Here’s what I do:
- Wipe clean after each use. Dirt or water can rust the shaft.
- Oil the pivot head if it feels stiff. A drop of light machine oil does the trick.
- Store in a dry place. I keep mine in a toolbox, away from water.
You don’t need fancy products. Just a little attention goes a long way.
When A Basin Wrench Isn’t Enough
Sometimes, even the best tool isn’t enough. Here are a few situations where you might need extra help:
- Corroded nuts: If the nut is rusted solid, you might need a penetrating spray or even a mini saw.
- Plastic nuts: Some plastic hardware strips easily. Don’t use too much force.
- Odd-sized fittings: Most basin wrenches fit standard nuts. If your faucet is unusual, measure first.
If all else fails, call a plumber. Some jobs just aren’t DIY-friendly.
Table: Types Of Jobs Perfect For A Husky Basin Wrench
| Job | Difficulty | Basin Wrench Needed? |
|---|---|---|
| Replacing Kitchen Faucet | Medium | Yes |
| Tightening Supply Line | Easy | No |
| Bathroom Sink Faucet | Medium | Yes |
| Installing Garbage Disposal | Hard | No |
Non-obvious Insights From My Experience
Looking back, there are a few things I picked up that aren’t in the instructions:
- A small mirror helps. Sometimes, it’s easier to see the nut with a hand mirror.
- Practice before the real job. I played with the wrench on an old faucet before using it under the sink. It made a big difference.
- You don’t need much strength. It’s more about the right angle and grip, not brute force.
Where To Learn More
If you want to see the Husky basin wrench in action or read more about plumbing tools, check out the Wikipedia page on basin wrenches. It explains the tool’s history and design better than most manuals.
Frequently Asked Questions
What Size Nuts Does A Husky Basin Wrench Fit?
Most Husky basin wrenches fit nuts from 1/2 inch to 1 1/4 inch. That covers most faucets and sinks in homes.
Can I Use A Basin Wrench For Other Plumbing Jobs?
It’s best for tight spaces like behind sinks. For bigger jobs, use regular wrenches or pliers.
Is The Husky Basin Wrench Good For Beginners?
Yes! It’s simple to use, even if you’re new to DIY repairs. Just take your time and follow the steps above.
What If The Nut Won’t Budge?
Try spraying a penetrating oil and let it sit for a few minutes. Gently tap the nut with a hammer, then try again.
How Do I Know If The Nut Is Tight Enough?
Tighten until the faucet feels secure, but don’t force it. Stop if you feel strong resistance. Check for leaks when you’re done.
After years of doing my own plumbing repairs, I can say the Husky basin wrench is a must-have for anyone who wants to fix faucets without calling a pro. With a little patience, you’ll be surprised how easy it is to use.
Happy fixing!
As an Amazon Associate, We earn from qualifying purchases